Warming house mineral wool with their own hands
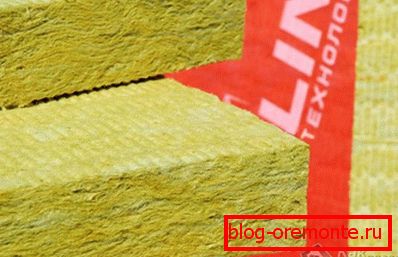
It's no secret that by warming your house or apartment, you can significantly save your money, which would be spent on heating the room. To date, there are many ways of insulation and a variety of insulating materials with which you can do this. One of them is mineral wool. It is an excellent material consisting of melted glass, rocks and blast furnace slag. The binder is resin. Mineral wool has a fibrous structure with different directions of fibers, depending on the purpose of the material. So, if you want to save heat in your home, you need to warm it. Thanks to the mineral wool, you can avoid the loss of heat, and your heating costs will significantly decrease. This article will look at how to warm your house with mineral wool, and if you follow the rules of installation and advice, then, even without experience, you will be able to cope with this task.
Advantages and disadvantages of the material
Very often, builders prefer to insulate the house with mineral wool. Why? Because of its many positive characteristics.
Minvata is of several types:
- Basalt
- Fiberglass.
- Stone

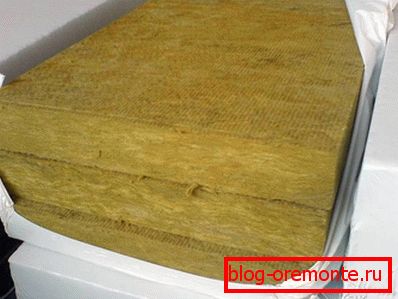
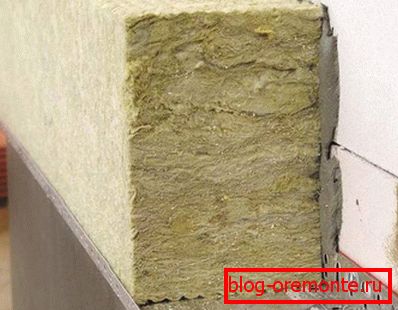
Produce material in the form of large mats or in the form of plates (plates are in greater demand). Their density is 80 kg / m3. The standard sizes of mineral wool are 50 × 1000 mm and 60 × 1200 mm, but the thickness can be 50 mm, 100 mm or even 150 mm.
The main advantages of the material:
- fire resistance, in contrast to foam plastic, wool does not burn or melt;
- high thermal insulation properties;
- sound insulation properties, thanks to which you will not hear the noise outside;
- the structure of the material allows it to "breathe", so that the air passes in both directions, so there will be no dampness in the room;
- ease of installation, as the material is malleable and soft, it is easy to work with;
- the ability to align the walls;
- Insect, rodents and microorganisms do not start in mineral wool;
- during operation, its initial properties do not change;
- practically does not undergo deformation;
- does not cause corrosion in metal objects that may come in contact with it.
Of the disadvantages of mineral wool can be called its price, which is much higher than that of the same foam. Environmentally friendly material can not be called, because of the layers of cotton wool can be allocated formaldehyde resin. Let's take a look at how the wall insulation works with this material.
Surface preparation
Before insulating the house, all walls must be prepared, removing all unnecessary. You need:
- remove the lining, or plaster layer completely to the wooden, brick, stone or concrete base;
- eliminate indentations or protrusions that are larger than 20 mm by sealing them with a solution or combing them to the desired level;
- clean the wall from dust and dirt;
- temporarily remove communication elements, such as ventilation grilles, air conditioners and drainage systems;
- special attention should be paid to mold or mildew, if there are any, you must definitely get rid of them;
- remove foreign objects that may stick out of the wall: corners, nails, fittings, etc.
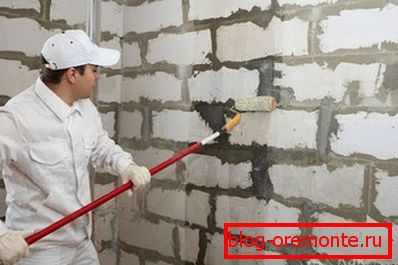
After cleaning the wall must be primed. This is a mandatory event, which should be written in the estimate. To prime the surface, use a deep penetration primer, applying it to the walls with a roller or paint brush. When there are traces of mold or mildew on the wall, treat the place with an antifungal agent or an agent to remove mold. Places where the base connects with the wall, it is recommended to treat aquastop.
If you insulate the house with your own hands for the first time, and siding or plaster with a coated “bark beetle” will serve as a facing material, it is important to fasten all the plates carefully. Therefore, start work from the back walls, which are not visible, to practice installing the slabs and plastering them. At that moment, when you insulate the walls, which are visible, your equipment will be much better, as you put your hand.
Marking of walls and fixing basement profile
In order to perform high quality facade insulation, you need to perform some organizational marking work. They include the installation of vertical, horizontal and diagonal sagging. Exaggerated sags will help to see the differences in the walls and will serve as a guideline in order to mount the insulation plates evenly.
In the role of a plumb will serve as a simple nylon cord, stretched between the pins. As the pins, you can use bars of reinforcement inserted into the holes of the wall, which are made in advance at different points. Do not forget that after installation these rods should be removed, therefore, you should not hammer them into the wall, and so you can easily remove them.
It is necessary to begin work on warming from below, moving ahead up. Therefore, in the lower part you need to install a metal bar or basement profile, which will act as a supporting guide and will provide support for the first row of insulation plates. He also protects them from various rodents and regulates the gap between the wall and insulation. The width of the profile is selected depending on the width of the insulation plates.
So, along the marked line, you need to attach a bar and mark on the wall the points where the holes will be made. The recommended distance between them is 300 mm. Drill a hole of O6 mm along the marking line. It now remains to attach the profile and fix it with the help of dowels. Parts of the basement profile are connected using connecting elements. Lining washers can be used to even out different irregularities.

The thickness of the insulation layer depends on the climate of the region where you live. The colder the climate, the thicker the layer of mineral wool. In regions with severe winters, plates can be laid in two layers. In this case, be sure to mount them not on a par with one another, but in a run-in.
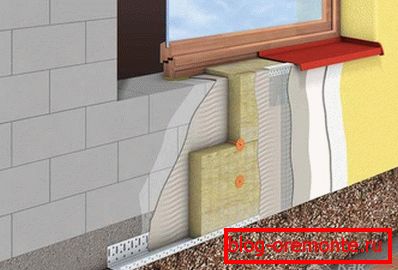
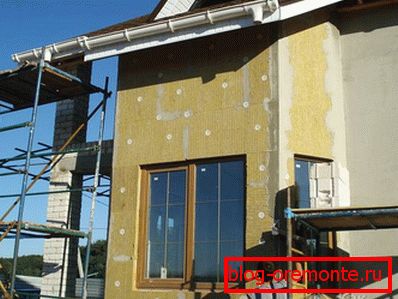
Installation of insulation
Now, after all the preparations, you can proceed to the installation of insulation boards. Attached to the outside of the wall, they will be using a special adhesive designed for such purposes. For good adhesion, you can use Ceresit CT190.
First you need to mix the glue. To do this you need a bucket of 15–20 liters, water and a mixer. Mix the glue in the bucket, adding water according to the proportions indicated on the package. Stir until the mass becomes homogeneous, without lumps. The composition should resemble puree. Leave the mixture for 5 minutes so that it is completely “ripe”, and then mix again to give it the best plastic and adhesive properties.
All this solution must be used within 2 hours, as its properties are lost further.
It is time to apply glue. Since the mineral plates are very dense, their mass is also rather big. Therefore, you need to apply glue over the entire surface of the plate. The point method of applying adhesive in this case is not suitable. Applying glue to the entire surface, it can be smoothed with a comb trowel. Such a method of gluing the plates is good because a reinforcing layer is created on the surface, which prevents the plates from deforming if moisture gets there. For reliability, a continuous application can be supplemented with “lapses”.
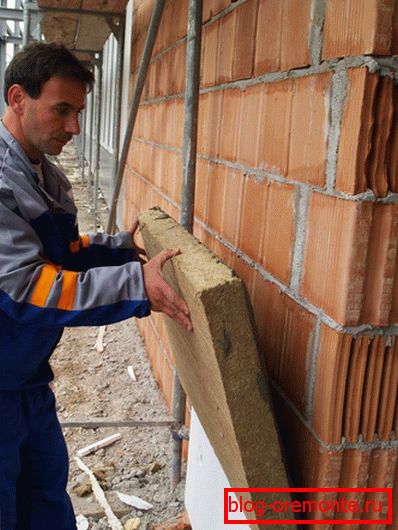
Immediately after applying the glue plates are applied to the surface of the wall. Remember that the first row of insulation will be based on the base profile. Press the slab tight so that it is in good contact with the wall. Irregularities can be leveled by striking a long float. Excess glue on the sides and top must be removed with a spatula. The first row should be set ideally, since all errors will be reflected in the next rows. Therefore, laying insulation carefully check the level.
Subsequent rows must be installed with bandaging, with offset vertical seams, the type of brickwork. Make sure that the plates lie flat to each other. If you have allowed the formation of cracks greater than 5 mm between the plates, you need to fill them with pieces of the plate.
During work, you should protect yourself, as the fibers of mineral wool can get on the skin and cause discomfort and scabies. To avoid this, wear gloves and clothing that covers skin. And if you handle slab grater, then be sure to wear respirators.
In places where there are openings (window frames or doors), the plates need to be cut to the desired size and continue laying. Do not forget to check each row by level so that the surface is flat.
Fixing insulation boards
But to plant mineral wool only on glue is not enough. If you want the heat-insulating plates to serve you for a long time and not disappear over time, they need to be additionally secured with the help of dowels, umbrellas. The choice of such dowels for fixing is based on the following factors:
- View wall material.
- Thickness of heat-insulating plates.
- The height of the building.
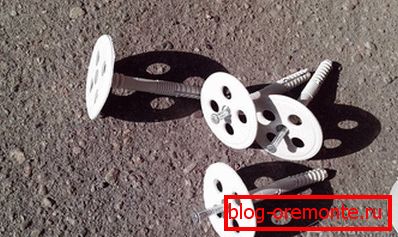
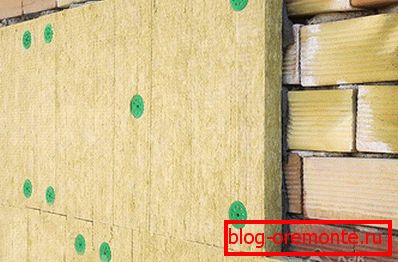
Fixing with dowels is made after not less than 1 day after mounting the plates. To do this, holes are drilled in the wall of the desired diameter and depth, into which the dowel will be hammered. To work you need a hammer drill, hammer and dowels. Consider that according to technology, if a building has 5 floors or less, then 1 m2 insulation need to score 5-7 dowels. When the building height is 9 floors, then at 1 m2 need 7–8 pieces. Their location should be at the corners of the plate, and 1 dowel to hammer in the middle.

The corners of the building and the place near the door and window openings must be additionally reinforced with a few dowels.
After the dowels are clogged, they need to be puttied with glue before the reinforcement is made with mesh.
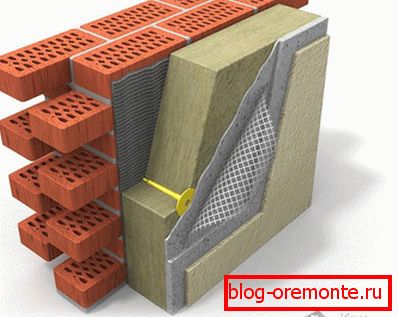
Reinforcement of corners and facade
To give the slabs shock resistance and protect them from mechanical damage, all corners are reinforced with a special reinforced PVC profile with a grid. To do this, all corners of the building need to apply a special reinforcing mixture with a layer of 2 mm. Its width should be slightly larger than the width of the profile with the grid. Attach the corner to the corner and drown it in the solution with a smooth trowel. Carefully iron the mesh so that it sinks smoothly into the solution. After all the corners have been made, you need to wait 1 day and begin to reinforce the entire surface of the facade plates.
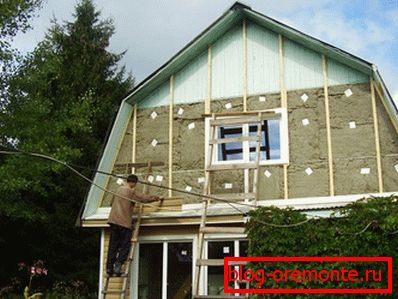
Perform such work is not advised in direct sunlight. To reinforce insulation you need to buy a special glass cloth mesh. On the plates, apply a special mixture for reinforcement. Roll out a roll of reinforcing mesh and fasten its end to the top of the insulated wall. Grid sink into the solution, gradually moving down the wall. Cut off the excess and continue the process until you reinforce all the walls. To avoid cracking, overlap one mesh to another at least 100 mm. The final stage of reinforcement will be the application of a 1–2 mm thin layer of the covering layer on the wet by wet method. It remains to wait 2-3 days so that everything is dry.
The final stage - decorative finish
After waiting for the complete drying of the reinforced layer, you can begin to finish the walls. It is advisable to walk on the surface with a primer in order to improve adhesion, that is, adhesion to the surface. As a decorative coating, you can choose different materials:
- decorative putty;
- work;
- siding;
- cloth
This is not all the materials that can ennoble your facade. Naturally, the choice of decorative coating depends on your desire and availability of funds. That's all, now your home is fully insulated and prepared for the harsh conditions of winter. Having warmed your house with mineral wool, you can not only make it warmer, but also save on heating services. But it is possible to warm the house not only outside, but also from within. Let's find out how this can be done.
Warming the house from the inside
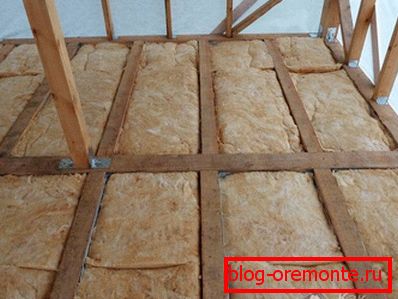
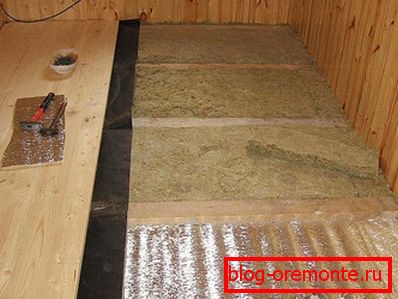
The first thing that should be warmed inside the house is the floor, since about 15% of the heat loss falls on it. In private housing construction laying of floors in logs is the most common technology. The advantage of this floor is the lack of wet processes, quick installation and ease of construction. If you warm the floor minvatoy, then also provide yourself with additional protection from noise. Consider the stacking technology in order:
- The construction is based on wooden logs of the floor. The recommended distance between them is 580–590 mm. Due to this, heat-insulating plates will fit snugly to the frame, leaving no cold bridges, which will also simplify installation.
- If the floor is in a place with high humidity, for example, a bathroom, before installing the wool, the perimeter should be covered with a vapor barrier film.
 Now you can lay the plates. Their thickness is selected by thermal calculation. Plates just fit between the lags. If two layers of insulation are being made, then you need to observe the gap of joints of at least 100–150 mm so that a bond is formed, due to which cold bridges will not form between the plates. For this, the plates must be cut with a simple knife.
- In order to avoid moisture condensation, another layer of vapor barrier material must be laid on top of the slabs, with an overlap of 100–150 mm.
- It remains to build a continuous floor covering of large-sized self-supporting materials that ensure the transfer and distribution of the load on the floor. This may be OSB plywood, chipboard, fiberboard, wood or special drywall.
- The final stage of floor warming is the installation of a finishing coating at your discretion.
In order to insulate the walls from the inside, you need to install an additional frame in which the insulation will be installed and subsequently sewn up with sheets of drywall. Let's consider 3 methods of how to insulate the walls inside the house.
Walls - method number 1
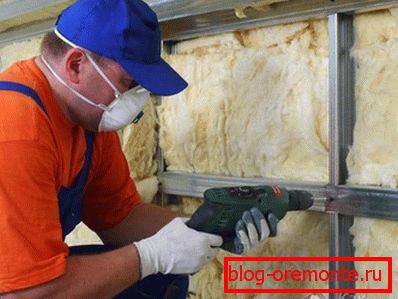
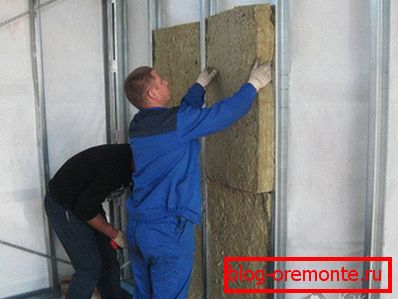
First, you need to build in the wall mounting brackets for the profile under the drywall. Attach them vertically with a distance of up to 600 mm. This distance is enough for fixing the mineral material, for assembling the frame and for fixing the profile. Staples need to give a shape that resembles the letter "P". You should get peculiar horns that stick out of the wall across the surface. These braces need to wear a minvata.
Before you cut the desired piece of mineral wool, measure the height of the walls. Cut the piece with a small margin, as the material may be deformed. For example, if the height of the wall is 2.20 m, then the length of the mineral wall should be 70–100 mm greater. The cut-out strip needs to be put on the mounting brackets. Vata is easily pierced with straps and hangs on them in a vertical position, therefore, it is not necessary to additionally fasten it. Set the next strip in the same way, only overlapped with the previous layer. Then the surface of the wall will be tightly covered without cold bridges.
Next, install the profile for drywall and cover the mineral wool with a vapor barrier material that can be fixed with small screws. After that, you need to fasten the drywall to the installed profile. Finally, it remains only to apply the selected decorative layer on the drywall.
How to implement this technology, see below:
Walls - method number 2
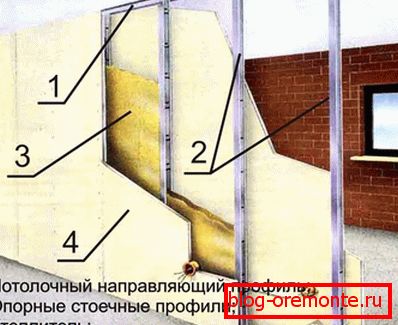
The second method is to assemble a ready-made frame from a profile for plasterboard wall cladding. It is necessary to fasten the profile at a distance of no more than 400 mm from each other. Since the width of the heat insulator is in the range from 500 to 1200 mm, you can put a heater in the frame spans.
In the case when the distance between the profile and the wall is small, mineral wool can be layered to the desired width. Your main task - to lay the material tightly, because it affects the quality of insulation.
Once you have laid all the mineral wool on the walls, stretch the vapor barrier material over the profile. After that, the surface is ready, and you can fasten drywall and apply finishing material.
Walls - method number 3
To begin, build a partition frame. One side should be sheathed with sheets of drywall, OSB or chipboard. The recommended distance between profiles is 580–600 mm. On the other hand, you need to lay mineral wool. If the width between the profiles is 590 mm, then the cut piece of mineral wool must be 7–10 mm larger in order to sit close and not slide down, since no additional fastening is foreseen. When it is necessary to lay two layers of insulation, the gap between the plates should be at least 150 mm. After completing the work, the partition must be sewn up with sheets of drywall, OSB or chipboard and perform finishing.
That's all, in such simple ways you can keep the heat in the house, make living in it more comfortable and pleasant. All you need is to buy the material and follow the instructions described above. If you have had some experience with mineral wool and in the process you have difficulties, share it with us in the comments. What exactly were the difficulties, and what helped to cope with them? Maybe you know something that was not mentioned in our article. Your invaluable experience will help all readers to perform perfect insulation of their own homes!
Video
The technology of insulation with mineral wool for plaster from the beginning to the end is presented in the following video material:
See also:
- How to insulate the basement.
- Insulation of pipes in the street.
- Roof insulation from the inside.
- How to insulate the walls of the foam.
- How to insulate the well.