Warming facade mineral wool with their own hands
About 30% of heat loss occurs through the walls. To solve this problem, they should be warmed. Warming the facade mineral wool with their own hands - this is one of the options for thermal insulation. Mineral wool is produced from glass melts, slag or rocks, and resins are the binding element. The material has a fibrous structure, the direction of the fibers differs depending on the purpose of the mineral wool.
This article will focus on the characteristics of mineral wool, technological features of wall insulation, features of thermal insulation of walls under siding and plaster. Knowledge will help you accomplish the task qualitatively, with minimal labor and time costs.
Characteristics of mineral wool
If you decide to insulate the walls outside the mineral water, then your choice is quite reasonable. Among the positive characteristics of the material worth noting:
- excellent sound insulation performance;
- low thermal conductivity;
- fire resistance - the material does not burn;
- resistance to decay;
- ease of installation, the ability to choose mineral wool in plates or rolls;
- vapor permeability;
- resistance to damage by microorganisms and rodents;
- environmental safety.
Mineral wool is of three types:
- Slag.
- Basalt
- Fiberglass.

Basalt mineral wool is considered the most effective for thermal insulation of the facade of the house. The material has a low level of thermal conductivity. For the arrangement of the ventilated facade specialists have developed a special heterogeneous insulation.
Facade mineral wool differs from its counterpart, intended for wall insulation from the inside. Vata for the facade has a greater hydrophobicity or ability to repel moisture, in addition, it is more dense.
Like every material, mineral wool has not only advantages, but also disadvantages. However, if the technological processes are strictly followed, they can be eliminated. If the mineral wool is not treated with hydrophobic compounds, then it will absorb moisture, and this will lead to a loss of the insulating properties of the material. If you do not install a reinforcing layer, the facade may crack.
Preparatory process
Warming the house outside will help you keep warm and, of course, reduce heat loss. The course of all work can be divided into the following stages:
- Markup.
- Installation Profile.
- Laying mineral wool.
- Fastening insulation.
- Reinforcement.
- Waterproofing.
- Finishing walls.
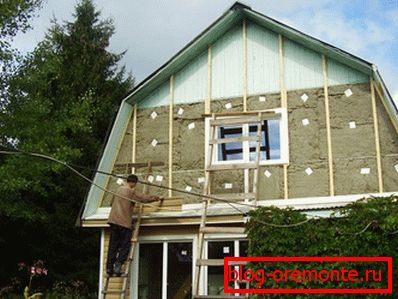
If you prepare the walls correctly before insulating the facade of the mineral wool, the whole workflow will take you less time, and the result will be much better. So, for a start, clean the facade of cement spills, protrusions and metal pins protruding from the walls. Then remove all communications, such as drain pipes, brackets, wires and other items.
If metal fasteners are left in the wall, they will rust due to temperature changes and condensate over time. Subsequently, over time, red spots will certainly appear on the facade cladding.
If the walls are cracked and chipped, then seal them with a solution. Then apply an anti-fungal coating to the entire surface of the walls. This event is important to do, even if there are no visible signs of mold on the walls. Such prophylaxis will prevent the appearance of fungus on the surface, especially if it is under constant exposure to moisture. If the walls of your house are made of wood, then impregnate them with antiseptic.
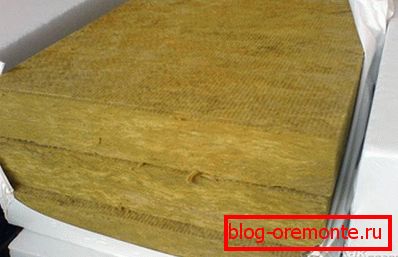
Minvata is made of basalt in slabs. Its dimensions are 0.6–1.2 m and 0.5–1 m, and the thickness ranges from 5 to 15 cm. Experts recommend using a material that is 10 cm thick.
Technological process
The technology of thermal insulation of facades with mineral wool consists of several stages, starting with the primer of the walls and ending with reinforcement and finishing.
- Primer walls. It is recommended for these purposes to use a deep penetration primer.
- As guides use a metal profile or wooden bars. The thickness of the horizontal guides depends on the thickness of the insulating material. Minvatu can be slightly compressed, so the thickness of the beam or the width of the profile can be 1–2 cm thinner than the insulation. The pitch between the guides is determined according to the dimensions of the mineral plates.
- Experts recommend measuring the distance between the bars on the one hand from the center of the beam, and on the other on the edge. Thus, the size will be slightly smaller. This event will provide an opportunity to lay the insulator thicker. However, the size of the slab must not exceed the distance between the bars by more than 2 cm.
- Guides are installed using dowels and screws.
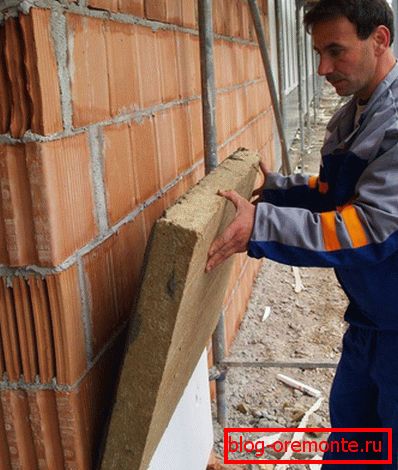
- Slabs of mineral wool are stacked between the guide rails. Installation of mineral wool starts from the bottom up, fixing it with dish-shaped dowels or putting it on a special glue. There should be no gaps between the guides and the insulation material. If they still form, they are filled with the remnants of insulation.
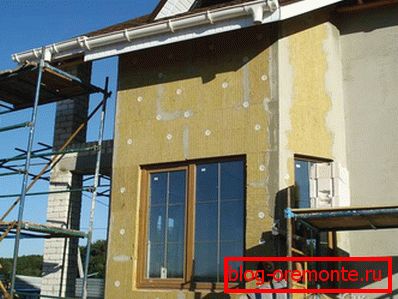
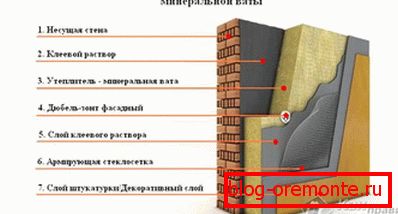
- In order to reinforce the surface, glue is applied to the plates of mineral wool, into which the facade reinforcing mesh is then pressed. To avoid deformation of the heat insulator, put another layer of glue on the reinforcing material. This, among other things, serves as protection against moisture.
Under siding
When finishing the walls with siding, in most cases, arrange a ventilated facade. Thus, the condensate evaporates unhindered. The vapor barrier film is fixed either with staples or liquid nails - it all depends on the wall material. At the next stage, the vertical profile is fixed at a distance of 45–50 cm from each other. In between is placed the mineral wool. Insulation can additionally be fixed with dowels.
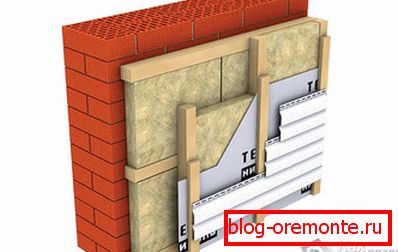
From above mineral wool is closed with a waterproofing membrane, the joints of which are taped with butyl tape. This is a mandatory step, as mineral wool is sensitive to moisture. Then install the contra-grille, on which the siding is subsequently installed.
Under the plaster
- Steam-wind insulation during the installation of mineral plates under the plaster is not carried out.
- The crate for installing mineral wool under the plaster is not needed, it is enough just to fix the mineral wool plates on the facade with glue and dish-shaped dowels without gaps, positioning the plates so that the vertical joints of the plates of each subsequent row are located approximately above the middle of the previous row of heaters.
- The reinforcing mesh is fixed in such a way that the canvases find at each other not less than 10 cm. This will allow avoiding the cracking of the plaster.
- You can proceed to the exterior finish only after the reinforcing layer has completely dried.
- To make the front of the house look attractive, use decorative plaster for cladding the facade. However, first you need to remove the drips of glue with an emery paper and trowel.
- If you find that the walls are not leveled after reinforcement, then resort to rough plastering.
- After you can proceed to the finishing wall cladding.
In fact, performing warming of the facade of mineral wool, you should not face problems. With the observance of technology, you can complete the work quickly and efficiently. Mineral wool is a material that will allow you to insulate a house, protect it from temperature drops, having done so in the shortest possible time and at a reasonable price. If you still have questions on the insulation of the facade of mineral water, then write them in the comments to the article. Specialists of our site will provide you with additional advice.
Video
Detailed instructions on the technology of thermal insulation of the facade with mineral wool under the plaster: