Wall hanger with his own hands
The entrance hall is in some sense the face of the whole apartment. It would be desirable, that from the very entrance one could feel coziness and comfort, therefore sometimes there is no point in cluttering it with massive cabinets. In this article we will tell you how to make a wall hanger with your own hands from wood and other materials, we will show drawings, photos and videos to create a hanger for clothes in the hallway.
Some features
The wall hanger can be placed not only in the hallway, but also in the bathroom and in the kitchen, so you can make it a design decision that will add zest to the interior of the room. The main requirements that can be imposed on this element are:
- simplicity;
- ease;
- uncomplicated;
- strength;
- availability of materials;
- compactness.
By way of installation, it can be:
- wall;
- ceiling;
- mobile.
In the first embodiment, there is a sense in the manufacture of angular designs. If you install the hanger on the floor, you can place more weight on it. Variants can be combined by creating, for example, a wall hanger with a floor support.
Floor construction is not commonly used in bathrooms and in the kitchen. It is inexpedient: this hanger takes a lot of usable space.
According to the method of hanging clothes allocate hangers:
- with hooks;
- with a rod under the hanger.
In the first case, the whole product will take up much less space, but any clothes can be hung on the hangers, without fear that it will hesitate, stretch and will lose its presentable appearance.
Materials
For the manufacture of hangers most often use wood and metal. Someone may decide to order a ready-made forged structure if it fits into the big picture. Hooks can be attached to:
- glue;
- self-tapping screws;
- magnets;
- suction cups
If you plan to hang outerwear, which is especially heavy in winter, then the best option would be to use screws. The rest is perfect for the bathroom or kitchen, where towels, bathrobes or potholders are usually placed.
The simplest
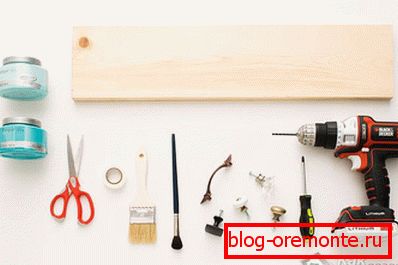
This option is used most often and it has a lot of variations that can be combined and combined. In order to make such a construction, we need:
- the material from which the hanger will be made;
- knife or lozenge;
- perforator;
- mounting material;
- roulette;
- corner;
- level;
- pencil or marker.
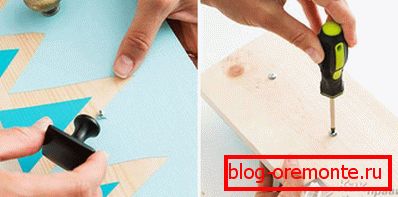
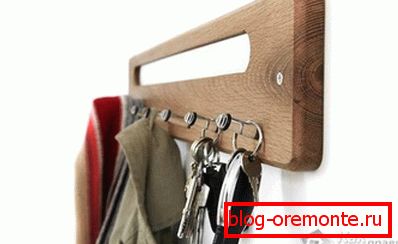
The simplest solution would be a hook bar. For its production we need a wooden plank (it should be without cracks and chips, and also well dried), instead of it you can use part of a sheet of chipboard or MDF. Its length is chosen according to your needs, and the width should be sufficient to accommodate the hooks on it. The wooden base can be varnished or painted, the plates do not need it, because the laminate is already applied on them. After that, several holes are drilled in the wall (their number will depend on the total length).
The distance between them should be such that there is a 5 cm indent from the edges of the board. To make the holes in one plane, a building level is applied. Dowels are inserted into the holes, and the base is screwed to them with screws. Hooks are already attached to the bar itself. If you choose a good mounting material, then this design is able to withstand heavy outerwear.

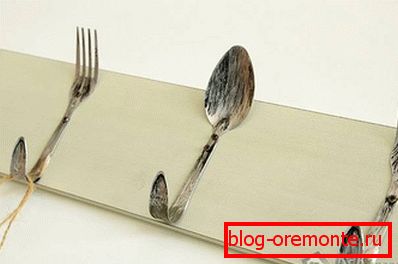
In relation to the hooks you can dream up. Instead of buying them, you can use, for example, old wrenches. First, they are cleaned and polished. After that, they are bent. Two holes are drilled into them, and the keys are screwed to the bar. For these purposes, you can use forks. Only need to take steel, because Aluminum is very fragile. The teeth themselves can be given an interesting shape.
Also knots from trees will approach: it is necessary, that such knot settled down on a small branch. To fix it to the base, you can slightly grind off the plane of the branch with a grinder, after which the hook is simply screwed with screws. It is not necessary to place them in one row. You can make them at different levels. If you draw the staff, the hooks will serve as notes. A rectangular slat is not a requirement. On the round one you can hang the hooks like numbers on the clock and draw arrows in the middle. In addition, the base can be made in the shape of a heart, clouds, sun, etc.
It is important that the wall under the coat hanger be finished, but not whitened. It is necessary that things do not get dirty.
Complicate
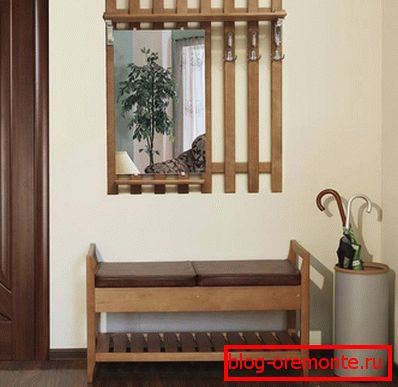
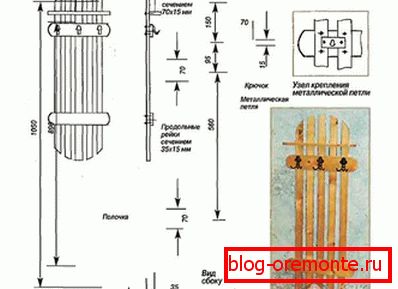
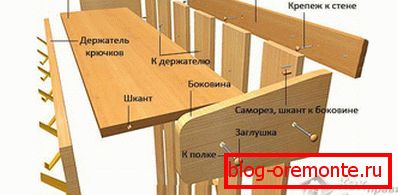
So that things do not get dirty about the wall, you can slightly improve the whole structure. You must take two strips of the same size. Their length should correspond to the width of the planned structure. They are fixed in a horizontal position parallel to each other (one above, the other below). Further we fasten several more vertical slats between them (we do this with the help of screws, the length of the fastening material must be twice the thickness of the slats in order to be able to pull them together well.).
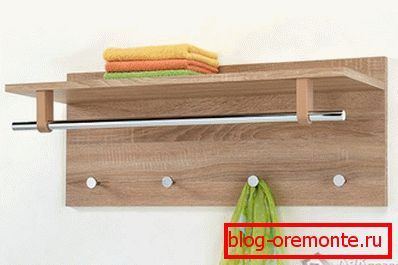
They can be as wide as two previous ones or slightly thinner in width, 1–1.3 m in length. If it is a hanger in the hallway, then it is good to attach a shelf for hats and caps from above. To do this, you will need a board 25 cm wide (you can take several elements of smaller width and fix them together with two jumpers). It can be fixed to the general construction with the help of metal corners or wooden sticks.
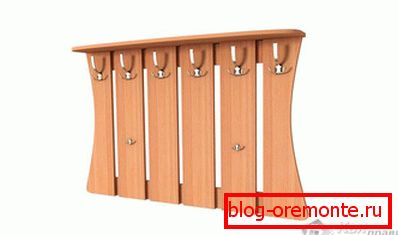
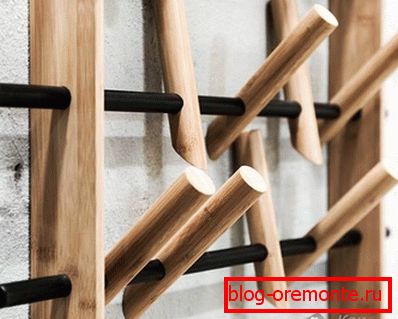
There is another interesting option. For its manufacture will need a bar with a size of 5? 5 cm. They need 7 pcs. 30 cm each. To begin with, boards are trimmed with a grinder. Sharp corners can be smoothed. After that, cover them with several layers of varnish. Then they will need to be fixed to the wall with a punch and screws. They must be arranged in the form of two letters P, which are connected with a jumper in the lower part.
In each plank, using a drill bit of 15 × 20 mm, we produce two holes. Next, cut out cylindrical dowels with a diameter under our hole. We clean and paint the color of the hanger. We coat them with PVA glue and sink them, let them dry well.
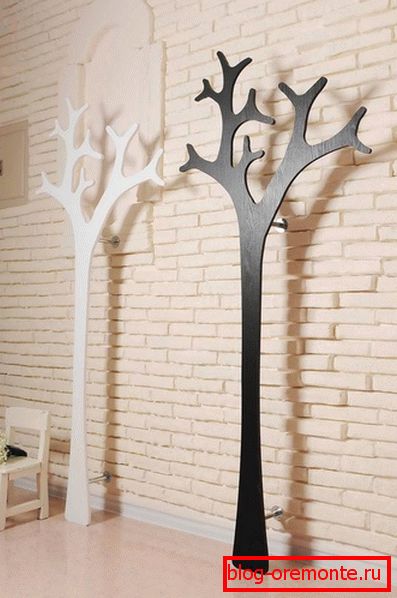
Most likely, you will enjoy the hanger in the form of a tree. To make it, we need a sheet of MDF, chipboard or plywood. With the help of a marker we apply the outlines of a plant. Next jigsaw saw out the resulting figure. The ends are processed and painted over or covered with the edge (in the case of chipboard). With the help of screws the product is attached to the wall, and hooks are hung on the twigs. Here you can apply real bitches, as in one of the previous options.
Ceiling and trempels

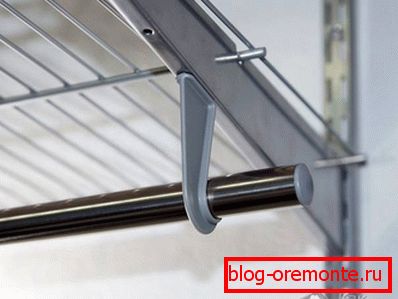
Hooks are not always the way out. Often it is necessary that things be merry on the trempels. In order to ensure this, it is necessary to provide a horizontal barbell. In this role, you can use, for example, a wooden plank 50? 50 mm. Sharps should be rounded off with a grinding machine, then the hangers can move freely and will be easy to remove. If the plank is long, then it is necessary to provide a horizontal jumper. Such a bar can be fixed to the hangers with a shelf, which was mentioned above. Instead of a wooden holder, you can use a special chrome furniture tube. It is fixed with flanges.
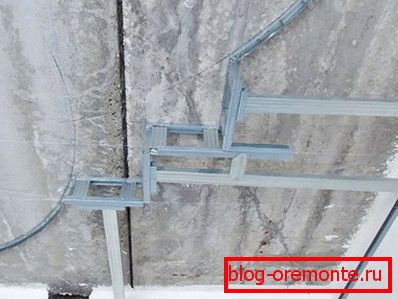
You can not use the wall for fixing. For this we need a chrome tube. We cut off two branch pipes with a length of 90 cm. We fix two flanges to the ceiling (we choose the distance between them according to needs). We insert and fix these sections of pipe in them. Next, take another tube, its size will be such that it fits between two hanging pipes. We mount the horizontal tube to the vertical with the help of the corners. It turned out minimalist hanger under trempeli.
This article was created to give direction to your imagination, and not to provide all possible options. We are sure that at home everyone has things that can be used in an interesting way.
Video
See which hanger can be made from just a few planks:
A photo

See also:
- Making a sofa with your own hands
- How to make a pull out bed
- How to make a kitchen table
- Making a computer desk
- Making shelves for shoes