Wall basement drainage
In order for a residential building in the private sector within the city or outside it not to be submerged, wall drainage of the foundation should be made. Such a structure allows you to limit the height of the flow of groundwater so that they do not flow through the critical point, flooding the basement or cellar (or viewing pit in the garage). In addition to the flooding of certain premises, there can be a lot of trouble. There will be dampness and mold on the walls, the ceiling and the floor of the rooms, the decoration and inventory will be damaged, the foundation will be destroyed.
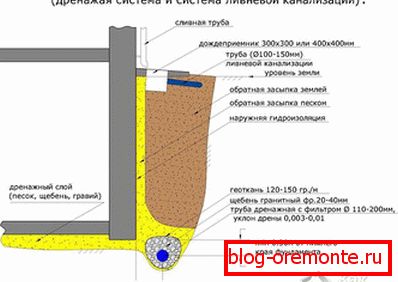
What does a drainage scheme look like? Below the basement level, respectively, below the level of the basement floor (or any other room, which is located below all else), a structure is constructed that is necessary to prevent groundwater and rainwater from penetrating into the basement rooms. Consider what constitutes a wall drainage device of the foundation.
Properties
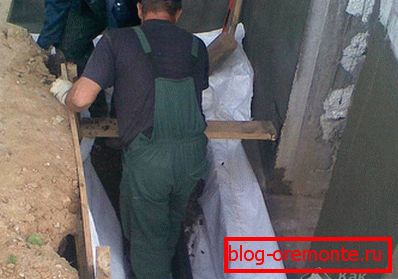
In fact, today few people will say that the drainage system is not needed. For those who have a house with a basement or there is a basement in the building, moisture removal near the wall is simply necessary. Of course, it will be better to take care of it even during construction, when the foundation is just being laid. Well, in the case when the building has already been built, but there is no moisture drain, you will have to find time and money to create a system for protection against groundwater. The beginning of the drainage device will be the work of digging out the pit around the house.
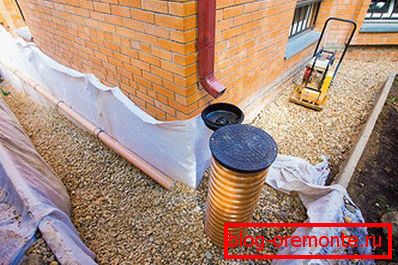
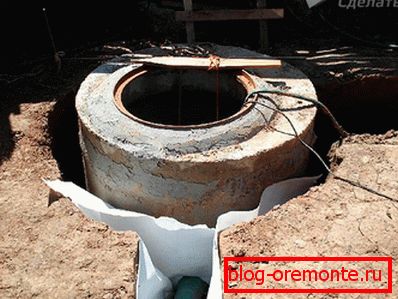
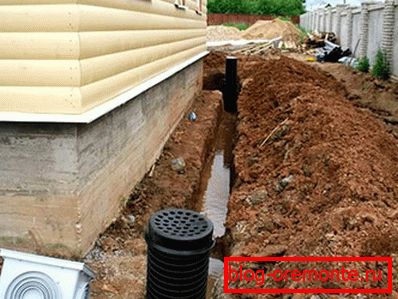
Moisture pipes, also known as drains, are placed around the entire perimeter of the building. At the corners of the house, where the pipes are joined to each other, inspection wells are made. A pumping well is arranged in the lowest place of the suburban area. His goal is to bring excess moisture beyond the borders of the territory to the nearest storm sewer system or some water body.
If you put a clay castle at a distance of half a meter from the foundation, you can additionally protect it from water.
To arrange moisture protection on the wall means that several types of drainage elements will be used:
- Linear. It is made of sections made of polyvinyl chloride. These sections have several gutters, as well as protective grilles, which are mounted across the blind area around the house. Getting into these grids, the water through the pipes passes into the sump well.
- Plast. This type of drainage is equipped directly under the foundation, positioning it on the same level as the sand cushion. As a result of this, all the excess liquid flows into the receiving well along drains with perforations, over which sand from the river and crushed stone (previously washed) is poured. Crushed stone and sand are needed because they play the role of a protective filter.
Performing calculations for the installation of drainage
When deciding how to hydraulically protect the foundation of a building, several important factors need to be remembered:
- Foundation depth. It depends on the depth of the drainage strip, which should be located at the level of a pillow or even slightly below it.
- Drainage slope. If the drainage system is evenly lowered to the side where the collection manifold is located, giving the pipeline a slope of 2 cm per linear meter, then it is possible to ensure the discharge of excess water without interruption, preventing it from stagnating in the pipes, acquiring an unpleasant smell.
In order to properly perform drainage, it is necessary to mark in advance the points of the system at the very top and at the very bottom. The mark of the depth at which the upper level of the system will have to be laid depends in the most direct way on the place where the water collection point and its outlet will be located. As a rule, a corner of a house is taken for such a mark, and a sink well-receiver can serve as a lower mark.
To understand how drainage is performed and related calculations are made, consider a small example. Take for illustrative example a house 8 m long and having a width of exactly 5 m. The well will be 9 m from the building, while its upper level will be a elevation 28 cm above the ground.
Calculate the length of the trenches. The length of the individual sections of the trench to the place where the water will be diverted is 13 m (the sum of the width and length of the house, equal to 5 and 8 m, respectively). The total length of the trench to the receiving well is 22 m (13 m, calculated above, and 9 m to the well). As a result, a value equal to 44 cm (2 cm × 22 m length) will be considered permissible slope.
If the point where water will be discharged is for some reason too high, you need to install a drainage pump, with which you can ensure pumping from the sump.
Regardless of what is required in your case, the drainage around the base plate should be located at a distance of at least 3 m from the building. And fillers - sand and gravel, fall asleep to a depth that will not allow these materials to swell if they freeze through groundwater. In addition, around the building it is necessary to arrange a blind area not less than a meter wide.
Layout
By and large, it is not difficult to perform wall drainage, the main thing is to perform all the work in stages, in the following order:
- During the creation of the sand cushion, it is necessary to carefully measure out height differences in different places using a level (geodetic instrument measuring the height difference at different elevations). Labels or milestones are set at marked places. Where the depth is less than the required, you should fill the sand, where it is more - cut the soil. This will result in a uniform slope, along which pipes can be laid so that the water flows along them evenly, without using a pump.
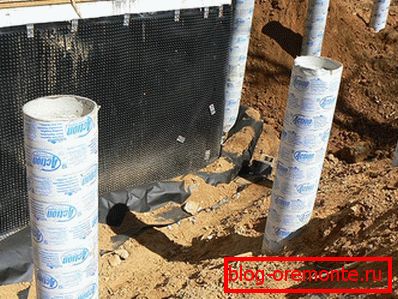
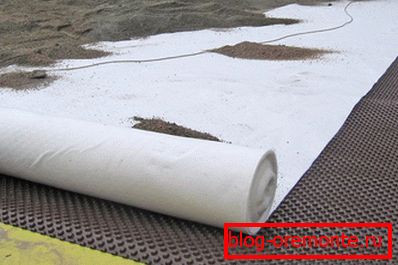
- At the top of the sand layer, it is imperative to spread the geotextile canvas, then pour the washed gravel onto it. When the gravel is scattered, they make an indentation in which a drainage will be laid. During laying it is necessary to ensure that the slope is the same throughout the length of the trenches.
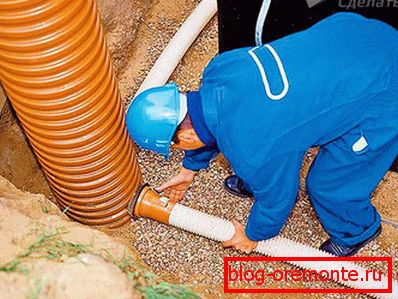
- Perforated polyvinyl chloride pipes should be laid on the gravel. The holes in them should have a size that will not allow small particles of gravel to form a blockage.
- Upon completion of all connections, we check the overall bias as a whole. You can do this by pulling the cord. On each pair of meters, the slope should increase by 2 cm. That is, after 2 m the drainage outlet will fall by 2 cm, after 4 m - by 4 cm, and so on.
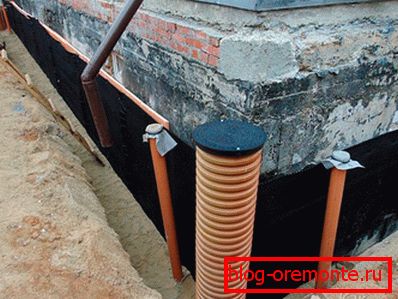
- At the corners, we use tees to make the corner joints, and bring up a vertical pipe, which will have a tight-fitting lid. Thanks to such taps installed at each corner, it will be easy for the system to flush out any debris or sludge.
- The pipes laid in trenches are wrapped with geotextile, and the winding should be without gaps. Also, it should not get gravel or sand. That the geotextile has not unwound, it is tied with a kapron thread.
- After winding, backfill is made with clean gravel, a layer about 17 cm thick. The resulting cushion of gravel must be covered with the same geotextile to prevent soil from getting into the holes.
- Coarse sand is poured over the gravel, which will make it possible to additionally filter wastewater.
- The release of sewage pipes from the house, it is necessary to insulate. To do this, you can use the foam thickness of at least 20 cm.
Actually, this is the last stage in the construction of wall drainage of the foundation. In the photo at the end of the article you can see what these or other stages of arranging such protection look like. The finished system can be operated for several decades, if you look after it and maintain it in a timely manner.
A photo


Video