Visor over the porch with their own hands
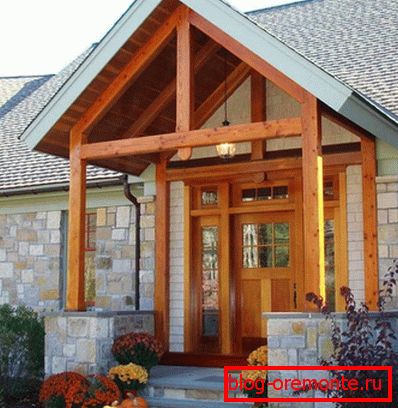
Among the attributes of the design of facades of residential buildings, special attention is paid to the porch, which is located at the entrance to the house and primarily characterizes the taste of its owner. According to the generally accepted opinion, the porch, devoid of a visor, creates the impression of incomplete work on the design of the facade. In addition, not many people will like the prospect of opening doors in bad weather in the pouring rain, for example.
In addition to the above arguments, the need for a visor above the entrance door is also explained by the reasons for the aesthetic plan. It should be added that anyone (with the experience of relevant work, as well as the ability to handle the simplest tool) can easily build a visor over the porch with his own hands.
Types of visors
In practice, there are several varieties of protective visors, which differ not only in the material used, but also in their form. The most common are the following options:
- sloping roof with a frame fastened to the wall of the facade;
- dvukhskatny canopy, both slopes of which cover the porch with each of its sides;
- canopy in the form of a tent, completely covering the area in front of the entrance door;
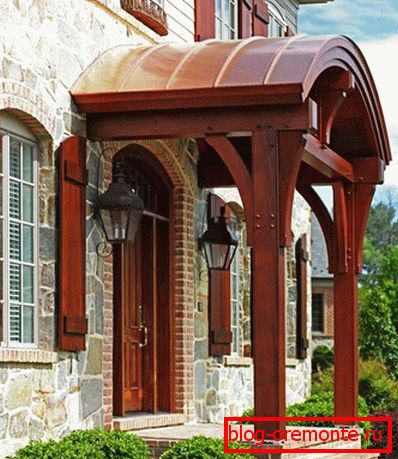
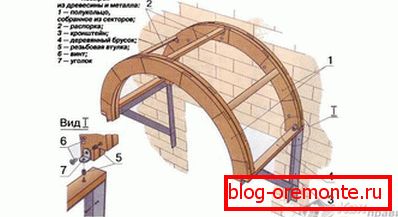
- arched design, bordering the porch from above and from the sides.
According to the method of attachment, all known visors are divided into structures, mounted on special supports and suspended structures, which are fixed directly on the wall using special brackets.
Material selection and sketch preparation
Before starting work, you must first choose the material for the future visor, as well as prepare its sketch, taking into account the material already selected and the climate in your region. At the same time, most often in the conditions of central Russia for the manufacture of these protective devices, wood is chosen that is easily amenable to decorative processing, which allows decorating the canopy of the visor with exquisite carving.
As a roof covering for it, metal tile or other similar materials are most often used. If you plan to make a protective canopy in the form of an arch or a tent - for their closure it is most convenient to use tiles or to make it from polycarbonate.
Work on the arrangement of the visor begins with preparatory operations, consisting in marking the place of its installation and removal of all necessary measurements. It should be borne in mind that the visor should completely block the porch over the entire area and even slightly protrude beyond its borders. This reserve will allow you to almost completely protect your porch from the rain in strong winds.

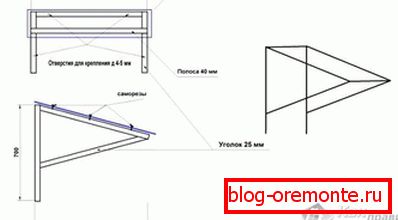
When measurements are completed, a sketch of the future product is prepared on a sheet of paper with an indication of all its dimensions. Such a sketch will help you determine the amount of materials needed for the manufacture of the visor and which will need to be purchased. In these calculations, the slope of the slopes and their total length should be taken into account. Before starting work, in addition to boards and boards, necessary for arranging the battens and rafters, special triangular brackets are prepared, and roofing material is purchased.
The procedure for the manufacture of wooden structures
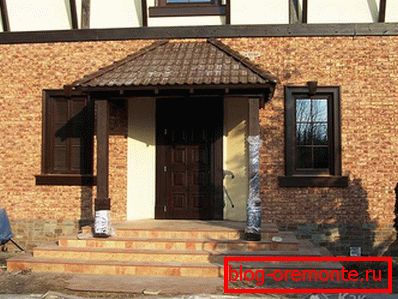
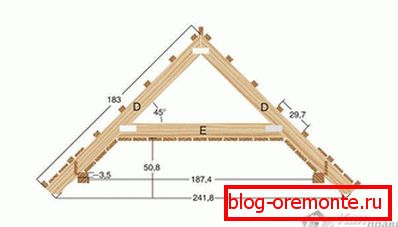
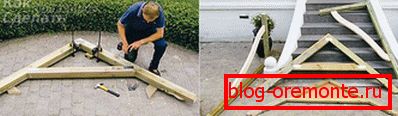
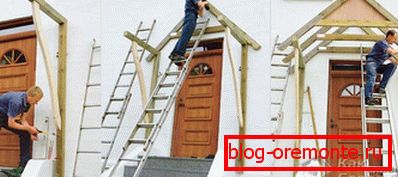
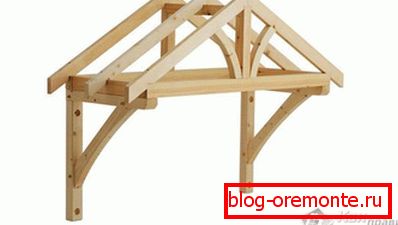
Work on the construction of a wood canopy begins with the manufacture of several rafter squares formed by two beams, fastened together at an angle of 45 ° or 60 ° (depending on the width of the overlapped area).
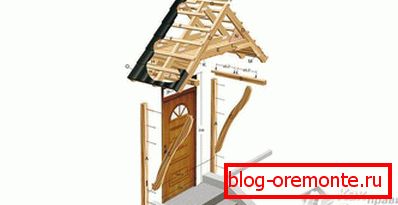
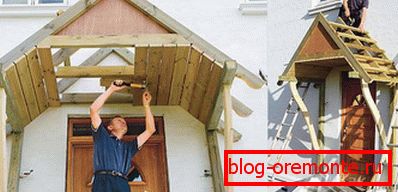
After that, a double-slope roofing structure is assembled from the squares, fastened with the help of two longitudinal beams, a ridge and a system of struts. The resulting structure must be securely fixed in the marked place of the wall on the pre-mounted metal brackets, repeating the shape of the squares.
As additional supports, two vertical beams with booms are used, which are rigidly fixed on the wall of the facade on the sides of the porch. Note that before the final fastening of the structure, it is necessary to check the horizontal position of the structure, as well as the verticality of installation of additional support beams. It is clear that all of the above refers to the installation of the suspension type visor.
If you choose the option of a protective visor with separate supports, the need to use special metal brackets is no longer necessary.
In this case, special pillars made of wood or metal and installed in previously prepared pits act as supporting elements. Before installing them, a mixture of rubble and sand is poured at the bottom of the pits, after which the base of the pole supports is concreted to the full depth of the pit. To the upper part of the support pillars, load-bearing beams are mounted with a system of rafters mounted on them (i.e., the entire structure prepared earlier). For a wooden porch, two pairs of truss legs are enough, which are additionally connected by bolts to increase the rigidity of the structure.
The installation of the supporting frame is completed by the installation and subsequent fixing of the ridge beam.
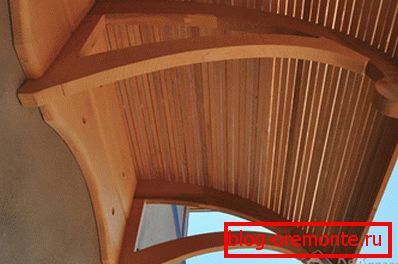
After that, the crate is laid on the already mounted rafters (thin bars, sheets of thick waterproof plywood or board can be used to make them).
A roofing material is laid on top of the sheathing, the installation of which is carried out in the order prescribed for the type of coating you have chosen.
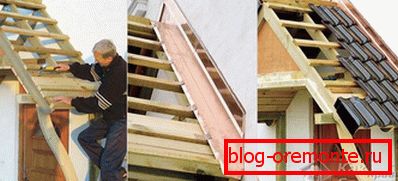
When finalizing the visor, you should worry about special hooks for fastening gutters, as well as wind slats. At the final stage of the work, the drainage elements and the protective eaves strip are mounted.
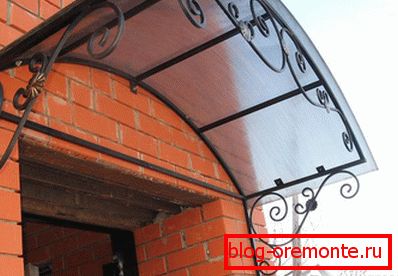
Polycarbonate construction
In the second part of this article we will consider the features of manufacturing a protective visor from such a common material as polycarbonate. Its appearance produced a small revolution in the design of most types of lightweight and light-transparent structures. And, indeed, a relatively inexpensive, fairly durable and lightweight cellular material immediately began to be in high demand by the consumer and widely used not only in the manufacture of canopies, but also in the arrangement of greenhouses, skylights, decorative barriers, etc.
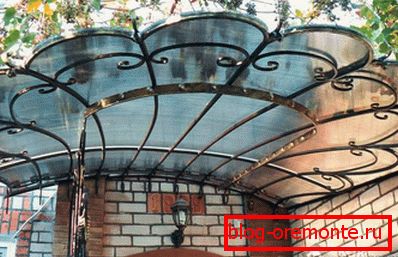
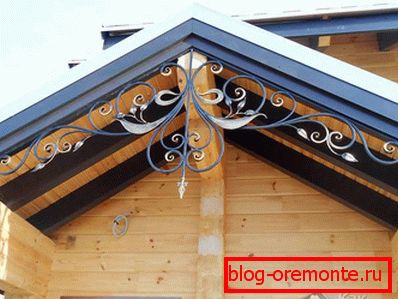
Anyone familiar with the openwork forms of polycarbonate visor above the entrance door will certainly appreciate its aesthetics and will not refuse to have a similar design in their home. That is why we decided to help home craftsmen and acquaint them with the specifics of the choice of frame material, as well as with the fundamentals of design and practical manufacturing of such structures.
The choice of materials for the frame
When choosing a material that is best combined with polycarbonate and provides the maximum possible strength of the visor, in addition to the special requirements of the SNiP, the attractiveness of its appearance should be taken into account.
That is why, first of all, we will try to explore different types of material for the frame for their compatibility with polycarbonate, and also try to assess the shortcomings and merits of each of them.
Wood
The wood frame is distinguished by simplicity of assembly and relatively low cost, but it is significantly inferior to the same metal base in terms of reliability and service life limits. To eliminate this drawback, only hardwoods are recommended for this framework.
Before you make such a frame, the wood should be treated several times with Oksol-type linseed oil or a similar impregnation, reliably protecting it from rotting. From an aesthetic point of view, a polycarbonate visor with such a frame fits perfectly into the facade of a wooden house, the frame of which is made of timber.
Polycarbonate sheets are fastened to the frame of these types of wood using standard self-tapping screws using special thermal washers, which ensure the tightness of the attachment zone and are colored to match the color of the sheet itself.
Aluminum
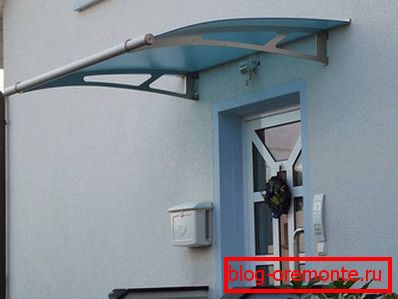
The frame on the basis of the aluminum profile is also quite light and differs in ease of installation, since for its manufacture angles or tubes are used, which can easily be cut and molded. One of the advantages of the visor on the aluminum frame - the optional primer and protective paint. The relative disadvantage of this material is its considerable cost.
But if you are not too concerned about the cost of the material, and in the first place attracts the design of the structure itself - this option is the most preferred. A visor with a frame based on an aluminum profile will look perfect on the background of any modern facade.
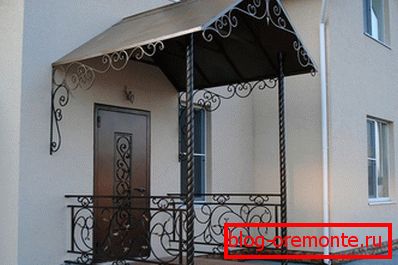
Steel profile
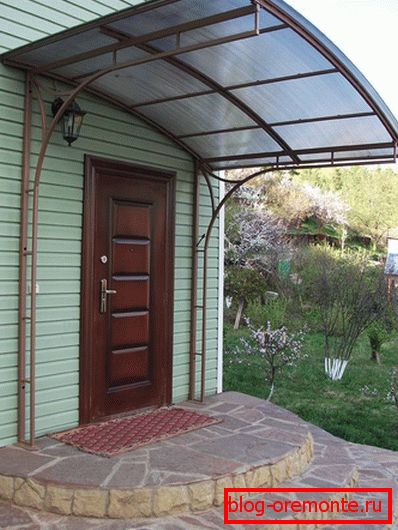
The steel profile construction is distinguished by its high strength, but it also has considerable weight and must be fastened with special care (preferably using anchor bolts). In addition, the reliability of mounting such a canopy over the entrance door can be ensured through the use of threaded connections (bolt or screw).
To improve the aesthetics of the perception of the whole structure as a whole, all the connections are best done by electric welding, and then carefully polished with a grinder.
Upon completion of the grinding work, the frame must be carefully primed and painted over with high-quality paint (preferably in two layers). The fastening of the blanks of cellular polycarbonate to the steel profile is carried out by means of self-tapping screws using special gaskets and plugs blocking the access of moisture to the frame.
Features of arrangement of a canopy
Some nuances of manufacturing a visor coated with polycarbonate, we consider the example of the simplest design, the assembly of which the material fits without deforming (bending) and with a slight bias, ensuring the flow of rainwater. All the necessary operations are performed in this case, taking into account the following installation features:
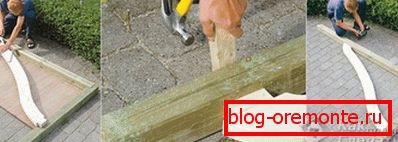
- Since polycarbonate is produced and sold in sheets of 6? 2.1 meters in size - you need to prepare a tool for cutting it in advance (hacksaw, electric jigsaw or a regular office knife).
- The frame of the mounted canopy can be fixed on the wall with the help of special sights.
- For ease of installation, the fastening of polycarbonate sheets is best to start at the end of the fixing frame on the wall.
- The number of sheet attachment points must be at least four.
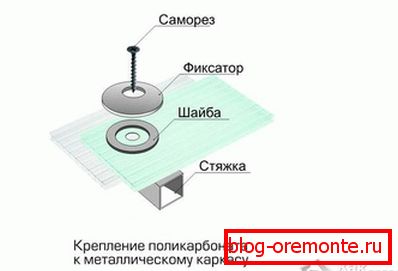
In conclusion, we once again note that for fixing polycarbonate blanks on the frame roofing screws of the required length with an elastic gasket and a special washer should be used.
Video
If you have the equipment, you can make your own forged visor with polycarbonate, as in this video. Visual instructions for making here:
You can make a lean-to visor with vertical supports:
A photo