Swimming pool in the country with their own hands:
In the warm season, the townspeople go to the country not only to harvest and make preparations for the winter, but also to rest. The pool is a great alternative to any body of water in the hot summer. Having worked a little on the beds, you can sunbathe and swim in an artificial pond. In the article we will explain how to make a pool in the country, give step by step instructions, and also show photos and videos.
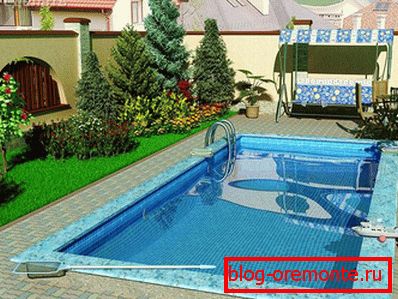
Project and site selection
First of all, well calculate your strength and financial capabilities. During self-construction, you will save most of the money on hiring a brigade of workers, but you still have to buy building materials. For the suburban area suitable low-cost frame pool, as well as composite or pit construction.
After selecting the structure and determining the size of the future structure, carefully inspect your site and select a place. The place should be sunny, without drafts, convenient for the supply of communications.
To work you need tools and materials:
- Cement and sand.
- Strong tamper base.
- Stones.
- Rods for reinforcement structures.
- Small sized stakes.
- Steel mesh.
- Waterproofing material.
- Screws and nails.
- Construction level and tape measure.
- Rope and boards.
- Shovels - Soviet and bayonet.
- Shut-off valve
When you have prepared all the materials and tools, you can begin to fulfill your dream.
Pool area and terrain marking

The choice of the area of the structure and its depth will have to be determined independently. We will give you only recommendations. The more people will have a rest at the same time, the more a pool is needed, but too large a structure requires substantial financial investments not only in construction, but also in care. Does it make sense to occupy a large area of the plot under the recreation area? The best option would be a construction area of 16 m2 and a depth of 180 cm.
Choosing a place for the pool, try to save live plants. On a plot with a slope do not plan construction at the bottom.
Start marking the construction site. To do this you will need pins and a rope. The boundaries of the site should be 50 cm larger than the projected dimensions of the pool. If there is a place, prepare a platform for a deck chair, umbrella and barbecue.
Preparation of the pit
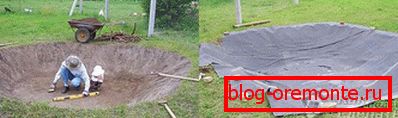
Dispose of the fertile layer scatter on the site. When preparing the pit there will be a lot of soil. It is better to take it out of the site or fall asleep to low places. This is mainly clay, which can be useful in the construction of outbuildings.
Make the walls of the pit smooth. The bottom is better to do with a slight slope, and the level of occurrence is 30 cm lower than the planned depth of the basin.
Drain pit and bowl reinforcement

Be sure to build a drain hole with a depth exceeding the height of the walls of the pool. Connect the pit with the drain pipe. From the side of the reservoir bowl, install the valve. When you need to drain the water to wash the pool, the valve opens. Wash the empty bowl, close the valve again and fill it with clean water.
Cover the drainage hole with a thick layer of large crushed stone. For water purification, it is best to install an overflow or skimmer system.
The bottom of the pit must be laid with a 30 cm sand layer. To compact the pillow, use a thick bar.
Prepare bitumen roofing felt for the waterproofing layer. The price of the material is low, and the roofing material itself is practical and reliable. When you finish the waterproofing work, start laying small stones. Put reinforcing bars on the stones or cover a special reinforcing mesh.
If you lay rods, the distance between them should not be more than 30 cm. For fastening use wire.
Formwork installation and bowl concreting

From the walls of the excavated excavation, retreat inward 15 cm and install a formwork of wooden shields. Lay the reinforcement mesh inside the formwork. The walls of the pit and formwork can be closed with a waterproofing film.
There comes the most crucial moment - pouring concrete mix. The work is painstaking and requires physical strength, accuracy and slowness. If you have a concrete mixer, things will go much faster.
It is necessary to pour concrete in small layers, carefully tamping them. The fewer voids in the walls and bottom of the structure, the stronger and more reliable it will be.
Finishing work
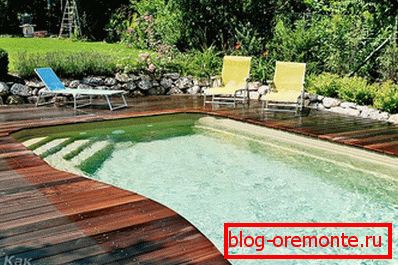
After the concrete hardens, remove the formwork and proceed to the final finishing of the structure. You can put the bowl inside with tiles, glass mosaics or just plaster. You can add naturalness to your small pond by laying a thin layer of clean river sand on the bottom of the bowl. Lay a ceramic tile track with a special anti-slip coating around the pool.
The recreation area can also be arranged in different ways. The playground covered with sand will remind you of the seashore. Ceramic tile also looks good and very practical. Immediately determine where the barbecue will be located.
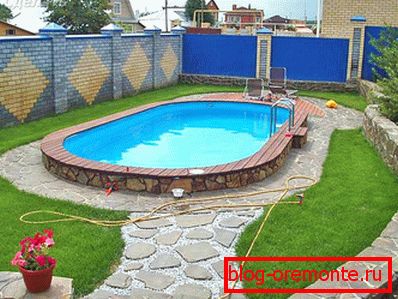
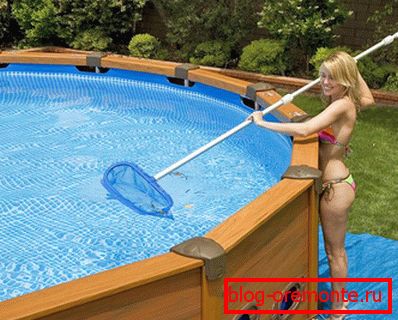
Frame type pool

The frame pool can be made of wood with an inner lining of tin or aluminum sheets.
You will need a pine timber for the construction of the frame strapping. Apply thick boards between the top and bottom of the frame. To make the construction durable, stable and tough enough, install bracing from durable boards.
Such pools after the end of the warm season can be easily dismantled. At the bottom of the bowl set the hose with a valve. If necessary, water is drained through a hose. Water can be used for watering plants.
To increase the resistance of wood to the aquatic environment, use special agents for processing. When working on the construction of a frame pond, use a sealant. You can buy regular plastic wrap.
When installing the frame structure, you do not have to engage in earthworks and disturb the fertile soil layer of the site.