Stages of repair in the apartment
Building a house or buying a house is not even half the battle. The next step the happy owner begins to puzzle over where to start to bring everything to mind. That is why it is important to know the stages of the repair of the apartment. If everything is carried out according to a certain schedule, it is possible not only to save a lot of money, but also to extend the life of some materials.
Where to begin

The very first thing that needs to be done is to think it over well. If you rush and, headlong, try to do something, you can make a lot of mistakes. It is important to decide what is required in a particular case:
- Cosmetic intervention. Usually involves small work that may affect one or more rooms. This includes sticking wallpaper, painting doors, window frames, etc. Demands smaller expenses in comparison with other types.
- Renovation. This concept appeared not so long ago in everyday life. It means something between cosmetic and capital repairs. It implies the use of modern materials that meet European quality.
- Overhaul. The most expensive. More often it includes redevelopment, which includes multiple changes. Especially relevant in the new building.
After the choice has been made, what type of repair is required for an apartment or house, you should create a small questionnaire. Some of them may relate to only one of the solutions.
- Will there be replacement or flooring?
- Do you need wall decoration? And to what extent should it be implemented?
- Is there a place to remove mold?
- Do I need to replace windows and doors?
- Will the position of rearrangements that are not carriers be changed?
- Is the installation of a heating system necessary? What specifically is best suited for the object?
- Is there a need for wall insulation?
- What kind of ceiling will be mounted?
- Is it possible to raise the level of the floor?
- Do I need additional waterproofing?
- In what condition is the electrical wiring, if any?
- Do I need to replace water pipes?
- How long has the sewage system been installed?
- Is there a need to replace piping?
- Is the wall tiling planned for the bathroom as well as the bathroom?
- Do you need an extension of the doorways?
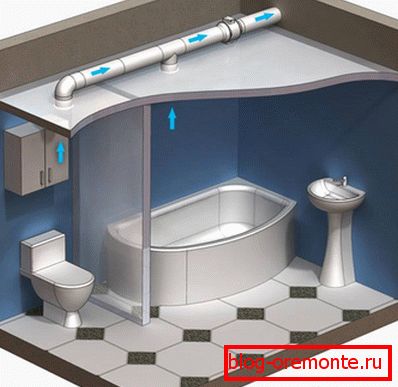
- Will the ventilation system be installed?
- How will the pipeline be laid if it is in the project?
- Is it planned to replace or install additional plumbing equipment?
- How will the hot water supply be realized?
- How will the input of telecommunications be implemented?
Conventionally, the entire course of events can be divided into the following stages:
- dismantling;
- rough work;
- installation work;
- rough finish;
- fine finish.

Designers forward
All the above questions allowed to determine approximately what you expect from future changes. The next step is to create a technical design. It is technical, because This concept includes not only the placement of certain elements on the plan, but also the exact calculation of all quantities so that during the installation process there are no problems.
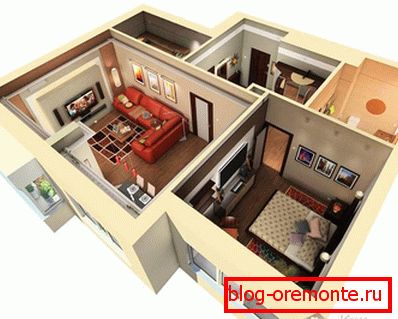
This task can be entrusted to professionals who perform it in a special graphic editor. The advantage will be the opportunity to see the repair already completed. Now is the time to decide on the color scheme. Will each room be a separate zone or will all merge into a single picture. Virtually every detail will be traced furniture. The projection can be rotated and viewed from all angles. The installation of lighting equipment is being considered, there is an advantage to immediately analyze which areas need more lighting. In real time, each light bulb can be turned on and see the falling rays. The same focus is done with the direction of sunlight incidence, depending on the time of day. All this is required in order to choose the best location for consumer electronics, beds and other equipment.

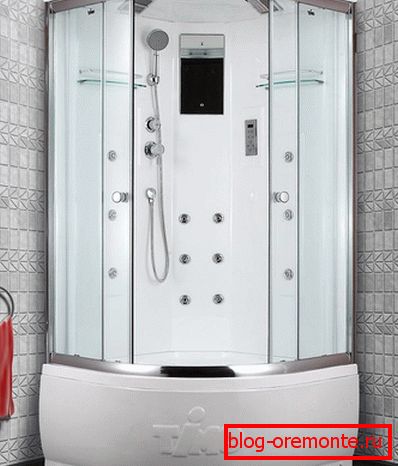
If you want to do everything with your own hands, then you will need a piece of paper, imagination and a little time. We'll have to draw a plan of the apartment in its existing version. It is desirable to do this in scale, so that it is easier to make calculations. Think about how best to make redevelopment and what costs it will cost. Perhaps there is a desire to combine the bathroom and bathroom in one room or, conversely, to separate them. If you have children or you often receive guests, then the second option would be preferable. Do not make them too dark. Dark colors will not help relieve fatigue after a hard day. It looks great multi-level lights, when one zone can be slightly muted, and the second to select. LED strip can be placed in a transparent floor. When every meter counts, then instead of the bathroom you can mount a shower stall with a deep tray, in which you can lie down if you wish. Another option would not be a finished purchase design, but a dedicated part, which is fenced off with a glass or other partition, and also has a sloping and heated floor. Shells are angular. In this case, they are set in the place that is usually not considered as a plot with useful territory. In a small space, smaller tiles look better. This factor is also relevant for the kitchen. Shelves can be mounted directly into the wall plane. Thus, the clutter effect will be eliminated and the territory will be visually expanded. A large mirror also contributes to this result. Heating for it will relieve from sweating and will give the opportunity to put himself in order immediately after the water treatments. Important is a good hood, which will be able in a short period to cope with moisture, removing it from the room.
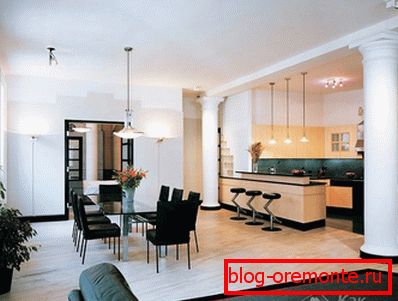
Note the size of the kitchen and dining room. Will they be separated by a partition or will they be joined by an arched opening. Pay special attention to cabinets, countertops and their location. Consider that from the sink under the working hand there should be a space in which it will be possible to dry the dishes. Try to eliminate sharp corners, because of which someone could get injured. How will home appliances be installed? In a confined space, you can use the area under the sill to hide the microwave. Thanks to the folding table will be more space during cooking, as well as a meal. There are options for tables that hide directly in the headset. If there is enough space, then do not take the view that everything should be placed in the corners. For example, a gas or electric stove, installed in the middle along with the sink, provides particular convenience and pleasure during cooking. Workspace requires good lighting. This is especially true in cloudy weather, when more shadow falls.
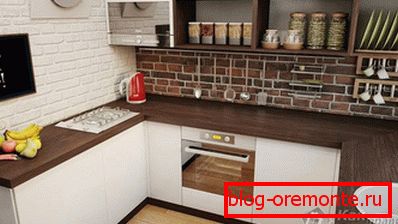
Must be a hood. Without providing it, you can significantly harm the finishing materials, which do not tolerate the accumulation of moisture and fat deposits. Everything should be very convenient, because it is here that a lot of time has to be spent both for the hostess and the household.
Is there an additional utility room planned in which it will be possible to mount a water heater or heating appliance? This is an optional requirement. Often the territory under them is included in the drawings of new buildings. It is also convenient because it can store all the utensils that will be needed for cleaning.
Any thoughts on the kid's room? A place for it can be distinguished by delimiting one of the existing premises. If the total area is small, then evaluate solutions for folding furniture. Think about the safety of the child. Will it be reasonable to place the bed on the second level. Create a small world where the baby will feel safe and comfortable.
Do not match the choice of colors: a girl is pink, a boy is blue. Often parents themselves create such stereotypes. Choose neutral tones that will be relevant for a long time. After all, the child will not live with his parents the first 10 or 15 years of his life, often this period is not limited to 18 years.
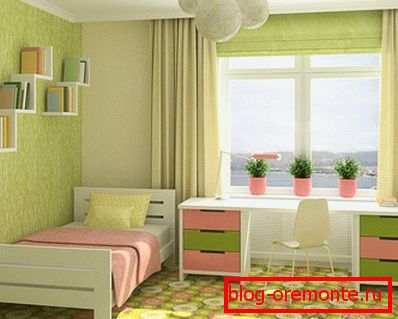
Safety of electrical appliances is also an important aspect. Special sockets have been developed that come with built-in plugs, and it is simply impossible to insert foreign objects into them. Ensure that the room gets as much sunlight as possible. This factor will contribute to the prevention of diseases of the organs of vision. Position the workplace opposite the window. Consider the child's desire to invite guests over for the night. An extra pull-out bed or mattress will be very relevant in this case.
The hall is better not to overload. Its main purpose is to communicate both apartment occupants and guests. Discuss what furniture really needs. Perhaps it will be enough just a sofa and a few stands for books and home appliances. As the flooring is perfect laminate or parquet. They look expensive and solid, and also create comfort. In addition, these materials are characterized by good insulating properties, which will allow the legs not to freeze. Give the walls neutral, non-spouting tones. This will contribute to a relaxed atmosphere in which it will be possible to discuss emerging issues and difficulties. Enjoying your favorite movie or program is much more comfortable with ambient light. For this ceiling is designed multi-level. LED elements which have no direct orientation to a floor keep within it.

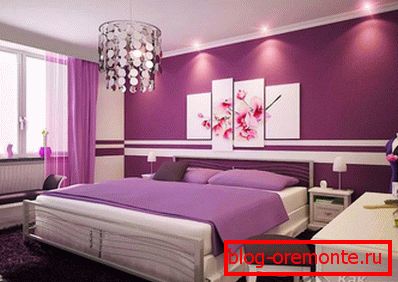
The bedroom deserves a separate approach. This is not a place where all things should be stacked. The room is designed to recuperate and relax. From the necessary here should be a large bed and bedside tables. There may be a small chest under the necessary clothing. Well, if each spouse has access to a separate control of the light, and it will be demarcated so that when one is resting, and the second wants to read a little more, there are no problems. The side may be sunny, but in this case it is necessary to consider the presence of blinds, shutters or Roman blinds. If the plans have the installation of air conditioning, then its position should be chosen in such a way as not to directly blow sleeping. In this case, you can easily catch a cold. The circulation is supposed to be organized so that the warm air under the ceiling cools and falls down. Someone wants the bylce, which is located against the wall, was drowned in a niche. Such a decision is allowed, but it will be necessary to take into account that the bed can be replaced with a large one over time, therefore, the notch should be done with a margin for such a case.

For things the ideal solution would be a large wardrobe. Having not regretted to allocate a separate small room for it, the customer will save a lot of really necessary space in other rooms. Thanks to him, there will be no problems with scattered clothes. A part of the space can be separated under shelves and drawers, the other side can be equipped with a bar for trempels. It is also allowed storage of bed linen and shoes.

Loggia may cease to be a separate room. In the case of such a design it is easier to implement than with a balcony, because less energy is required for insulation. The partition, which was located under the window, you can tidy up completely or leave as a small bar or desk. The necessary step will be the installation of a heated floor. If a draft is a water variant, then it must be a separate circuit so that it can be turned off at any time when the room is not in use. Glazing is better to do with duplex or triplex glass. They have an additional air gap that will prevent heat loss.
The corridors are devoid of windows, the light enters them through the adjoining rooms. Therefore, do not use dark wallpaper in them. Take care of a good backlight. At the level of the shoulders and the belt, you can make decorative plates that will prevent abrasion of the applied coating. Do not sacrifice the width of the transitions for the sake of other rooms. This will subsequently have a negative result when it is necessary to cross it with another person.
It is better if the hallway will also be in bright colors. It is possible to install a small closet for outerwear. Sliding doors on the compartment format will be just the way. The space near the entrance door can be sewn up with remnants of laminate or clapboard.

To make it easier to think about specific solutions, review a few ready-made projects. Perhaps, if you take one thing and transform a little, there will appear a zest, which you didn’t even suspect. It is easier when there are certain practices and experiences.
Dismantling works
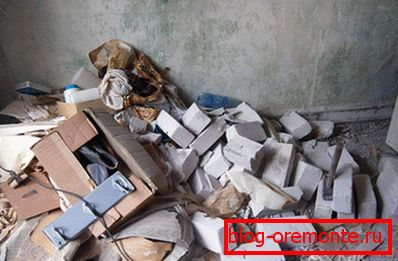
Before a sculpture is made of stone, it is necessary to remove all the parts that make it difficult to see the beautiful. The same principle applies during repairs. The process begins with the dismantling of the old flooring. If this will be done on its own, then take care of personal safety measures. Be sure to use a respirator, it is needed, because a lot of dust with harmful impurities settles to the floor. In addition, if it is linoleum, then the substances used for its manufacture can be toxic and dangerous if they enter the human body. Durable gloves prevent damage to your hands. Additionally, you can use a disposable costume painter. For parquet and laminate apply nail pullers and other devices.

- The next step are the walls. Old wallpaper and other facing material are torn down. In the case of the first there are several ways that will facilitate the task.
- Turns off electricity. Disconnected sockets and switches. Bare wires are insulated.
- 50-100 grams of liquid soap or dish detergent are added to a bucket of warm water.
- A small area is selected and abundant wetting is performed on it using a large brush or foam roller.
- After 20 minutes, the procedure is repeated.
- After waiting a few more minutes, you can begin to act. For this you need a metal spatula. Moving better from top to bottom, so it will be much easier to shoot large parts.

With vinyl wallpaper will have to work a little, because the upper part will be removed easier, but the paper can be firmly glued to the wall. Liquid is removed much easier. They use water-soluble glue, which is soaked well, even after drying. Do not try to immediately cover a large area. While you are moving, some will have time to dry and you will have to repeat everything again.
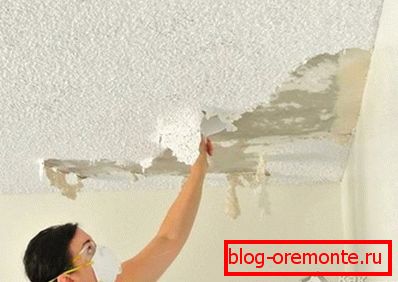
Next, the ceiling is cleared of wallpaper or whitewash. If you need to eliminate the coating of the second type, then it is better to prepare a solution, which will include a tablespoon of vinegar, 5 liters of water and 50 g of detergent for dishes. It is easiest to apply it with a sprayer. Just as in the case of wallpaper, you should not try to cover a large gap. If the layer is large, then you can hook it with a metal spatula, but usually you just have to go with a sponge and wash it off.
Removed all plumbing equipment. If any modules are still planned for use, then it is important to remove them with care and move them to another storage location, since pottery can be easily damaged when heavy objects are dropped. At the same time, the old wiring pipes are cut out. Before this, you will need to block the risers and install additional cranes if they were not there before. During the work should be access to water.
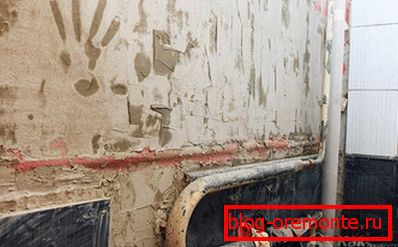
Old plaster stray. This process can be quite complicated if it was performed with sand-cement mortar. In the case of a clay or lime layer, you can use a well-sharpened ax or a hammer with a chisel. Work will proceed quickly. For the first option, you need a powerful punch. In it the chisel of the increased size is established. Start to move from the corner. It is there that the easiest to knock down the first section. Small residues can then be removed with a metal brush. In the same gap dismantled the old system of electrical wiring. Most often it is not laid in accordance with modern requirements.
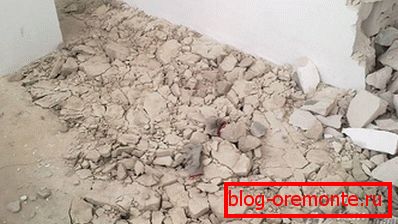
In the case when it is planned to refine the floor plane or install its heating, additional efforts will have to be made to remove the existing screed. For such a task will require more powerful equipment than a punch. Using the wall chaser you can divide the entire area into separate squares or rectangles. An electric jackhammer beat off the bathed parts. It is most convenient to take out all the garbage in construction bags. They must be prepared in advance.
Understand the old perechenki. Prior to this work, it is important to coordinate with the relevant services. Some of them may be carriers. If you damage them, then it will not only result in a fine, but also disrupt the entire structure of the house. In the case when the building material may be needed, it is necessary to take care that the dismantling is carried out with a flat-bit hammer drill, thanks to it, you can gently hook each individual element.
If the repair work will be performed by the contractor, then it is important to remember that they do not take funds for the dismantling at all or this amount is symbolic. In the case when a significant amount of money is assigned for this, and finishing is declared at a ridiculous price, then, most likely, it will not be executed at the proper level and it will be impossible to find the masters in the end to ascertain all the circumstances.
First stage
This step involves preparing for roughing. Now is the time to wiring electrical cables. It is very convenient until there are no rearrangements - you do not have to make additional holes. Conductors must be fixed to the ceiling, and not to mutate into the walls. If the ceilings are suspended, then it will be very easy to access them. It is necessary to think over everything in advance as to which devices will be in each room. In this case, it would not be superfluous to make additional exits. Each cable must be laid in a separate corrugation. Choose non-flammable. In case of any failure, it will die out independently. At each outlet will require conductors with a cross section of 2.5 mm2for lighting 1.5 mm2. To make it all solid, opt for a copper monozhil. It will be able to withstand the required current strength. It is better not to assemble the main shield directly at the facility, but to order it. It must have a certificate, as well as a test of full performance at maximum load. Simultaneously with the wiring is done wiring communication cables: twisted pair, telephone and television. If you plan to have an intercom and alarm, then the appropriate conductors are installed. Immediately prepared all the boxes under the sockets and switches.

Someone may advise to hide all the wires in the floor screed. But this is not a good idea. The fact is that they will be tightly sized. Filling the solution, it will not be possible to completely eliminate the voids under the conductors. Ultimately, this will cause the surface to sink and cracks will appear. It will be very unpleasant if this happens after the laying of the facing covering.
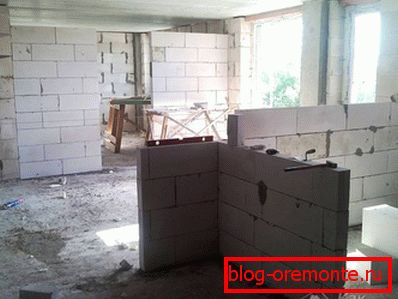
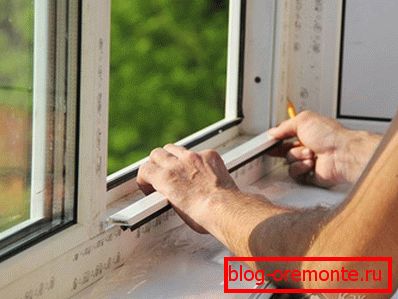
Displays are replaced. For them, you can use several varieties of material. The easiest and fastest way - plasterboard. Thanks to them, you can close a large space at a time. Provide sound insulation will mineral or glass wool, laid in the cavity. Gas-blocks are also inexpensive and easy-to-work material. They guarantee the possibility of further processing and good insulation. Also their weight is small, which minimizes the load on the floor. Now is the time to replace windows. You can dismantle the old and install new ones. You should not spare money, it is better to take products of the middle class with a sufficient number of cameras in the profile, if it concerns the plastic option. Only in this case it will be possible to avoid their fogging and the formation of dew. You should not remove the protective film before the completion of the finishing, otherwise the frame will be damaged and lose its appearance.
Replacement of risers for heating, water supply and sewage are carried out during this period. It will also be good to do the layout immediately. Do not save on the material: copper, cross-linked polyethylene, metal-plastic are excellent products that will not only last a long time, but will also be safe from water hammer and hydrostatic stress. While peresenki are still bare, there is an advantage to make the necessary grooves and hide the pipes in them. Do not forget about warming. Thus, it will be possible to realize significant fuel economy for heating. The leakage protection system is an essential element of a modern home. It will protect against the costs incurred by the flooding of both their own homes and neighbors, which are located below.
Roughing
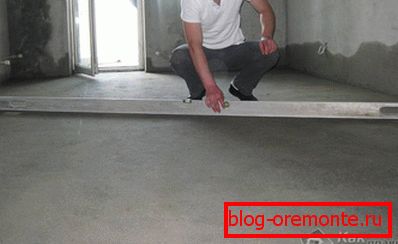
The main task of this stage will be the alignment of all the planes. The first thing poured new screed. It can be from self-leveling compounds. But it will be relevant if the differential is within 3 centimeters. With greater difference, it is better to use a cement-sand mortar. There is no ban on working with the first option, but it will take a lot of material, which would entail significant costs. If you plan to install a heated floor, then the next step is insulation and insulation. Next - guides, pipe and refinished screed again. Together with these works, it is possible to wiring the entire heating system. Pipes, as in the case of water supply, can be hidden in the grooves.
Stucco walls. In order to make it smooth, it is best to use metal beacons. Some owners choose an alternative for plasterboard sheets. In this way, an almost perfectly smooth surface can be achieved.
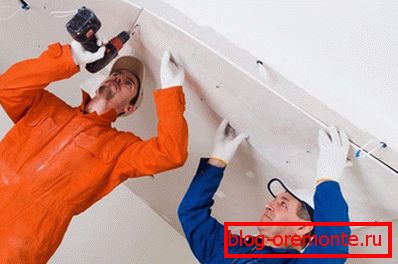
The ceiling is treated in the same way as the walls. To not mess with plastering, because this can be a very difficult task, the plane is simply covered with drywall. A multilevel project can be mounted in which the design idea of the backlight will be implemented later.
The final step of the draft phase will be putty. It is desirable that she was engaged in professionals. On how well it will be executed, the final appearance of the entire repair depends. Also installed boxes for interior doors.
Fine finish
At this stage, painting the walls and ceiling. This can be done with water-based paint. It is advisable to choose one that you can safely wash without fear that it will peel. This is a necessity when there are children in the house. Someone chooses wallpapering. But it is important to remember that in the first version there will always be an opportunity to refresh the appearance without cardinal intervention, in relation to the second such number simply will not work.

Stages of bathroom repair include the installation of sanitary equipment: sinks, taps, shower stalls. The surfaces in the bathroom and in the kitchen are lined with tiles. At the same time, it is necessary to move so that all trimming is as hidden as possible under furniture or other equipment.

Fitted floor covering. This stage is important to complete after the ceiling. If you do not follow this sequence, then during installation the tool may fall and damage the expensive laminate or parquet. And the replacement of its parts would entail the need to dismantle a large area.
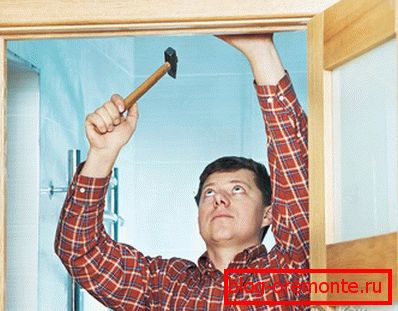
Interior doors are installed in the prepared boxes. It has been observed that sliding solutions are not as practical as conventional sash solutions. The fact is that in the niches beneath them accumulates a large amount of garbage that is difficult to get. And this situation will be sad for allergy sufferers, as well as children. In addition, if the hinge system fails, then you have to disassemble part of the wall for its repair. Sound insulation also suffers.
Cabinet furniture is installed both in the kitchen and in all rooms. Only after that the baseboards and cashiers are fastened. Do not do this before, because then it is difficult to ensure the quality of the junction of elements. Sockets and switches are mounted in prepared boxes. If the work is carried out by a hired firm, then the toilet is put in its place at the very least. So the customer will have confidence that he will be the first to use it.

The final step will be setting up all telecommunication and security systems, placement of paintings, shelves and other accessories.