Shelf in the bathroom with their own hands
It is extremely difficult to imagine life without various trifles, which allow you to improve your home with comfort and coziness. For this reason, when creating an interior, it is extremely important to think over where exactly such a small but important item as a shelf will be located. The shelf has the greatest value in the bathroom, because it is in this room that there are a large number of small items. In this article, we will look at how a bathroom shelf with your own hands can be made. At the same time, at the beginning we will also talk about what types of bathroom shelves are available.
Large variety of bathroom shelves
Shelf selection will directly depend on personal taste. Although in some cases the choice is fairly obvious. So, according to the method of fixing the shelf for the bath can be:
- wall mounted
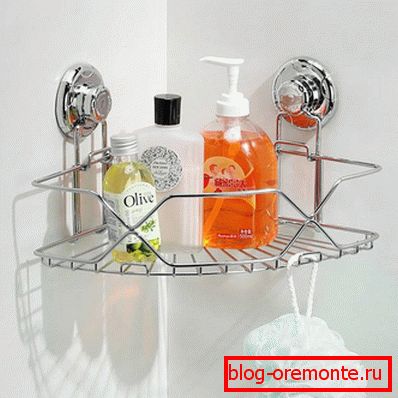
- angular,
- floor standing
- suspended,
- stationary,
- removable.
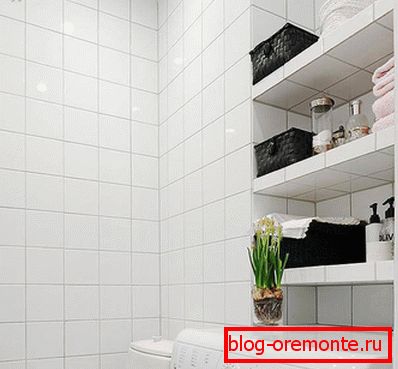
Regarding the location of the shelves in the bathroom, then everything also depends on the size of the bath. For example, in some cases, you can install a shelf under the bathroom or under the sink. In other cases, the shelf is hung on the wall. Shelves may also differ in appearance, for example, closed and open lockers. As for the use of the material for the shelf, here you can use wood, drywall, glass, plastic and metal. Each of these materials has its positive and negative sides, respectively. Now consider in detail some of the technology of manufacturing shelves in the bathroom and find out what functions the shelf in the bathroom.
What are they needed for
It should be noted that the shelf in the bathroom plays an extremely important role. For example, it is able to provide security. From what? Glass jars, bottles that stand on the bath itself can fall and break. If you have a regiment, then all this can be prevented. Moreover, a shelf in the bathroom can save considerable space. If you compare them with the lockers, they will not occupy usable space. This is especially important in small baths.
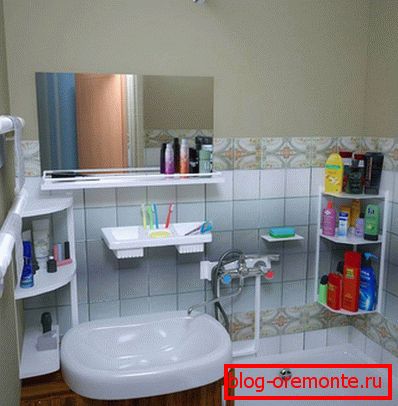
Corner, hanging and wall shelves significantly increase the space in the room. Another plus shelf in the bathroom - aesthetics. If you think out its structure correctly, you can decorate the general interior of the room. Let's see how to make the shelf yourself.
Glass shelf!
As for the manufacture of shelves of glass for the bathroom, then there are some requirements and rules. Moreover, the shelf can be made of glass with your own hands of any shape and size. So, for the manufacture of such a shelf you first need to determine its size, namely the width and length. After in the glass workshop you can order the necessary piece of glass. Ask the craftsman to smooth out the sharp edges of the glass. If you have a built-in niche of plasterboard, then you just need to insert the workpiece, using special mounts for glass. Usually glass is fixed with the help of decorative holders. Previously, with the help of a level, they should be fixed on the wall strictly at the same level. After these holders are installed in the glass harvested.

It is important to consider the future load that will affect the glass shelf. You should take care of its strength. The thickness of the glass shelf should be at least four millimeters.
Everyone understands that glass is very dangerous, especially in cases when it is broken. If you have small children, the probability of this increases several times. To prevent the worst, for example, injury by small fragments, it is recommended to pre-glass the glass with a special transparent film. Moreover, some use this film for decorating glass. So, without putting much effort, a shelf for a glass bathroom can be done within a few hours, provided that all the preparatory work is done.
Drywall Shelf
Drywall Shelf это одно из самых простых и в то же время недорогих вариантов. Для ее изготовления вам потребуются профили CD и UD. Из них изготавливается каркас, который скрепляется специальными саморезами. Если в ванной комнате на стены монтируются гипсокартонные листы для их выравнивания, то можно изготовить небольшие ниши. Именно они будут служить в качестве полок для всех необходимых предметов. Когда каркас готов и обшит гипсокартоном, поверхность можно обложить кафельной плиткой. Более того, при желании такую конструкцию можно комбинировать со стеклом. Во встроенные ниши на декоративные держатели монтируется стекло. Так получается полка для ванной, которая отлично подойдет к интерьеру. Такую полку можно дополнить светодиодной лентой, которая будет являться дополнением к основному освещению. Но в таком случае вместо декоративных держателей для стекла, вам необходимо будет приобрести алюминиевый профиль. Именно в нем и будет крепиться светодиодная лента.
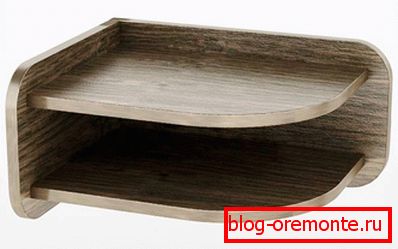
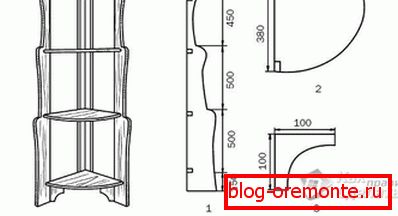
Corner shelf made of chipboard
In the event that the bathroom has a free corner, you can build a corner shelf. Chipboard can be used as a material. All work should be divided into several successive stages.
Preparation of parts
Chipboard thickness must be at least 16 mm. Mark the center on the sheet and draw a circle, the center of which will be this point. You can choose any radius, in our case, let it be 25 cm. Further, the resulting circle should be cut out with a jigsaw. With the help of the square it is necessary to draw a line, dividing the circle into equal two halves. After each of the halves should be divided into two parts. Thus, it should be equal to four parts. When you cut the circle completely, you should cut it using drawn lines with a hacksaw. As a result of the preparatory work should be four identical corner shelves.
Making grooves in the rail
In the corner where the shelf will be installed, put a wooden rail. On it you should note the location of the upper and lower shelves. Next, you need to divide the distance between the upper and lower shelves proportionally, so that you get the shelves of the same height. When the marks are on the rail and shelves should be made grooves. Attach a shelf to the indicated place and paint it from two sides with a pencil. Next, you should make a cut on the specified labels. The depth of the cut should be no more than half of the rail. Such a cut is made for each of the shelves sequentially. It is imperative to ensure that the regiment entered the groove with difficulty. At the next stage, such a cut should be done on the shelf itself. Having drawn the lines, you will see where and how many cuts need to be made. If the shelf hardly enters the groove made, then the edges can be lightly sanded.
Installation of the corner shelf
There are several options for fixing the corner shelf. For example, you can use mounting bolts. If you do not want to drill tile, you can use mounting glue. But for this you need a special glue that connects the wooden rail with tile. Apply a strip of glue to the back side of the rail. To prevent the rake from sliding on the tile, you can use double-sided tape, which is glued in several places, for example, from above, below and in the middle. When the glue is dry, it remains only to install the shelves. Due to the fact that the shelves fit snugly in the grooves of the rails, it is not necessary to fix them with glue. Additionally, the shelf can be painted or pasted decorative and moisture-resistant film. Despite the simple design of such a shelf is strong enough, therefore, will be able to serve for a long time.
Hinged shelf
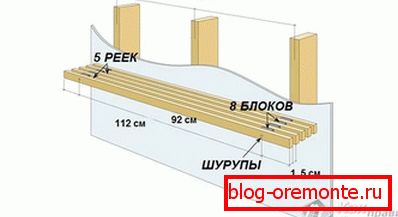
Another option for the bathroom shelf is a hinged shelf. Consider how to make a shelf in the bathroom with a length of eighty centimeters. If you need another length, then just take the slats of a different size. Moreover, you can add the number of sections, making it wider. You must first prepare the required construction material, as well as tools:
- 5 racks, preferably from pine. Their length should be 112 cm, width - 3 cm, thickness - 1.5 cm.
- 8 blocks also of pine. The length is 3 cm, the width is 3 cm, and the thickness is 1.5 cm.
- Special glue for wood.
- Ruler.
- Drill.
- A set of carpentry tools.
- Special wood screws, 13.5 cm long.
- Several dowels for mounting the shelf on the wall.
So, five consecutive steps to manufacture such a shelf:
- On each rail, it is necessary to measure ten centimeters from two ends and put marks on it with a pencil.
- According to marks, blocks are planted on the glue between the slats. If the block size does not match the rail, then the block should be filed.
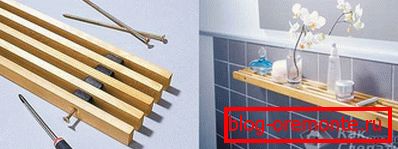
- In the next step you will need a drill. In the middle of each glued block should make a mark. As shown in the figure below, it is necessary to make holes. At the same time, the block and rail are drilled at the same time.
- At this stage, the entire structure should be assembled into one. To do this, take a long screw. Through the drilled holes poke a screw with a screwdriver. It is extremely important to carry out this process carefully, otherwise the wood may burst and you will have to redo this or that rail.
- When the whole structure is assembled, it remains only to hang. If desired, you can pre-open it with varnish and stain to give it a more attractive look. For its installation you need to use a level and a tape measure. Having noted the places of drilling, drill holes, drive dowels. Using a special mounting mounted on a hanging shelf, carry out installation. This shelf has several advantages over others. For example, water will never accumulate on it, so for the bathroom it is a great option.
A photo процесса изготовления:

So, we have considered, perhaps, the most common types of shelves that can be made by hand. If you have fresh ideas, write about them in the comments to this article. So, you can share an invaluable experience.
It is interesting:
how to install an acrylic bath with your own hands;
how to solder polypropylene pipes.
Video
Another option for a homemade glass shelf with spectacular lighting:
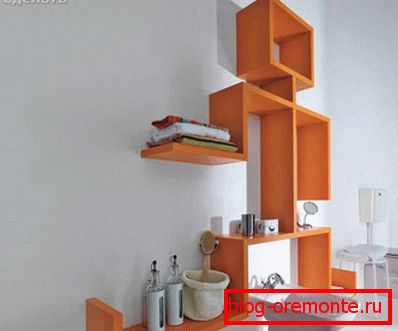
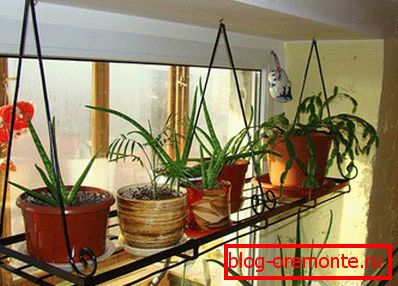
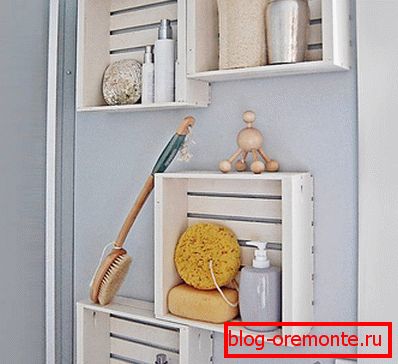
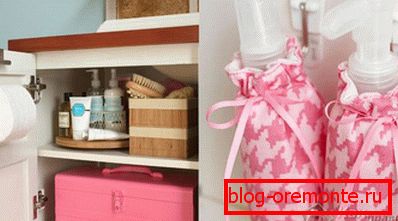
A photo
Interesting ideas for bathroom shelves are presented below: