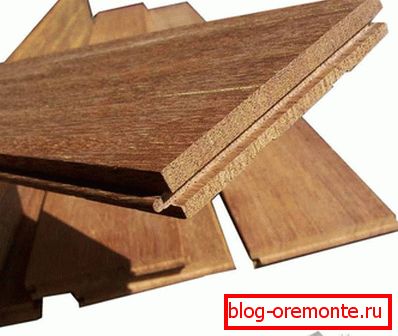
Scraping parquet with his own hands
It would be desirable, that repair which is given hard, with the big expenses of forces, time and means, kept the freshness throughout long time. But, unfortunately, it does not work and the finish requires good care. For example, you may need to do a parquet with your own hands.
General information
Generally speaking, scraping is a series of events, which is aimed at giving the parquet floor an almost original look. She may be:
- manual;
- mechanical.
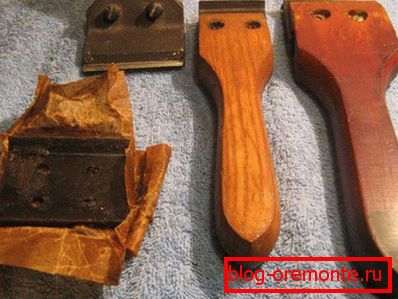
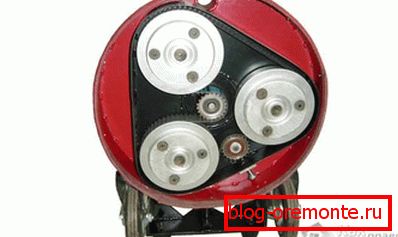
The first method was very often used before special devices were developed. In cases where it is not possible to purchase or rent equipment, this method can be applied today. For machining, you will need several basic units of the electric tool: a chipper (in essence it resembles a conventional belt grinder, but the weight and dimensions are several times greater), a vibration or eccentric grinder, a vacuum cleaner and consumables.
Is it always possible
In fact, you can always. It is more correct to raise the question of whether it will be expedient in each case.
Before you decide on a recovery step, not a replacement, you need to weigh a few points:
- Was there a scraping before. This moment is important to determine in order to know which layer has already been removed and whether it will not be a problem to remove another one.
- Is there a source of damp under the floor. To find out, you need to cover the floor with a film and leave for a few days. In the case when there is condensation on the oilcloth, it is important to find out the reason for its occurrence.
- Has the fungus started to develop? Usually this factor is related to the previous one. In certain situations, to withdraw it completely fail. Even if you make a scraping and varnish, then over time the mold will show itself, and all the work will go down the drain.
- Significant mechanical damage to the flooring. If there are potholes that occupy a large area, then it may not be possible to remove them when removing the layer. If it comes to several plates, they can easily be replaced. In some cases, this issue can be resolved with a special putty.
- It is important to determine if the shaschel is not wound up. In most cases, in such a situation, a complete replacement of the flooring will be required.
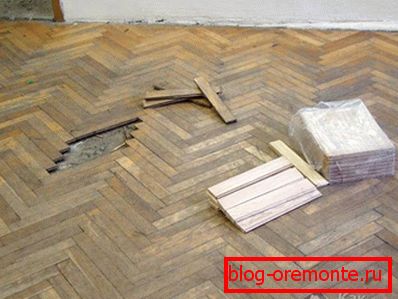
The condition of the board inside can be checked with the help of ordinary awls. It is enough to choose a floorboard, which is located on the edge. At the end of the need to drive the awl. If it fails, then perhaps the wood is already rotten. This test is necessary to conduct around the perimeter of the room. The wear level can also be checked in this way, only the tool needs to be immersed in butt joints up to the spike. So you can find out which layer can still be removed.
Floor preparation

This important process will help save your money and nerves.
- The very first step will be the release of space. It is necessary to remove all the furniture and other items from the room.
- Next you need to dismantle the plinths. If you feel that they are planted tightly, then you should not be zealous, so as not to damage the floorboard.
- Carefully inspect the floor, walk on it. Listen, whether there are creaks or deflections in any points. Assess the potholes that are most likely present.
- When detecting sagging parts, it is necessary to determine the cause. If the beam from below is leaky, you will have to disassemble a part of the coating and strengthen or replace it.
- If you notice squeaks, then eliminate them will be easy. Need a drill with a diameter of 8 mm to drill a hole under 45? in the seam. Further in this hole it is necessary to immerse to the whole depth a wooden dowel greased with PVA glue.
- When one of the floorboards is simply loose, it is necessary to drill a hole in it with a drill, it should be less than a nail in diameter. It is also better to make sweat. The nail is hammered and sunk as deep as possible, more depth of future processing.
- If there are potholes that are less than 3 mm deep, there is no need to take any action. If the depth is greater, then you need to putty it with putty on wood and let it dry well.
- When there are large gaps between the floorboards, it is possible to eliminate them by hammering strips of wood that have been previously missed with glue. Instead of a tree, you can use the papier-mache effect. Newsprint is moistened with white glue and is laid in a gap in several layers. Excess is cut off, and what is left is covered with stain according to the color of the parquet.
- It is important to hammer all protruding nails around the perimeter so as not to damage the sanding belt.
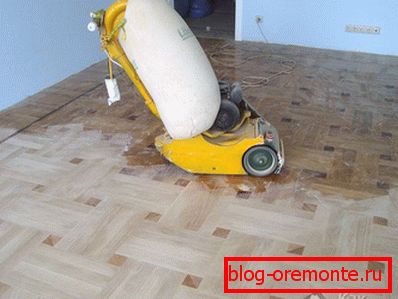
The most important stage
Before turning on the grinder, it is necessary to close all the doors so that the dust does not fly to other rooms. Take off your shoes and put on soft socks, you can still wear shoe covers on top. This is very important because it is easy to damage wood when it remains without protective layer.

- We make cleaning with the vacuum cleaner. It is better to use the construction, as the force of its suction will remove all particles of debris.
- Carefully look in which direction the wood fibers are located. Need to move in the course of their location.
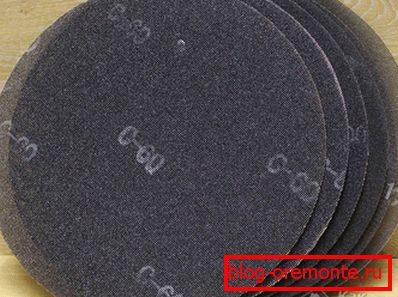
- Install sandpaper with a coarse grain sanding machine. Depending on which layer you plan to remove, it can be P40 or P60.
- Before starting the unit, raise the drum; this is very important so that the recess is not eaten out. It is advisable to repeat this procedure when you change direction.
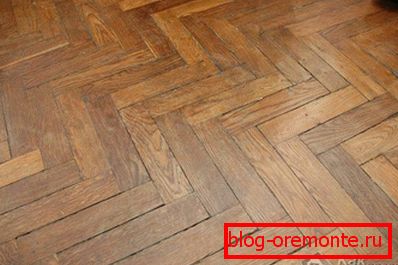
- Start processing is from the middle of the room. If the parquet is laid diagonally, then it will be necessary to move. If it is laid parallel to the wall, then we move strictly along its lines. In the case when there are circular patterns on the floor, it is necessary to follow a twisting spiral.
- Each next strip must be done with a slight overlap on the first.
- The second layer must be removed perpendicular to the first. It should also start from the middle of the room. At this stage it is better to install another sandpaper with a smaller grain, for example, P80.
 Now you need to remove the remnants of the upper layer, which is closer to the wall. It is better to do this with a special shoe. This is a grinding machine that is shaped like a boot. It can be replaced by an eccentric one, if you are sure that it will be able to pass through hard-to-reach places. Some masters prefer to do this with a grinder, on which a special circle is installed with a velcro sandpaper.
- After the room is passed and the top layer with varnish is removed, it is necessary to once again examine the entire coating. You may notice that the cracks are bare. Now is the time to putty them.
- After all these procedures, you need a surface grinder and sandpaper with fine grain (P100 or 120). Well, if you can use the unit with three discs. There are two passes in the directions, as in the previous case. After this, it is also necessary to do a sweep in the direction parallel to the walls.
When doing work, be sure to use a respirator. Not all particles will be removed to the dust collector. This way you protect your airways from harmful inclusions that may be contained in the varnish. If it is not possible to rent a special machine for grinding, then it can be replaced with a conventional tape machine or a manual cycle (when using the latter option, it will be necessary to moisten the floor so that the process proceeds with less strain on the hands). But in this case, you will need several days, or even weeks, in order to remove the top layer.
Processing after grinding
After the polishing is completed, half the case remains - finishing. At this stage, we need a microfiber roller with a long stick, varnish, the shade of which is chosen according to the preferences of the owner and the primer.
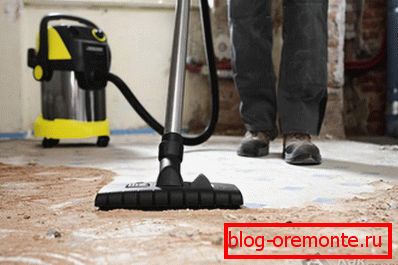
- After finishing polishing, it is necessary to vacuum everything well again.
- We cover the entire area with a primer. It will well fill some shortcomings and will contribute to the partial leveling of the surface. It is better to apply 2? 3 layers. This must be done at intervals of 30 minutes.
- Next, give the floor to dry well. For this you may need a day.
- You may need to once again walk the surface grinding machine. The fact is that after processing the primer, some fibers can rise.
- We again clean with a vacuum cleaner and apply another layer of primer.
- Now proceed to the varnishing. To achieve the perfect result, you will need 2? 3 layers. Approximately every 10 m2 need 1 l of varnish.
- It should be applied starting from the place where more sunlight falls. Roller need to pass first along and then across. The first movement - we put, the second - we align a layer.
- Allow time for the first layer to dry well.
- We pass a surface grinding machine with a very fine sandpaper. This is necessary for good adhesion to occur with the next coat of varnish.
- We make cleaning and we put the following layer. Next, repeat the previous step.
- Apply the finish coat and let it dry well.
Before you start work, you must give the varnish to get the room temperature. Also in the room must be respected a certain temperature. Usually this value is +18? C. In this case it will be easier to apply varnish, and also its drying will occur faster.
In most cases, do not do without scoring. This is very painstaking and sometimes tedious work, but the result will delight you for more than one year. Successes in your endeavors!