Sauna in the apartment with their own hands
In this article we will explain how to make a sauna in the apartment with your own hands, consider the various options for the location and types of saunas, as well as give photos and video instructions. First of all, it is necessary to choose the right room for the sauna.
Features of the sauna
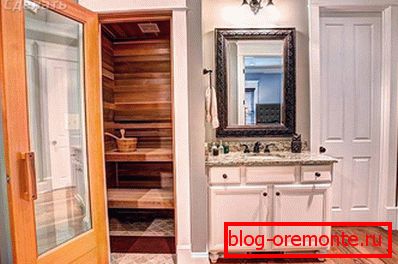
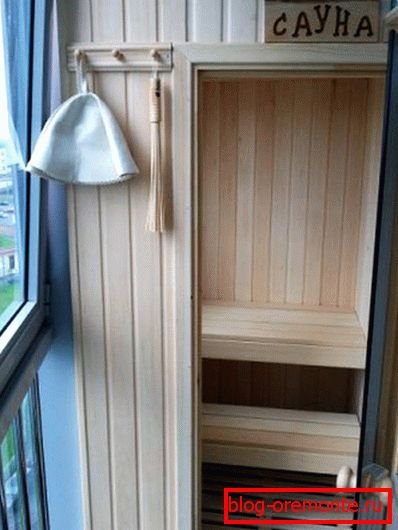
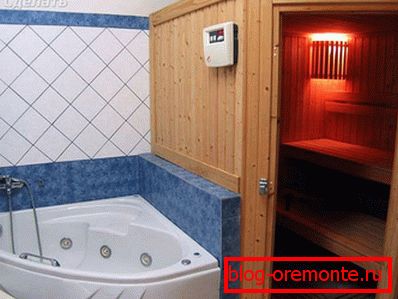
The ideal option is considered to be a bathroom - it already has all the communications you need, and to accommodate a sauna you will not need to take additional permits from interested organizations. However, often under the sauna give pantry, balconies or even attach it to one of the walls of a large room. In these cases, redevelopment of the apartment will have to be coordinated.
The second point that you should definitely pay attention to when setting up a sauna is wiring. Since initially the sauna in the apartment was not provided for, the electric cables to the load from the furnace were not calculated. Therefore, it will have to be replaced and, perhaps, immediately in the whole apartment (it is better to do this to an electrician-professional).
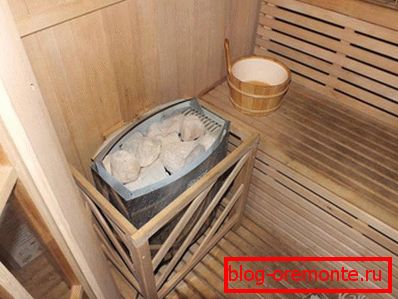
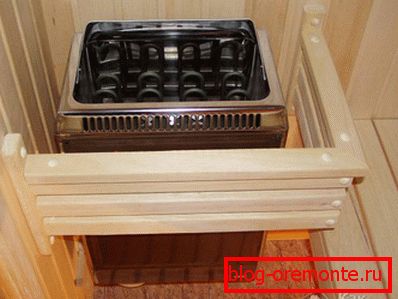
The third point is the sauna stove itself. It must be electric and only factory made (no homemade products even from the best local craftsmen!). It is also not allowed to make any improvements to the factory furnace. Elektrokamenka should turn off automatically after 8 hours of operation and have a power suitable to the volume of the room allocated for the sauna.
The fourth point is fire safety. Since the sauna is electricity, wood (a very combustible material!) And a sufficiently high temperature, it is necessary to approach fire safety issues thoroughly:
- Invite specialists and install a fire alarm system in the apartment (if the sensors in the apartment have already been installed, make sure that all the house fire alarm is in working condition);
- use only hardwood for finishing the sauna;
- place the control panel of the electric stove outside the sauna in a dry room;
It must be possible to quickly and freely switch off the electric “automatic machine” to which the sauna stove is connected, while you are not using it (this is especially important if there are children in the apartment who adore turning everything on and off) .
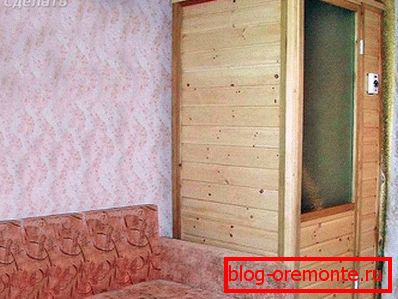
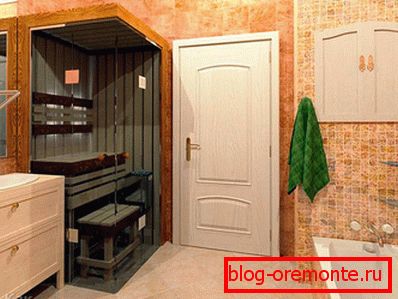
The fifth point: the door to the sauna should be specially made, it is desirable that it be glass (otherwise the sauna will look like a small wooden box that can cause claustrophobia). And it is necessary to acquire it even before you begin to build the frame of the sauna.
Advantages of the design
Sauna for an apartment has a number of advantages that should be considered when deciding on its arrangement:
- You can afford rest and some relaxation at any time suitable for this. Accordingly, you should not spend time on a trip to the sauna.
- There is no need to conduct a separate sewer and water supply, as is the case with the construction of a separate building with a sauna. Connect a mini-sauna can be centralized sewage / water supply.
- The risk of colds decreases as there will be no need to make rushes down the street.
- Mini-sauna for an apartment will have a beneficial effect on the entire body, removing slags from it.
- Strengthening the cardiovascular system.
- Excellent tool for recuperation after a hard day of work, etc.
Given these positive aspects, you may decide to purchase a mini-sauna for the apartment. However, consider the obvious disadvantage of such an installation. It lies in the fact that there is not always free square meters in a residential apartment.
Types of mini-saunas
There are several types of saunas for installation in the apartment. They differ not only in price, but also in design, volume, heating method and other additional functions. Consider the most common saunas.
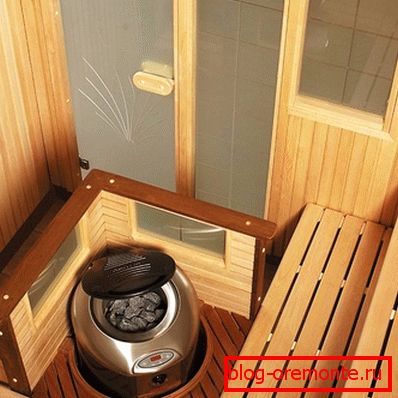
With electric heater
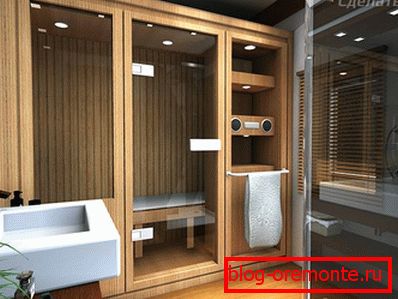
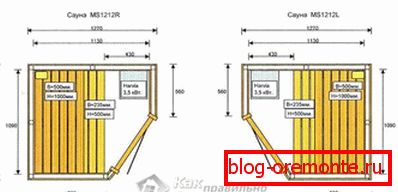
The area of such a sauna is 1.2 m2. If you have a small family, then this is a great solution. Its main advantage is the ease of installation. As a rule, the factory assembly is a wooden frame, which is complemented by shields. For its assembly is enough two people.
The sauna with an electric heater already has vapor insulation and heat insulation in its design. Therefore, in addition to the assembly will need to make a connection to the water supply and sewage.
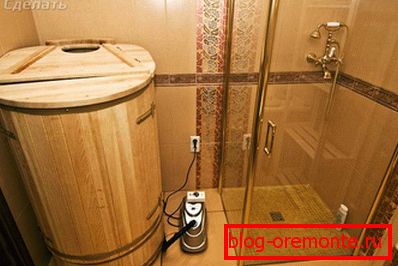
Phytobot
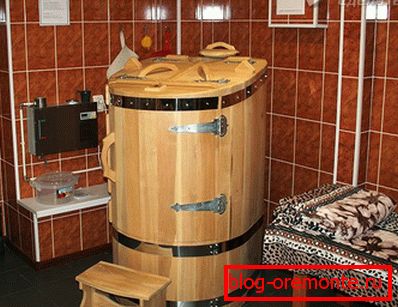
For such a sauna plan will require a minimum of space. Moreover, it is not necessary to additionally strengthen the wiring. Based on the name, the design resembles the shape of a barrel. The entrance is located on the side. If it sits on the bench, the body is completely immersed in it, and outside only the head.
The use of phyto barrels is important when steaming the body with medicinal herbs and various flavors, which has a positive effect on human health.
Portable sauna
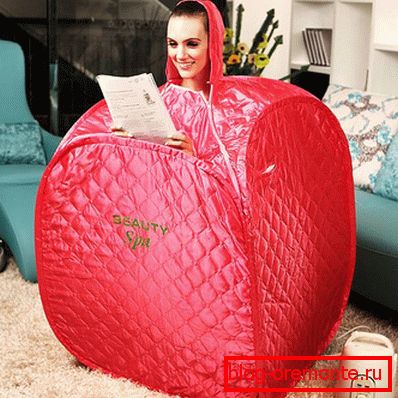
This type of sauna is represented by a frame that is covered with a cloth. By the principle of action, a portable sauna is like a phyto barrel. In her head is not amenable to thermal influence. This device is relatively inexpensive, has a small weight and does not take up much space. The main advantage is ease of use. It is enough to have a working outlet near the device.
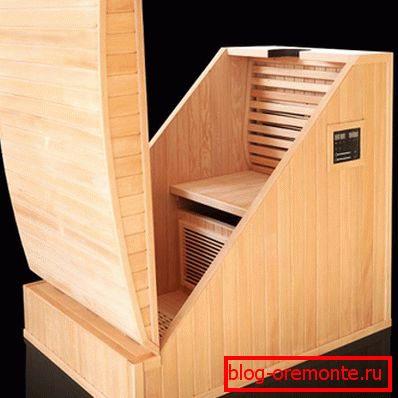
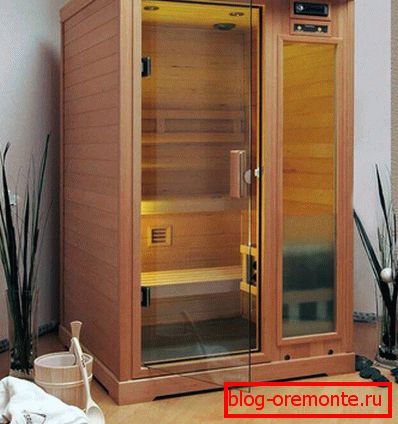
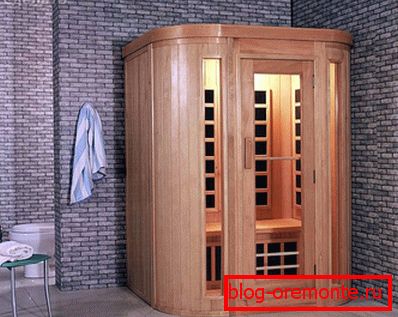
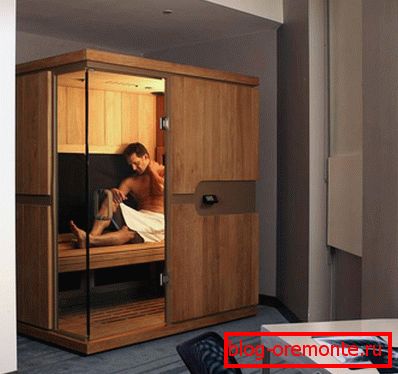
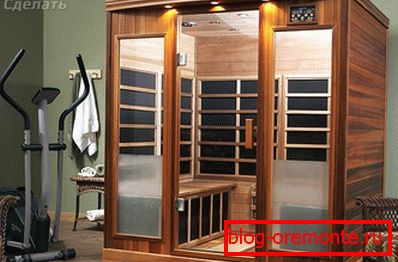
IK sauna
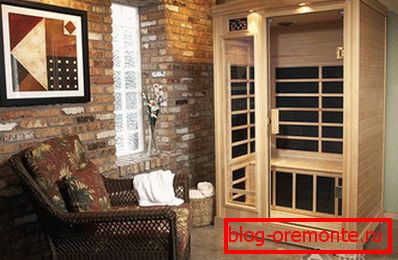
In this case, the infrared radiator is used for heating. Although the temperature regime is considered to be gentle in it, in the region of 40–60 ° C, the skin is rather deeply heated in it. Therefore, it can be not only adults, but also children, as well as the elderly with heart and vascular diseases. One of the advantages of the installation is that it consumes a bit of electricity.
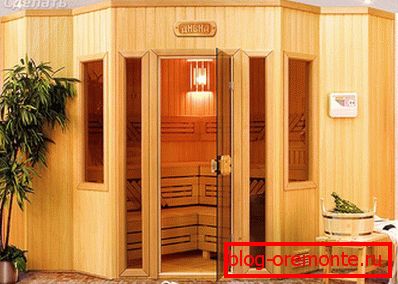
Finnish

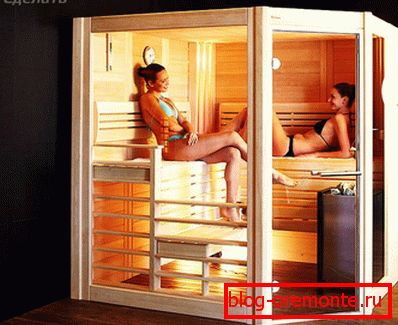
If the room in the apartment is large, then you can seriously think about purchasing a Finnish sauna. It can simultaneously be several people at once. It uses dry steam to heat up to 90–100 ° C and this is the main difference from the other saunas listed above.
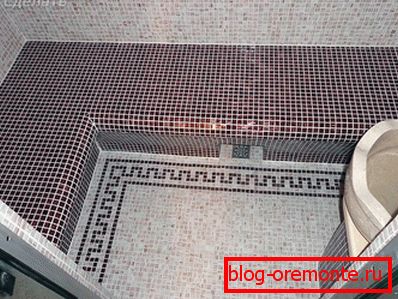
Turkish
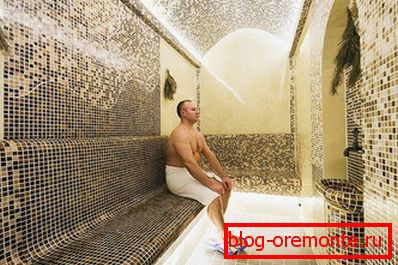
This sauna can rightly be called exotic. It is very rarely mounted in an apartment, as this requires:
- install hoods;
- make high-quality waterproofing;
- install a warm floor;
- tile floors, etc.
A steam generator is specially installed to get steam in the Turkish bath.
What to do if power is not calculated
Some restrictions on the use of the sauna in the apartment may impose insufficiently powerful wiring. Moreover, if the apartment has an electric stove, the power is over 3 kW, then the wiring will not be able to withstand the load. In this case, it will be necessary to make a small reconstruction of the wiring, and to purchase a sauna stove with a capacity of up to 2 kW. But with such power, the temperature in the sauna will gain a very long time. This, in turn, requires the arrangement of high-quality thermal insulation.
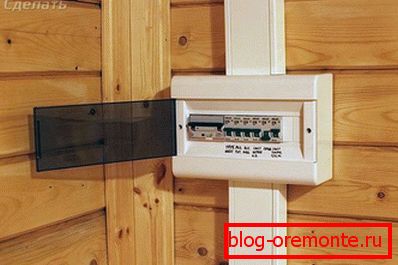
To install a sauna in an apartment, it is recommended to organize an individual power cable connection, which is connected directly to the panel.
Important requirements are also placed for wiring inside the sauna. For this, only the closed posting method should be used. The cable, in turn, must be heat resistant. The construction of the sauna should be grounded, and the UZO should be installed on the line.
If you use an electric stove with a capacity of up to 4 kW, then it will not create a special load on the network. But at the same time to include the heater in the sauna is not recommended.
Legal details and recommendations

More recently, the thought of installing a sauna in an apartment had to be abandoned. However, today, with the observance of a number of requirements, this idea can be realized. So, to install a mini-sauna in an apartment, one should observe a number of the following conventions:
- Heating of air in the sauna is possible only from the installed furnace by the manufacturer. It provides automatic switches when the temperature reaches + 130 ° C, as well as in the case of continuous eight-hour operation.
- To spray water in the sauna, you must install a perforated pipe or a drencher. Connection to the sewage system and water supply should be made only outside the sauna.
- The floor area must be at least 24 m.2.
- The wood used must be specially treated to protect against fire and rot.
- Sauna is not allowed in the living area.
In order to agree on a sauna in an apartment project, it is necessary to bypass such services - housing inspection, fire service, HOA, SES, etc. In different regions of the country the number of passable instances may differ, therefore in each case everything should be clarified in advance.
Necessary equipment
Sauna consists of a cabin and a special stove. The choice of furnace power depends on the area of the steam room. On average, 0.6 kW per 1 m is calculated3. If you buy more powerful equipment, you will have to spend more money to pay for electricity. If the stove is weak, the sauna, accordingly, will heat up longer.
As for the cab itself, you can make it yourself or purchase a ready-made factory model. Aspen, linden or conifers of trees are mainly used for the framework. Aluminum or galvanized steel can be used to build a floor frame, but you can also use wood by constructing a slatted floor.
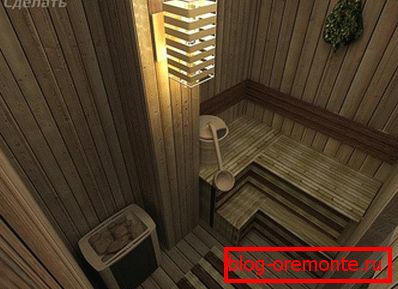
You should also install sun beds. Their number depends on the size of the room. They can also have different shapes, for example, G or U-shaped.
Stages of work
After all five of the above five issues related to the arrangement of the sauna have been completely and qualitatively resolved, the construction process itself can be started.
We build the frame of the sauna. For this we need wood (timber), a drill, dowels and screws for fixing the timber to the wall, asphalt (it will play the role of an external insulation layer), a tool for working with wood, a construction level, a tape measure, a pencil.

The easiest option is to attach the frame timber horizontally straight to the walls of the room allocated for the sauna. In cases where this is not possible (the room is larger than the sauna planned for it), sufficiently thick wooden struts should be installed between the floor and the ceiling (the horizontal frame made of timber will be attached to them in the future).
The distance between the horizontally mounted on the wall beam should be as follows:
- 1 row - 3 cm from the floor,
- 2 row - 60 cm from the floor,
- 3 row - 1 meter from the floor,
- 4 row - departing 5 cm from the ceiling,
- 5 row - exactly between the 3rd and 4th rows of the bar.
The entire timber is aligned in one plane along the side that “looks” inside the future sauna.
The frame of the ceiling is made of wide boards in increments of 60-70 cm. And do not forget about the vertical stands around the opening, to which the door frame will be fixed.
Around the air inlet and exhaust vents, be sure to make a "frame" of the beam.
Wiring. In the sauna, in addition to the electric furnace, there must be at least one lamp (the switch to it should be outside the sauna). At the installation of electrical wiring attract an electrician who must put it in the metal hose.
Finishing sauna. First, clapboard sheathes the ceiling, moving from the entrance to the sauna to the opposite wall. The plating technology is as follows:
- we stretch and fasten with the help of buttons a foil (one cloth),
- fasten 3-4 rows of lining (with the help of studs, driven into the groove),
- in the resulting space we install insulation,
- Further we continue everything similarly - a foil (overlapped), lining, a heater.
Insulation should only be non-flammable - mineral wool. It is impossible to take foam plastic for warming a sauna - it melts at a high temperature.
Shop Support for the benches in the sauna are made of timber. If you are doing a bench above the bathroom, it is better to perform folding or removable. The support for the bench is fixed on three walls, and if necessary it is also installed a vertical stand with an emphasis on the floor.
The flooring of the shop is assembled from boards with a width of at least 80 cm and a thickness of at least 20 mm in two rows (longitudinal and transverse). The width of the bench on which they will lie should not be less than 70 cm.
The next step is to install a heater (sauna stove) in accordance with the manufacturer’s instructions and fix the lights. With the help of screws, you should attach a thermometer, vent valves and, of course, an hourglass to the wall paneling.
And the last thing is the preparation of the sauna for use: on the first day it is heated with the ventilation valves open and the doors reach 50-60 degrees, on the second day they are kept for 3-4 hours at the same temperature (but the doors and valves are closed), on the third day they are heated to 90 degrees and maintain it for 3 hours, on the fourth day, the sauna can be heated to 100 degrees for 3 hours, and then at maximum heating for half an hour, periodically pour water onto the stones.
If no defects have been identified during these four days, the sauna can be operated normally.
Prices
As for the price of a sauna for an apartment, they are different. It all depends on its type and configuration. Below are estimated prices for some types of saunas:
- Finnish sauna SR1D003 LUXURY CHROMOTHERAPY from 215 thousand rubles.
- Finnish sauna SR1T4026 LUXURY CHROMOTHERAPY TWIN from 400 thousand rubles.
- Infrared mini-saunas in the range of 120-260 thousand rubles.
- Turkish saunas hammam from 200 to 700 thousand rubles.
Video
This video will tell about the phased construction of a sauna in the apartment:
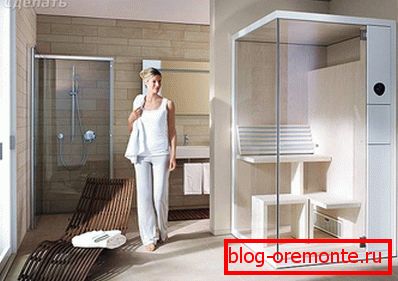
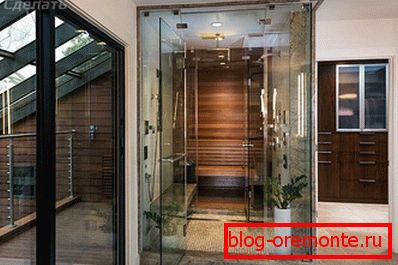
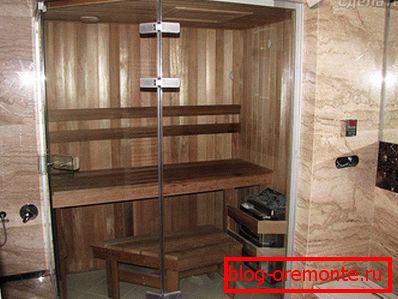
A photo
On presents various options for saunas that can be installed in a residential apartment: