Putty ceiling do it yourself
Smooth ceilings are an important detail of the interior. To achieve the desired result, it is necessary to putty them. This process is rather complicated and time consuming. That is why many people prefer to entrust it to professionals. But this will require additional investment. And the repair itself is expensive.
If you are not afraid of difficulties and follow the instructions, then puttying the ceiling is quite a workable thing. How to do this, we analyze in the article.
Stocking materials and tools

Before starting work, prepare everything necessary so that the process is not interrupted. You will need:
- various spatulas;
- special roller for primer;
- metal half-eater;
- tank for mixing the solution;
- drill with nozzle or construction mixer.
The putty itself must be chosen depending on the irregularities on the ceiling. As a rule, the usual mixture is designed to smooth out differences up to 5 cm. If the unevenness is greater, then other technologies should be applied (plaster or leveling with the help of mounted structures).
Making the choice of putty, pay attention to some parameters. In the first place - this is the time during which the finished solution will be suitable for use. This is especially important if such work is done for the first time. Also ask how long the layer dries completely. The fact is that there will probably be several layers. And each subsequent is applied after drying the previous one. Therefore, the duration of the entire repair depends on this indicator.
Also, when choosing a material, pay attention to the recommended environmental parameters when working. If you putty in the house, in a dry and warm room, then these figures are not so important. Most of the putty and recommended to use it under such conditions. Another thing, if you work in a humid and cool rooms. Here you must select the appropriate material.
Foundation preparation

First you need to prepare the ceiling. If there are no large defects on it (with differences of more than 5 cm), then the process itself will not take much effort from you.
The first thing you need to remove the old finish. For this whitewash and wallpaper wetted with water. This is done with a sponge and in small areas. If you wet the entire ceiling at once, it will dry while you are cleaning one section. Dampen a small area, wait until the whitewash or wallpaper is fed. Then they are easy to erase or remove with a spatula.
If an old putty is applied to the surface, then it is not necessary to comb it. Tap the entire surface with a spatula handle. If you hear a dull sound, then this area must be cleaned from putty. A sonorous sound will mean that the layer is held tightly, which means that there is no point in touching it.
If there are big drops, you need to get rid of them. This can be done with plaster.
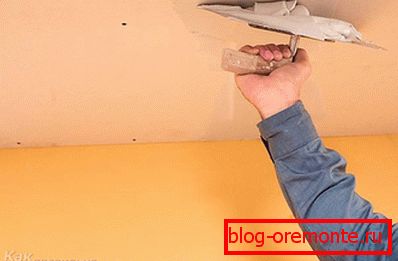
The second step will be the primer surface. Apply two layers, while the second must be laid after drying the previous one. The first layer is best applied across the room, the second along. Try not to leave smudges and marks from the roller on the surface.
Putting
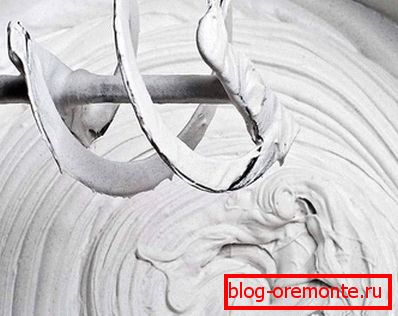
After preparing the foundation, proceed to the main work. The first step is to prepare the mixture itself. This is convenient to do with a mixer. As a result, you should have a solution with a consistency of sour cream. Gradually putty putty with constant stirring.
Experts do not recommend immediately preparing a large volume of solution, especially if you are a beginner. Better to make a small amount. Putty rather quickly hardens. If you make it a lot, you get material overrun.
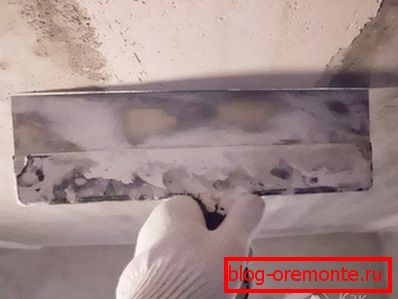
After preparation of the solution, with the help of a small spatula the necessary quantity is gathered. The solution is distributed over a large spatula and applied to the ceiling with it. Residues are again discharged into the tank. So you need to do with the entire surface.
Do not try to immediately repair all the irregularities. It is unlikely that you will manage with one layer, since it will be difficult to even out and the putty may crack. Therefore, walking across the surface for the first time, let it dry. Then proceed to the application of the second layer. And so on until you achieve the desired flatness of the ceiling surface.
The last layer is called finishing. It is made with a large spatula quickly and in one motion. With a small spatula they remove the excess, for this it needs to be pressed tightly to the surface almost at a right angle. If the finishing layer is made correctly, then the need for sanding will disappear.
Spatula drywall
Plasterboard ceiling puttied a little differently. The surface itself is already smooth, so you need to apply a finishing layer. But before that you need to do the preparatory work.
The first step is to close the seams. As a rule, drywall sheets are made thinner around the edges. If there is no such recess, then it needs to be done independently. To do this, use a sharp knife.
The reinforcing mesh is glued to the joints. It is made of fiberglass and has an adhesive layer, so there will be no problems with pasting it. Above all, do not forget to prime the seams. After the grid is applied, the joints are puttied with a narrow trowel. You also need to deal with the caps screws (they must be drowned in a sheet of drywall).
Allow the putty to dry and sand the entire surface. After that, drywall primed and covered with a finishing coat.
The nuances of putty surface for painting
When applying the paint layer may crumble. To avoid this, a waterproof mixture for the finishing layer can be used for painting.
But you can do with the usual finishing putty. To do this, add a water-repellent primer to the ready solution. Add it not during the preparation of the mixture, and already in the finished solution. Covering the ceiling in such a layer, you will achieve the desired result.
You can do it easier. Enough to buy a waterproof primer. The finishing layer is covered with this material.