Plaster walls without beacons with their own hands
If you started a repair, you probably already know what you want to see in the final result. However, have you thought that by making repairs, you can save money at some construction stages? With all this, the quality of work will not suffer much. For example, with regard to the decoration of the walls, for many it is important that they be plastered exactly in level. Of course, it's great if you can invest in repairs. The task is especially simplified, if drywall is installed on the walls, then their verticality will not be in doubt. But not always there is such an opportunity. How to balance the desire to do exactly and economically?
If we are talking about plaster, then the majority know the technique by which lighthouses are fastened to the wall in the first place and are monitored for them. In this article we will explain how to conduct such work.
Plaster - what is it
Under the plaster refers to the mixture applied to the surface for their alignment. In this case, plastered surfaces must be subject to their subsequent processing. This finish can be applied to the walls in one or more layers. The larger the filler, the thicker the layer can be applied.

In the classic version of the plaster consists of the following components:
- cement;
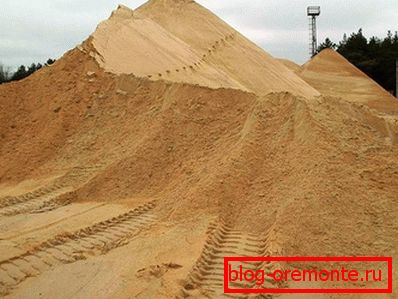
- sand;
- lime (not always);
- water.
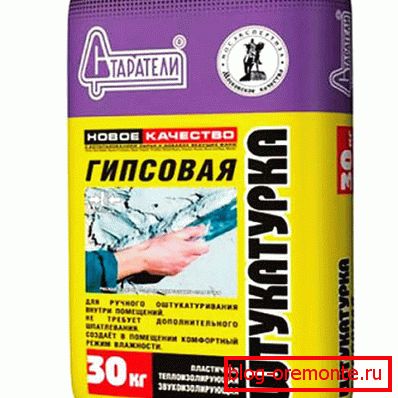
This composition is important to use if you want to level the walls in large volumes. However, as practice shows, their use requires special skills and great labor costs. Considering this, a new technology was developed, according to which the finishing is performed with a special gypsum mixture.
Various manufacturers make ready-made dry mixes specifically designed for plaster. It is easy to apply such structure on a wall and level. The way speeds up the finishing work several times.
When possible plaster without beacons
Immediately it should be said that this type of finish has the effect of visual alignment. After the work, if you apply a rule to the wall, cracks and strong curvature will not be detected. If you use a laser level, then the situation will be different. However, given the savings, for the majority of domestic craftsmen, this leveling method is considered optimal.
So, visual alignment can be done in the following situations:
- the surface of the wall is relatively flat, but there are potholes, shells and projections on it;
- the plane is flat, but the deviations in the corners are strongly noticeable;
- there are deviations in the junction to the floor or ceiling.
There are several positive aspects of this technology:
- saving time;
- cost savings;
- the ability to plaster a thin layer;
- minimum solution consumption;
- no cracks due to the absence of lighthouses.
If you have decided to abandon the beacons, then you can also refuse the services of specialist plasterers. Especially this technology is relevant for those rooms where perfect evenness is not required, for example, in a garage, outbuildings, etc. However, for the sake of objectivity, it is worth highlighting the main disadvantage of this technology - you cannot achieve a perfectly flat surface.
Types and selection of plaster
Although the plaster can be prepared independently, there are quite a few ready-made dry mixes on the market today. They contain all the necessary components and binders. It is enough to mix the composition with water with a construction mixer, and the plaster is ready for use. When choosing, be sure to consider the following nuances:
- type of surface treated;
- features of the room: the level of humidity, temperature, etc .;
- Are there any restrictions on the timing of the work.
Thus, cement and gypsum dry mixes are known. Compare them to each other:
| Cement | Гипсовая |
| The composition includes cement, fractional sand and other additives. | Used at optimum moisture. |
| Low cost. | It is possible to align with a thin layer. |
| Plastered surface acquires high strength, as a result, the coating will last more than one year. Even in conditions of high humidity. | Due to the plasticity of the mixture is easy to apply on the wall evenly. |
| It is used to align large irregularities. It can be used for both exterior and interior work. | In a short time, the plaster seizes, which allows you to quickly proceed to the next stage of finishing. |
| Drying time is directly dependent on the temperature and degree of humidity in the room. |
|
| After applying the plaster layer, its subsequent processing can be started no earlier than in 10 days. |
Video
Using plaster mix to level the walls
As already mentioned, the alignment of walls without lighthouses is possible, and in this sense, ready-made gypsum mix, which is sold in every hardware store, is perfect. Moreover, a level is not always necessary. For alignment, the main tool will be the rule.
When buying a finished gypsum plaster, it is important to pay attention to how long it hardens. The more this indicator, the better. Especially if you are a novice master, it is important that the mixture does not harden quickly, otherwise you will have to knead in small portions or throw out the dried one.
If we talk about the merits of gypsum plaster, here pay attention to the following:
- if you already have experience of use, then you can apply a finishing layer at a time;
- good adhesion to the surface;
- at the end of the work there is little waste;
- high performance and quickness of drying after its application;
- minimum coefficient of thermal conductivity;
- The material is fire resistant, it is explained by the presence of water molecules in the mixture. In case of fire, the molecules evaporate, which slows down the process of heating the wall;
- mostly white plaster, which simplifies the following work steps;
- there is no negative harm to human health;
- often used for decoration;
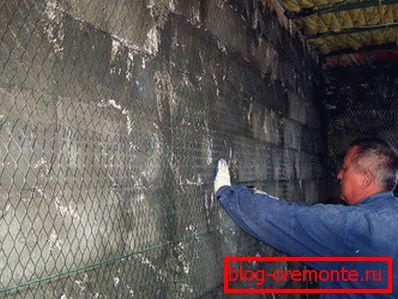
- can be applied up to 6 cm thick without the use of reinforcing mesh.
With all the advantages, it is worth highlighting the negative aspects of this technology:
- unlike the cement composition can cost more;
- it is impossible to knead a large amount at a time, as the solution quickly sets;
- it is important to protect the respiratory organs when working, especially during mixing.
Video
Расход и технические характеристики смесей «Guardians», "Rotot" и «Волма-Слой»
Average consumption per 1 m2 is about 8–9 kg, this is subject to the application of a layer of up to 10 mm. The minimum deposition layer is from 5 mm, and the maximum can reach 50 mm. Now we offer you to compare among themselves the three most popular and common gypsum plaster mixes.
«Guardians»
This mixture is packaged in bags of 30 kg, so the table will give the characteristics based on this indicator:
| Specifications | Magnitude |
| Batch proportion | 30 kg on average 20 liters of water |
| Solidification period | About 20 minutes |
| Minimum and maximum layer thickness | From 5 to 50 mm |
| Layer thickness when leveling walls using glass mesh | Up to 100 mm |
| Compressive strength | 2.5 MPa |
| Adhesion strength | Not less than 0.5 MPa |
| Расход при слое 10 mm на м2 | 8–9 kg |
| Colour | Gray |
Штукатурная гипсовая смесь «Guardians» используется для обработки поверхностей из кирпича, бетона, газо- и пенобетона и других. После высыхания материал устойчив к образованию трещин, а также отличается высокими звукоизоляционными свойствами. С указанной даты фасовки срок хранения в мешках составляет полгода.
"Rotot"
Packaging material also comes in 30 kg bags. The table lists the main technical characteristics:
| Specifications | Magnitude |
| Working temperature | +5 - + 30 ° С |
| Recommended thickness слоя | 10 mm |
| Minimum layer | 5 mm |
| Maximum layer | 50 mm |
| Расход при толщине 10 mm | 8.5 kg / m2 |
| Drying time 10 mm | Up to 60 minutes |
| The density of the dried layer | 950 kg / m3 |
| Compressive strength | More than 2.5 MPa |
Further in the article we will discuss with you in more detail the use of this mixture for plastering walls.
Volma Layer
This mixture has the following specifications:
| Specifications | Magnitude |
| Compressive strength | Not less than 3.5 MPa |
| Setting time after application | Up to 180 minutes |
| Время полного затвердевания при слое в 10 mm | 7 days |
| Maximum layer thickness | Up to 60 mm |
| Recommended thickness | Up to 30 mm |
| Расход при слое 10 mm | Up to 9 kg / m2 |
| Working temperature воздуха | +5 - + 30 ° С |
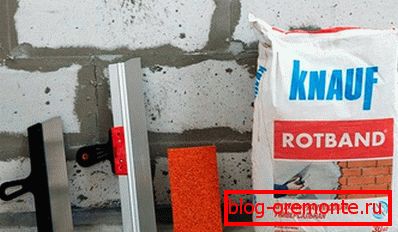
Plaster Rotband - features and technology of its application
The plaster mix KNAUF Rotband represents a product from the German producer. In comparison with similar formulations Rotband has a high cost, however, it fully justifies itself. It is considered the best in durability, quality and practicality.
Advantages of Rotband

Above in the table we presented the main technical characteristics of this mixture. Now consider its positive aspects, which make it the best among all competitors:
- За один раз можно выравнивать стены слоем до 50 mm.
- During the drying process, no cracks or shrinkage are observed.
- The dried surface is quite smooth, which makes it possible not to process it with an additional finishing layer.
- In the process of drying, there is no sudden loss of moisture, which contributes to the gradual and uniform solidification.
- Unlike other gypsum plaster mixes, the setting time after kneading is long.
- Differs in high adhesion.
- In contrast, cement formulations are significantly lower consumption.
- "Rotot" отличается паропроницаемостью, за счет чего стены «дышат», и в помещении создается комфортный микроклимат.
- In the composition of the mixture there are no harmful compounds that adversely affect human health.
Plus, it is worth adding that the total weight of the Rotband plaster mix does not exert a heavy load on the surface to be treated. With some experience, you can even level the walls in one pass. If necessary, applying a thick layer additionally applied fiberglass, which prevents cracking.
Video
Plaster plaster technology

You should first prepare the necessary building materials and tools:
- wide and narrow spatulas;
- the rule;
- plaster mix;
- cold water;
- drill;
- construction mixer;
- reinforcing mesh;
- mixing container.
All work on applying a gypsum mix without beacons consists of several stages:
- Training.
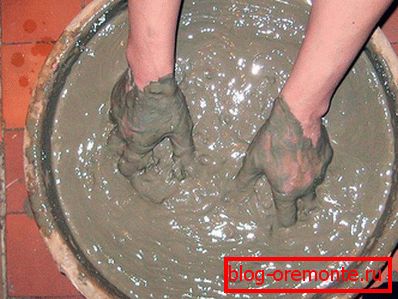
- Kneading the solution.
- Application
Consider all these steps in sequence:
| Stages of work | Process description |
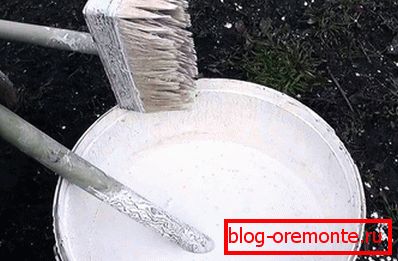
| Training | First of all, the surface preparation is carried out, namely the elimination of dust, dirt, greasy stains, areas that crumble and the like. If the wall absorbs moisture, then an important stage of preparation is priming. Related materials are recommended for this purpose, for example, Knauf Stuc-Primer.
If the surface does not absorb much moisture, for example, it is concrete, then Knauf Betonokontakt primer will do. In this primer there is quartz sand, which gives the wall roughness and increases the quality of adhesion. Primer before plastering without beacons is a requirement, otherwise the mixture simply will not hold. The next step is to start only after the ground is completely dry. |
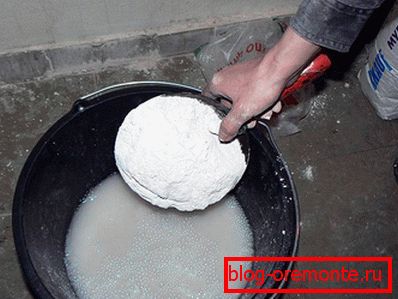
| Zames | Unlike cement-sand mortar for plaster, gypsum is not worth kneading in large portions. This is due to the minimum period of viability. The amount of batch should depend on your performance. For the first kneading, use about 10 kg and not more. You can see how much time you need to work out the batch and whether it can be increased. As for the proportions, then look at the bag.
Cold water is used for kneading. Mixing is necessarily carried out by a drill with a nozzle mixer. This will help to prepare a homogeneous mass. After mixing, leave the mixture for 5 minutes, and then re-mix and proceed to the next step. |
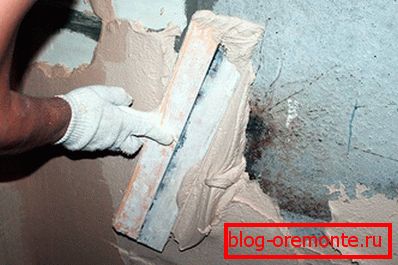
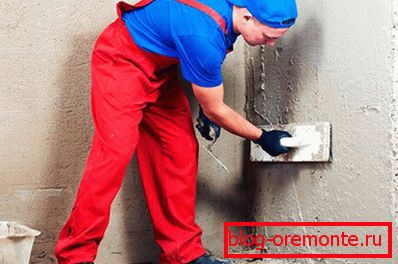
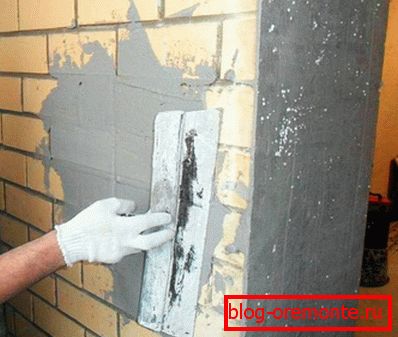
| Drawing | Процесс нанесения осуществляется при помощи широкого шпателя. Смесь накладывается на участки поверхности, где предполагаются неровности. После разравнивается правилом. Вначале работы рекомендуется наклеить на наружные углы металлические уголки. Для установки обязательно используется уровень. Уголок крепится к стене штукатурной смесью. После его затвердевания по нему можно полностью вытянуть угол. Один край правила прикладывается на уголок, чтобы посмотреть, какой зазор по всей плоскости. Все пустоты постепенно заполняются. Если толщина слоя будет превышать 50 mm, то второй слой следует нанести после высыхания первого. Более того, также рекомендуется использовать армирующую сетку. Она полностью исключит появление микротрещин, а также придаст штукатурке большую крепость.
Depending on the type of subsequent finishing, additional finishing is carried out. For example, if the walls are planned to be painted, then they must be puttied with a putty. |


Plaster cement-sand mixture
To perform the work it is necessary to prepare the following tool:
- rule 2 m;
- level;
- capacity for mixing the solution;
- 2 buckets;
- plastering bucket;
- Master OK;
- foam grater.
Filler for cement mix
Plaster mix consists of several important components, which are presented in the following table:
| Filler and binder | Specifications |
| Sand | In most cases, river quartz sand is used. It does not contain unnecessary inclusions, which adversely affect the quality of the mixture. For example, mountain, ravine and sand sand is not suitable for plaster.
If it is necessary to process a concrete wall, then part of the sand (0.25 based on the total volume) should be replaced with ground quartz. Otherwise, there is a risk that the plaster will simply fall off the wall, even if there are nicks. |
| Clay | This material is used as a binder. It is used depending on the type of surface to be plastered, such as wood and so on.
|
| Lime | It is a binding material. At the same time only hydrated lime is used. Lime milk, dough and fluff are also used.
|
| Cement | Cement grade 200 or 400 is used predominantly.
|
| PVA glue | Glue is used to impart a mixture of plasticity and greater strength.
|
"Fatness" of components - an important aspect of the choice of fillers. Depending on the deposit, the fat content of lime and clay varies. This directly affects viscosity and adhesion.
Subtleties of work
It is important to do all the preparatory stages. At the same time, remember that doing a simple stool will not work. For work at height it will be convenient to use small forests. They can be made independently or simply rented.
As in the case of gypsum plaster, the wall must first be prepared. All exfoliated elements are removed from it, the surface must be primed. If cracks are detected, they should be precoated beforehand, especially when it comes to cracks of more than 2 cm. If the wall is concrete, notches must be made. This will increase the quality of the setting.
Video
Drawing первого слоя
So, before applying the first layer of the wall must be moistened with water. Next, the mixture prepared with a construction bucket or trowel is piled over the area to be treated. For convenience, it is recommended to throw the solution in no more than 1 m.2. After that, the construction grater is taken and the whole plane is leveled. Thus, the layer can reach 7 mm.
For grouting, it is best to use a 50 cm long grater. Thanks to this, you can evenly distribute the layer of mortar on the wall. The job is not an easy float. She needs to drive from side to side. For example, movements can be from bottom to top, and vice versa. At one time it will not be possible to achieve a perfectly flat and smooth surface, so you shouldn’t stay long in a particular area.
Applying the second layer
The second layer of the solution is applied only when the first has dried. Preliminarily take a long rule and run it along the wall, you will be able to detect all the irregularities and surges. The sharp side of the rule removes all sags from the surface.
You can apply a second layer. Now you need to smooth the plaster better. In this case, the solution should not be thrown over, but it should be gently smoothed with a float. When you have processed the whole wall in this way, you can check it for evenness by applying a rule. Below it, you can see the possible cavities or flows that need to be smoothed. If there are bumps, they should be removed with a float or the same rule. If there are cavities, the solution should be added to the required thickness. After all these actions, the wall surface should be practically free of defects.

The third layer - the final
The last layer of plaster should be the thinnest. To do this, the solution should be made quite liquid. It is applied to the wall with a bucket from top to bottom. After applying the float in circular motions, it should be leveled, rubbing it into the surface, figuratively speaking. As a result of these actions, the plane being machined will be smooth.
Upon completion, the result is checked for defects. For this, a rule is traditionally applied to the wall. Of course, this method of alignment will be relative.

So, you learned how to align the walls without using beacons. Although this job requires effort, you can save well as a result. Moreover, in this way you will be able to do the plaster in the outbuildings on your own without attracting craftsmen. If you know another technology and have practical experience in this business, then share comments at the end of this article.