Plaster concrete walls do it yourself
After watching the professionals, you might think that plastering any wall, including concrete, can be easily and simply. However, when it comes to independent work, it turns out that everything is much more complicated, and at first glance, from the side, it would seem, elementary work may not work, or be done with difficulty. Yes, plastering concrete walls do it yourself requires knowledge and training!
Regardless of how smooth the wall is, the preparation of the surface is absolutely necessary - whether the wallpaper will be glued, or maybe it is planned to revet or decorate it with decorative plaster. The durability of the applied materials depends on how well the preparatory work is performed. But the plaster serves not only for these purposes - with its help:
- cover the seams of concrete blocks or traces of formwork.
- quite a bit, but still improving insulation.
- moisture penetration into the wall is prevented.
Surface preparation
First of all, you need to cut down the protrusions of the walls and remove concrete leaks and overflows. Then you need to clean the surface of the walls from dust and grease, or asphalt stains. If the wall is too uneven, or there are large potholes, then the metal wire “wire rod” should be fixed with dowels.
It should not hang out, so you need to fasten it with tension and tie it with wire.
The diameter of the rod should be 6 - 10 mm, and the grid will be required with cells no more than 10 × 10 mm.
Tools and materials
To get started, you will need:
- Plaster on concrete. Either cement-lime, or polymer-cement plasticized mixtures.
- Rule
- Level.
- Wooden slats.
- Screws.
- Falcon plastering.
- Trowel.
- Half meter wedge.
Getting Started
As already mentioned, the composition of the solution is different. It can be based on a dry mixture, or a synthetic compound. Plasticizers are also added to such mixtures, which, depending on the purpose of the solution, can speed up or slow down the freezing, so you need to deal with this issue before purchasing the mixture, and prepare the solution according to the recipe printed on the package.

- You will need wooden slats of the same height as the wall height, 10 mm thick. With their help, you divide the walls into sections no more than a meter, which will greatly facilitate plastering work. If there are no ready rails, you will have to cut them.
- Having outlined the places where the slats will be installed, attach them to the wall with stone screws, having checked their position verticality with a level. This mount is necessary because the slats will need to be removed.
- After that, moisten the wall with a spray gun, otherwise the dry surface will very quickly absorb water from the solution, not allowing it to firmly attach to the wall.
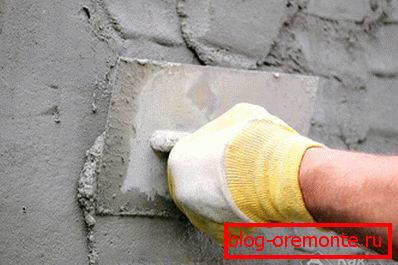
- Knead the selected mortar and start plastering the room from the corners.
- When applying plaster, try to level it with force, but only within two rails, which can be used as beacons, removing the excess solution with a wedge.
- After the entire area is plastered, let the layer harden, and, having unscrewed the screws, carefully remove all the slats, smoothing the grooves with a solution.
Stucco concrete walls are painstaking, especially when the uneven wall has a very smooth surface. In this case, it is necessary to do serifs, clearing them to a depth of two centimeters. If you need to make the walls rough, then you can use a sandblaster, however, not everyone has such equipment.
If you have to apply a fairly thick layer of plaster, then it should be done in several stages, using a metal grid.
The solution is best applied with a thin layer (about 5 mm), thoroughly rubbing it into all roughness. You apply the following layer of plaster only after full drying previous. At the end of the wall is rubbed and smoothed.
Doing plaster of concrete walls with your own hands, it is important to know that in addition to the compositions intended for these purposes, there is a "decorative plaster for concrete", which is very different in characteristics and it is not intended for leveling walls. With its help, it creates a decorative surface that imitates concrete, and has very different properties. Therefore, when buying do not confuse decorative plaster with the desired plaster mixture.
Watch the consistency of the solution, and if you have not guessed with water, pouring too much of it, put a brick in it for a few minutes. He will perfectly cope with this task, having absorbed the excess moisture, making the solution more thick.
In no case should not try to speed up the process of drying the walls, drying them with central heating or any other heaters, otherwise the plaster will crack and disappear. In the summer, do not even interfere with additional wetting.
Video
See how plastering of concrete walls is done: