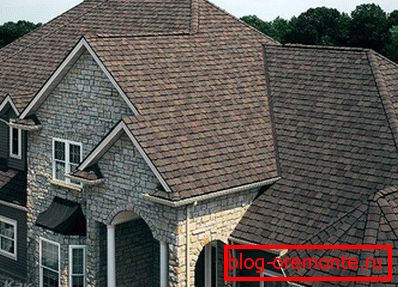
Multi-roof do-it-yourself roof
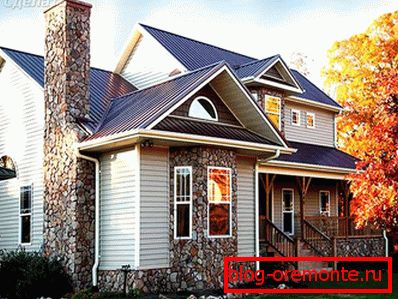
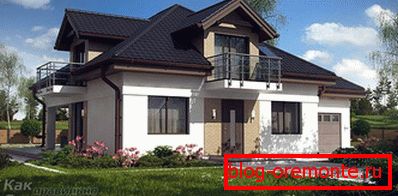
Among the various structures of the roof, the most complex and attractive is considered to be multi-tong. The peculiarity of its design lies in a large number of complex elements. These include pediments, tongs, valleys and ribs. In this article, we will describe how to build a multi-gable roof with our hands, we will show drawings and diagrams, photo and video materials.
Most often, a multi-tongued roof is made in several cases:
- initially;
- in the process of extension of the premises;
- for mounting side lighting in the attic;
- in buildings with a complex layout and many rooms.
Special features
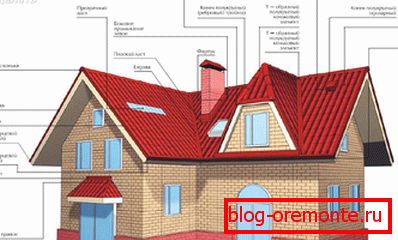
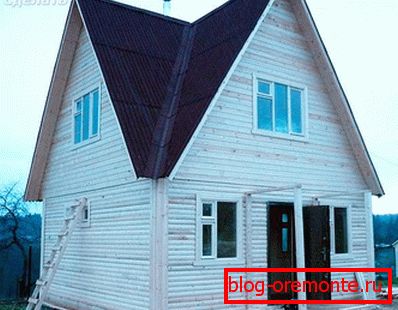
A simple variant of a gable roof is a gable roof without gables. In this design, the upper triangular section of the wall is called a gable. In the process of building a multi-roof, there are no simple steps, all actions, starting with calculations, require knowledge and skills. The roofing device allows you to place a living space under it. Despite the difficulties, homeowners take on an independent installation, which saves a significant amount of money. The multi-tip roof will require enormous physical and financial expenses, but it will delight the creators of the architectural beauty of the building.
Advantages of the design:
- thanks to a balanced roof rafter system, it can easily withstand high loads;
- the roof has an original and attractive appearance;
- the design differs in reliability and durability;
- there is free space for an extra room or attic;
- snow cover is not delayed on steep slopes.
Disadvantages:
- complex design that requires proper calculations and installation;
- a large amount of waste arising from the cutting of the roofing material, especially metal;
- high load on the valley, due to snow;
- the need for high-quality waterproofing of internal joints.
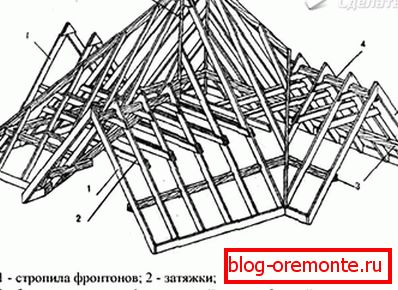
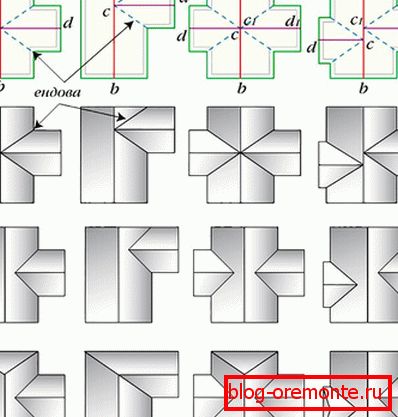
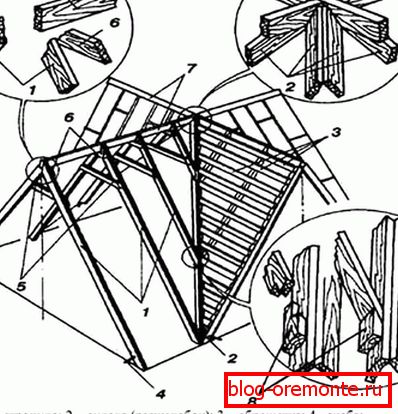
Designations of the main structural elements
Endova - a place of internal connection of skates, they are one of the key nodes. They have to withstand a significant load from the accumulation of snow, so the support from the system of supports and struts is performed from below. Waterproofing the site is of great importance, on the valley passes all the water flowing down the roof. Any design error will result in leakage.
Ribs - represent the outer corner of the connected slopes. One of the most difficult places in the design of a multi-holed roof is considered to be the intersection of the ridge bar, to which the endova adjoins. The ridge is one of the edges of the roof.
Cranberries - the section of the wall limited by slopes, it turns out in the form of a triangle and is not separated from the wall by a cornice.
Reward - the bearing base of the entire roof, which distributes the load on the walls and the foundation.
Rafters - suspended, hanging and diagonal.
Obesity - the framework from a bar, necessary for fastening of a roofing material and warming.
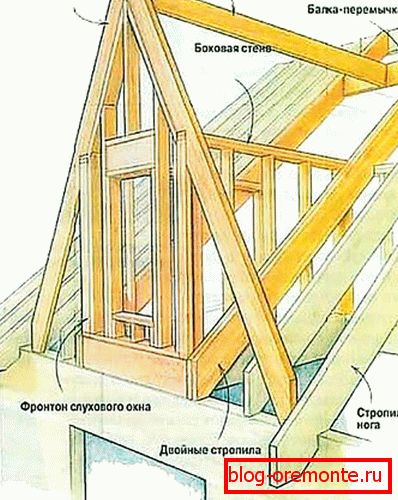
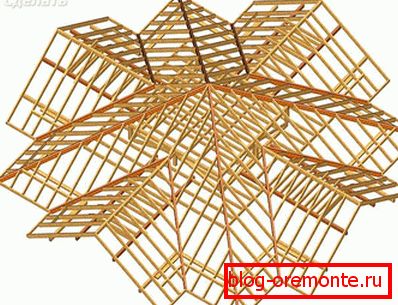
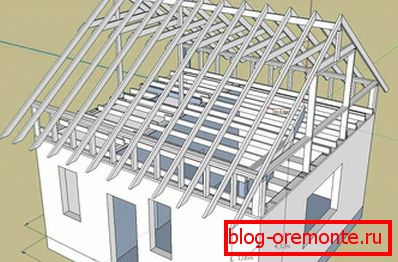
Installing a truss frame
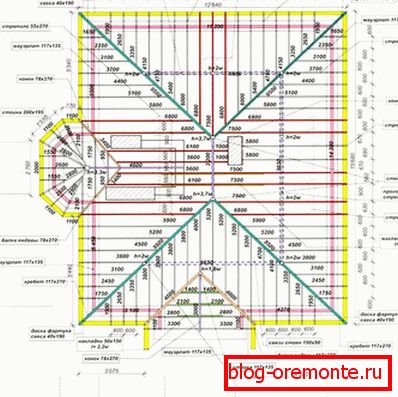
The basis of the multi-gable roof is the mauerlat. The base element is subjected to a high load, therefore a beam with a cross section of 150 × 150 mm is used for it. It is fastened to the walls of the building with anchors laid down during the construction of the house. On the mauerlat lean rafters. Rafters can be sloped and hanging. Their choice is determined by the design features.
In the case of hip and half-hinged roof, diagonal truss legs are installed at the joints of the slopes. These elements account for the main load, so they need to be reinforced by female workers. Such rafters can be made double, connected from two boards of 150? 50 mm. Rafter legs, reinforced by struts and bolts, form a farm. To ensure an attractive appearance of a multi-tongued roof and the required rigidity of the structure, all parts of the trusses are made as a template. Novice builders can not assemble trusses with a cutting, but fastening them with metal overlays.
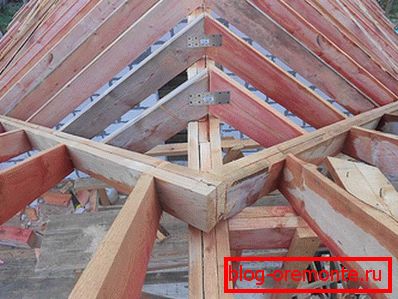
Fastening rafters to mauerlat performed by zapilov, installing brackets or corners. In the upper part of the rafters are connected with a ridge bar. When installing a truss system in a large house, ceiling beams are used as puffs. Strengthening the structure allows the log - horizontal bar, laid exactly in the middle between the two walls and connected to the power plate. Under the nakosnye legs and endova can be stacked additional sunbeds.
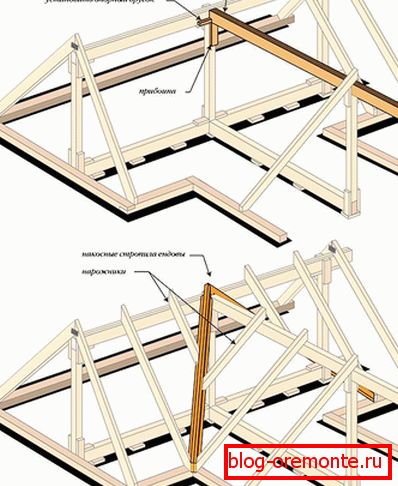
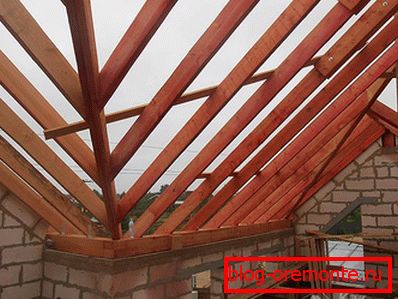
Mounting endovy

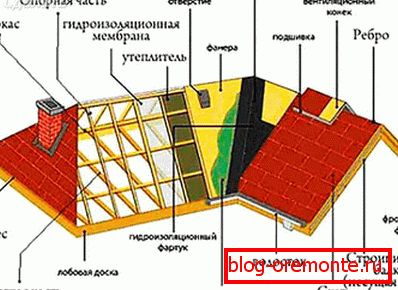
After installing the rafters, the crate is stuffed on them, at the joints of the ramps, where the endova are arranged, it is continuous. The layout of the waterproofing device of the inner corner provides for the laying of an additional layer to ensure the reliability of the design. Waterproofing is laid on the boards and the lower plank is mounted. If the endova consists of several parts, they are mounted on the bottom, the top part overlaps the edge of the lower element. The junction of the bottom rail and roofing is insulated. To give the structure a finished look, the upper plate of the valley is set.
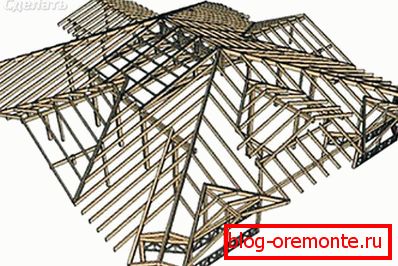
Device crates, insulation and installation of the roof
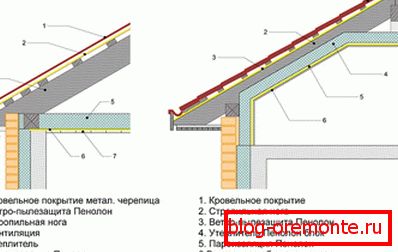
The last element of the truss system is lathing. It is stuffed onto the rafters with a step that depends on the choice of roofing. For a soft roof, it is made solid, for metal tiles - in 25–30 cm increments. A sheet for waterproofing is laid horizontally on the batten, the strips overlap by 10 cm. Making the insulation design, we must not forget about the ventilation holes. For a multi-gable roof, a low-weight coating is recommended so as not to put additional strain on the rafters, for example, when installing metal tiles.
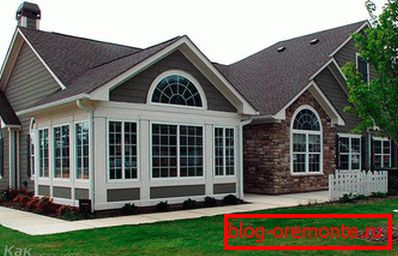
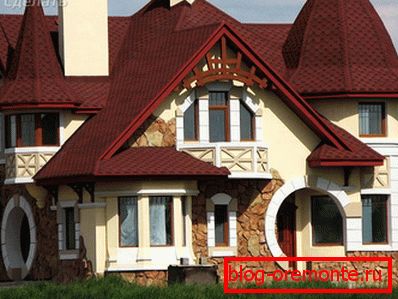
There are many options for how to make a multi-tongued roof, they differ in complexity of design and appearance. Most naturally, this type of roof looks on square and rectangular houses.
Video
Watch the video, which describes in detail what you need to know to properly design the roof truss system:
A photo


Scheme