Mosquito net diy
Intrusive insects prevent live and sleep at night in the warm season. They fly into the house through open windows. Despite the presence of a large number of special sprays and electric mosquito catchers, only the mosquito net can significantly reduce the number of insects. Today, carrying out the replacement of windows, you can additionally order this item that costs money. How to solve the problem in the budget option? In fact, everything is very simple, as the mosquito net is mounted very quickly with the hands of the available materials.
Safety nets
Before going to the hardware store for all the necessary components, you should decide on the type of grid. They all differ in different parameters:
- By type of attachment: hooks, Velcro, pins and Z-shaped brackets.
- By type of opening: stationary, removable, movable and roll.
- According to the presence of the frame: frame and frameless.
- According to the place of attachment: internal and external.

Each of these types has its advantages and features, but along with them and disadvantages. All this is important to take into account in order to make the right choice and not waste your money. Particular attention is paid to the method of attachment, so let's see: what are the pros and cons?
- The frame is very tough, because it is made of metal with a mesh fabric. It can be installed on plastic and wooden windows from any side.
- Sliding fastening is suitable only for aluminum windows, as sliding doors will be used.
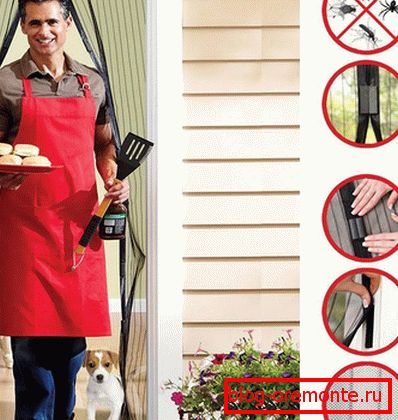
- Mosquito nets on magnets - a very relevant option for those who want to quickly get rid of insects. It is mounted on the windows and on the door. In the latter case, you can not worry about the permeability, as the curtains are easy to open and close instantly.
- Rolling nets will allow you to effectively combat mosquitoes. The material is easily folded and unfolded from the cassette placed above the window.
- Simple Velcro is also easily fixed and removed. In this case, the grid can be washed at any time in a washing machine.
Mosquito nets are installed not only on the windows, but also on the door, because mosquitoes and midges also penetrate them.


Choice of canvas
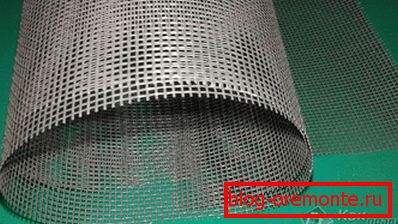
The main element of any mosquito net is the canvas. You can buy it at any hardware store on the footage or on a roll (approximately 30 m). If you need to make only a couple of nets, then it is better not to spend money and buy the required number of meters. For more protective nets, it’s worth comparing prices: they can vary per square and running meters.
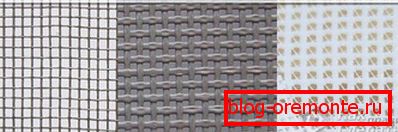
If we talk about quality, it is important to consider several parameters:
- cell size;
- web thickness;
- material type;
- strength.
To create a grid "antikoshka" parameter strength is very important, as it must withstand all the "attacks" of domestic animals. The most ideal option for this will be polyester with special impregnation. Additional fasteners are also needed. It is especially important to install such mosquito nets on the balcony.
When determining the size of the cells, consider the size of insects in areas where additional protection is required. The minimum size of the cross section is 0.25? 1 mm. Such a grid can become a reliable protector not only from mosquitoes and flies, but even from sand, poplar fluff and dust. To protect the windows and the room from rain, experts recommend a section of 1? 1 mm.
Having decided on materials and having made necessary purchases, it is possible to start production. How to make a mosquito net on a window frame and frameless type, will be discussed below. Protection will be the same functional as with the production.
The quality of the protective mesh will be responsible for the material from which it is made. Recently, the most popular fiberglass with a polymer coating.
Making frameless mesh
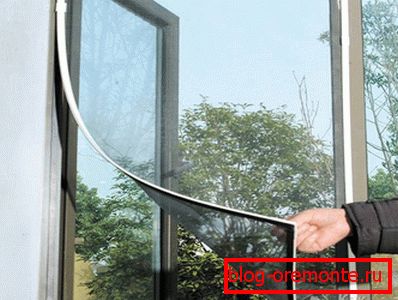
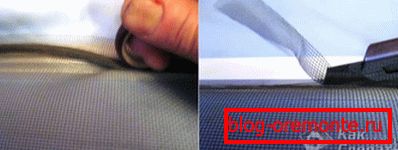
This is the easiest and budget option that allows you to make a removable mosquito net, spending small funds. The easiest way to make the protection stationary - just stick the canvas to the window frame. To ensure that it is better fixed at the edges, a tape of material with high adhesion properties is sewn on. When it comes to wooden windows, the usual clerical buttons can act as additional fasteners. There is one significant drawback - such a mesh can not be removed for washing.
It is better to put a little more money and effort to get universal protection. It is about a grid on a flypaper. To make it yourself, you will need the following materials:
- anti-mosquito material to the size of the window;
- sticky tape (burdock - one side with a nap, the other with hooks);
- construction glue.
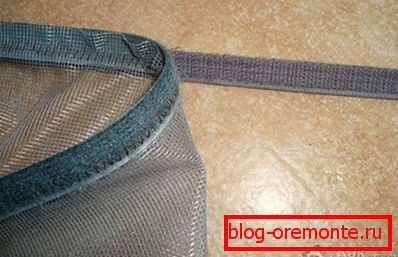
Measurements are performed on the inner (opening) part of the window with a margin of 1 cm on each side. This size is necessary for fixing the future mosquito net. One part of the adhesive tape is fixed around the perimeter of the window with the help of building glue (for example, Titan) or a simple double-sided tape. The second is sewn around the entire perimeter of the grid. When everything is ready and the glue is completely dry - you can fix the protective sheet.
The whole process of work takes a maximum of 2 hours, and as a result, everyone receives reliable protection from insects.
Before gluing velcro to plastic, it should be thoroughly cleaned and degreased with alcohol.
Making mesh frame type
Unlike the previous method, it is somewhat more complicated, but still everyone will cope with it. It should be noted that this option is suitable for the manufacture of mosquito nets on the door. So, for the installation of the frame with your own hands will need such components:
- cable channel of rectangular section 15? 10 cm (length is determined independently based on the external parameters of the frame, where the frame will be fixed);
- metal corners of 10 mm - 4 pcs .;
- exhaust rivets - 16 pcs .;
- thin nylon mesh;
- construction glue.
Instruments:
- knife;
- whetstone;
- pencil;
- scissors;
- roulette.

We proceed to the construction of the structure:
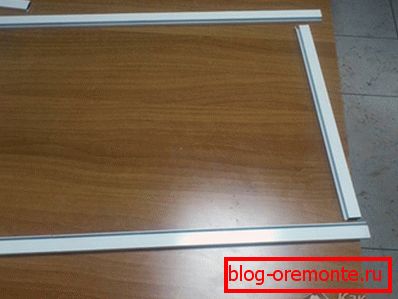
- We make measurements of the outside of the window opening. Based on the data obtained, a frame will be made.
- Mark on the plastic box the length and width.
- Using a knife, cut off the vertical and horizontal parts at an angle of 45 °. The cut points are carefully ground with a grinding block.
- We assemble the construction: we fix the corners with special connecting metal corners with rivets (nuts and screws are also suitable).
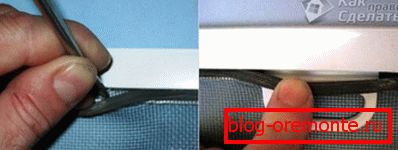
- We put a mosquito net with an allowance of 2 cm on each side.
- In the upper part, we clamp the canvas with a plastic cable channel cover. In the process of snapping, we change the long and short sides. For reliability, some places glue glue.
- Excess tissue is cut with scissors.
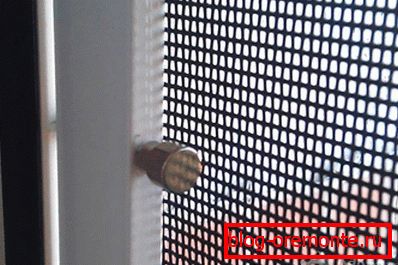
The finished mosquito net is installed in the window opening with the help of Z-shaped brackets.
And so the grid from a special profile gathers:

Restoration of mosquito nets
An equally important process is the restoration, which includes the following main steps:
- Removing the frame from the brackets.
- Cleaning from dust and dirt.
- Removal of damaged nylon.
- Installing a repaired mesh in the window opening.
Before replacing any element in the structure, it is necessary to pay attention to how it is fixed and whether it should be removed. Most of the elements on the mosquito net from the manufacturer are fixed with a special sealing cord. If it is carefully removed, the holders can be easily removed.
All repairs are carried out very carefully. It is important to remember that you are working with a fragile structure.
As you can see, in order to make a mosquito net with your own hands, you have to spend 2, or even 3 times less than when ordering a similar design from the manufacturer. In addition, the installation process is quite simple, does not require special knowledge and equipment.
Video
See below for instructions on making mosquito nets for plastic windows:
You can do without making the frame, if you act like this:
See also:
- How to measure the mosquito net.
- Installation of mosquito doors.
- Installation of plastic windows.