Liquid floor do it yourself
Anyone wishing to have a homogeneous and seamless flooring in their apartment, we advise you to pay attention to the liquid floors, made on the basis of dry mixes, mixed with water in a certain proportion. Compositions prepared on the basis of such mixtures, perfectly fit even on poorly aligned bases, filling all existing voids and irregularities.
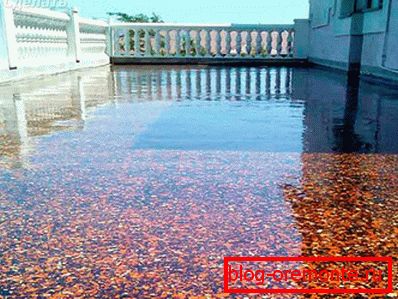
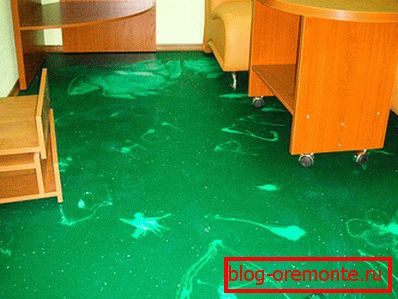
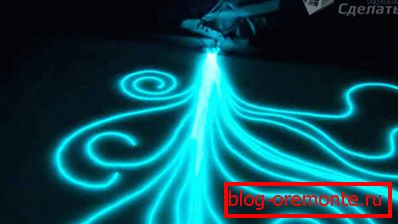
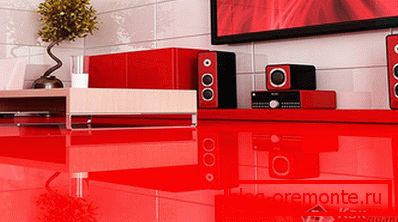
With their help, it is possible to obtain a decorative coating, decorated with one or another color pattern and immune to static electricity. Another advantage of the proposed method of preparing floor coverings is the ability to pour the liquid floor with your own hands (without the help of specialists).
Features of technology and preparation for work
Before pouring liquid floors prepared on the basis of self-leveling mixtures, you should familiarize yourself with all the subtleties of the operations performed during this process and be sure to take into account the following observations:
- base irregularities up to 5 mm are aligned by pouring one layer of the prepared liquid composition; for leveling the higher magnitude drops, you will need more layers (two or even three);
- for the “setting” of each layer with a thickness of 2 to 5 mm should be no less than 24 hours;
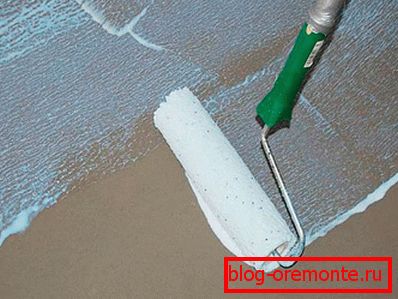
- for uniform distribution of the liquid self-leveling coating over the floor surface, it is recommended to use a special needle roller;
- during the casting work, it is necessary to monitor the humidity and temperature in the room and not to allow these indicators to deviate from the normalized value.

When choosing a brand of mixes for self-leveling floor, you should remember that the latter can be used both for the preparation of a rough base and as a finishing finish. You can determine the purpose of the composition you are purchasing by the inscription on the package indicating the order of its application. It is also necessary to take into account the fact that there are also quick-setting mixtures that dry out 7–8 hours after leveling the flooded surface.
Before pouring the liquid floor, you should familiarize yourself with the general order of work, starting with the preparation of all the necessary tools.
So, to successfully fill the coating based on dry mixes will be required:
- construction level and roulette;
- rules of two sizes (large and small);
- drill with mixing head;
- tank for the preparation of the working mixture;
- roller and brush (for priming the coating);
- special needle roller;
- small spatula.
Preparation of the solution

Before getting the finished solution, it is recommended to calculate the amount of dry mix required to fill the floor in the room of your choice. The calculation should be carried out taking into account the fact that with a liquid layer thickness of 10 mm, the consumption of dry powder will be about 15–17 kg / m ?.
To prepare a single portion of the solution, the dry mixture is poured into clean water, previously poured into a plastic container with a volume of at least 50 liters (the choice of capacity depends on the calculated amount of the starting material). After mixing the composition of the finished solution, first let stand for several minutes, and then again thoroughly mixed.
With the right proportion, you should get a homogeneous plastic solution of medium density, not containing in its composition solid formations (lumps).
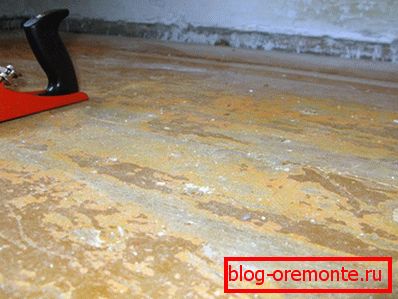
Preparation of the base with its subsequent pouring
Fill the liquid floor preceded by mandatory procedures for the preparation of its base, which usually boils down to applying a layer of primer. The choice of a particular type of primer depends on the properties of the treated substrate; the most convenient is the option of using a universal film-forming mixture, suitable for any coating material. It will be possible to transfer to the flooring only after the previously applied primer has fully grasped (in about 30–40 minutes).
It is recommended to work with the liquid mixture in special shoes with spikes attached to the sole (“cats”), and to align it use a rule or a rail of suitable length. The procedure for pouring liquid floor looks like this:
- first, a portion of the prepared solution is poured from the tank onto the floor;
- after that, the solution is evenly distributed on the surface of the base;
- no later than in 20 minutes, the next portion of the solution is poured, after which it is distributed over the surface so as to evenly mix with the previous one.
When using a quick-drying mixture (brand "Horizon", for example), the waiting time for its full setting can be significantly reduced. Approximately in five hours it will be possible to move on the finished floor, and in a week it is allowed to lay tiles on it.
In the video presented on the site you can get additional information on the topic we are considering.
We advise you to read:
- how to level the floor screed under the laminate;
- laying laminate diagonal with his own hands.
Video
This video shows how to properly make self-leveling floors with your own hands:
A photo