Laying laminate do it yourself: step by step instructions
To date, the most attractive type of flooring is laminate. And the price of this material is affordable, and the appearance is attractive, and you can lay it yourself. Yes, and performance in many respects are not inferior to natural materials.
In order that installation did not turn into disappointment, it is necessary to get acquainted carefully with features of technology. In this article we will give step-by-step instructions for laying laminate.
Surface preparation
The first step in working with laminate is to check the surface for any differences. In case of floor drops of more than 2 mm per m2, the surface must be evened out. This can be done with the help of finishing self-leveling mixtures. It is easy to work with them, they dry out within 24 hours, however this method is suitable only for differences that slightly exceed the norm. If there are large slopes and elevations, then you can not do without screed.
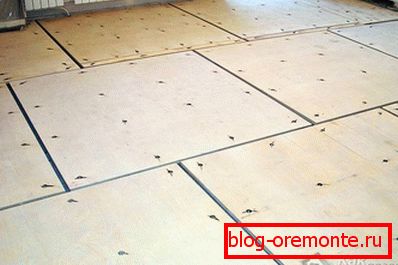
Another option for the basis of laminate flooring may be plywood. Plywood can be started up both on the screed and on the logs.
Required Tools
After leveling the floor surface at the same height level, you can proceed directly to work.
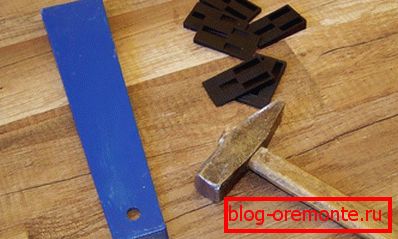
Laying is done with the following tools:
- jigsaw or miter saw;
- construction level not less than 2 m;
- Roulette 5 m;
- hammer;
- pencil;
- construction knife;
- steel square;
- packing set (it includes wedges and a tamping block).
You can save a little and use instead of a tamping set, trimming from laminate, which will remain in the process of installation.
Consumables - this is the usual plastic film that serves to waterproof the screed, counterfeit material, adhesive tape and waterproof putty or sealant.
Since after installation you cannot do without installing baseboards, you will additionally need a punch or a hammer drill, and you will need a block to cut corners of 45 degrees.
Where to begin?
First you need to calculate the amount of laminate. It would seem, it is already possible to start installation. But first you need to make sure that the screed is dry. To do this, there is a proven old-fashioned way: a piece of film is laid on the floor, which is glued with adhesive tape around the perimeter to the screed. If condensate comes out in the morning, it means that the screed has not dried yet. In addition, it is necessary to check the screed for the presence of cracks - the base of the tree should not creak or be movable.
Laminate must be dried and let it rest. For this, it is placed for several days in a room with a temperature of at least 18 ° C and a humidity of no more than 75%.
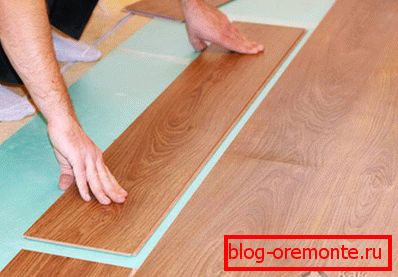
Laying the substrate
When everything is dry, you can cover the floor with a waterproofing film, and lay false material over it. The sheets of the substrate are placed end to end to each other, after which the joints are sealed with masking tape. Scotch taping facilitates subsequent work, as it prevents sheets from being displaced during installation.
First row

Usually, laminate flooring begins to be laid from the far left corner of the room, while the installation is carried out along the direction of sunlight or along the longest side of the room. For maximum accuracy, a cord is fastened parallel to the wall and, guided by it, is aligned. In the case of the curvature of the wall, the first row is cut along the contour of the bend.
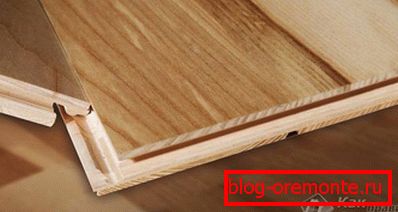
Planks are placed with a comb to the wall, joining the boards with their ends. It should be mentioned here that there are two systems for laying laminate: glue and lock. The advantage of the castle system is that the coating can be put on a warm floor (only with water heating), it is somewhat cheaper and simpler. But the adhesive system prolongs the life of the floor for at least a few years due to the greater tightness of the coating.
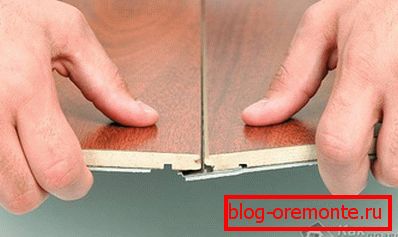
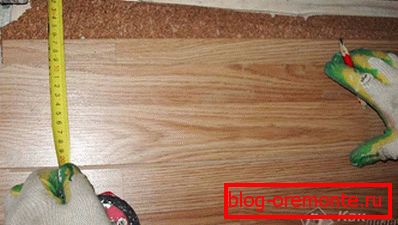
In any case, adjusting the slats, we must remember that you can not directly hammer on them. All fitting should be done through a block or just a wooden block. Reaching the last bar, you need to measure, do not forget about the technological gap, and then cut off the bar of the required length.
Laying the second and subsequent rows of laminate
The most spectacular laminate floor looks when the panels are assembled in a gap. Yes, and the end seams with this method of assembly become less noticeable.
The most economical way to achieve this effect is to use the second row as the first board, the remaining trim from the first. It should be borne in mind: if the length of the trimming was less than 20 cm, then its application will give rather negative visual effect.
The floor gets the best view when you run into a third of the board. Unfortunately, if we purposefully cut off the third part of the panel for laying a new series, then a significant increase in material consumption is inevitable.
The second and subsequent rows of laminate are laid as follows: at an angle of 20-30? the crest of the panel is inserted into the groove already laid, after which it is slowly aligned on the substrate.

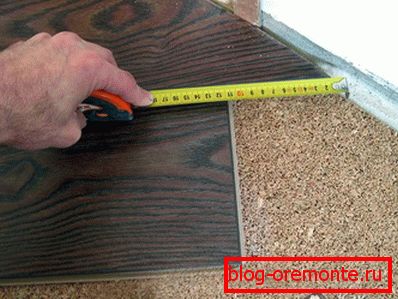
After laying the second row, a technological gap is established. It is located between the wall and the laid cover, and its width must be at least 8 mm. This distance is provided by the installation of pre-prepared wooden wedges, and its main purpose is to enable the laminate to “breathe”. With the same purpose, a large 20 mm wide technological seam should be made in the middle of a room in a large room. Subsequently, he covers the decorative strip.
The important point is that the styling takes place in a “floating” way. Those. the panels should in no case be nailed or glued to the base. Baseboards fasten to the walls, but not to the floor.
The last row
The most difficult may be laying the last row. However, this will happen only if the distance between the last but one row and the wall is insufficient to put another row of panels. Then you have to cut laminate boards along the length in accordance with the contour of the wall and the remaining uncovered area, taking into account the technological seam.
In the case of a castle installation system, the floor is ready for use almost immediately. It is only necessary to cut the excess protruding film and the substrate, as well as to mount the baseboards and decorative strips. If the laminate is laid on the glue, then until the moment when the coating can be walked, it should take at least a day.
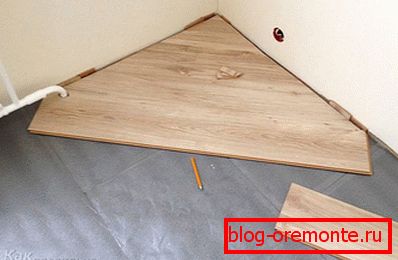
Diagonal installation: important points
You can also lay the laminate in a somewhat unusual way - diagonally.
Material consumption will increase by 5-15%. This indicator is not a constant value, since the lamellas have to be customized in different rooms, and the amount of waste depends on the piece to be cut.
The optimum angle of the flooring is considered to be 45º, since the minimum amount of waste remains and the best visual effect is achieved. If you need to do something else, then deviation is allowed when laying no more than 30º. The lamella fit algorithm is practically no different.
Stages of work
The preparation of the floor has already been written and there are no differences here, so we will immediately proceed to the choice of the angle from which the installation will begin. If the direction of the seams is not important for you, but you don’t need to choose a color or pattern, then it’s best to start from the corner where heating pipes or other communications go - so you will save yourself from tedious lamella fit at the final stage of paving.
In order to properly cut the lamella, you need a corner or piece with a pre-selected cutting angle.
A common cause of material overruns is the error in marking the slats and cutting them in the wrong direction.
It is quite clear that each new row will have to be customized, cutting to size. The work is painstaking, requiring utmost care and concentration. If the first time you lay out the laminate diagonally, it is better to carefully measure and adjust each panel. It is also important to know that most of the segments can be used when installing the coating on the second half of the room, when the direction of the cut will change.