Laying ceramic tiles do it yourself
Ceramic tiles have become a familiar element in the interior design of kitchens, bathrooms and other rooms with high humidity. She is good to finish not only the walls, but also the floor. Laying tile - not too complicated process to call the wizard. All work can be done independently. It is only necessary to carry out some preparatory work and choose the right materials for repair. In this article we will talk about laying your own ceramic tile on the floor and walls, give step-by-step instructions, as well as video and photo materials.
Preliminary work
Before laying the ceramic tile, it is necessary to clean the room.

- All furniture is removed from the bathroom or kitchen.
- If you plan to finish the walls completely, then you need to remove from them mirrors and other items. Wash basin is also better to remove.
- After the room is freed from plumbing and mirrors, it is necessary to assess the scale of work with the walls.
- If the walls already have an old tile, then you can take a chance and stick the tile directly on it. However, in this case, there is always a chance that the glue will not sustain the excess weight, and the repair will go down the drain. Better to dismantle the old tile.
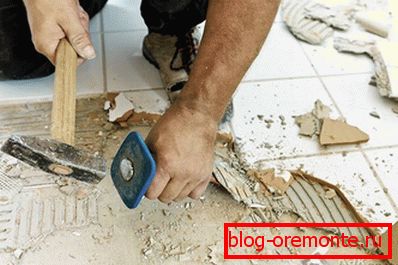
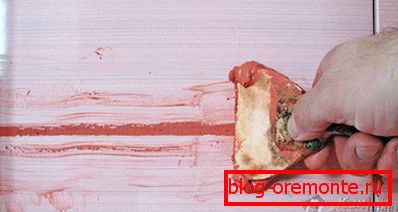
- In order to remove the remnants of the old tile, it is necessary to prepare a chisel. The tile gently breaks.
- After the surface is cleared from the tile, it is necessary to remove the remnants of old glue and other coatings from it.
- In order for a new tile to serve for a long time, the walls must be smooth and without deviations. The same applies to the floor, where you can also install tile. With the help of the level it is also necessary to determine the slope of the walls.
- If there is an unacceptable level of slope, it is necessary to correct the situation with the help of special mixtures. The mixture begins to be applied from the place where the greatest slope. The surface after treatment should dry out. That there were no problems with drying, it is necessary to lay the composition with a layer not exceeding 1.5 - 2 cm. In modern homes, the slope of the walls is usually not very large, so problems should not arise.
Tile selection
A tile has certain characteristics that distinguish one type of tile from another. Sometimes the owner after the purchase finds out that the tile that he has is not intended for the room where the repair is being made. Even if you install such a tile, it will very quickly lose its strength and initial properties. Therefore, laying ceramic tiles begins with the correct choice of material, which takes into account all the details.

The following characteristics of tile are distinguished:
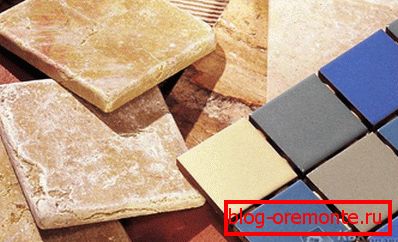
- Relief. This figure seems unimportant, but only at first glance. The relief of the tile, as well as the roughness of the surface can save from falling. If the tile is laid on the floor of the bathroom or in the bath, then it is better to choose the product not with a smooth surface, but with a relief.
- The shape, size, color and presence of patterns. The color and the presence of patterns will affect how harmoniously the tile will fit into the existing design of the room and apartment as a whole. With the help of color you can even visually change the size of the room or kitchen. When choosing a tile of a certain shape, it is necessary to take into account that small rooms need a tile of small format.
- Abrasion The tile has 5 classes of abrasion, where the highest is the fifth. When choosing, do not focus on the most difficult to tiled products. It is better to ask the sales assistant, which tile is suitable for a particular case.
- In addition to abrasion, there is another important indicator - moisture absorption. The characteristic has 4 classes. When buying, you need to remember that for wet rooms you need a tile with the lowest level of moisture absorption. This applies to places such as the bathroom, bath and, in part, the kitchen.
On sex

After completing the preparatory work, you can proceed to the immediate installation of tiles. To work you need to prepare the following tool:
- Master OK;
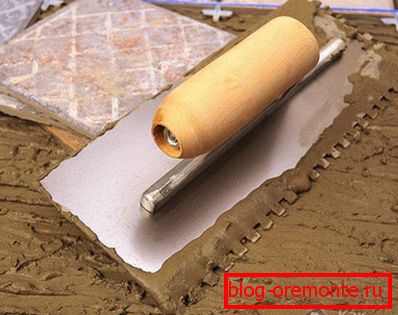
- notched trowel;
- trowel;
- small (up to 40 cm) and medium (up to 80 cm) level;
- plumb;
- rubber mallet;
- capacity for kneading glue;
- drill with nozzle on the mixer;
- rubber gloves;
- tile cutter;
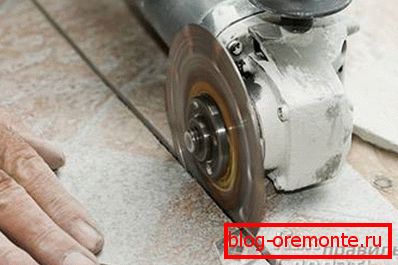
- Bulgarian with a circle on granite;
- crosses to form a seam;
- wet rag;
- diamond-coated crown;
- pliers.
This set of tools is also necessary for laying ceramic tiles on the wall.
Laying tiles to dry
Before starting work, it is necessary to make calculations. To do this, you need to perform a tile layout on the floor dry. If the room is small, then this layout will help to perform the trimming of most of the tiles. You can also trim near the pipe. Consider that the tile will rise due to the layer of glue, so cut a hole with a margin, on each side 15-20 mm will be enough.
To make the tiles on the floor look beautiful, think over the layout so that there is an identical length of tile on both sides of the walls. After all, from the aesthetic side it will be ugly, if on one side the strip will have 5–8 cm, and on the other - 12–18. Although much depends on the size of the tile itself. Therefore, consider the most aesthetically consistent tile layout.
Some tilers trim tiles perform along the laying. The probability of error is thus minimized. The above trimming method is applicable in cases where the room, for example, a bathroom, is small.
Laying technology
The sequence of laying tiles on the floor is as follows:
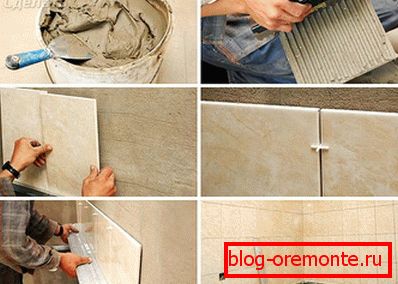
- First, make a small batch of tile glue. In the finished mass should be no lumps. To prevent this, mix the glue thoroughly with a construction mixer.
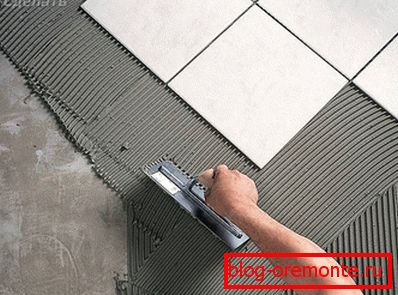
- After this, apply the glue evenly with a notched trowel on a small area of the floor, for example, for 2 or 3 tiles.
- Before laying the tiles it is recommended to wipe its back side with a damp cloth. Dust impairs adhesion.
- It is not necessary to wet or wash ceramic tiles. It absorbs moisture poorly.
- Now you can apply glue on the back of the tile and also a notched trowel.
- Lay out the first 3 tiles, wedge them with crosses to form a smooth and neat seam.
- If one of the tiles protrudes, then gently move it back and forth, drown it, or gently tap it with a rubber mallet.
- If the tile sags, then it should be torn off immediately and add glue to this place.

- Be sure to check the tiled tiles by level.
- If it is necessary to detach the tile from the wall, then you can use all the same crosses or plastic / wooden wedges. To fix the tile is often used masking tape.
- When laying the second row also check the level and do not forget to put crosses.
- In the process of laying tiles on the floor, glue will protrude from the seams. It must be removed with a damp sponge or rag. Also clean the seam of glue, for example, with a cross. It is easier to remove the glue when it is slightly grabbed.
- As you progress, do not forget to check the level of each tile.
So, if you summarize the whole process of installing the tile on the floor, the scheme looks like this: glue is applied to the floor, then the back side of the tile is moistened, and then a glue is also applied to it in a thin layer, then the tile is pressed to the floor and set on a level, and crosses are placed between the tiles to form a seam.
At first glance, it may seem simple, but do not rush to conclusions. In this work, as in all others, there are many nuances. Especially the filigree work of installing small pieces of tile under the wall, in the corners and near the pipes. Here you need to cut out all the details with millimeter precision.
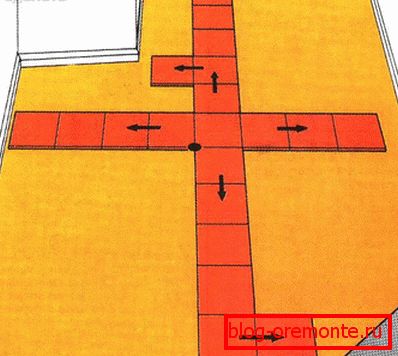
Tile Layout Methods

There are several ways to tile:
- Straight rows "seam to seam."
- Scramble. In this case, each subsequent row is shifted by half the tile of the previous one.
- Diagonally. This method is uneconomical (due to masonry many scraps will be formed). Its hardest to implement.
For beginners it is recommended to stop at the first option - “seam to seam”. This technique is the simplest.
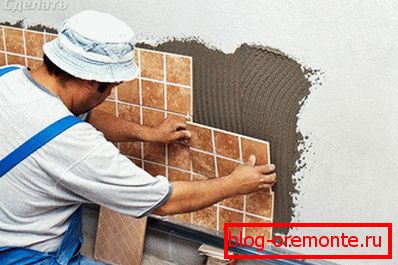
On the rock
The technology of installing ceramic tiles on walls differs from laying them on the floor, but there are some similarities. For example, it is also necessary to determine in which direction the tile will be laid out: horizontally, vertically or diagonally. For example, if it is necessary to visually expand the room, then the tile is laid horizontally. If you need to increase the height of the room, then vertically.
Mounting the first row
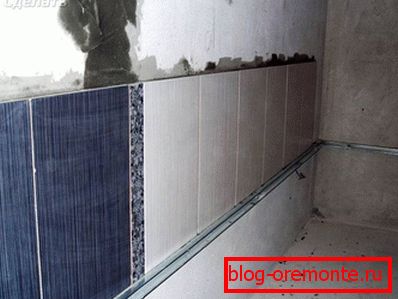
The first row of tiles on the wall is not placed from the base of the floor, but at a height of 2 or 3 rows. Why? It is not always possible to achieve an ideal flatness of the floor, as a result, the first and subsequent series will be uneven. But even if the floor has a perfect horizontal, then often in the bathroom or toilet on the floor are sewer or water pipes. For this reason, it is necessary to start laying from the height of the second - third row. The work process looks like this:
- Using the water level, make a markup on the wall.
- According to the line, you install a metal profile, which is usually used for the manufacture of plasterboard.
- It is very important to correctly measure the height of the laying. To do this, fold the size of the two tiles and note the required seam between them. Also calculate so that between the tile that lies on the floor and the first row of wall tile there is no large gap, ideally 2 rows of tile should be placed without trimming.
- This also applies to the last row. If the entire height of the wall fails to lay out rows without trimming, then decide where the tile will be trimmed at the bottom or top.
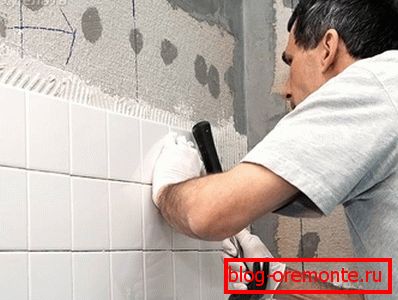
- If the guide rail is installed, you can proceed to gluing tiles.
- Apply glue to the wall, but not over a large area. Glue thickness up to 7 mm. Glue on the surface of the wall is distributed with a spatula with teeth.
- Also, glue is applied to the back side of the tile.
- After that, the tile is installed on the profile.
- It is necessary to check the level to the horizontal. Each subsequent tile will be exactly on it.
- Tile should be pressed into the glue applied to the wall.
- All the glue that came off is removed.
- Be sure to place crosses between tiles. The width of the seam may be different.
- Having reached the corner, cut the tile to size.
An important nuance concerns the marking of tiles on the wall. Make the calculations so that the corners were trimming tiles of the same size. This will give the room a more aesthetic look. You can select the corner with a different color tile.
Installation of the second and subsequent series
Each subsequent row is laid out in accordance with the first. There is also an important requirement for checking on the horizontal and vertical. If you have reached a place where there are outlets of water pipes for a mixer or tap, then in a tile you cut a round hole with the help of a diamond-coated crown.
At the end of the work, it remains to grind the joints with a special mixture. If the tile is placed in the bathroom, then choose the grout specifically for wet areas. This will prevent mold on it.
On wooden floor

To the surprise of many, today ceramic tiles can be laid on a wooden floor. But to perform this work, it is necessary to make a number of preparatory work. As a rule, wooden floors are painted. For the task, it should be removed with the help of various chemical agents and special tools, for example, a building dryer. Also, the surface of the wooden floor can be processed with a grinding machine. In addition, you should ensure the integrity of the lag and the coating itself. If there is damage, then separate sections of the flooring, as well as logs, should be replaced. As a substrate for the tile, you can use moisture-resistant drywall. He is screwed to the floor with screws. For the organization of ventilation, holes are drilled in the sheets. This is important, because due to the accumulation of moisture drywall can become a breeding ground for dampness and mold.
When the plasterboard sheets are laid, take a mounting foam and insulate all the joints between the floor and the wall. After this coating must be treated with linseed oil. Immediately before laying the tiles, it is recommended to spread the paint net soaked in latex onto the floor. The next layer that will cover the grid will consist of a mixture of water, water glass and coarse sand. This will ensure good adhesion, and during operation the tile will be held securely on the floor. The further course of laying tiles on the floor is performed according to the technology described above.
Important details
 Do not wet the tile before laying on the glue. This often causes one unpleasant effect: the tile begins to "float".
- Tiled seams can not have a strictly defined size. They are determined individually.
- If there is old paint on the wall, then there may be a desire not to remove it completely, but to cut it on the surface. You should not do so, the coating must be completely removed. Otherwise, the tile will not last long.
- Work with dirty tools is strictly prohibited.
- For cutting tiles it is best to use a diamond wheel. This is one of the most accurate tools that allows you to cut tiles of the right size.
Where the beauty and appearance of the surface are not critical, you can use a cutter. But it is less accurate.
Video
The process of installation of ceramic tiles is discussed in detail in the following video: