Installing dormer windows do it yourself
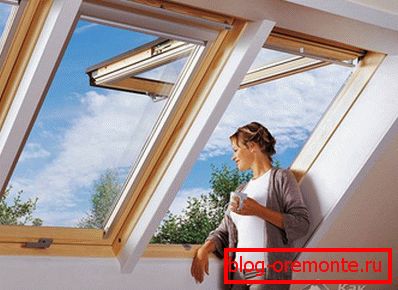
Желание увеличить метраж полезной площади сделало мансарду очень популярным помещением. Пространство, бывшее темным холодным чердаком, благодаря переделке и утеплению становится полноценной комнатой, ее освещение могут обеспечивать не только окна на фронтоне, но и на скатах крыши. Installation такого источника освещения довольно сложен, но, желая сэкономить средства, домовладельцы, имеющие небольшой опыт работы со строительными инструментами, стремятся выполнить его самостоятельно. Правильный выбор и установка мансардных окон своими руками с соблюдением технологических норм обеспечат качественную теплоизоляцию и отсутствие протечек.
Basic installation rules
- Fixing the attic window is not performed to the crate roof, and to the rafters.
- The distance from the window opening to the rafters should not be less than 3 cm.
- The lower part of the window is preferable to place on a horizontal beam.
- The sash window is worn after the installation of its box.
- Required insulation of window construction.
- Proper installation increases illumination by 40%.
- The tightness of the window is of great importance, since it accounts for a high load from precipitation.
- Salary window is selected in accordance with the type of roof.
Types of windows
The window in the attic can be placed vertically, with the mandatory device of a separate roof, and obliquely - in the roof of the roof. As a material for window frames can be used solid wood, plastic or aluminum.
- Rectangular windows for mansards are issued with a rotary frame, the deaf design is made under the individual order.
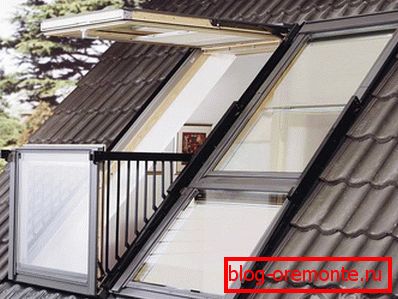
- The design of the sloping and vertical window allows for opening both to the balcony when opening.
- Composite window: its upper part is movable, and the lower one is deaf, it serves to increase the illumination area.
When the roof slopes are very steep and it is impossible to observe the surroundings through the roof windows, vertical structures are installed under them.
What includes equipment

The device window for the attic is more complicated than usual, its design includes:
- Roller blinds or awnings used to provide exterior darkening.
- The salary protecting a window design from influence of an atmospheric precipitation.
- Frame and glass pack, filled with inert gas.
- Sealant serving for waterproofing.
- Internal slopes.
- Drainage gutter.
Choosing a place for window construction
The specificity of the attic window requires taking into account some of the nuances: the width of the structure must be less than the span between the rafters, if you want to get more light, you need to install several windows. The height of the installation should provide the ability to control the sash with the handle, its average value is 80-130 cm.
Installing a window opening over the radiator will eliminate the appearance of ice.
The angle of slope of the slopes also affects the placement of the windows, on the flat roof they are located higher.
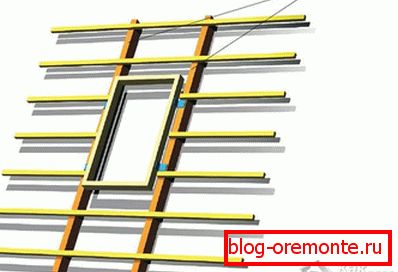
Installation
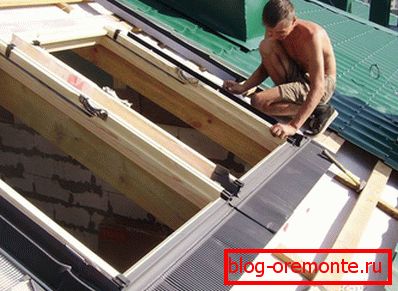
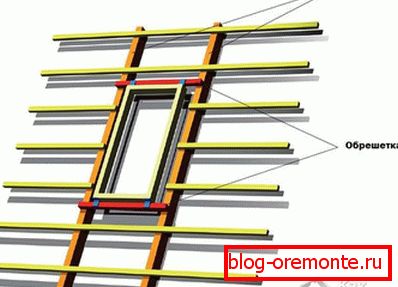
Before you install a roof window, you need to mark up the space for it. It is produced from inside the premises. 3 cm from the rafters, the lower limit of the window is planned, an additional 9 cm is deposited for a roof with a high profile and 6 cm for a flat one. Noting the upper limit corresponding to the height of the model, mark up another 7 cm. The waterproofing sheet is cut with a margin of 20 cm and wrapped inside. If the roofing is already installed, it must be cut off, the crate is also removed.
In some cases, you can install as follows:

A bar oriented horizontally is nailed in the lower part of the opening, in the upper part - a bar parallel to the crate.
A factory drainage gutter for sediment discharge is mounted above the upper plank, it is installed at a slight angle. If such an element is not included, its role can be performed by the construction of a waterproofing strip.
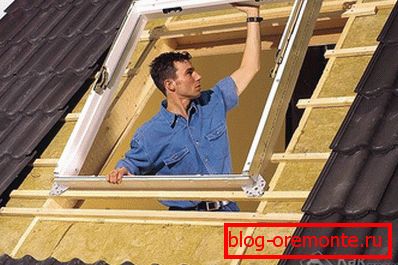
In order not to damage the glass and fittings during the installation process, it is recommended to remove the sash. Next, the frame is mounted according to the manufacturer's instructions. Brackets are included in the drilled holes. A strip of mineral wool is attached to the upper part of the frame with a stapler for insulation. A strip of insulation is also attached to the assembly bar at the bottom of the structure. The frame is installed in the opening and is fastened to the corners with self-tapping screws. The upper fastener is not fully tightened, leaving room for alignment.
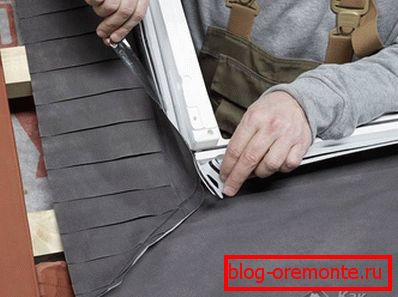
Now the sash returns to its place and checks the uniformity of the gap on all sides of the fit. Making sure that the sash is properly installed, we perform a secure fastening of the screws in the upper part, and remove the glass again. The left parts of the waterproofing are fastened under the window seal with staples; a waterproof apron unfolds around the window, the top of which is inserted under the gutter.
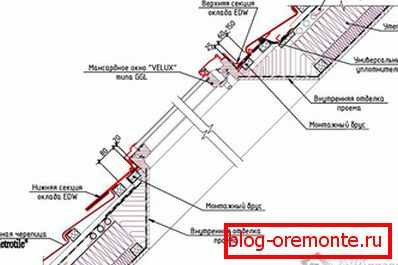
Set a salary
Work on the installation of parts of the salary begins with the installation under the window of a corrugated apron. After that, the side elements are fixed, which need to be inserted into the lower part until it clicks. Completes the process of the upper pad. All parts are attached to the frame with screws and tightly joined to each other. Next, fit the roofing material.
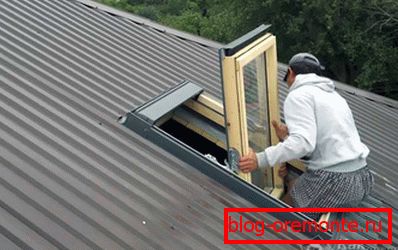
The time has come for the final installation of the sash in place, the roof window is installed.
Video
Watch the training video on installation of the Velux roof window: