Installing a wooden window sill do it yourself
Among the materials used in interior decoration, wood is becoming increasingly popular. More precisely, it regains once lost popularity. In due time, thanks to the development of the chemical industry, plastic polymers practically displaced wood from a number of finishing materials. However, the demand for wooden interior elements arose again. And this is quite understandable, since there is not much that can be compared to a tree by its naturalness and aesthetic appeal. Increasingly, wood is used as a material for the manufacture of a window sill. About how to install a wooden window sill with your own hands and what are necessary to follow the rules, and will be discussed below.
Why choose
In order to finally make sure that installing a wooden window sill in an apartment or a private house is a good enough idea, it’s enough to familiarize yourself with some of the unique properties of this material.
- Wooden windowsill will have excellent performance. Here, first of all, it means the complete naturalness of the material, and therefore such a window sill can be installed even in the children's room.
- The material is durable and resistant to various kinds of impacts. This refers to both temperature and humidity differences, and chemicals used, for example, during cleaning.
- It should also be mentioned that the tree leaves plastic analogues far behind in terms of aesthetics. In the building stores you can find a variety of options for these elements of decor. In this sense, even the most demanding taste can be satisfied. You can choose a windowsill for any interior option.
How to choose

Before proceeding to the description of the process of installation of a wooden window sill, you need to slightly clarify the rules in accordance with which you should make a choice.
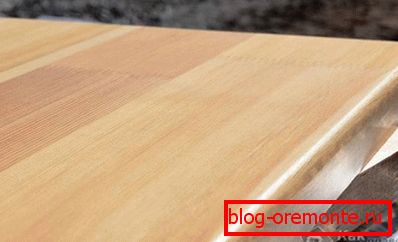
- First of all, you should pay attention to the integrity of this element. It is necessary to look at the end of the product. Cracks and chips should not be on the surface or in the structure of the wood.
- Of considerable importance when choosing wood products is the type of wood used for manufacturing. In the case of a window sill, it is worth paying attention to hard rocks. Among them, the undisputed leader is oak. You can also look at beech, chestnut or pine.
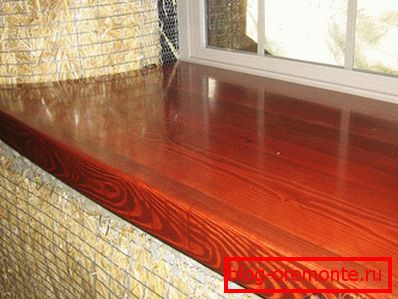
- And, of course, it would be wrong to overlook the aesthetic side of the question of choice. You can find many shades of wood, textures, too, not to mention the wood pattern. And if we simply add to this a huge number of varnishes, paints and impregnations, then we can say that such a window sill will not only cope well with its tasks, but also act as a true decoration of the entire interior.
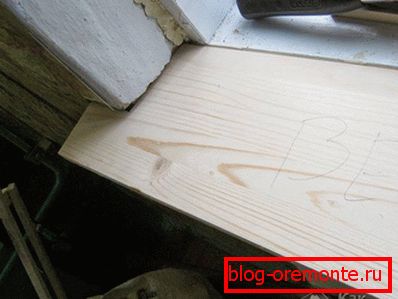
Here you can also add that if you want to make the interior truly unique, then you can make the window sill yourself. To do this, you only need a board that is suitable in size and appearance, which you need to bring to the required dimensions (which by the way should be about 10 cm more than the dimensions of the opening) and impregnate with special protective compounds. When all this is absorbed and dries, you can go to the installation itself.

But before that, on the inner surface of the future sill, it is necessary to perform the so-called drips. This is a small groove, about 8 mm wide and 3–5 mm deep, designed to drain moisture, which can and most likely will be formed on the inner surface of the sill as a result of temperature drops.
After the window sill is selected, you can install it. The work is best divided into several stages and carry out them consistently.
Training
First of all, surface preparation must be carried out. We are talking about whether it is a new house or a major overhaul, after installing window blocks, there is surely some construction waste that needs to be removed.
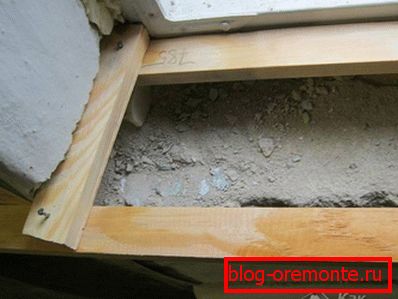
Also at this stage it is necessary to level the surface as intended for the installation of the sill. If there are at least slight distortions, they should be removed with wooden wedges. The only bias that is allowed is a slight inclination of the plane of the window sill towards the room, but here we are talking about a few millimeters.
Installation
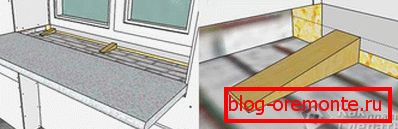
When the base is ready, you can begin the installation of a wooden window sill. Typically, this process is performed using a cement mixture. That is, it is necessary to prepare a certain amount of cement-sand mixture. Here it can be said that the solution should be enough to cover the upper planes of the wooden wedges used for leveling the plane by 3-5 mm. After that, the wooden window sill is laid on top and pressed down. Excess solution is simply removed with a spatula.
Sealing and fastening

After the above actions, in principle, you can do without additional measures, but to achieve the best effect, additional sill fixing would not be superfluous. In the case when not only window sills are made of wood, but also the frames of window blocks, you can proceed as follows.
On the back side of the window, right through the frame, you need to screw a pair of self-tapping screws into the window sill. The length of the additional fasteners should be chosen so that the screws are not less than 5 cm into the window sill. Such measures will be far from superfluous and will allow you not to worry about the fastening strength of the window sill. This is especially important if this window trim will be used to have flatware with flowers or other decorative elements.

Also, we should not forget that all the remaining cracks after the work must be sealed with foam or silicone sealants. In this case, you will not have to worry about what will be blowing out from under the window sill.
Installation features

To this, it would not be superfluous to add that in order to properly install a window sill, it is necessary to keep in mind certain features that this process has.
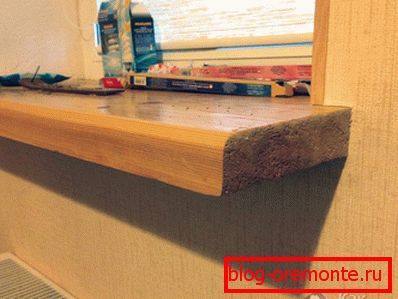
- The width of the window sill is considered optimal if it protrudes from the wall at a distance of about 7–8 cm. This is quite sufficient in most cases. But, if you intend to use a window sill for arranging, for example, a large number of colors or it is planned to equip an additional resting place on the window sill (and this happens much more often than it might seem at first glance), then the width of the window sill may not be enough, and therefore you will have to install a wider element . In order for its mount to be strong enough to withstand the weight of a person, additional supports need to be built in under the window sill. As them you can use rods of metal reinforcement. What pre-must be done holes.
- As material on which installation of a window sill is made, assembly foam can be used. It is necessary, like a solution, to be applied in sufficient quantity on the base, after which to put a window sill. Thus, it is possible to reduce the total time of work and to achieve maximum tightness of the window.
- Installation деревянного подоконника возможна не только в том случае, если оконные блоки тоже изготовлены из этого материала, но и в сочетании с пластиком. При правильном подходе к выбору цветовой палитры, деревянный подоконник вполне способен гармонировать с пластиковым окном, более того, этот элемент конструкции может добавить некую изюминку в безликую штамповку пластика, чем внести во внешний вид помещения индивидуальность.
In conclusion, it can be added that the installation of a wooden window sill can be done independently, but in order for the result to be guaranteed successful, especially if there is not enough experience in carrying out such work, it will be better to entrust the work to the experts and, if desired, to control the process.
A photo


Video
In this video set wooden ash sill: