Installing a plastic window sill do it yourself
You may well purchase a window sill separately from a plastic window, because it may break, for example, or you first wanted to leave the old wooden window sill, but then changed your mind. We will tell you how to install a plastic window sill with your own hands.
Choosing the right
If you chose it on the PVC window sill, most likely all its positive and negative sides were evaluated. The advantages are:
- Durability. By itself, the plastic has a very long service life. It is not exposed to water or other corrosive, non-corrosive liquids.
- Relative ease of installation. Compared to products made from other materials, there is less risk of doing something wrong during installation.
- Acceptable cost. Wooden window sills made of artificial or natural stone have a cost that is much higher.
- Low weight.
- Ease of processing.
- Additional heat insulation.
- Easy to clean. Practically any washing not abrasive means approach.
Here are some cons:
- Instability to high temperatures (in most cases).
- Impossibility of recovery after damage. If wood, for example, you can putty, clean and paint, then there is no such number.
- If the surface of the product is rough, there over time accumulates dirt, which is not so easy to wash.
Window sills can be purchased both with installed windows and after. Their installation is made both on a balcony, and in the wooden house. In this case, you should pay attention to:
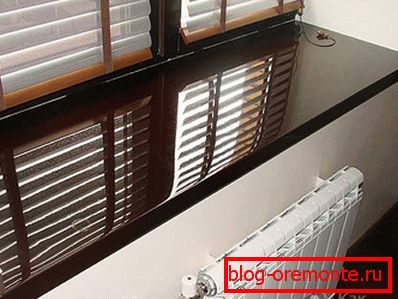
- Colour. It does not have to be white, as many are used to. There are various color options that mimic marble or wood. It is, of course, better to stop at the fact that it will be suitable for the mounted windows.
- Manufacturer. Brand has a big effect on quality. For example, some plants apply a coating on the surface that can be resistant to both temperature and abrasive substances.
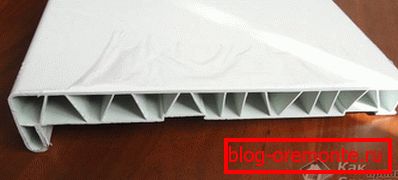 Design. Be sure to look at the butt cut. The greater the thickness of the ribs, the better, the greater the load can withstand the product.
- Warranty. With properly performed installation work, you can count on the fact that the manufacturer is responsible for their offspring.
Tool
In order for the installation to go like clockwork, we will need the following tools:
- hammer;
- roulette;
- level or laser level;
- building corner;
- polyurethane foam and gun;
- Bulgarian;
- stameska;
- plastic lining or other material;
- acrylic or silicone sealant;
- side plugs.
Foam can be with varying degrees of expansion. Choose it for your needs. But it is better not to take one that will not expand at all, since it will not be able to compensate for some of the gaps, and they may remain after installation.
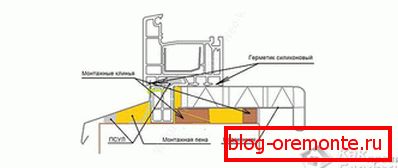
Foundation preparation
This stage may take most of the time, but in fact it is the most important in the whole process.
We look, as the window is established. It is important to assess whether there are any deviations from the horizontal plane. To do this, we apply a level or at the lower edge of the frame, letting the projection from the laser level. In the future, the window sill will be exhibited exactly on it, which can also lead to a bias. If there are small deviations, then it is not scary, then it will be described how to compensate for them.
Measure the width of the window opening. It is important to remember that the plane of the stand should be 1 cm from each end recessed into the slopes, and the protruding part on the sides should go beyond the opening for 3 cm or more.
We make grooves in the slopes, where the ends of the window sill will go. A guideline in this regard will serve as the edge of the frame. Pay attention to the edge of the stand on which the window stands, namely the lower edge of the frame.
In order to do everything correctly, you can use several methods. By means of a laser plotter of the planes a horizontal line is projected onto the opening. From this line along the window, the measurement is made to the edge, the value is fixed. Further from the same line the same distance is deposited, but already on the slope. If there is no level, then you can use the water or ordinary level, which is placed close to the bottom line of the frame, is aligned in the horizontal plane on the bubble indicator and is marked.
A straight line is drawn that connects our mark and the edge of the frame.
Most likely, at the corners of the slopes is a metal corner. In no case should you try to knock it down with a chisel and a hammer, so you can damage it completely. For this it is better to use the grinder. Just make two small transverse incisions to its width. An incision is also made along the applied line.

With the help of a chisel or other suitable tool and a hammer, grooves of 1.5? 2 cm are knocked out.
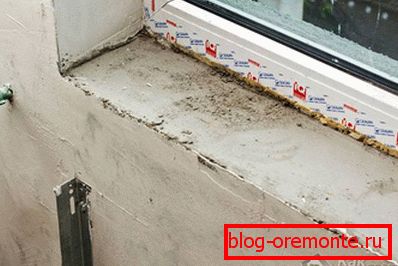
Next, you need to evaluate the surface on which the installation will be carried out. Attention should be paid not only to how uneven it is, but also to what distance from it to the bottom of the window. Ideally, it should not exceed 4 cm. This is due to the fact that it is at this thickness that the foam is polymerized in the best way, which makes it sufficiently dense and strong. If the layer size is large, then voids may form inside, which reduces the carrying capacity, and can also cause drafts.
In the event that the size exceeds 4 cm, it is necessary to reduce the gap. This can be done with the help of available tools. For example, you can build a small formwork from the rule and pour the solution. In this case, it will be easier to bring the required level. If the installation is carried out at a time when inside there are still remnants of a brick or foam block from the rearrangements, then you can lay the foundation out of them, and seal all gaps with mortar or glue. After that, you need to give at least a day, so that everything holds out and grabs.
In the case when the level of the base will be raised using a foam block, it must be briefly soaked in water. Due to its porosity, it absorbs moisture well, and if it takes too much of it from the solution to which it is put, it will not seize. Wetting saturates the foam block with moisture, so the setting will occur as well as possible.
The site can be considered finished, now you will need to correctly transfer all measurements to the canvas and take into account some of the nuances.
Assembly work
The first step is cleaning. It is better to produce it with a construction vacuum cleaner, since brushes and brushes are not able to remove all the dust.
Moisture is necessary for good adhesion of the foam to other materials. Therefore, the surface is recommended to moisten with water. But you can go ahead and kill two birds with one stone. It is necessary to use not water, but a primer. In this way, it will be possible to remove residual dust, as well as provide the necessary moisture. You can apply it with a brush, but it is more convenient to do it with a hand sprayer. If you use the latter, then cover the windows with something or wipe them immediately. If you give the impregnation to dry, then then it will have to be removed with the consequences.

The marking of the window sill is carried out. The total width of it will be the width of the opening plus 10 cm (this overlap is necessary to provide 5 cm for each “ear”). The depth will be equal to the distance from the window stand to the middle of the heater, if it is under the window. It is better not to close it completely. If you do this, then the warm air will not flow to the glasses, and they will mist over, which will lead to accumulation of condensate and the growth of mold and mildew. If there is no battery and radiator, the departure can be carried out by 5 cm. In some cases, at the request of the customer, an even larger projection is made. Perhaps the space will be used as a continuation of the desktop or something else. In this case, it is necessary to install metal corners as supports. Their base is sunk into the plaster. The length of the sill is adjusted taking into account the fact that the edges will be recessed into the wall by 1 cm.
With a hacksaw or electric jigsaw, trimming is done.
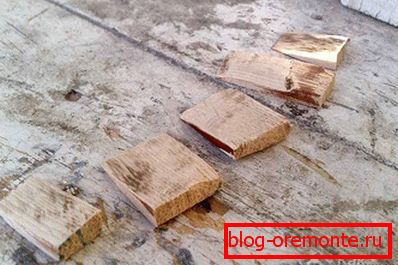
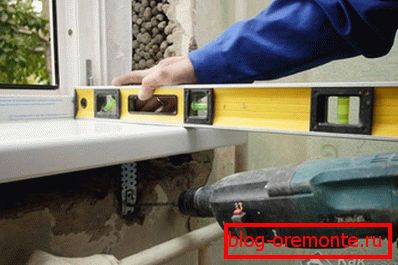
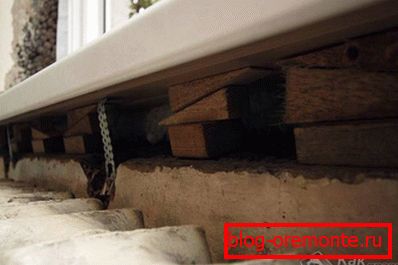
Next, you need to prepare props, which will lay the plane. Often used special plastic plates, but they may not give the necessary rigidity. Instead, you can use part of the trimmed window sill. They should be placed every 40–50 cm. They are set using a building level or using a level (when using the latter, a line is projected and measurements are taken from it to the supports at two ends, the distance should be the same). Their height should be such that the window sill end-to-end comes under the bottom of the frame and rests on the installation bar. In order not to move them in the process, you can fix them with screws. If the platform is made of gas, then you can simply screw through with screws, in the case of a brick you have to use a hammer drill and a dove.
You can go the other way and install the props not across, but along the window sill. They can be made of beacons for plaster. In this case, there will be a greater emphasis, which will precisely eliminate deflections and creases.

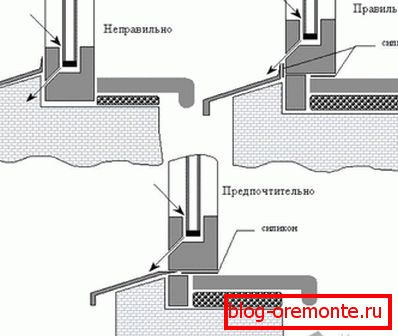
With the help of a pistol and polyurethane foam, the gaps that may be under the window are sealed. Particular attention should be paid to the corners. There are cases that everything is set beautifully, and a draft is inflated from below, which is an indicator of inattention.
On the window sill are installed plugs, and it is put on its place. If there is no gap between it and the window, then you can continue the installation. In the case when the gap is large enough, it is necessary to raise the supports, with its minimum values, we can expect that the foam compensates for the gap. Until the repair is completed, the film does not need to be removed, it will be enough to lift it in those places that will be hidden in the wall and under the window.
If the struts were mounted along, then the main layer of foam should be applied before the sill is installed in its place. If across, then blowing can be done in several stages. Before installation - the part that is closer to the window. Then walk along the middle line, and then along the edge.

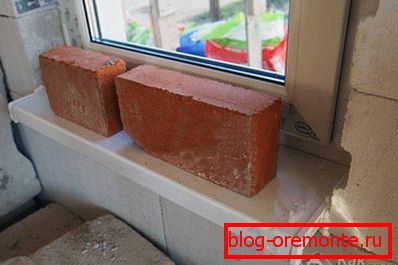
At night, the plane must be pressed down with the help of cargo. To do this, you can use books, egg pads with water, dumbbells (but under them it is desirable to make the lining of durable material), etc.
After polymerization and drying of the foam, its excess is cut off. Moreover, under the window sill, it should be cut flush by about 1 cm so that you can safely putty this space and the applied material had a sufficient layer.

If there is a bias
The output will be a little installation trick. Most often it remains invisible to others, especially if the product is more than 25 cm wide. For this we need self-tapping screws or some other material with which it will be possible to make adjustable beacons. They are mounted in two lines. The first one should be practically right next to the window, and its level should exactly repeat the slope of the window. The second is set closer to the edge. It must be leveled exactly to the level with a special tool. After installation, the distant part of the window sill will fit snugly to the window frame, and the closest one will be precisely set to level. This will deceive the vision and create the visual effect of the correct location.
Installation of the window sill can be combined with the installation of plastic overlays on the corners near the window. Never be in a hurry in the process, especially during marking. We are interested to know what nuances you noticed for yourself. Share observations in the comments.
Video
Watch the video tutorial from a professional installing a PVC window sill. All the nuances clearly: