Installation of thermal panels
Thermopanel with clinker tiles is a unique combination of finishing material with insulation. This material has proven itself as a finishing material for building facades. If you are looking for a rational option for finishing the facade of your house, then pay attention to this technology. Consider all the advantages and features of installation of thermopanels, as well as the process of installation work.
Features and Benefits
For the production of thermopanels with clinker tiles used heat insulator. The heat insulator, in turn, is made on the basis of polyurethane, polystyrene foam and penoplex. As the cladding used high-quality vintage baked brick-tile. When buying thermopanels, it is necessary to make the right choice, because each of them is intended for a particular surface. As for the advantages of facade thermopanels, this is one of the most modern facing materials.
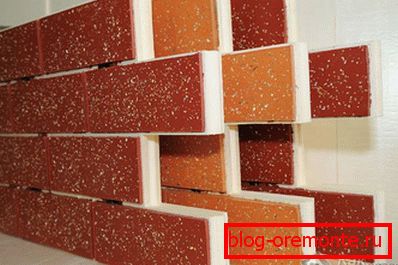
- Due to the high quality of waterproofing, they are absolutely not afraid of moisture or dampness. Moreover, thermopanels will not pass moisture at all.
- The maintenance is very simple.
- Durable.
- In addition to the improvement of the facade, thermopanels provide reliable thermal insulation.
- Thanks to the seamless connection, reliable thermal insulation can be achieved.
- The panel itself, as well as the clinker tile, is not exposed to the appearance and, accordingly, the development of fungus or mold.
- Low weight allows you to install them yourself. As a consequence, there is no need for additional reinforcement of the foundation.
- You can install them at any time of the year.
- You can do their own installation without the involvement of specialists.
- Their high price fully justifies their characteristics, since there is no need to additionally buy insulation and decorative material. The clinker tile thermopanel performs both functions simultaneously.
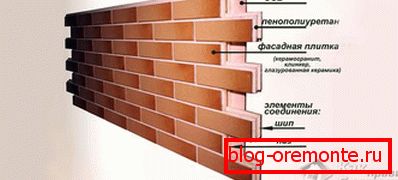
So, if you have already purchased this facing material, then you should prepare the following tool:
- water level
- trowel for grouting
- screwdriver
- level,
- perforator,
- Bulgarian.
If you have everything ready, then you can proceed to installation work.
Installation process

First of all, it is necessary to carry out a number of preparatory work. For example, perform a true material count. As a rule, it is enough to know the area of the entire facade of the house. Already starting from this value, the purchase of thermopanels is carried out. In order not to miscalculate, it is best to make a small margin, after all, there will definitely be cuttings, and, possibly, material damage. It is recommended to purchase a stock of 10-15% more than the calculated value. To find out the exact or at least the approximate number of panels, you should divide the area of the house into the area of one thermal panel. In addition, you must check the geometry of the house.
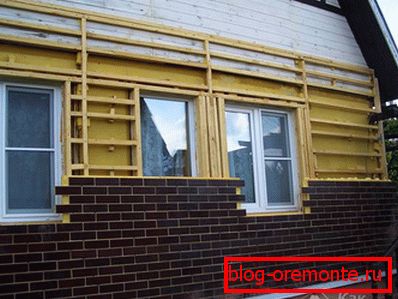
If the walls have large drops and irregularities, then you may need to make an additional crate. As for cutting thermopanels, for this it is necessary to use a special diamond cutting wheel or a hacksaw for thermopanels.
Start
To check the geometry of the facade, you must perform the following steps:
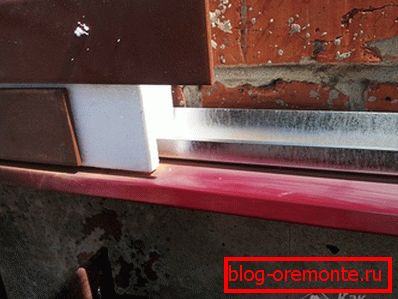
Beat off a horizontal line around the perimeter of the facade. Install a starting profile on it, while it is important to check the verticality of each corner. If their parallelism has deviations up to 30 millimeters, then this can be leveled. If there is a deviation of more than 30 millimeters, you will need to make a batten.
If the house is built of timber or round timber, then the installation of thermopanels is carried out in any case on the frame.
Base
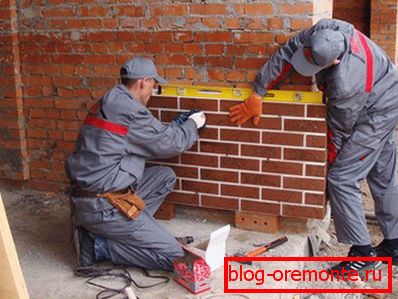
In the next step, the thermopanels are mounted on the base of the building. On average, one square meter of material consumption dowels or screws up to 15 pieces. Such a number of fasteners allows you to create a good clamp to the wall all over the plane.
Corner elements

Далее монтируются угловые элементы. Это важно, так как монтаж термопанели начинается с угла здания. Corner elements монтируются на угол здания. Для этого потребует дюбель-гвоздь 12–16 см, а также шуруповерт. На отмеченном месте перфоратором просверливается отверстие. Если вам пришлось монтировать деревянный каркас, то крепеж угловых элементов выполняется при помощи обычных саморезов по дереву длиной в 12 см.
To prevent air circulation under the cladding, it is recommended that after fixing the first row of panels to fill the gap formed with polyurethane foam between the building wall and the basement profile.
How to cut
Fastening of thermopanels between themselves is carried out using a groove-ridge connection. If it is necessary to cut the clinker thermopanel, this can be done with a diamond wheel. This is especially necessary if the facade of the building has arched or other shaped elements. For example, this applies to door and window openings. The cavity in such places is also recommended to fill with polyurethane foam.
Clearance openings
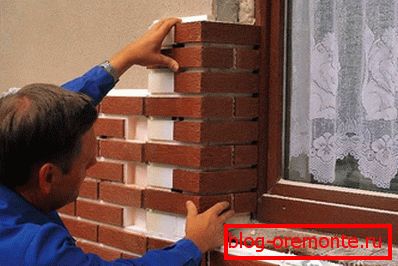
As for the processing of door and window openings, there are several options. For example, you can use the original element of the slope. You can also make a cement-sand mortar and put it on the slope. You can use tiles and the like.
Cornices
As for the eaves, the finishing of the junction of thermopanels to the eaves of the roof is carried out upon completion of the installation work. The gap between the roof overhang and the panel is covered with a decorative element.
Drains
After the installation of drains. They are fixed to the wall with screws through thermopanels. At the same time, it is necessary to carry out the work very carefully so as not to damage the already finished facade.
Zipper
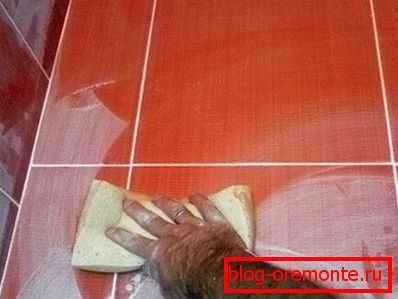
At the final stage, grouting between the clinker tiles is carried out. For this purpose, a special frost-resistant grout is used, which is applied using a special grouting gun. This work should be done at a certain temperature, namely from + 5 ° C to + 30 ° C. The average consumption of grout is 5 kilograms per 1 square meter. It should be noted that all installation work except this stage can be carried out at any time of the year.
The result is sure to be great!
So, you can do the installation of thermopanels with clinker tiles with your own hands. To do this you need to follow the entire sequence of work. As a result, you will get a beautiful facade that will perfectly fit into the overall interior of the adjacent territory.
Video
Additionally, you can watch a video in which the process of installation of facade panels described in the article is clearly presented: