Installation of polypropylene pipes do it yourself
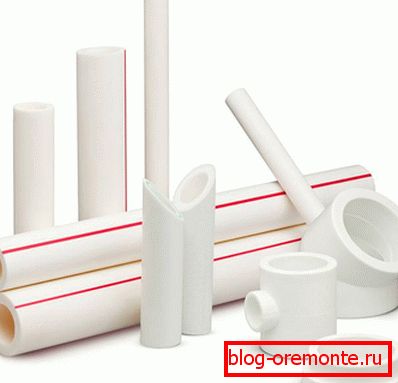
The greatest demand for the installation of plumbing or heating systems are pipes made of polypropylene. The material used in the manufacture of pipes extends their service life to 50 years. The polypropylene pipe does not rust, therefore does not require painting, and welding is not required when installing the pipeline. In this article we will talk about the installation of polypropylene pipes with their own hands, give step by step instructions, as well as show photos and video materials.
Installation advantages
To perform the installation of the pipeline does not require welding. All connections are made by soldering. The pipe fits into the fitting, and then is soldered with a special coupling. The advantage of this soldering is that within an hour after soldering the entire system, the pipeline is ready for use.
Tool preparation

In addition to having all the necessary parts and materials, to complete the installation of the pipeline, it is necessary to prepare the entire tool.
- The most important tool for the job is a soldering iron, with which soldering couplings will be performed. Buying this tool is not worth saving. This can affect the quality of the soldering and the speed of the work, and the soldering iron itself can stop working very quickly. A high-quality soldering iron with long work will not harm the Teflon layer of coating nozzles.
- You will need pipes for soldering. Basically, they come complete with a soldering iron.
- The main part of the work will be performed stationary, so a stand is required for the soldering iron.
- To cut off the desired section of the pipe, you will need special nippers, you can use a pipe cutter.
- The removal of the aluminum layer from the pipe is carried out with the help of a shaver.
- To solder the pipe freely entered the fitting, you will need to chamfer the edges of the pipe using a phasor.
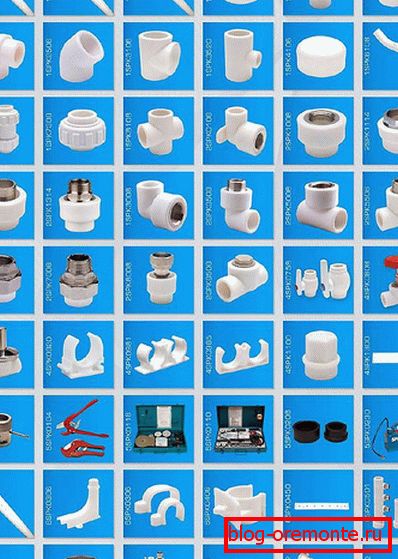
Pre-visit the hardware store and buy all the necessary tools.
What can you save

Solder the polypropylene pipe with improvised means will not work. But still, some tools can be saved. If you have to perform a small amount of work, you can cross out the pliers or pipe cutter from the shopping list. Cutting the pipe can be done by the grinder. The shaver is used only if there is an aluminum layer. If this layer is missing, then you can not buy the tool.
Work plan
Having decided on an independent installation of the pipeline, it is necessary to draw up a plan of work to be performed. It is required to calculate everything so that the soldering of the couplings in most cases takes place not on weight, but stationary. At the end of the work, all that remains is to connect the entire system and solder the last connection points.
Before starting work, there should be a thoroughly designed pipeline scheme. This will greatly facilitate working conditions, and you do not have to buy extra materials. Properly performed calculation will allow you to perform all the inconvenient soldering places on the table.
Features of soldering pipeline
To perform solid soldering, the outer edge of the pipe and the inner side of the coupling are heated. Only that part of the pipe that fully enters the coupling gets warm. After connecting the heated areas, the soldering of polypropylene occurs.
At the beginning of the soldering is necessary to prepare the material itself. The required pipe length is measured and cut off. On the edge of the cut pipe, from the outside, a chamfer is removed with a depth of 3 mm and at an inclination of at least 15 degrees. The edges of soldered materials are cleaned of contamination and degreased with a special solution. And only now you can solder the product.
Pipe soldering
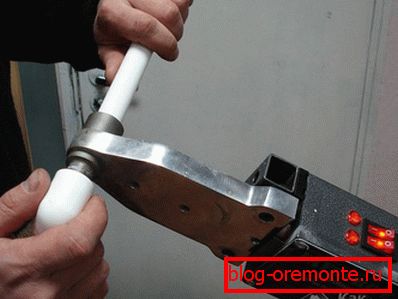
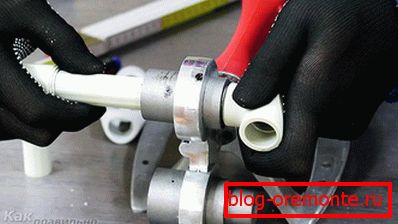
- Before the start of soldering, the soldering iron is installed using a stand on the table and is connected to the power grid. Soldering occurs at a temperature of 260 ° C. Therefore, if the soldering iron has a temperature controller, it must be set to this value. For your information: at other temperatures, the soldering of products is not performed. Therefore, you should not overpay for the purchase of a soldering iron with a temperature controller.
- When the soldering iron is fully heated, you can begin the process of welding parts. The fitting should warm up simultaneously with the pipe, so a fitting is put on one side of a special pin; The tube inserted into the sleeve is put on the second side of the heater. After a full warm-up, parts are quickly removed from the soldering iron and connected.
- When soldering, it is necessary to observe the warm-up time of parts, otherwise the part will quickly deform and become unsuitable for connection. An insufficiently heated part will not be able to solder reliably, as a result of which a leak is formed at the junction.
To determine the heating time, a table has been developed, which experts use when installing polypropylene pipes.
| Pipe diameter, mm | Width of welding belt, mm | Heating time, sec | Connection time, sec | Cooling time, min |
| 20 | 14 | 6 | 4 | 2 |
| 25 | 16 | 7 | 4 | 2 |
| 32 | 18 | 8 | 6 | 4 |
| 40 | 20 | 12 | 6 | 4 |
| 50 | 23 | 18 | 6 | 4 |
| 63 | 26 | 24 | 8 | 6 |
| 75 | 28 | 30 | 10 | 8 |
| 90 | 30 | 40 | 11 | 8 |
| 110 | 33 | 50 | 12 | 8 |
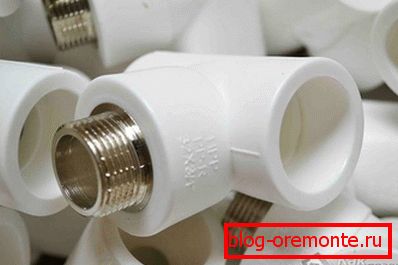
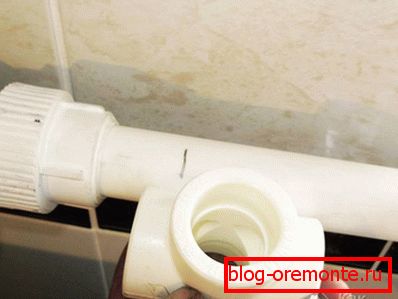
- The pipe is inserted into the sleeve with little effort, as well as the fitting worn on the heater rod. This is due to the design of the cone nozzle, which is made at an angle of 5 degrees. Only the middle of the fitting coincides with the diameter of the pipe.
- Before heating the pipe it is necessary to measure the depth of the edge of the sleeve. The measured distance should be marked on the edge of the inserted pipe. This is necessary in order not to exercise excessive pressure on the pipe. Otherwise, the soft edge of the pipe may crease in the form of a thickening, which will lead to a reduction in the cross section of the pipe. With experience, such emphasis will be felt automatically.
- After heating, the connection of the pipe with the coupling is performed quickly. The pipe is inserted into the coupling strictly straight, without turning. For the amendment of the connection will be just a couple of seconds. After cooling, they are held together, and the force applied to correct the joint may spoil the quality of the soldering.
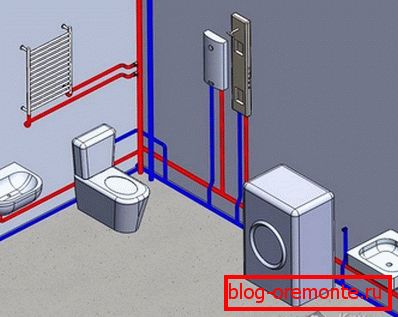
System installation
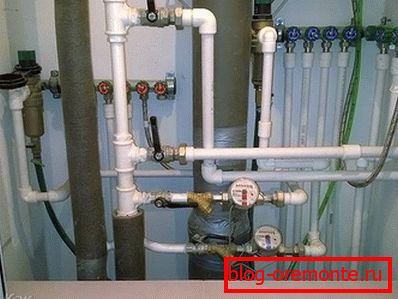
The installation of the piping system around the house begins after pre-soldering all its parts. For ease of installation, it is desirable to perform as much soldering of turns and fittings in a stationary position. For soldering on weight, there should be transitions in the walls and points of connecting plumbing fixtures. On the wall are marked the attachment points of the pipeline and holes are drilled on the markup. Using dowels, clamps are attached to the wall, and pipes are inserted into them.
When installing the heating in the house, keep in mind that the polypropylene pipe can not be attached to the heating boiler. The boiler is connected by a transition fitting connected to a metal pipe. The length of the transition pipe must be at least 50 cm and it must be connected directly to the heater.

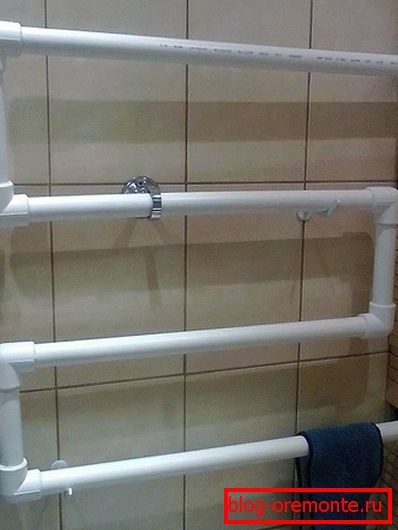
Unlike threaded connections, soldering is not serviceable. Therefore, the pipeline can be hidden in the wall so as not to disturb the beauty of the interior of the house. However, such installation should be carried out after thorough testing of the pipeline with water under pressure.
In this article, we reviewed the main issues related to the implementation of see, there is nothing complicated and scary. Perform the installation of polypropylene pipes, first for yourself, and then, having acquired the skill, you can consider this work as a source of additional income.
Video
This video shows the technology of soldering polypropylene pipes:
A photo