Hozblok for giving their own hands
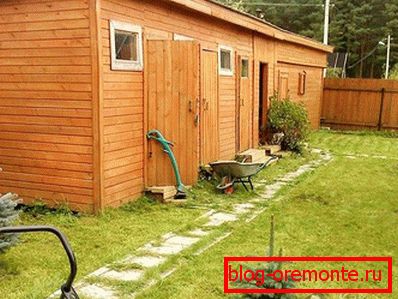
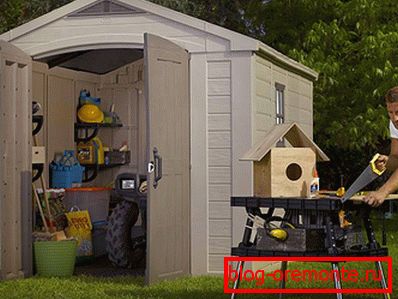
Are you a country owner? If yes, then you know that in the country to do without a hoe-block (or a shed) is simply impossible. In it, you can store auxiliary materials, various tools, agricultural tools and garden items. This is a necessary building, and if you do not have it, you can think about its construction. Moreover, you can build a hozblok to give their own hands, since special work and special skills are not required. We suggest you study the material that will help you to make a barn from start to finish.
Stage 1: Design
Building a power block can help you solve several problems:
- the room will serve you as a workshop and storage for tools and equipment;
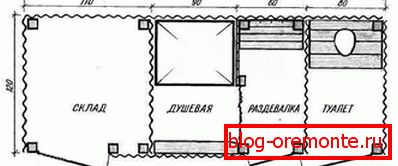
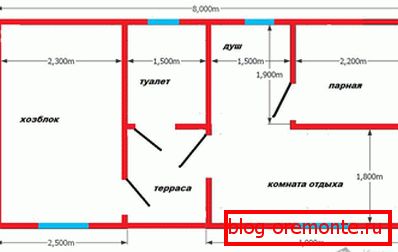
- the building may have additional areas such as a shower and toilet;
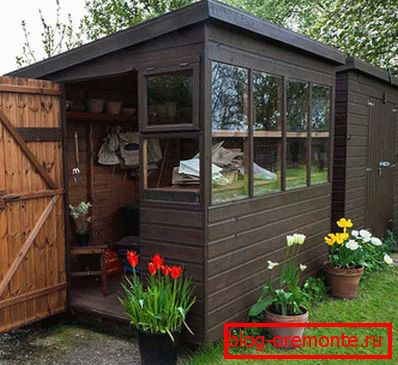
- It can be equipped not only with a bathroom, but also with a seating area - a room with upholstered furniture and amenities.
All this can be achieved through planning. A shed can be one of the 3 types of buildings listed above, and can include all of them. It all depends on your needs and desires.
You should not assume that the barn should be inconspicuous and ugly. You do not need to set a task to do it with minimal expenses. Thanks to the efforts and work, you can make a wonderful hozblok that will not be inferior in beauty and functionality to your country house.
When making drawings, think about the size, height and number of compartments you need. Moreover, when designing a building, remember that it must meet the following criteria:
- The most properly allocated space.
- Long operational life and reliability.
- Carrying out the necessary communications: electricity and water. If your utility room with a toilet, you need to provide sewer drain.
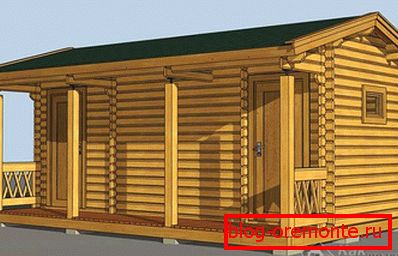
You will not spend a lot of money on the construction of such a shed, therefore, choosing a material, you will stop on a wooden bar. This is the most common and suitable material. For example, buildings from a usual board will not stay long. But the hozblok on the foundation with a frame of timber meets all the requirements and will serve you for many years.
If you can not make a project of your dog house, use the world wide web. Especially for those who can not do projects, people put ready-made drawings. They can be downloaded for free or bought for a symbolic amount.
To create hozbloka prepare such tools and materials:
- ax, shovel, screwdriver, handsaw, electric drill with a set of drills, a plane;
- bars, cladding boards, metal anchors;
- finishing materials for roofing and walls, cladding panels, heat insulation (if needed).
Stage 2: Procurement of Material

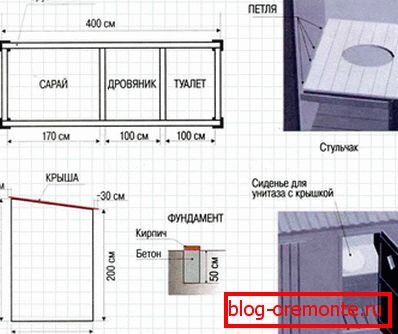
To make a hozblok, the dimensions of which are 6 m long, 3 m wide and 3 m high, with a single-sided roof and two interiors, you need to prepare the following materials:
- plywood - 28 m2;
- ruberoid - 28 m2;
- timber 150? 150 mm - 0.65 m3;
- timber 150? 100 mm - 0.37 m3;
- timber 100 × 100 mm - 1.2 m3;
- timber 50? 100 mm - 0.15 m3;
- edged board 30 mm - 2.2 m3;
- batten 40 mm - 0.37 m3;
- Asbestos-cement pipe O 150 mm - 6 pcs. 1200 mm each;
- gravel, sand, cement;
- fittings - O 10 mm, length 350 mm, 4 pcs.
This preparatory work is completed. The next step will be the correct location of your cabins.
Stage 3: Location Selection
Definitely, in order to build a power unit on your own, you will not need special cash deposits. But be prepared for the fact that the construction process will take away your time and effort. To make work faster, ask for help from households or neighbors. However, just before construction, you need to choose where to place the shed so that it is comfortable and meets the requirements. Building codes and regulations (SNiP) in 02/30/97 paragraph states that:
- in the case when household animals, birds will be kept in the economic block, or it will serve as a lavatory, it should be placed at a distance of 12 m from the walls of a residential building and 4 m to the border of a section of neighbors;
- if it will be used as a shower cabin, it should be placed at a distance of 8 m from a residential building and 1 m to the border of the plot of neighbors.
If you neglect such requirements, you may have serious problems when you want to sell your site. In this case, the state will refuse to execute a sale transaction with buildings until their placement complies with the standards in force in the territory of the Russian Federation.
Having chosen the optimal place, we smoothly went over to the main question of how to build a utility block in the country. Let's find out.
Stage 4: laying the foundation

So, our goal is to build a building of 6? 3? 3 m. Since the building itself will not produce a special load on the foundation, it can be made columnar. To make it easier for you, we will divide all the work into separate stages.
- At the place where the shed will stand, you need to remove the top layer of fertile soil around the perimeter of the building, having previously marked out the future site based on the project.
- The prepared place must be tamped down, cover 10 cm of sand from the top and again properly tamp.
- For such a construction you need six pillars. Drill or dig a hole O 20 cm, 120 cm deep in the intended place. Please note that the columns to be installed also have a length of 120 cm.
- At the bottom of the holes you need to fill a layer of sand in 10 cm or gravel, and then ram this pillow.
- In the holes, lower the segments of asbestos cement pipes. Place them strictly vertically on the level. To fix the pipes, the remaining space between the hole and the walls must be filled with sand and rammed.
- It is time for the first stage of casting the pillars. Prepare the concrete and pour it into the asbestos-cement pipe 1/3 of the entire length. Then it is necessary to raise the pipe by 10–15 cm, set it in a level, fix it and wait for 2–3 days. Such manipulations allowed the formation of a base of concrete at the bottom of the pits. The diameter of the base will be larger than the diameter of the pipe, which will not allow the columnar foundation to rise when the ground wakes up in winter.
- After the concrete has dried, the remaining cavity of the pipes can be poured. But before that, prepare 4 bars of O 10 mm reinforcement, thanks to which the grillage from the beam will be securely fixed on the posts. They will need to be drowned in 4 corner pillars. From the total length of trimming the armature - 15 cm is necessary for immersion into the pipe, and 20 cm will protrude.
- If you consider reinforcement fixation unreliable, an anchor can be fixed in such a foundation. They are placed on the frame and secured with nuts. In this case, the end of the anchor and the nut should be drowned in the grillage.
- After preparing the solution, fill each tube with it. As casting, compact the concrete with a bayonet to force air out of it. Then install the fixture reinforcement exactly in the center.
- It remains to wait for the solidification of the solution, which will occur after 2-3 weeks. During this time, you need to cover the pillars from the sun and wet them with water in dry weather.
On this work on the installation of the foundation is completed.
Stage 5: assembly and installation of the grillage (frame)
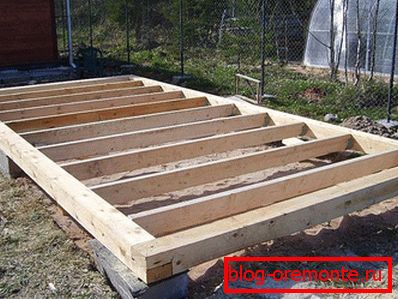
The frame must be assembled from bars, the cross section of which is 150 × 150 mm, its size will be 6–3 m. The frame will consist of four sections, 1.5 × 3 m in size. The bars, which form the frame, are interconnected by half-wooden slots. They need to be fixed with special two (if the frame is installed on the anchor) or four (if installed on the reinforcement) wood screws. To install the frame on the foundation, in the right place should be made holes for the protruding reinforcement or anchor.
In order to ensure sealing, it is necessary to put 1-2 layers of roofing material on the poles so that its edges protrude 10 cm. They need to be bent down so that the water drains and does not accumulate under the wooden bar. Before you put the frame on the foundation, the wood should be covered with an antiseptic - put at least 2 layers of drying oil. Then the frame is installed and attached to the foundation. The length of the frame, you need to install three lags "half-dead" from a bar 100? 100 mm, in increments of 135 cm.
Stage 6: the frame of the economic unit

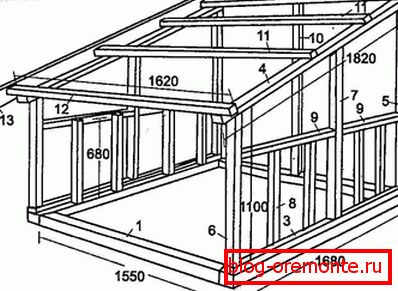
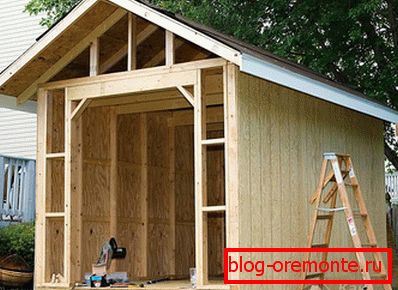
To build a framework, wooden bars with a cross section of 100 × 100 mm and 100 × 150 mm will be required. For the convenience of further roofing work, the frame bar must be installed at different heights. The front side of the frame will be 3 m high and the back side 2.4 m. Thus, it will be easy for you to install rafters for a single-sided roof.
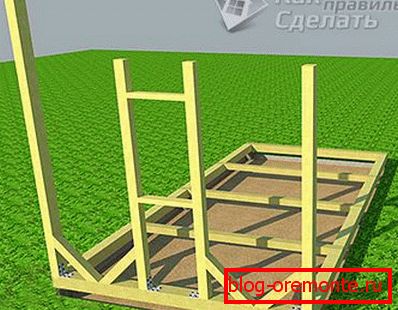 The first thing you need to collect the same end walls. In each of them will be an opening for the window. To the frame of the rack are mounted vertically with galvanized steel corners, size 130? 10 mm or 105? 90 mm and screws. First you need to put the corner stand, whose height is 3 m, and the cross-section of 150? 100 mm, narrow side to the end. To do this, it is necessary to make a hole of 10 mm in diameter and a depth of 50 mm in it in order to fit the timber on the reinforcement that protrudes from the frame. The same holes must be made in the other three corner bars. Departing 1 m from the corner, you need to fix the other two bars, the cross section of which is 100 × 100 mm and the length of 2.4 m. The distance between them should be 0.6 m. The last one on the end wall will be the corner beam, which sits on the armature. Its height is 2.4 m, and the cross section is 150 × 100 mm. All racks are fastened corners. And in order for the design to be strong and rigid, between 1 and 2, 3 and 4 racks it is necessary to make struts with a cross section of 100 × 100 mm. To do this, the ends of the struts need to be cut at an angle of 45 ° and attach them to the frame and the uprights with the help of bolting. Be sure to put a washer before tightening the nut. Between the 2 and 3 racks you need to insert window beams, the cross section of which is 100? 50 mm. The first bolt is installed at a height of 1 m from the frame, the second - at 1 m from the first. The second end frame must be assembled in the same way. As a result, you should have, as in the figure.
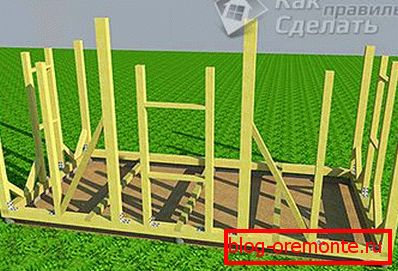 Now you can assemble the front frame. Level the main pillars with a height of 3 m. There should be four of them, two of which are already standing in the corners. It remains to establish two medium racks. From the extreme posts you need to retreat 1.8 m and fix them. So that they do not stagger, temporarily connect them with nails or screws to the board. Since the hozblok will be divided into two separate sections, you need to make the window opening in the middle and the doorways on the sides. The door frame will be 2 m high and 0.85 m wide. Therefore, take a stand 2.4 meters high with a section of 100 × 100 mm and set it at a distance of 0.85 meters from the extreme stand. Do the same on the other side. In order to strengthen the structure, set diagonal braces between the 2nd and 3rd pillars. On the other hand, do the same. Next, you need to install window racks. Again, take a timber 2.4 m in height with a cross section of 100 × 100 mm and secure it at a distance of 0.37 m from the third pillar (3 m high). Then retreat 0.85 m from the installed rack and set the second one, exactly the same. It remains only to insert the horizontal bolts. Fix the first one at a height of 0.8 m from the frame, the second - 1 m from the first. Now the front side is ready, you should come out as in the figure.
 Now make the rear facade. Since the corner posts with a height of 2.4 m are already standing, it remains to put 2 intermediate, with the same height and section of 150 × 100 mm. Step from the end of the rack - 1.8 m. Then set two braces between 1 and 2 of the rack and 3 and 4.
It remains to make the top trim, for which you need a bar of 100? 50 mm. Mount it at a height of 2 m from the grillage (frame). To do this, pieces of timber need to be fixed vertically between all racks around the perimeter. It is necessary to connect them end-to-end, fixing with a reinforced steel angle and screws. As a result, you should have such a wooden frame, as in the figure on the right.
Stage 7: Mount the rafters
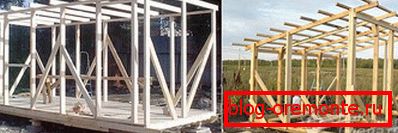
Collect rafters more convenient and easier on the ground. It turns out, you will mount them on the rack frame in the finished form. In order for the roof to have a visor that will protrude along the perimeter, take rafters 5 m long with a cross section of 100 × 50 mm. Connecting them to each other will be crate of 30 mm cut boards. Rafters are placed in increments of 0.85 m. The crate does not necessarily attach tightly to each other. It all depends on the roofing material. If its mass is small, the distance can be greater, but if it is large, the boards fit more closely.
To install the roof, in the racks on which it will rest, you need to cut the grooves at an angle of 10 °. Why 10 °? Because the height difference between the front and rear pillars creates exactly this angle. Before you install the roof, you have to sew up its overhangs and eaves trimmed 30 mm board. After this, make the floor using a floorboard. It is possible to use both nails and screws. In the racks make holes for screws. To raise the finished roof up, you can use logs, which must be placed behind the building. On them the design is lifted up, the rafters are installed in the grooves on the racks and everything is fixed with self-tapping screws.
Stage 8: plating and interior work
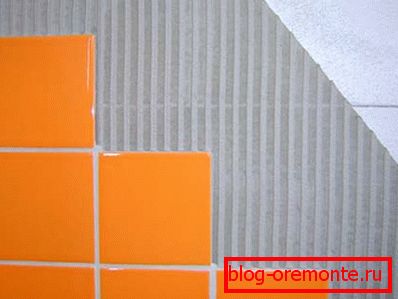
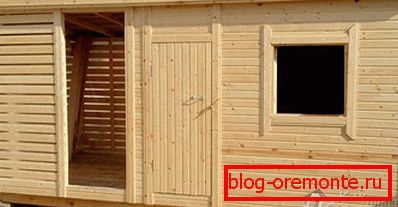
Now that the frame is completely ready, it remains to complete the outer skin. Lining is suitable for this purpose. Then you need to lay the roof covering that you choose, insert the windows and install the doors. To separate the two sections inside the hozblok, make a frame-shield partition, using a half-tree connection. Fiberboard or plywood sheathed ceiling of the building (you need to fix the materials with screws). Optionally, you can sheathe base, using asbestos cement sheet. And if this is done from the inside and outside, filling the space with expanded clay, then it can be insulated with mineral wool or foam. Then the building will be much warmer, which will allow using it not only as a warehouse.
If you like this project, write to us in the comments. You can also share other options that you can implement on your own!
Video
Watch the video on how to build a barn to give yourself:
This video shows the construction of a wooden hozbloka:
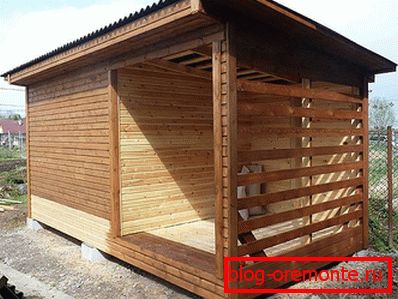
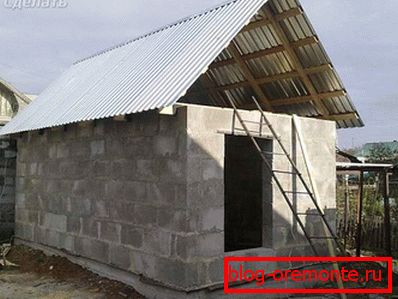
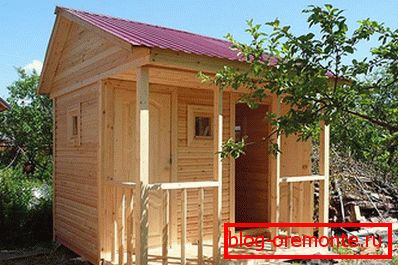
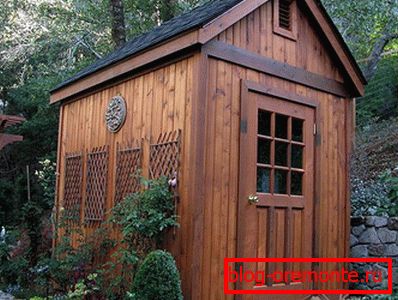
A photo


Blueprints