How to weld a ceiling joint by electric welding
The use of welding joints in the assembly of metal structures is considered the easiest and most reliable method of their installation, not only in industry but also in everyday life. It is clear that in order to master the techniques of electric welding, a private trader will need not only to complete a special training course, but also to acquire certain practical skills.
For those who at least partially own these welding techniques, we offer an introductory article on the peculiarities of the formation of the ceiling seam, the preparation of which requires special attention and care from the performer. Indeed, when welding a seam, for example, on the ceiling of a garage, the bottom of a car, or in any other place, the prepared joint is located directly above the welder's head, which explains the requirement for special care to carry out all working operations. As a result, before you weld the ceiling joint with electric welding, it is advisable to familiarize yourself with the peculiarities of the operations for its formation in certain conditions.
Features of the formation of seams
The complexity of the preparation of ceiling joints is explained by the fact that during welding, the molten metal due to its own weight can flow down, and this creates a certain threat to the contractor (getting burned open body parts, in particular). That is why experienced specialists in such situations use special welding techniques that ensure compliance with safety requirements.
To understand all the subtleties of the procedures for the preparation of ceiling joints, first of all, you should be familiar with the basic requirements for the technique of performing work of this class. In the process of welding operations, the following mandatory conditions must be met:
- welding can be done only by hand;
- so-called coated electrodes are used to form the compound;
- welding should be done in the “short arc” mode using electrodes of no more than 4 mm O;
- when preparing the seam in order to avoid metal spreading, the electrode should be kept slightly aside;
- the width of the weld being prepared should not exceed twice the electrode thickness;
- in order to avoid the formation of gases that reduce the quality of the seam, the electrodes used must be completely dry;
- Welding should be carried out in the direction of "self", which allows you to select the optimal pace of progress, as well as monitor the quality of the resulting weld;
- in order to obtain a solid and reliable joint, the edges of the surfaces to be welded or blanks are carefully cleaned before starting work, and at the end of the work, solidified welding residues are removed from them.
When working with blanks of greater thickness (about 1 cm or more), welding should be performed in several passes. At the very first pass, an electrode with a diameter of not more than 3 mm is used; all subsequent operations are carried out by an electrode of Ø 4 mm.
We would especially like to draw your attention to the fact that ceiling joints are not only horizontal, but can also have a certain slope, varying from 10 to 80 degrees (the so-called semi-ceiling joint). In this case, both manual and automatic welding using the same coated electrodes can be used to form an inclined weld.
Butt joint preparation

Before you seal the ceiling joints using electric welding, you must have at least some idea of the types of welded joints, which differ in the way they are formed. Since the volume of the article does not allow us to investigate each of these types, we will limit ourselves to the simplest of them, namely, the so-called butt joint.
The specified connection is welded, as a rule, in several passes, implemented in the following sequence:
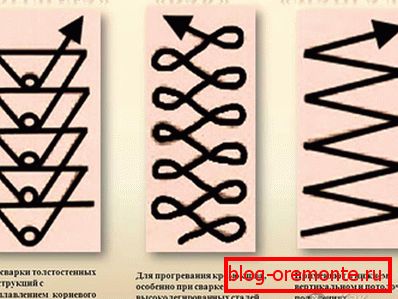
- First, the so-called root roller or root root is formed. In ceiling welding, it is performed using an O 3 mm electrode, which is conducted along the seam in a known manner, called a “ladder”. The value of the current set on the welding machine is selected in the range between the minimum and average values (we are talking about the values laid down in the technical characteristics of the unit itself).
- The second and third passes are performed by O 3 4 4 mm electrodes. The current is selected at the same time as the average or closer to the maximum. In order to prevent the formation of "humpback" welding is carried out with a delay at the edges of the roller with a passage along the edge of the workpiece and a further transition to the next edge by the method of "ladder".
- All subsequent layers of the roller are formed in the form of surfacing (without any deviations from the welding line).
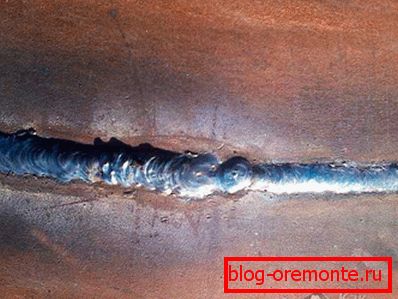
- The face layer of the formed ceiling joint should look so that the width of the unfilled groove does not exceed 0.5–2 mm. If necessary, this layer can also be made in several passes.
In the case of all the above requirements, you can get a high-quality and reliable connection. In more detail the order of its formation can be studied on the video attached to the materials of this article.
Welding Safety
Requirements for the safety of welding operations during the design of the ceiling seam are as follows:
- All work must be carried out in a well-dried room, the humidity of which should not exceed the value specified in the regulations.
- In open spaces, welding is not allowed during a snowfall or thunderstorm.
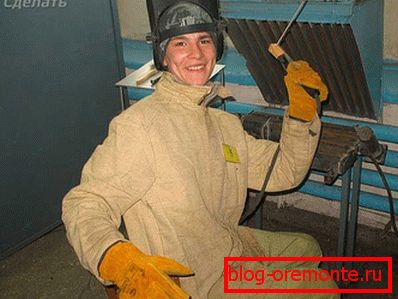
- Welding work should be carried out only in clothing designed for this purpose with a special protective coating and mask.
- During work, unused equipment must be disconnected from the mains.
- Only well insulated wires should be used for welding.
Video
This video shows the process of welding the ceiling seam. Although the comments are in English, what is shown on the screen does not need additional explanation: