How to warm the barn
Starting the construction of the house, make a utility room - a barn in which tools are stored. As a rule, it is hastily assembled, temporary structure, not characterized by high quality. After completing its mission, the barn is demolished or refitted to contain various living creatures. Usually, for this purpose, a capital structure is immediately made of wood, brick, or other available building material.
The building was erected (or re-equipped), and pets are safely infused into it, but with the onset of cold weather it is found that the temperature inside is very low. What to do in this case? Heat? If you count the costs, it turns out that the game is not worth the candle. There is a way to warm the barn for chickens for the winter.
What should be the temperature
For pigs, it is necessary to heat the room to an average of 18 ° C, which will prevent the animal from getting sick. And for the winter maintenance of chickens such a high temperature is not needed, since, thanks to strong plumage, they can even tolerate frosts. But hope that they will feel good and be carried, it is possible only if the temperature inside will not fall below +7? C. The optimal is 12–15? C. Depending on which inhabitants "get a residence permit" in the barn, the temperature regime is chosen, but it is much easier and cheaper to maintain it if the building is properly insulated before the onset of cold weather.
We warm the floor
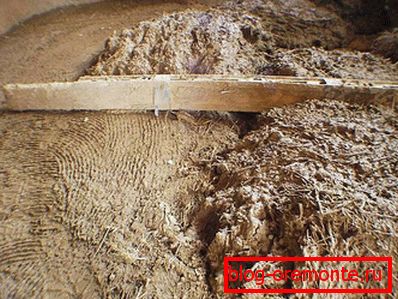
As you know, the coldest air is always from below (in this case we will not consider the principle of the floor heating). If the barn is not capital, then at best it is installed on a shallow non-warmed strip foundation, and often it is not observed. One can only guess how much the earth is frozen. The blind area with warming will seriously help, but not every person will consider it appropriate to do it. Some people pour manure around, reed or leaves and cover it with clay on top, but in the spring this structure is removed so that the walls do not rot. The method is unique, but when inside the building on the walls and the floor is frost, then at least something is better than nothing.
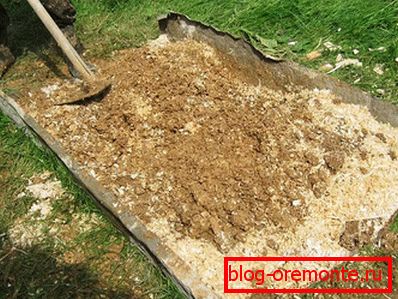
To insulate the floor, you can add soil around the entire perimeter of the building to raise the level by 10–15 cm, and then pour the clay on top and stamp it all. Such a floor can be sprinkled with sawdust, which must be periodically changed.
You can also knead the clay with straw and make a clay floor.
More seriously, insulation is carried out in capital premises made of stone, blocks or bricks. In this case, the foundation is insulated by the penoplex, a solid blind area is made, and the floor is insulated (if necessary), and the concrete screed is poured.
The situation is somewhat different with a barn built on piles.
Doing the doors
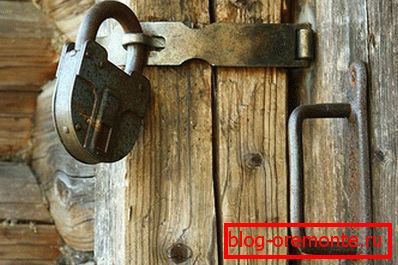
It is impossible to look at the doors installed in barns without tears. Most often, the words from the “I blinded you from what was” song can be applied to them. If, at the sight of your door, the same song comes to your mind, it means that it is not subject to restoration and you need to make a new one, preferably together with the door frame, otherwise the whole further process of insulation will be meaningless.
We hope that your door is not in such a state and will serve for some time. In this case, it can be restored. Take advantage of the experience of a person living in the village.
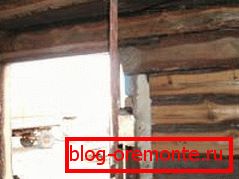
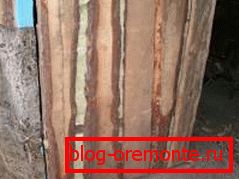
|
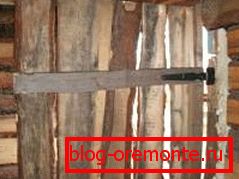
| Often you can meet just such a door. It is good in the summer, as there is ventilation, but it is not suitable for use in the barn in winter. |
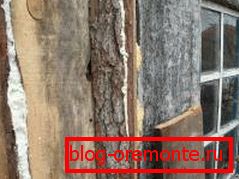
|
| The thickness of the door itself is usually small. |
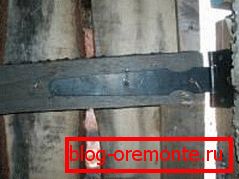
|
| Since the mass of the door after our repair will increase significantly, so that it does not sag and not come off, reinforced hinges will be required. |
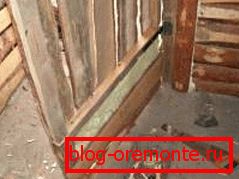
|
| Next we need the boards, it is possible substandard, only in this case there will be cracks. Such could bring with firewood, in addition, they can be cheap to buy at the sawmill. We will cut them to the width of the door, checking to enter the doorway. |
|
| We take the boards and stuff them around the perimeter of the door at some distance from each other, in order to put the mineral wool between them. |
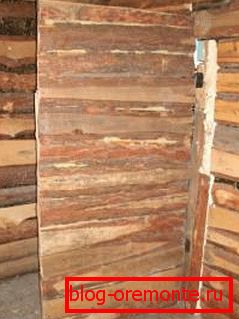
|
| Then the heater is laid and a number of boards are nailed on top. |
|
| If cracks remain, they must be replaced with foam. In order not to get the insulation wet, the door can be upholstered with plastic wrap or roofing felt. |
|
| Inside the doorway it is possible to seal the door abutment with a self-adhesive foam seal. |
|
| It turned out a curve, but reliable and warm door. |


For better heat saving inside you can hang the doorway with a tarpaulin or an old unused blanket.
What to do with the windows
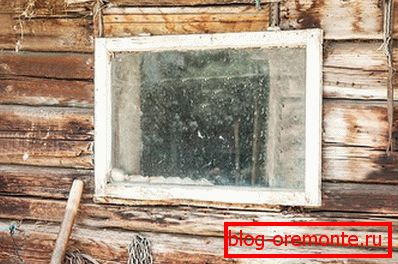
Even for the sake of maximum heat preservation, it would be extremely unwise to clean all windows, no matter how frail they are. If the frame is still not falling apart, but the glass in it rattles with each door opening, then you can use putty for windows, sealing the glass. This will partially solve the problem, but not quite, even if 2 rows of glazing are installed. It is possible to improve the thermal insulation by nailing a thick polyethylene film over the frame, having previously pressed it with slats.
Wall insulation
The structure of the boards
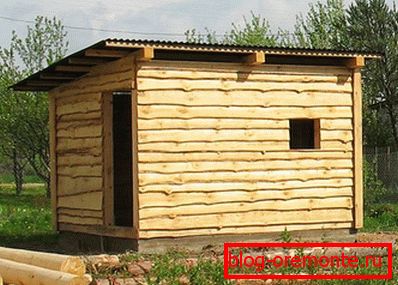
Even if the barn is built of boards, it can be well insulated.
- Boards and with good care cracked, and even in the board shed, and even more so. This phenomenon will have to fight. You can use the materials at hand (tow or dry moss) in order to repair the cracks, but this will be done much faster with the help of construction foam.
- Now from the inside you need to make a second wall at a distance of 30 cm from the main one. A frame is simply made on which the OSB sheets are screwed, and the space is filled with insulating material. Design features do not matter, as long as the system is reliable. Instead of OSB, you can use an unedged board, nailing it with a Christmas tree. In this case, the gap and the inside will have to close the mounting foam.
- So that the insulation does not pull the moisture from the floor, under it, the roofing material is laid on the ground.
What to do the work
For insulation, you can use different materials.
| Straw | This natural material can be used to insulate walls efficiently and quite inexpensively. Of course, if there is no straw nearby, then it will have to be purchased and delivered, but it will be relatively inexpensive. In its pure form, this material cannot be used, since insects may start in the straw, or it will simply start to rot. In view of this, for every 25 kg of straw, 1 kg of lime should be added. Everything is thoroughly mixed, and only after that the composition becomes suitable for filling the opening between the walls. Do not confuse straw and hay, as it is unsuitable for warming and will rot very quickly. |
| Sawdust | If there is a power-saw bench nearby (or there is another possibility of delivering this material), then dry sawdust can be used. They also need to be mixed with lime at a ratio of 1:15 (lime / sawdust). You can also add cement, about 10% of the volume of sawdust, which will make the mixture more caking-resistant and more moisture-resistant. Laying sawdust, it is necessary to ram them, of course, that this will be done within reasonable limits. After a couple of weeks, it is necessary to check and fill up sawdust if necessary, since they could be compressed. |
| loose Penoizol | Penoizol very much reminds a foamy crumb. The degree of thermal insulation is much higher than that of sawdust and straw, and if you have to buy insulation, it is better to buy penoizol, since it is not afraid of moisture, and its cost is quite acceptable - about 5-6 thousand rubles. for m3. The baby simply falls asleep in the place prepared for it and is closed from precipitation with plastic wrap. It would have been simpler to pour all cavities with Penoizol, but it would be expensive. |
| Foam | Also quite effective insulation that is not damaged by mold. Its cost is almost the same as that of loose Penoizol. Ramming is not necessary. |
| Керемзит | Expanded clay will cost 3 or even 4 times cheaper than the above materials. Give preference to the material of the fine fraction, since between the large "stones" there are large voids, which are cold bridges. If you have such a material, you can mix it with clay and fill the voids between the main and auxiliary walls with such “concrete”. In this case, the filling is done gradually, the bottom layer is allowed to grab, otherwise a large mass of the composition can squeeze out the inner wall. |
Video: sealing gaps between logs with foam
Made just half the battle, since eliminating drafts is not enough to maintain an acceptable temperature inside the room.
We will not perform warming of a log shed by the same technology as a wooden house. There is another way, which is also very effective, but is no longer used in modern homes - clay mixed with sawdust.
Of course, the clay will not be applied on bare walls, since with such work, it will simply fall off, but first we will fill the shingles from the rails.
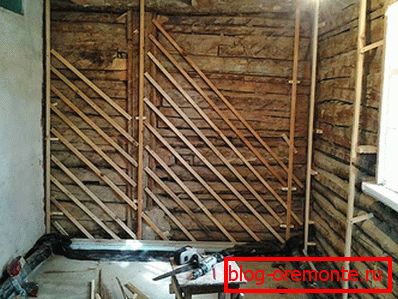
The first layer of rails nailed diagonally in one direction, and the second layer? in the opposite.
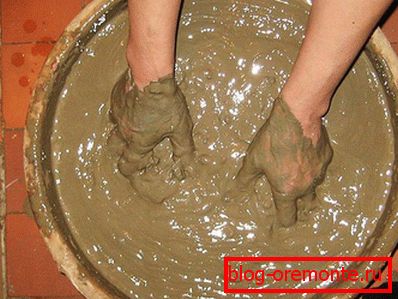
Having finished with shingles, we will soak clay for half an hour so that no lumps remain in it, and the mass itself turns out to be pliable and plastic.
If the clay is very dry, then it is better to fill it with water a few days before the start of the warming process.
You can add sand in a 1: 1 ratio to fat clay, and then, after mixing, add hay. To prevent rodents from settling in such plaster, slaked lime is added to the solution. Some use straw instead of straw, which is too tough for mice.
Now you can use the prepared solution, putting it on the wall with a layer of about 5 × 7 cm. The thicker layer will crack. Essentially, a plaster wall is being performed. The solution is poured onto the surface, and then leveled. The corners do not need to be made straight - it is better to leave rounded, adding a little solution in these places.
Depending on the time of year, the drying of the plaster may be different, but it should still take several days until the wall is ready. Accelerate the process should not be, as this will lead to the appearance of numerous cracks. Even with the right approach to doing work, a certain amount of cracks will appear, but it doesn’t matter. Prepare a solution of sand and clay (2: 1), and then rub them all the flaws.
At the end of the work, the walls can be whitened with quicklime - the view will become more attractive, and protection from rodents will be provided.
Stone or brick barn
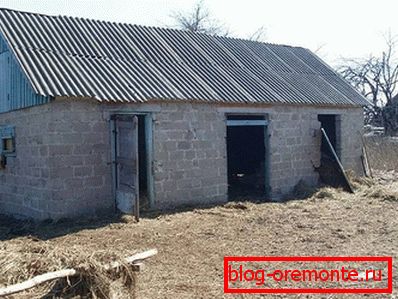
Whether brick or stone barn, its thin walls freeze through in winter. Options for insulation there are many, but many of them will cost the owner in a round sum. In addition, the approach associated with the conversion of a barn for wintering animals, somewhat different. For example, the use of foam can lead to high humidity, and chickens will peck it out, so additional protection is required.
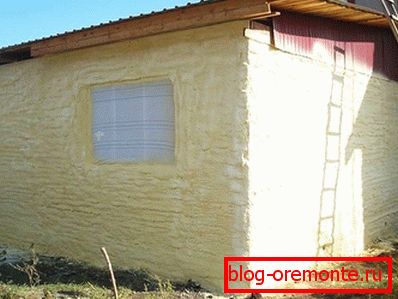
You can also perform external insulation of the walls with polyurethane foam.
Many people, learning from their own experience, recommend warming a brick barn just like wooden bricks, mixed with quicklime, or nailing a frame, shingles on the walls, and then smearing it with clay. In addition, from the inside, the second wall is made not only from boards, but also from foam concrete, which in itself is a thermally insulating material, but mice do not like it.
Video: insulation of sawdust and cement
Which of these methods you choose is a matter of personal preference.
We warm the ceiling
The ceiling can be warmed both from the inside and from the side of the attic (if there is one).
Attic side

Plastic film is laid on the attic floor. If its size is not enough to block the entire span from edge to edge, so that it comes on the walls, you can lay it overlap, gluing together with tape. If you do not take care of the vapor barrier, the insulation will soon get wet, and there will be little confusion from it. It remains to lay the straw or sawdust, and the cold from the attic does not penetrate into the barn.

Video: insulation of sawdust ceiling
Internal work
Not every barn is made with an attic - many are simply covered with slate or other roofing material. In this case, the insulation can be attached to the beams (to make a rough ceiling or fix the sheathing).
Video: ceiling insulation from the inside