How to sheathe a house with a siding under a log
A great material for building a house is a log. The only disadvantages of such a home is its high cost and regular maintenance. Having sheathed a building with a siding imitating a log, it is possible to get a house at an affordable price, in appearance resembling a log cabin. In order to understand how to sheathe a house with a siding under a log, it is important to study all the stages of work that you can do with your own hands.
Metal siding. What is it?
For the manufacture of metal siding used steel or aluminum sheets, which are applied to the polymers. This coating mimics the log (and not only) and serves as a protective layer that protects the metal from corrosion. In addition, with the help of siding, you can not only change the appearance of the facade, but also hide various defects of the walls.
Under the siding, you can place some communications so that they do not catch the eye and do not spoil the look of the building.
Choosing metal siding, it is important to know that there are several types of coatings for it, differing in the term and conditions of operation of the material to which they are applied.
Polyester
Metal siding with this kind of coating (both with glossy (PE) and matte (MPE)) is in demand in Russia and the CIS countries.
- Warranty 10 years.
- It will last 15–20 years.
Polyurethane
Polyurethane coating (PUR) is more resistant and practically does not fade, as it is resistant to UV light.
- Warranty 15 years.
- Will serve 30 years.
ПВДФ (PVDF, PVDF2)
Metal siding with such a coating, according to the manufacturer, will last a very long time. It consists of acrylic (20%) and polyvinyl fluoride (80%) and incorporates high-quality pigments designed to maintain color fastness.
- Warranty 15 years.
- Will serve 30 years.
Plastisol (PVC)
This coating of polyvinyl chloride with the addition of plasticizers is very wear-resistant, but it is not recommended to use it in the southern regions, as it is afraid of intense ultraviolet radiation.
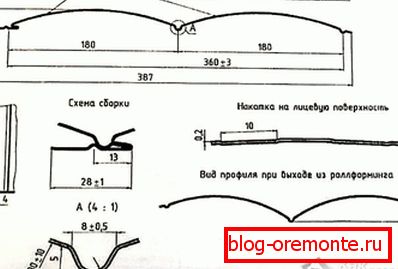
Metal siding has a width of 30 cm and a length of 3 to 6 m. You can choose material of other dimensions: a width of 0.5 m and a length of 1.5 m.
Features metal siding

Metal siding has many positive qualities:
- Acceptable cost.
- Material practical and durable.
- Not scary damp.
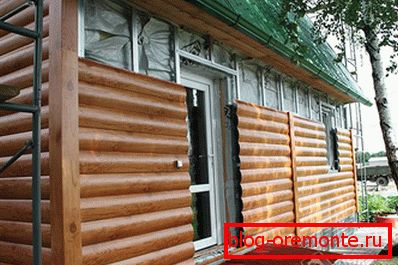
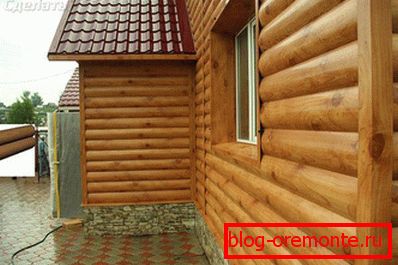
- It looks beautiful and at some distance the house can not be distinguished from the one built from timber.
- You can choose the texture, color and shade, imitating a particular tree species.
- Suitable for covering any structures.
- The possibility of building insulation.
- Fireproof and resistant to external influences.
- You can purchase panels for vertical installation.
- It is easy to look after such covering.
There are some negative qualities:
- If steel metal siding is scratched, it may rust.
- The siding is made of thin metal, which can be easily bent, and it will not work out painlessly - you will have to replace the panel, choosing it in color.
As you can see, the positive qualities are much greater.
How to install siding
Before you get started, it is important to stock up on the necessary tools and purchase all the materials you need.
Required Tools

For work you will need:
- roulette;
- hammer;
- marker;
- building level;
- plumb;
- scissors for metal;
- jigsaw;
- hacksaw;
- perforator;
- screwdriver.
Also required and materials, the amount of which you must tell the consultant. The amount of material, types of fasteners, as well as the necessary additional elements will depend on the size, shape and number of floors of the house.
Surface preparation
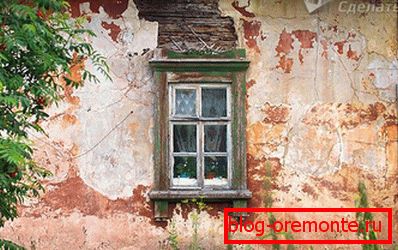
First check the surface to which the crate will be attached. When the plaster leaves much to be desired, you first need to do it. If everything is normal with the coating, then remove the peeling plaster from the wall surface and remove dust from the wall surface. It is also important to remove from the walls everything that will interfere with the performance of work. This may be a drain, antenna, and more.
Marking
The facade must be marked. On the construction slang, there is such a word as “grab”, which means the area to be repaired or covered. Grabs are applied in stages, denoting the order of work.
The second step at the marking stage is marking the position of the fasteners and their installation. When marking the place where the brackets will be attached, it is important to remember about the step, which is 60 cm wide and 80 cm vertically.
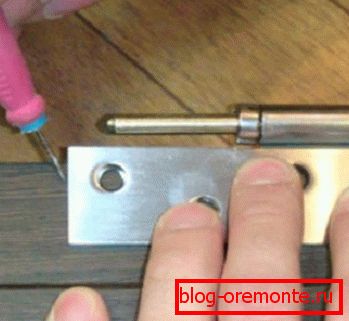
How to install brackets
By marking, applied earlier, install the brackets. First you need to drill holes to match the diameter of the dowels and anchor nails. Putting izolonovoy gasket, you can install.
As for the brackets and fasteners, the specific conditions affect the length. For example, in case of unevenness of the house (level difference), it is necessary to pick up the brackets of a certain length so that when fastening in the lower place freely protrude in areas with a large level.
A little bit about thermal insulation
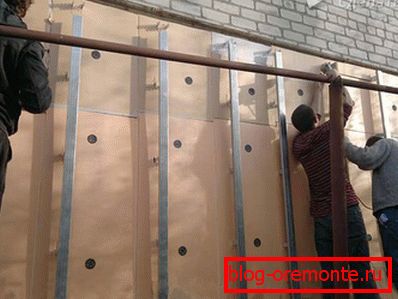
At the junctions of empty places should not be. For ease of installation of the plates use special cup nails.
Plates of insulation are fixed so that they fit as close as possible to each other.
A fixture of a dowel (plastic) with a wide hat serves as a guarantee of fixing the facade insulation. The second part is a metal rod. Per square meter take 7-8 pieces.
To protect the insulation, you can use a vapor-tight membrane. It is overlapped on each side about 10 cm.
Installation of various elements
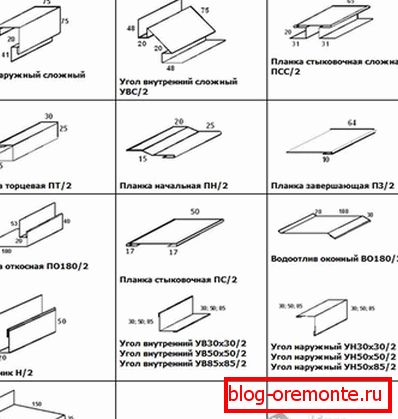
At the next stage, the installation of profiles. Fixing elements to the brackets is carried out with self-tapping screws. If there are rivets, they are also suitable as a mounting material.
After the profiles have been installed, the plane is adjusted. For this purpose, install the mount for draining water, corner connection and more. On the window sill should be fixed slatted strips.
Self-tapping screws 4,2? 16 mm fasten an initial level and socle drain to a wall. Installation is best done on the lower edge of the vertical profile. In the process of work it is necessary to check the horizontal level.
How to fix siding
- When installing the siding under the log, it is worth remembering that the trim start to perform, installing the first row, and attach it to the starting bar.
- The upper edge of the bar is attached to the profiles with self-tapping screws.
- Further work is done as well. Constantly check the horizontal installation of the attached planks level.
- In the process of work, some inexperienced owners make a gross mistake - fixing the bar to the vertical element butt. This is a serious violation, since metal siding tends to change its size depending on the temperature. As a result, deformation of the facade structure may occur.
- Finally, the installation of the last row, adjacent to the roof, is carried out with the help of special elements and slats.
Following the step-by-step guide, you can install the siding under the log is not worse than experienced professionals. A beautiful and warm facade will delight the eye for a long time.
Also read:
- We sheathe the window with siding.
- House covering siding do it yourself.
- Finishing gable siding.
- How to do sheathe facade siding with your own hands.
- Laying siding.
Video
Watch the video installation guide for siding under a log:
This video is about metal siding. You will be told about the choice and features of the installation of this material: