How to seal the ceiling joints between the floor slabs
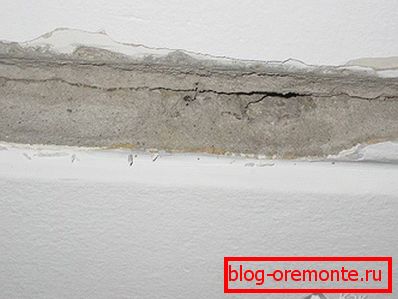
Very often in homes there is such an unpleasant phenomenon, as cracks in the ceiling. This happens for various reasons: house shrinkage, improper repairs, large temperature drops, dry climate, poor solution, etc. The view of such an apartment will be very unattractive, but that’s not all. If you are a resident of the upper floor of a multi-storey building, a through slot will cause odors from the attic to enter the apartment. Since the sealing of seams does not require special knowledge and extensive experience, any person will be able to perform the work.
Where to begin?
If the ceiling cracks? rest assured, in time they will only become more. Therefore, for a fundamental solution to the problem, we need appropriate measures. Correct actions are a guarantee that you will no longer return to this question for a very long time. Before starting work, make sure that you have all the necessary tools. Here is what you need:
- ladder;
- perforator;
- spray gun;
- wide and narrow spatula;
- narrow metal brush;
- primer for concrete;
- cement or gypsum plaster;
- finishing putty;
- capacity for mixing the solution;
- serpyanka mesh.
Stages of work
It is necessary to completely remove the whitewash. For this we need a spray. With its help, you need to spray a small portion of the surface with water and allow it to soak in (usually not more than 5–10 minutes). Now, with the help of a large spatula, we will remove the old coating, and then we will deal with the next section.
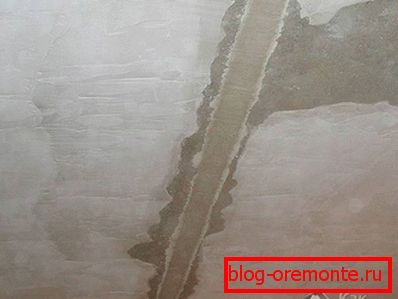
After complete cleaning of the ceiling, it is necessary to remove the old solution from the gaps between the plates. Perform work punch. Set the shock mode without rotation and clean the seam to a depth of at least 50 mm. Shallow seams can only be slightly extended with a spatula.
Take a metal brush and carefully clean the interplate space. This is followed several times by priming the gap and the space near it. This treatment provides better contact with the solution that will fill the gap.
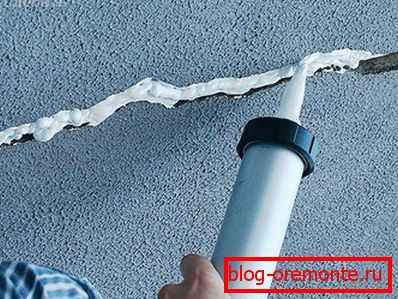
If there are very wide gaps between the ceiling plates (more than 50 mm), they must first be filled with mounting foam, because it expands and fills the voids well. Excess foam (after curing) must be cut so that a cone is formed inside the seam with a very obtuse angle.
Further work is carried out using gypsum plaster, which is filled with the remaining voids. The gaps should be sealed very carefully using narrow and wide spatulas. Try not only to apply the solution, but to deepen it as far as possible in the gap. Then use the same trowel to level the mixture so that it is flush with the ceiling.
After that, we begin to reinforce the seam. This is done using a serpyanka mesh, which is applied to a thin layer of putty. Serpyanka superimposed on the seam itself and the surface of the plates to a width of 10 cm from the seam. Press the serpyanka into the solution, and remove excess putty with a spatula.

After hardening putty, it is necessary to completely primed the ceiling. Since the cleaned concrete slabs well absorb the primer, the procedure can be repeated two or even three times. Then proceed to leveling the surface with a putty, which should be applied and smoothed with a wide trowel.
If during the cleaning of the seam with a perforator, a round hole appears, then you will have to work harder to seal it. First, you need to thoroughly clean the inside of the hole of the pieces of the old solution and fine dust. Do it better with a narrow metal brush.
Treat the inner walls of the "hole" several times with a primer. Fill the hole with foam. After hardening, the foam must be cut with a knife so that it forms a cone with an obtuse angle inward. It is necessary for reliable fastening and leveling putty. Then put a thin layer of putty on the hole and near it, press it with a roller and let it dry.
Since finishing the seams requires finishing work, we suggest you read the articles that will help complete the ceiling repair:
- Remove the yellow spot.
- Paint roller.
- Coloring with water-based paint.
- How to putty.
- How to paste wallpaper.
- Sticking the ceiling tile.
- Whitewash.
- Gluing the baseboards.
- We cut the plinth.
- Choosing the right adhesive for baseboards.