How to prepare the walls for painting
Currently, for the design of the premises used a huge number of design options. Coloring of walls in various tones and combinations is widely applied. In order to lay the paint evenly and hold on for a long period of time, before starting painting work you need to learn how to prepare the walls for painting, because only this way you can be sure that the result will be excellent.
Stages of preparation
Depending on the type of walls and the presence of any kind of coating on them, the approach to their preparation will change, so we will consider how to do the job properly with your own hands.
This must be done first.
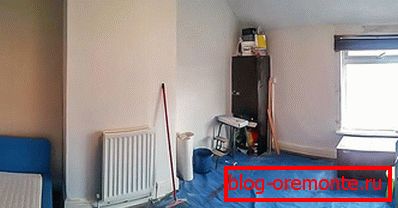
We strongly recommend de-energizing the room by turning off the power supply in the instrument panel. Otherwise, it is possible that electric shock will occur if the wiring is accidentally damaged. Remove the switches and sockets if you have to plaster the walls. We will not talk about shelves, paintings and sconces, it is clear that they should not be indoors, but it is better to take out heavy pieces of furniture too. In the extreme case, they can be wrapped with polyethylene, secured with scotch tape, and then covered with cardboard so that a fragment of plaster that has flown away suddenly does not damage the cabinet or upholstered furniture.
No matter how carefully you wrap a wardrobe or a sofa with polyethylene, there is still a high probability that dust will get inside.
Walls after wallpaper
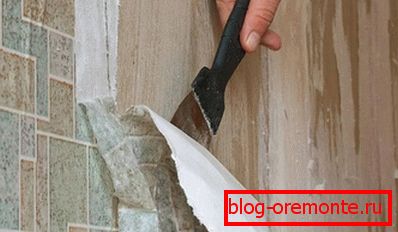
First, the old coating is removed from all surfaces - wallpaper or paint. If the wallpaper is moving away poorly, they are pre-moistened with warm water and then removed with a spatula. The walls are cleaned of dust.
If, when stripping off the wallpaper, the old plaster peels off the wall and there are large cracks, then it is removed completely.
How to remove oil paint
Often in apartments and houses can be found painted with oil-painted walls, which firmly ingrained in the base. But this is not a sentence, as there are several ways to remove it.

- The usual, simple, but the most time-consuming method is to remove the paint with a metal scraper.
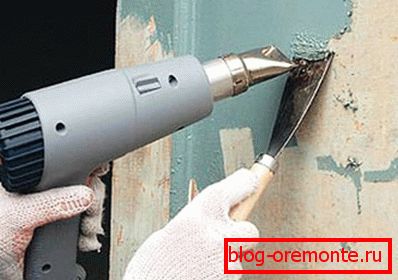
- You can use the building dryer - a small area of the painted wall is heated so that the paint swells up and is easily removed with a narrow spatula. The work is dustless, but the smell of burning will be very strong, so you will need to constantly air the room, which is not always convenient to do in the winter. Immediately it is worth making a reservation that it will relatively quickly go with a painted wooden surface. If the wall is made of dense building material (stone, brick, concrete), then it will need to be warmed much longer, so heat will be absorbed by it.

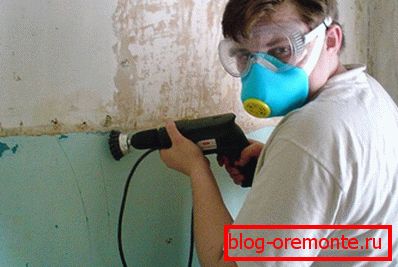
- Not for the first year, people use paint removers, but if you have to clean a large section of a wall or even a few walls, then this technology will turn out to be very expensive, in view of the need to purchase a large amount of this chemical. Choosing this method, you need to consider that for people with allergies, it is not suitable. Masters advise to work in a respirator, but it does not protect against evaporation - only a gas mask will help. In addition, the remover is very aggressive and comes into contact not only with paint, but with everything that comes into contact with it, including with human skin. With careless handling, you can get a serious chemical burn, after which an ugly scar will remain on your body.
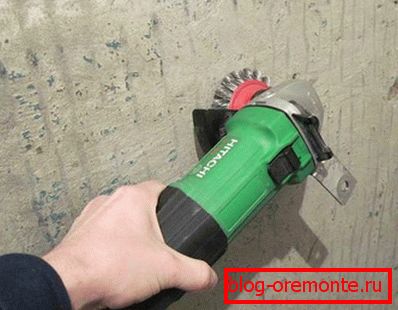
- With the help of grinders (or drills) and nozzles (like brushes for metal) you can cope with the task relatively quickly. The method, though effective, is very dusty and noisy. In addition, pieces of paint scatter in different directions with great speed and can even sink into the body, therefore not only eyes need protection. You also need to take into account the wear of the tool (the grinder must be protected from penetration of dust) and consumables. Calculate how much m2 you have to clean and divide by 5 - this will be the number of brushes that will wear out during work. We explain the calculation - 1 brush is enough to clean 5 m2 surface.
Water paint removal
Water emulsion paint began to be widely used not so long ago, but often there is a need to upgrade it or paint the walls with oil paint. First of all, you need to figure out whether it is necessary to wash off the emulsion paint at all. The fact is that if the paint does not peel off, and there are no other compelling reasons for removing it, then there is no need to remove it. In such a situation, you can apply a layer of fresh paint over the old one. First, remove dust from the wall and prime the surface with an acrylic primer. After the wall is dry, you can paint it.
If the old paint is churned, peeled off, does not resemble the color or many layers of paint are applied, then it will have to be removed. Consider some ways.
Use water

Of course, flushing is not carried out with water from a hose, so some tools will also be needed:
- High stool, and if the repair is performed in the apartment stalinka, then you need a stepladder.
- Narrow and wide metal trowel.
- Wide water tank.
- Roller with a long handle.
- Respirator and glasses.
- Brush on the metal.
We cover the floor with newspapers or plastic wrap.
How to wash ordinary emulsion
- In the prepared container to gain warm water.
- Wearing glasses, dip the roller in the water and wet it with the wall section on which the paint will be removed.
- In addition to the glasses, after 15 minutes, also put on a respirator and start to remove the wet paint with a scraper.
- If there are places where the paint does not tear, the soaking procedure must be repeated. If this time did not work, then you can use a brush on the metal.
- Having finished cleaning the intended area, you can proceed to the following.
Wash away waterproof emulsion
Algorithm for removing waterproof emulsion paint will be as follows:
- If after wetting the paint is not wet, it means that it is moisture resistant and therefore it needs to be scratched with a brush on metal, removing the top layer.
- Now you need to moisten a fragment of the wall several times with water at an interval of 10 minutes. This procedure is performed until the paint swells and becomes pliable.
- Further, the cleaning process is the same as in the previous case.
Glue use
Many people know the picture when, when removing the wallpaper, the coating applied to the wall goes away with them. Now use this method to remove the water emulsion.
- We need the usual paste or glue for wallpaper and newspapers or old unwanted wallpaper.
- Glue is applied to the paper, after which it must be thoroughly glued to the wall, otherwise all the paint will not come off.
- After our improvised wallpapers are dry, they are removed, using a spatula.
- It remains to view the wall and with a spatula or brush to remove the remaining paint.
As is the case with oil paint, a Bulgarian or a hairdryer can be used to remove a thick layer of emulsion.
Chemicals
On sale there are many effective preparations intended for washing of water-based paint. Unfortunately, they are unsafe and can, if they do not comply with the manufacturer’s instructions, harm human health. Although the instructions for use may differ slightly depending on the manufacturer, it boils down to one thing - the product is applied to the wall (except plastic), and then after 10-15 minutes it is removed together with the paint.
How to clean old paint from drywall
As a rule, no one ever paints plasterboard walls, so in most cases they do not need to be cleaned of paint, and minor irregularities or pits can be leveled with putty.
If such a need has arisen, then it is important to remember that by tearing off the paint, you can tear off the cardboard. Therefore, cleaning work is best done with emery cloth or washers. Then the wall is dedusted and impregnated with primer. In this preparation of the base of drywall finished.
Having finished with removal of old paint, we will start preparation of the basis.
Brick and concrete walls

The plastered walls, which have large holes and cracks, are treated with a cement-sand mortar, and after it is dried, with a starting putty, which in its composition has particles of fine sand. It is applied with a layer up to 5 mm. This putty fits well on the wall, does not crack when dry, and does not shrink. The curing time is about 40 minutes, so it should be diluted in small quantities.

If the irregularities are more than 4 mm, a reinforcing mesh is used. First, the wall itself is aligned, and then the corners. Concrete walls should be without cracks, but if there are any, they should be leveled together with the grooves with a putty.
Types of putty
In terms of its composition, the applied putty is divided into several types:
- Cement. The most affordable option, has good quality, but not quite plastic, can cause slight shrinkage during drying.
- Гипсовая. It has good elasticity, has poor sound conductivity, also retains moisture, but quickly hardens and has a high cost.
- Polymer. When hardening, it becomes very strong, tolerates temperature fluctuations, does not shrink, but is the most expensive in its segment.
Spatula process

- After drying, the walls are finished with a finishing putty. All the material should be of the same color, as stains may appear after painting. It is applied with a layer up to 2 mm across the entire wall, even where there are no microcracks.
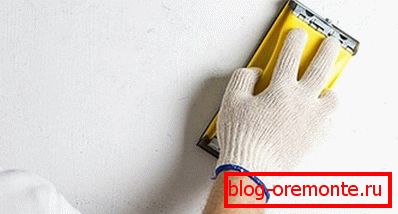
- Then, after curing, the walls are cleaned with sandpaper or a grinder. During this procedure, all minor irregularities are removed.
- The wall for painting is cleaned from dust, and a primer is applied with a roller. For each type of surfaces selected the desired composition of the mixture. After all the above actions, the walls are ready for painting.
If before starting work on the walls there are traces of mold or dampness, then they are treated with special compounds against fungus and mold. And raw places are dried before.

So, in order to lay the paint evenly and hold on for a long time, the walls must be perfectly smooth, without any irregularities.
If you decide that this occupation is not for you, then before inviting the masters, you need to know how much this work costs. Rates fluctuate within 150 rubles. for m2, but so that the amount does not grow "accidentally" by a third, or even half, agree in advance with the team leader to come and, assessing the complexity of the work, call the specific amount.