How to make shelves on the wall
Self-made shelves allow efficient use of space and create an individual interior. Home craftsmen are not limited in their imagination in the choice of form and material, but we must not forget about reliability. Among the popular materials for the shelves: glass, wood, drywall, plastic and chipboard. Working with them does not require the purchase of special tools, and the result can become a highlight in the decor of the room. Consider how to make shelves on the wall.
Classification by design and location
All products can be divided into several types:
- Classic wall - a common option, characterized by simplicity of design and mounting on the wall with the help of corners, screws or in other ways. Such a regiment is easy to do yourself.
 Suspended - the product is attached to the ceiling and held with cables or chains.
- Corner shelves are different from the classical support at the same time on two walls, most often this design is used in the bathroom.
- Floor - the design has no fastening with a wall, it is placed on the floor and rests on legs or a solid surface.
- Open or closed shelf design - in the first case its contents are accessible for review, and in the second it is hidden behind a door of glass or wood.
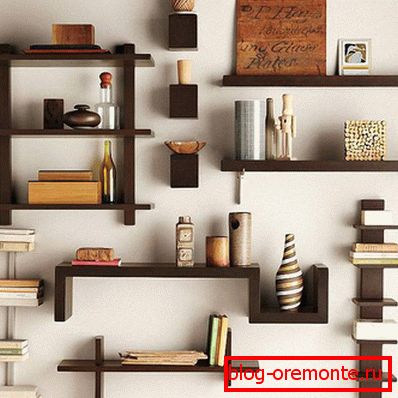
- Decorative shelves are made without taking into account the shape of any material, their main purpose - interior decoration.
Material selection
Determining the choice of material for the shelf, you need to take into account its purpose.
Plastic. For use in the utility room or on the balcony, you can use plastic, inexpensive and moisture-resistant material.
Drywall A common option for the bedroom and living room - a shelf-niche of plasterboard, giving the interior originality. In the manufacture of shelves in the bathroom, use moisture-proof plasterboard, and the outer surface is trimmed with ceramic tiles.
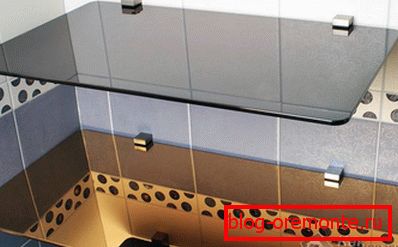
Glass. The material is able to decorate any interior due to its lightness and transparency. Working with him requires caution and care. In the bathroom it is better to use glass in combination with stainless steel.

Wood, as well as chipboard and MDF are suitable for any design. It is easy to work with a tree, it is durable and attractive. Such shelves are appropriate for any room design style. For self-production is the best option.
Making wooden shelves
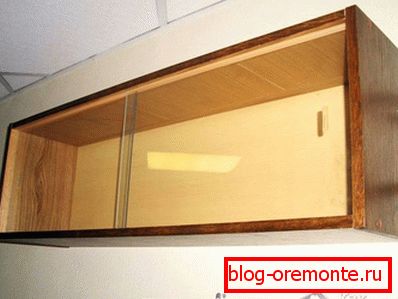
Suppose you want to make a shelf for a convenient place for books. For work you will need:
- boards of 20? 200 mm;
- plywood sheet;
- wood screws;
- varnish, stain or paint;
- pencil and tape measure;
- drill;
- hacksaw;
- level;
- grinder or sandpaper.

The classic rectangular shelf with side parts and top will be made. Size of construction: width 200 mm, length 1000 mm, height 290 mm.

The first step is the drawing of the future shelf, all dimensions and the location of the parts are marked on it. The product consists of two parallel boards with side parts inserted between them, the back part is covered with plywood.
- A hacksaw saws off two boards of 1000 mm and two of 250 mm each. A blank of 1000 × 290 mm is cut out of plywood.
- Boards are processed with a grinder or sandpaper to smoothness.
- Blanks are varnished, stained or painted.
- After the parts have dried, the assembly begins: on the lower and upper parts, departing from the end 10, and from the edge of 50 mm, points are marked. Using a drill, 4 holes are drilled in each board.
- The side parts are attached to the bottom part and screwed into the holes with screws. The upper part is fixed as well.
- A sheet of plywood is attached to the ends with small nails.
- At the ends of the side parts brackets are placed and screwed with screws.
- On the wall with a level marked place for mounting the shelf. The distance between the brackets is measured and deposited on the wall. Screws protruding 5–7 mm protrude at these points, a shelf is hung on them.
From plasterboard
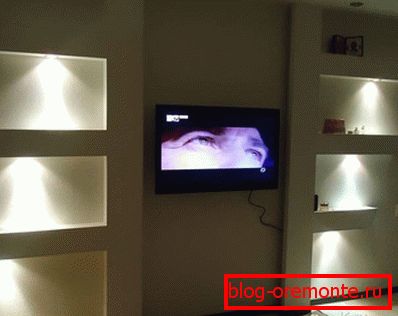
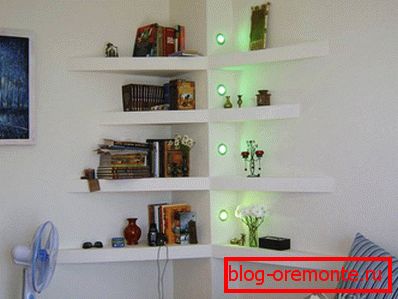
A drywall construction can make a room look different, especially if it is a multifunctional structure between walls. There are books, vases, souvenirs, frames and even a TV set on it. The addition of shelves with backlighting from spotlights or LED strips will make them more spectacular and more attractive.
For the manufacture of construction will need:
- guide profile UD;
- self-tapping screws;
- plasterboard;
- reinforcing mesh;
- putty;
- level;
- screwdriver;
- construction knife;
- plum, roulette, carandas;
- metal scissors or Bulgarian;
- putty knife.
Before mounting the frame, a drawing is drawn up, all dimensions and location of the shelves are applied to it.
- The wall is laid out according to the drawing. All marks are applied by level, the reliability of the design depends on it.
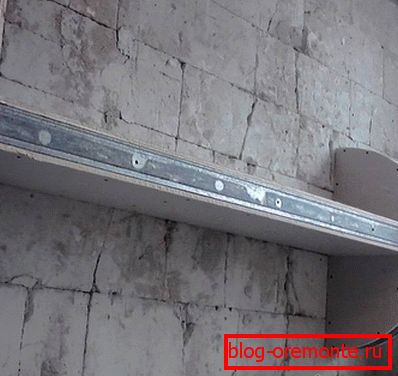
- In the guide profile, drill holes for dowel-nails. The profile is screwed to the wall along the marked lines. For stability, the frame is attached to the ceiling and floor.
- The bulkiness of the construction gives the installation of jumpers from the CD-profile. The joints are fastened with crabs - metal fasteners for drywall.
- At production of the shelf under the TV the usual profile is replaced with a metal corner.
- After the assembly of the frame, if there is a backlight, the wiring is laid.
- The dimensions of the shelves are transferred to drywall, which is cut by a construction knife.
- The frame is sheathed with cut parts that are fastened with self-tapping screws. For shelves with a high load, a material with a thickness of 18 mm is used; for ordinary shelves, 12.5 mm is enough. For mounting fixtures in drywall, holes are cut with a special nozzle on the drill.
- All joints are covered with a reinforcing mesh and coated with gypsum putty. After the seams have dried, the entire surface is covered with starting putty. Smooth ends helps to create a special galvanized profile. Finishing is completed with finishing putty and painting.

Any shelf, made independently, will become not only a functional subject, but also a reason for pride.
Video
This video shows how to install shelves with hidden fastening:
And here you can see instructions for making a wooden wall shelf of an interesting design: