How to make an aquarium with your own hands
Most of us love animals. Someone prefers a cat or a dog as a pet, someone loves exotic things and gets raccoons, chameleons or skunks. Some want peace, which brings with it fish watching. That's just for the latter and will be useful information on how to make an aquarium with your own hands.
Sealant selection
Clay plays a major role, since it is thanks to him that the fixation and further retention of the whole structure is carried out. There are many types of substances with which you can connect the pieces of glass to each other. But in relation to the glue for the aquarium the following requirements are put forward:
- нетоксичность;
- high strength;
- elasticity;
- presentable appearance;
- relatively fast setting;
- ease of application;
- long service life;
- high degree of adhesion.

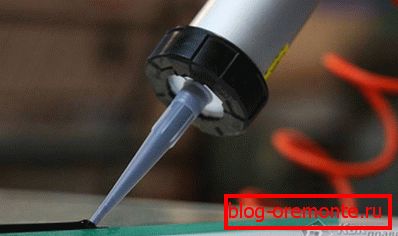
All these properties has a silicone sealant. But when buying, you should pay attention to the fact that it was 100%, free of impurities and not anti-bacterial, otherwise animals will simply die. Today there are three primary colors: white, transparent, black. If you use the first, the aquarium will look like a certain incompleteness. The second is well suited for products up to 100 liters. Anything more is better to glue with black. Small designs with it look very cumbersome, but in large ones, on the contrary, it emphasizes lines and gives elegance. The choice of those who have been building aquariums for some time often falls on the Dow Corning 911, KNAUF 881 or Kleiberit Suprasil 590E.
Typically, manufacturers themselves indicate that a particular type of sealant is intended for the manufacture of aquariums. But be sure to see the composition.
Glass selection
If you decide on self-assembly of the aquarium, then now is not the time to save. There are many options for tables and calculators that promise to produce the perfect result. But rarely where the need to install transverse or longitudinal struts. Before proceeding to the choice of glass thickness, you need to decide on the desired size. If you do this operation for the first time, then it is better not to risk with non-standard shapes and bends. Next, we calculate the volume of our design. To do this, multiply the length, width and height. Roughly speaking, the standards will be as follows:
- up to 30 l - 4 mm;
- up to 80 l - 5 mm;
- up to 150 l - 6 mm;
- up to 220 l - 8 mm.
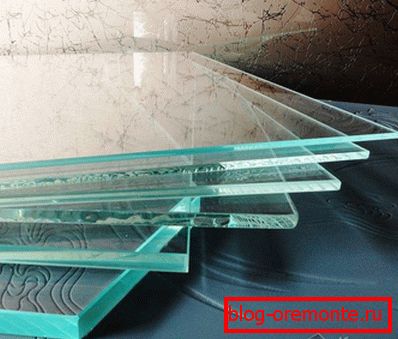
Below is a table in which the main points are taken into account. It will allow you not to make a stock, which will reduce costs a little.

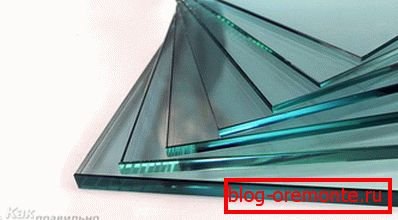
You should not use glass that has been lying in the basement, garage, standing in a shop window or in another place for a long time. The fact is that in a certain sense this type of material also has its own life. It interacts with the environment, which leads to the loss of sodium ions. They will be replaced by other particles that weaken the strength. You need to buy new and consider the following:
- Suitable silicate glass. Silicone sealant perfectly interacts with it, which forms a molecular bond, which allows it to withstand a pressure of 200 kg per 1 cm of the seam.
- Better if it will be the brand M1.
- There should be no sagging or irregularities.
- Choose where there are no bubbles. On the one hand, they will violate aesthetics, and on the other, weaken strength.
- If the edges are already polished, they should be perfectly smooth, since the sealant interacts better with these surfaces.
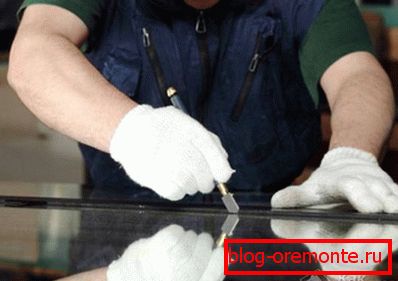
If you have never done glass cutting, it is better to order it in the workshop. This is a very crucial moment, because the edges after cutting should be perfectly smooth, otherwise it will not work to glue them securely. Prepare two copies of the drawing. Provide one to the glazier, leave the other to yourself so that later there will be no questions in case of inconsistencies.
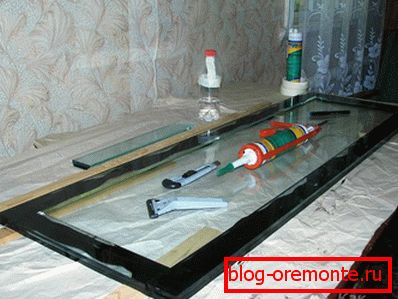
Instruments

After the main expenses have been completed, you can start preparing the necessary tool, and the following elements will be needed:
- silicone gun (also called a skeleton);
- metal corners;
- small clamps;
- small masking tape;
- office knife with a retractable blade;
- small spatulas;
- substrate to create a gap.
Metal corners and clamps can be replaced with corner clamps. But if you do not use them in the future, then there is no point in spending money on their acquisition.
For assembly, it is better to choose a flat surface, it should be stable, and its size should allow to freely place all the constituent elements.
Designs

Depending on which configuration is selected, the angles may be:
- straight;
- acute;
- stupid.
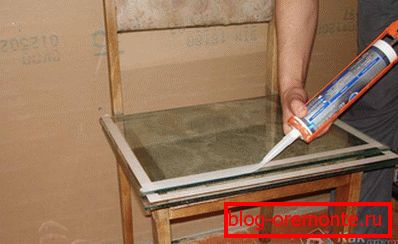
Before applying a sealant, it is very important to degrease the surface. To do this, you can use alcohol or acetone. The size of the seam is chosen for the load that will be on the glass:
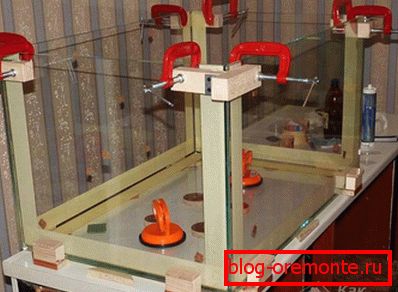
- Up to 100 liters. A thin strip of silicone is applied. To make this easier, press the tip of the tube into the finger and press it against the edge of the glass and slide from one end to the other. Better use gloves to avoid cutting your hands. After that, the glasses are joined. It is not necessary to press them strongly. To ensure the correct angle, a metal corner is applied on the outer face. Lining is made of cardboard and everything is pressed with the help of clamps. At each corner you will need one profile and two clamps.
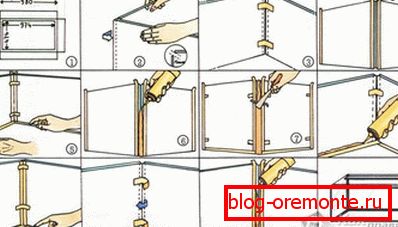
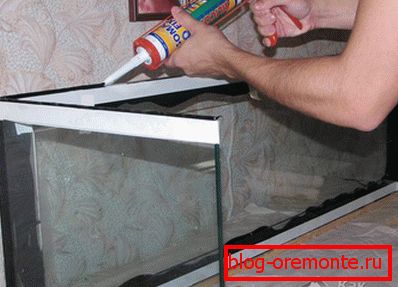
- From 100 to 200 liters. A margin of 2-3 mm from the edge is made, a strip of masking tape is glued. Next, the resulting area is filled with sealant. In the process of applying, it will be seen how after each pressing the nodules appear. To eliminate them, after complete application, you can take a small plastic plank or spatula and make a semicircular incision in it according to the shape of the seam. It now remains to hold the glue to align its thickness. Next, the glass rises to a vertical position and a second one is inserted to it (it must also be glued with a stopper made of painting tape). The angle and docking are carried out as in the first case. Excess sealant can be removed with a spatula or cut off after drying with a stationery knife. While the glue is fresh, sticky strips of adhesive tape are removed.
 From 200 liters, as well as for obtuse angles. As in the previous case, a restrictive tape is glued with a margin of 4-5 mm from the edge. Before applying the sealant, both glasses are fixed with a metal corner and clamps. At the same time between the planes must provide a gap. For this fit a small bar. Final fixation is performed and the lining is removed. Silicone is applied from top to bottom. This should be done in such a way that it fills the gap well. After that, protruding excess sealant is removed, as well as masking tape. If the angle is obtuse, then it is necessary to prepare in advance the profile that will fit the configuration. Everything is fixed in exactly the same way; a fixing composition is applied. But in the end we need a small spatula, which can form a round seam on the inside of the aquarium. From the outside you can do everything flush.
The bottom can be installed in two ways:
- the walls rest on it;
- built around it.
In the first variant, the common frame is assembled first, after which it is turned upside down, degreased, sealant is applied and the glass is laid. In the second variant, the gluing of the walls will need to be carried out together with the gluing of the bottom.
In some cases, another glass may be used to reinforce the lower edge. In this case, the two elements are glued together over the entire area.
If the design implies the presence of stiffeners, then it is important to remember what requirements they must meet:
- the size of the longitudinal must be equal to the length of the larger wall;
- width should be from 5 cm (for models up to 50 liters, 3 cm is enough);
- glass of the same thickness should be used;
- to give greater strength stick it overlaps, and not on the inside.
Full drying of the sealant usually takes up to three days. At this time, it is better not to move the structure and not to violate its integrity. If this is not met, then the seams simply will not sustain the planned load.
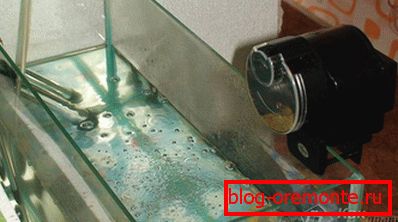
Installation
After the aquarium has already survived the required period, you should not install it at the planned location. It is better to test it. To do this, it is brought into the bathroom, placed on a flat surface (you can build a stand and place it on the bathroom) and filled with water to the desired level. In this state, it is left for several days. If all is well, the fluid is removed, and the structure is mounted on its pedestal.
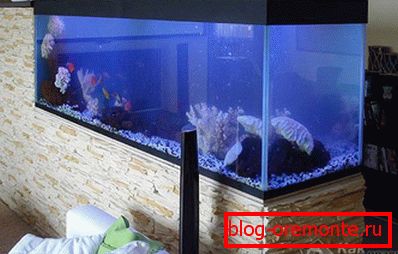
From the aquarium, you can make a partition between the rooms. In the event that it will be in the replacement room, it is necessary to take care of the presence of ventilation. Due to this moisture will be removed, which evaporates, which eliminates the formation of fungus. There will also be an unpleasant smell. The surface above the aquarium is better to close the vapor barrier - foil. If it is simply installed on a separate pedestal, then it is covered with a plastic cover with slots for air circulation.
In any of these cases, under the aquarium is better to lay a layer of foamed polyethylene. This will compensate for some irregularities, which will prevent the risk of chipping.
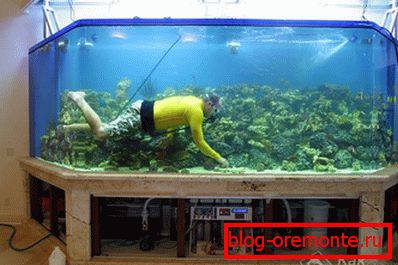
Interior arrangement
The location of the internal elements is, by and large, an expression of the owner’s inner world, but there are some rules that should be considered:
- At the bottom it is better not to lay sand. He quickly collects sludge, which will lead to the need for frequent cleaning. It is better to use small and medium-sized pebbles. Only large will not work, because the plants will not be able to cling to the roots.
- Algae are selected for future inhabitants. They are an important part of the microflora, because to some extent they provide water purification, as well as its saturation with oxygen.
- Additional decorative elements and snags will not be easy to serve to improve the interior. For some species of fish who like to spend time in solitude, they are simply necessary.
- Be sure to install the pump and filter. They will ensure the flow of water, as well as the removal of accumulated harmful substances that could lead to the death of the inhabitants.
- An integral attribute will be an aerator. It provides sufficient oxygen.
- In order to have enough light, special lamps are installed for aquariums that can emit ultraviolet light.
Clean water is used for the aquarium. It should not be boiled or mineral. It is necessary to give it a good stand. Fish can be run two weeks after everything has been mounted and installed.
Service
The whole process of caring for the aquarium and its inhabitants is as follows:
- Verifying the operation of all pumps and filters.
- Cleaning filters as they get dirty.
- Walls can be cleaned with two brushes with magnets embedded in them. They are simply installed on different sides of the glass and move in parallel.
- In order to determine whether to clean the bottom, you need to move the stick along the ground. If air bubbles rise, there is a need to take action. For this purpose, special mud scrubbers are used. It can be made independently. You will need a plastic bottle, a silicone hose and two syringes. From one syringe we do a sleeve, cutting off all excess parts. In the second we cut the stops for the fingers, and on the place of connecting the needle we cut a hole of 5 mm. We connect them together so that the sleeve is at the bottom. Connect the bottle and syringes with a hose. The process boils down to the fact that the syringes are immersed in the soil, and with the help of a bottle, pressure is created that raises all the sludge. Next thing for the pump and filter. In some cases, it may be necessary to completely replace the water. During this period will have to take care of temporary housing for fish.
As you can see, if you approach the issue wisely and don’t regret money for basic materials, then you can build an aquarium at home with the most positive result. Now you can try to make aquariums semicircular or conical shape.
Video
About the methods of gluing aquarium glasses in the following video: