How to make a visor over the porch 2
The front door in a private house / cottage is exposed to aggressive environmental influences. The visor will partly protect the door from destruction. There are many options for mounting these structures. In this article you will learn how to make a visor over the porch so that it is a beautiful and reliable decoration of the house, properly performing its basic functions.
Purpose
The main functional purpose of visors:
- Protect the front door from rain and scorching sun.
- Provide comfort to the homeowner. For example, it is more pleasant to open the lock under a canopy, especially in bad weather.
- Decorating the exterior of the house.
Varieties
Most often, the owners of private homes make visors for the order. If you also do not have time for the manufacture of this design, then you can do the same. But if necessary, save the family budget, you can make a visor with your own hands. Whatever it was, so that you can have a high-quality visor that meets your needs, we suggest that you familiarize yourself with the varieties of visors and their features.
Polycarbonate
Polycarbonate visors are now in great demand among consumers. This is not surprising, because this material has several advantages:
- Durable.
- Lasting.
- Practical.
- Sold in a wide range of colors.
Although there are materials to cover the visor and cheaper, but the performance characteristics of polycarbonate fully justify its cost. Below is an instruction for the manufacture of arched visor from this material.
Of metal
To work with metal you need a welding machine and some skills in working with it. Although metal is cheaper than polycarbonate, but working with it is an order of magnitude more difficult. It is possible to bypass welding works, using mechanical standard connections of metal elements by means of bolts and nuts.
Among the advantages of metal worth noting:
- Reliability.
- Affordable.
- Durability (provided that it will be treated in a timely manner with anti-corrosion agents).
It is because of the need for regular care of the metal, many consumers refuse to manufacture canopies from it.
To install a polycarbonate visor, you still have to make a metal base under it. In this case, the advantages of polycarbonate are still greater, since the framework for it takes up to 30% of the entire structure, due to the lightness of the roofing material. And if you cover the structure with a metal visor, you will have to take care of the frame and the roof.
From plastic
Plastic plates, suitable for the device visor is more expensive than PVC, used for interior work. Therefore, the cost of PVC roofing is not as low as we would like. Externally, these plates resemble polycarbonate.
Plastic can be installed on the frame of any shape. You can buy white plates and stick a film of the desired color on them or buy them already pasted.
Material advantages:
- A light weight.
- Durability.
- Reliability.
- Easy installation.
From a professional flooring

Today the professional flooring is in great demand among consumers. In terms of sales, it can be said that he has taken a leading position in the market. It is used for the manufacture of fences and roofs. Among the disadvantages of the material, it is worth noting the instability to mechanical damage. Even the lightest dent will already be noticeable on the profiled sheet.
If you decide to purchase this option of a covering for arrangement of a peak, then buy a professional flooring of higher quality and thicker. It is much easier to work with it than with metal tile and metal.
From metal tiles
If you decide to make a visor of metal, then remember, its color and structure should match the roofing material of the roof. The difference in color and texture, even the most insignificant, will be very noticeable.
It is best to make a visor of metal tiles at the stage of covering a house or another building, at the entrance door to which you decide to make a visor. In this case, you can make a visor from the remains of metal from the roof of the roof.
As a roofing material for the visor can also be shingles or other similar roofing material, even roofing material of the domestic manufacturer.
From wood
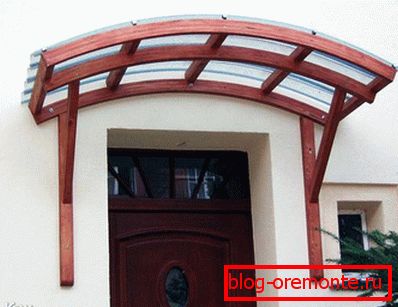
This refers to the manufacture of wooden frame. The same polycarbonate, metal tile, sheet metal, slate, etc. can be useful as a roofing material. For old-type houses, this visor is best suited. In addition, among the buildings, the exterior of which is suitable for the wooden construction of the visor - houses from a log house, restored mudricks and structures made in the style of fakhverk.
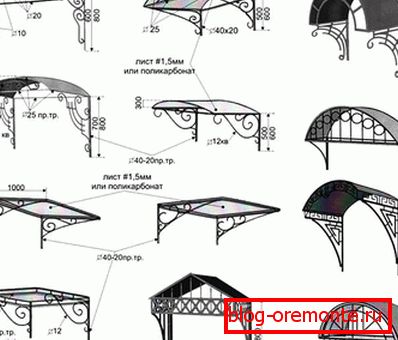
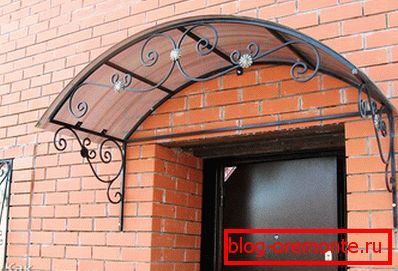
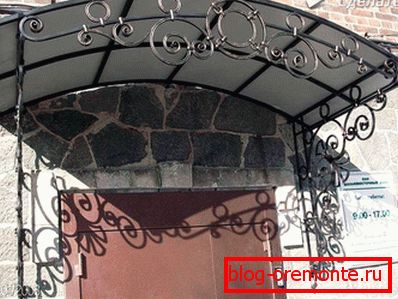
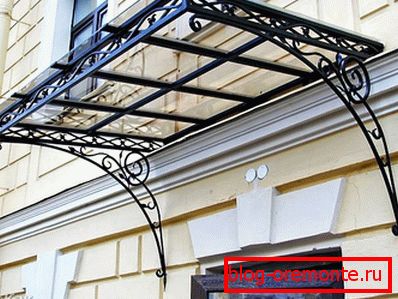
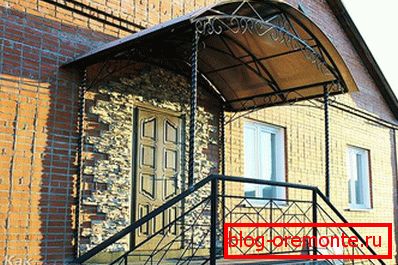
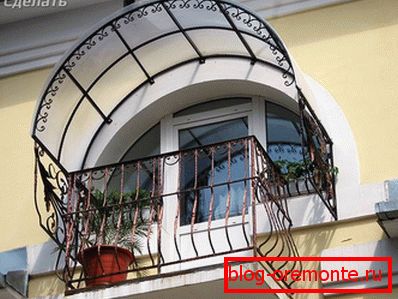
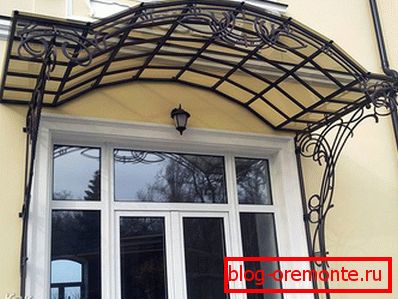
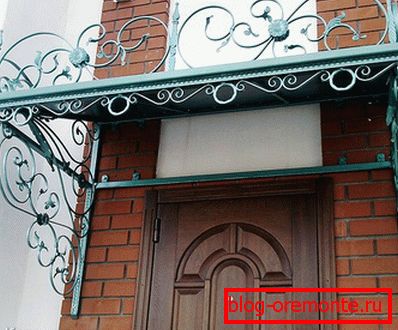
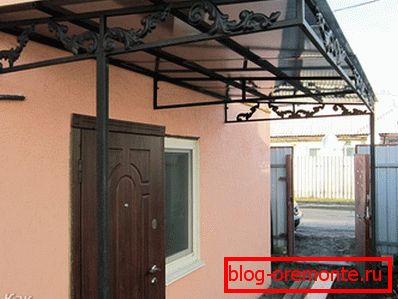
Forged
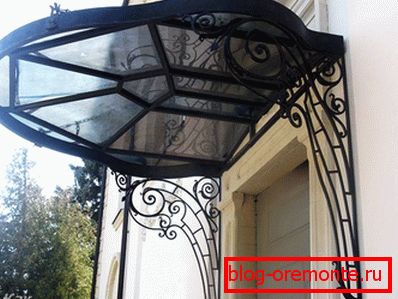
The best design solution will be a visor, the frame of which is made of forging. It will serve as a worthy decoration of the house. However, this design will cost you a pretty penny. Forged visor can be combined with roofing materials such as polycarbonate, tiles and even plastic.
Forged visor is quite heavy, so in order for it to serve for really long, you need to install it correctly.
Forging is suitable for almost any design, as it can consist of both coarse and refined elements. If the garden plot already has forged elements, then the visor should be made in the same style with them.
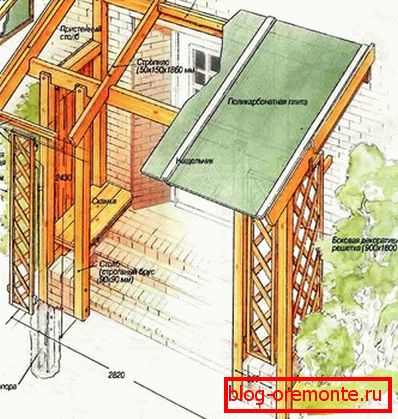
Production shedding visor
For the manufacture of such a structure, you will need a list of materials:
- Eaves plank.
- Gutter.
- Metal corners.
- Junction bar.
- Trumpet.
- Bruski.
- Decking / shingles.
- Anchors, screws and screws.
From the tools you will need the following:
- Welding machine.
- Yardstick.
- Hacksaw / Bulgarian.
Before starting to manufacture a visor, you need to sketch its sketch. For the construction of a specific visor you need to make certain measurements, such as the width and length of the porch. Add to the resulting figure another 60 cm. This will be the width of your design. To get the length of the visor, you need to measure the distance from the entrance door to the end of the porch, adding another 15–20 cm to this figure. The height of the visor is calculated depending on the architecture of the house.
The slope of the visor should be about 20 ?.
Using this data, you can draw a sketch on paper or in a special program on a computer to scale.
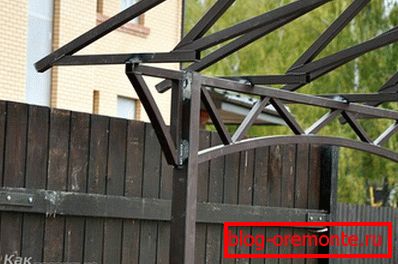
In accordance with the project, cut the metal corners. The length of the rafters from the corners is equal to the height of the slope. From the corners also need to make struts and wall beams. The frame parts are interconnected by means of a welding machine. The frame is fixed above the porch.
Lock the wall beam. This is done with the help of stainless steel screws, and anchors are used to fasten the struts. Make a crate of bars, installing it on the rafters. If a professional flooring is used as the roofing material, then a distance of 30 cm should be between the slats. For a flexible tile, it is necessary to prepare a continuous crate. She will be subsequently laid roofing material.

Fix the shingles can be with screws. The flexible tile keeps within overlap, but not end-to-end.
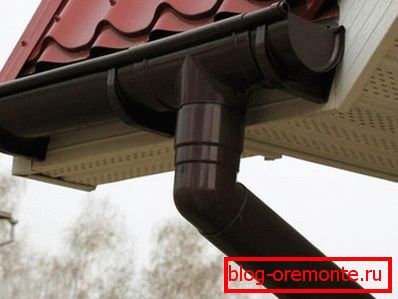
Now you need to fix the metal strap to the top of the ramp. At its bottom side you need to attach the eaves bar, and then connect and install the gutter and pipe.
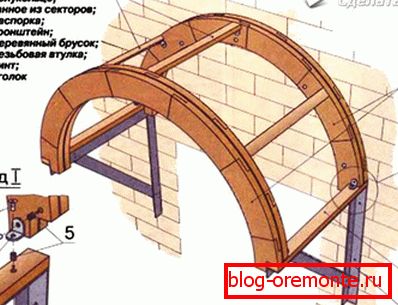
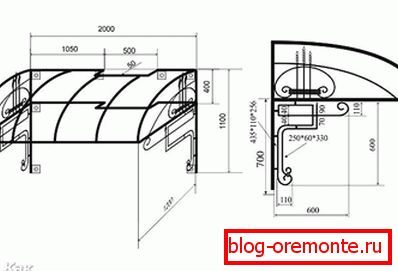
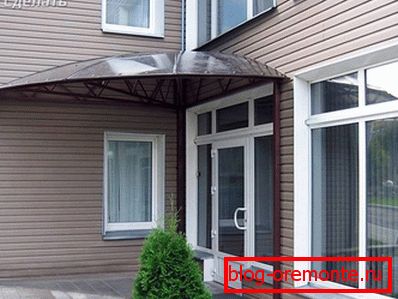
Production of an arch peak from polycarbonate
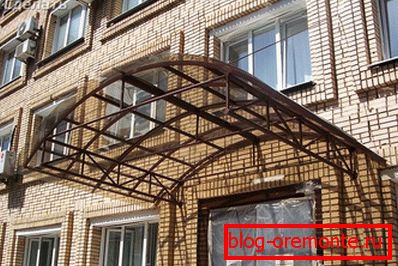
It is not difficult to make such a construction even for a person inexperienced in construction. Ready-made frame can be purchased at the hardware store or build yourself.
As in the previous case, before beginning work on the manufacture of an arched visor, it is necessary to make measurements and draw a sketch.
- Make a frame of 12–16 mm square pipe or aluminum pipe. Bend the pipe along the radius of the arched visor. You will need to make 2 identical arc.
- Connect the arc in straight pipe at both ends. To make the arched visor frame more rigid, weld a connecting beam on the inside of it.
- Then weld the canopies to the rear arc. With their help, the visor will be fixed to the wall of the house.
- Now clean the frame from rust and scale. Prime and paint it.
- Install the arched structure above the porch with screws.
- Secure polycarbonate with screws.

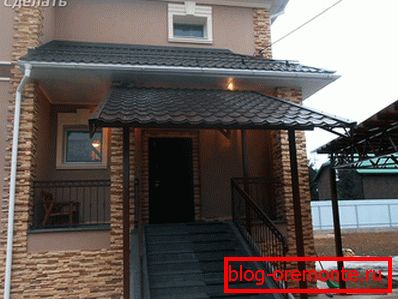
If you make a visor above the porch of a single-story house, then make it so that the edges of the overhangs protrude 20–30 cm above the porch. Thus, water / snow may not be allowed to attach to the wall, which will prolong its service life.
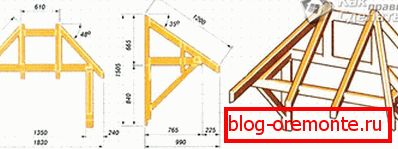
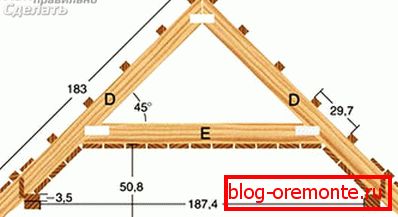
Manufacturing gable design

Dual visor make it harder. But it provides the best protection against slanting rain. And if you need to clear it from snow, it will be easier. The gable visor is stiffer than its counterparts, therefore, it has a high level of wind protection.
First you need to make measurements and perform a sketch. Then you should calculate the size of triangular brackets and crates.
The final result of the visor manufacturing is completely dependent on the accuracy of the measurements. Therefore, this stage of work can not be taken lightly.

- Make 2 brackets. They can be metal or wood. To do this, connect the two perpendicular beams to each other and fix them with a strut at an angle of 45–60 ?.
- Fix the brackets at a distance that would be equal to the width of the visor. Attach the vertical beams of the bracket to the wall, level it and fix with 3–4 stainless steel screws.
- If the visor should be a support, then make brackets is not necessary. Instead, you need to install metal / wooden poles. Dig holes under the pillars at the required distance from each other. In the pit, make a sand pillow, tamp it. For sand to shrink, lightly wet it with water. Install the pillar and fill with concrete. The upper ends of the pillars are connected by bearing beams.
- Make rafters from wooden blocks / edged boards. If the visor is small, then you will need two pairs of rafters. Fasten between each other truss legs bolts. Then fix the rafters on the upper beams of the brackets and install the ridge beam.
- Make a crate. It can be made of board / timber / plywood. The choice of material is optional.
- Install hooks to install gutters.
- Lay the roofing material in accordance with the manufacturer's instructions. Now you need to install the bar adjacent to the wall and wind bars to the front of the gable visor. They, among other things, will protect the structure from moisture and snow.
- Now you need to install the gutter and the eaves bar. Remember that the bottom edge of the rail must be lowered inside the gutter. Secure the drain pipe.
Before installing wooden elements of construction, each of them must be treated with antiseptics, which will significantly increase their operational life.
So, depending on the type of visor and your skills in working with the tools listed in the article, you can make the visor yourself. If, after reading the instructions, you realize that this work is too tough for you, then it’s better to order a ready-made visor. Have questions on the subject? Ask them to our expert. Experience can be shared in the comments to the article.
Video
In the provided video, you will be able to visually learn about the intricacies of making a visor above the porch:
;
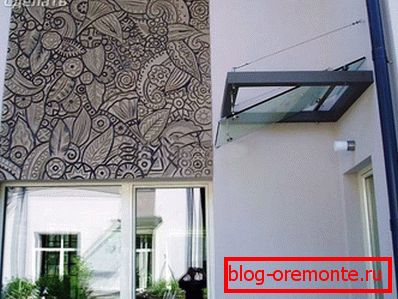
A photo
In this photo gallery, you will see a lot of interesting ideas for making a visor:


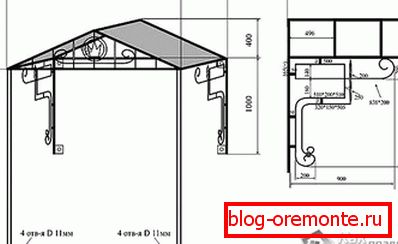
Scheme
If you decide to create a visor yourself, then the diagrams outlined below will help you design your own visor model: