How to make a suspended ceiling in the bathroom
Carrying out repairs in the bathroom, it is often necessary to think about how to make a ceiling in it, because you want this part of the bathroom to be beautiful, practical and durable. For the ceiling, you can apply the following building materials:
- Plastic panels.
- Plasterboard.
- Linen
To begin with, how to make a suspended ceiling in the bathroom of the panels. There is nothing difficult.
Why first of all we consider panels, but not drywall? Of course, you can make a false ceiling of plasterboard. First you need to bring the material on the truck, and then do the finishing - cover the seams and sheets with a grid, apply and level the filler, paint it. Of course, this ceiling will be beautiful, but, in general, plastic panels look great too. Moreover, not everyone can do the installation of the gypsum ceiling with their own hands, but it is easy to mount the panels. Next, we also consider the options for the ceiling and plasterboard.
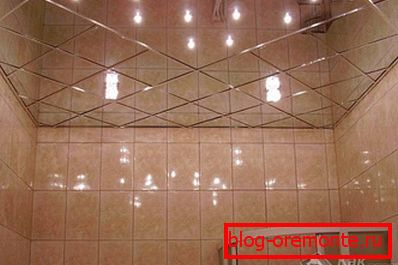
The advantages of the ceiling of plastic panels
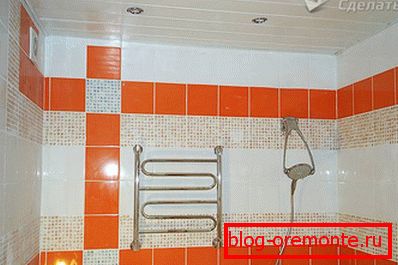
A little about the advantages of plastic on the ceiling. He is not afraid of moisture and water - and this is the main requirement that is imposed on the ceiling in rooms with high humidity. The same drywall for the ceiling should be purchased only if it is moisture resistant, and such a sheet will cost more than usual. In contrast, plastic panels of any type are not deformed by moisture. In the case of ingress of dirt, it is enough to wipe the material with a wet cloth, but the drywall may have to be re-painted. If even on top negligent neighbors arrange a flood, there will be absolutely nothing plastic.
The advantage of plastic bathroom panels is that they do not mold, do not need additional finishing and are easy to replace if necessary. In addition, there is always a wide selection of colors, so that the bathroom will look aesthetically pleasing. Such panels can close the ceiling with any irregularities and other disadvantages. In addition, it does not take as much space in height as a suspended ceiling made of plasterboard sheets, and at the same time electrical panels can be laid over the panels or even hidden pipes.
For the manufacture of plastic panels used polyvinyl chloride - in general, a safe substance for human health, which is also used for the production of disposable plates and other similar products.
Installation of frame ceiling

Before you mark the framework and start installing the ceiling, you need to determine the distance at which the suspended ceiling will be from the floor slabs or the old ceiling. If lamps are installed, then a height of about 100 mm is needed, or even all 150 mm. When you have decided on the height, you can start marking on the walls to fix the frame profile.
If the ceiling is even (you can check it with a building level), then you can not make the hanging frame, but fix the wooden slats directly on the ceiling, and then nail the panels to them.

How is the markup done? A mark is placed on the wall in one of the corners, for example, 15 cm down from the ceiling. Then similar marks are put on other walls (using a laser or water level). One continuous line is drawn along them, which will be the level of the bottom of the metal frame.
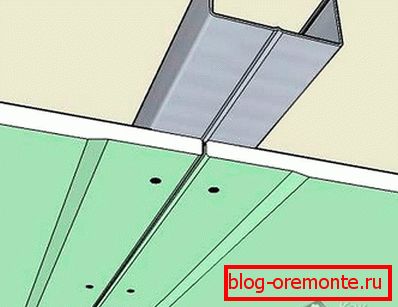
Regarding the profile - the profile of two types will be needed - CD and UD. The UD profile is required for mounting on the wall, and the CD as a transverse profile. Count the number of profiles is easy. The wall profile has a length of 3 m, which means that it is necessary to calculate the perimeter of the bathroom and divide the value obtained by 3. Similarly, the situation with the longitudinal profile. It should be placed every 50 cm. By counting the total number of axles along which it will be mounted, and their length, you can find out the number of the CD profile in a similar way.
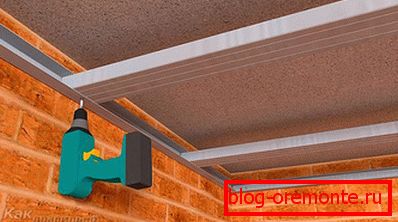
Installation of the wall profile is performed using dowels, and longitudinal - using self-tapping screws for metal of small size (the so-called “fleas”). In order to drill the wall under the dowels, you need a punch or a good hammer drill with a drill with a pointed tip of Ø 6 mm. The pitch, which fasten the wall profiles with self-tapping screws, must be at least 40 cm.
When the wall profile is fixed, mount the longitudinal profile, connecting it with the wall and among themselves "fleas". The area of the ceiling will need special suspensions of the spokes or strips, which can be fixed profile so that they do not bend. Given the low weight of plastic panels, they will not need much.
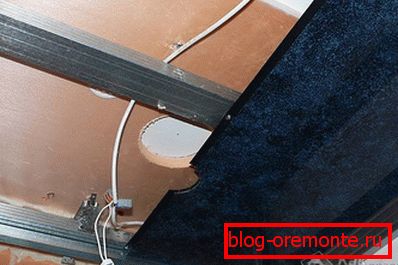
When the frame is made, do not forget to conduct the wiring to illuminate the bathroom. A copper cable with a cross section of 1.5 mm is suitable for it ?, held in a corrugation. Attach the cable to the ceiling, not the frame. At the place where the lamp (or luminaires) will be located, conclusions need to be drawn 25–30 cm long from the frame for the convenience of further connecting the wires to the chuck. For fixtures it is necessary to think of the mount.
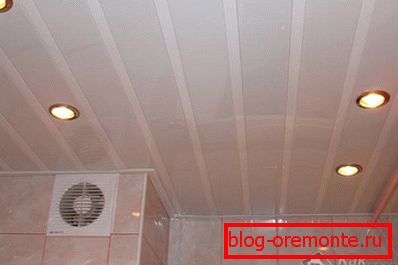
Installation of panels
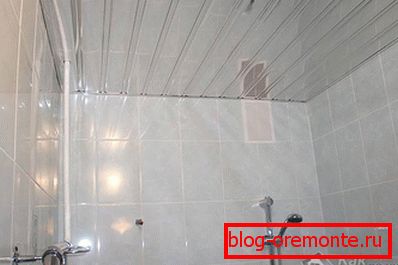
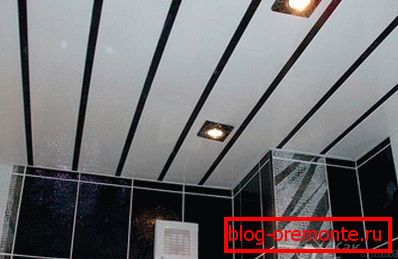
Now the final stage of the ceiling installation is fixing the plastic panels in the bathroom. Works always start from the edge. Briefly about the device panels. One side of it has a spike, and the other a groove into which the next panel is inserted with its spike.
The first panel is cut along the length (or two panels are fastened, one of which will be cut) and set with a spike to the wall so that they are located across the frame profile. After that, it is fixed on this profile using small screws with a washer, which are twisted into the spike and the lower part of the groove. After that, insert the next panel, but only the lower part of the groove is fastened in it. According to this principle, the entire ceiling is mounted to the very end. The last panel is cut (if necessary) not only along the length, but also along the width, then it is fixed to the edge near the wall.
When all panels are assembled, corners with glue that will hide the seams between the plastic and the wall are glued at the corners with the wall and ceiling.
If the plastic panel is dialed in length, but its length is not enough for the entire ceiling, then it is necessary to supplement it with a segment of another strip. In order for the joint to be made correctly in this case, it is necessary to purchase a special fastener that has grooves on both sides so that the panel can freely enter in the width.
If you need to cut the profile, it can be done with scissors for metal. The panel is best neatly cut with a hacksaw or with a sharp construction knife.
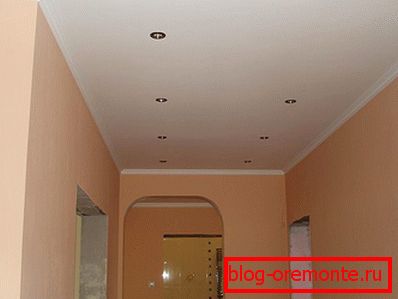
The finished ceiling can be gently wiped with a damp cloth, after which you need to hang lamps, fixing them on the ceiling. By connecting the wires to the cartridge, a light bulb is twisted into the lamp. We can say that the installation of the ceiling is complete.
The suspended ceiling made of plastic panels is quite easy to make, and it is durable - in the next ten years you should not worry about repairing the ceiling. In addition, performing its installation, you can significantly save on repairs without losing the quality of the work performed.
Plasterboard ceiling
In addition to the panels, you can mount gypsum boards to the ceiling in the bathroom. However, you need to consider that not all sheets will work - in the bathroom you can only use moisture-resistant drywall, which would be able to withstand the increased humidity in the room.
Plasterboard ceiling более сложен в монтаже, чем устройство потолка из пластиковых панелей. Зато его преимуществом является отличный дизайн и возможность создания потолка из нескольких уровней, если это позволяет высота санузла и его размеры. Итак, рассмотрим, с чего начинается монтаж потолка.
In a sense, the framework for the plasterboard ceiling is similar to the framework that is required for plastic panels. A guide profile is also fastened to the wall, and longitudinal and transverse profiles are inserted into it, which are supported on hangers. But there are certain requirements for the step between the latest profiles. Thus, the size of a single sheet of drywall is usually 2.5 m in length and 1.2 in width. Creating a frame in the bathroom, you need to take into account these dimensions.
For installing a plasterboard ceiling in the bathroom, some people prefer to purchase non-standard sheets or cut existing ones. In this case, the frame must be assembled, given the size of the resulting sheets of drywall.
 Sheets on the ceiling begin to mount to the edge, on one of the walls. Consequently, the two sides of the drywall in length and width will be attached to the guide profile, tightly adjacent to the wall. The following profiles are arranged according to the following scheme: the longitudinal profile, as well as the transverse one, should only go on the sheet by half, so that the next sheet can be fixed on its second half.
This means that the distance from the wall to the profile center at the junction of the sheets should be equal to the width of the sheet, that is, 1.2 m, or another value, if the given width has other dimensions. However, the distance of more than a meter without additional amplification is fraught with the fact that the sheet may begin to sag and even crack. Therefore, it is necessary to secure another longitudinal profile in the middle of the sheet, the center of which would extend 60 cm from the wall and at the same distance from the profile at the junction.
In terms of length, the situation is similar. The profile center, which will be joined by two sheets, should be in the middle, and between it and the wall it is necessary to place more transverse profiles - approximately every 60 cm (step). The joints of the longitudinal and transverse profiles are reinforced by suspensions. It is possible to strengthen not all the joints, but after one - it will be enough that the ceiling does not sag. By this principle, the entire frame is recruited in the bathroom.
In some cases, if the bath is large enough and high, the owners of the house may decide to make a suspended plasterboard ceiling on several levels in their bathroom. In this case, you need to dial the top row of the frame, and then the bottom, while both levels will be connected by a profile in those places where the vertical sections of drywall will be mounted. The optimum level height is 10 cm.
Before you fix the drywall, you need to lay the wiring, previously hiding it in the corrugation.
Ceiling from lining
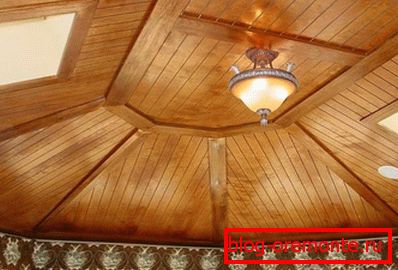
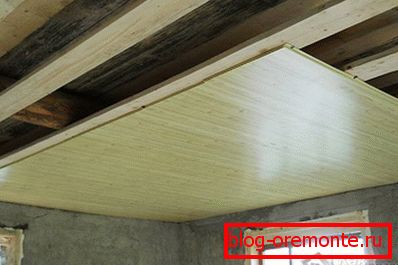
Recently, lining, made from various tree species, such as larch, cedar and other wood, has gained considerable popularity. Besides the fact that wooden lining is durable and durable, and also due to impregnation is not afraid of water. You can mention that it looks good. With the help of clapboard, you can create the look that the ceiling in the bathroom is made of perfectly smooth boards. And if you use a raised beam, it would seem as if the ceiling is made of wooden bars.
The principle of fixing the wall paneling is no different from how plastic panels are installed - the wall paneling also fits along the principle of “spike into groove”. The only difference is that it is fastened not with metal clips, but with screws to the frame made of wood.
We recommend reading:
- do-it-yourself drywall ceiling (step by step instructions);
- how to hang a chandelier on a plasterboard ceiling;
- how to glue the ceiling plinth on the putty.
Video
In this video you will see how the installation of the ceiling made of plastic panels in the bathroom:
See how to make a slatted aluminum ceiling in the bathroom:
A photo