How to make a slope window
One of the most important operations performed when replacing window blocks is the manufacture of slopes, the quality of the arrangement of which ultimately determines the appearance of the entire window as a whole. Today in construction practice there are three types of window slopes:
- plastered;
- from drywall;
- plastic slopes.
Plastering slopes
This type of slopes refers to the old technique of facing window openings and is considered very impractical and inconvenient in execution. The disadvantages of such slopes include:
- poor thermal insulation properties;
- the possibility of condensate with rapid temperature changes;
- high probability of cracking of the plaster due to contrasting operating conditions;
In the process of manufacturing such slopes are plastered in several layers, after which they must be coated with primer and painted. Their production (taking into account compliance with all requirements on the topic “how to properly make a window slope”) will take, as we see, quite a lot of time; besides, only professionals can perform high-quality plastering work.
If you still choose this type of slopes, then you should consider the following recommendations, concerning mainly the preparatory procedures:
- during operation, the frame should be closed with any protective material;
- it is desirable to reinforce the upper slope using a chain-link mesh;
- Before starting plastering to the side slopes on both sides, ideally even planks should be nailed, which serve as control surfaces.
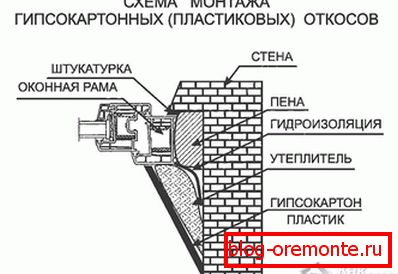
Plasterboard slopes
In comparison with plaster slopes, plasterboard slopes are considered more durable and, in the case of warming them with cotton, can provide good thermal insulation for windows. But because of the increased sensitivity of drywall to moisture, you will hardly be able to obtain good waterproofing with it. Therefore, it is allowed to install such slopes only in rooms with a low humidity level.
Note that their production also requires a certain skill and ability to perform a variety of auxiliary operations (putty, primer, painting, etc.).
For the manufacture of plasterboard slopes, the following is done:
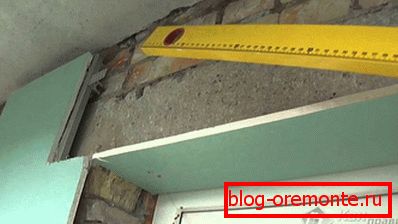
- The profile corner is taken and cut into segments according to the size of the window block. Then these segments are attached along the edge of the window profile (along the entire perimeter of the block) with the help of screws, which will later be hidden under the gypsum board.
- After that, the drywall blank is cut (moisture-proof material is best suited for this purpose) to the width of the slope and to its entire height. Part of the slope on the side of the window is filled with mineral wool, and the inner edge with the cut face is attached directly to the corner. The second edge, facing the edge of the room, is glued to the slope with a special glue.
- A perforated corner is fastened to the corner part (from the side of the room) with the help of a sealant, after which the joint near the window is sealed and the entire surface of the slope is carefully puttied. After polishing, it is covered with a special primer (deep penetration) and painted on top with water-based paint.
Video
One of the ways to manufacture plasterboard slopes:
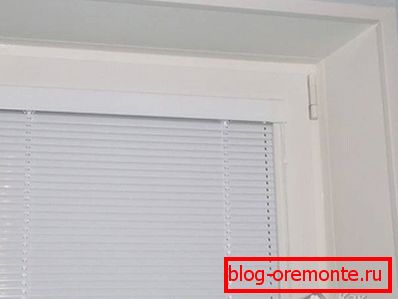
Plastic slopes
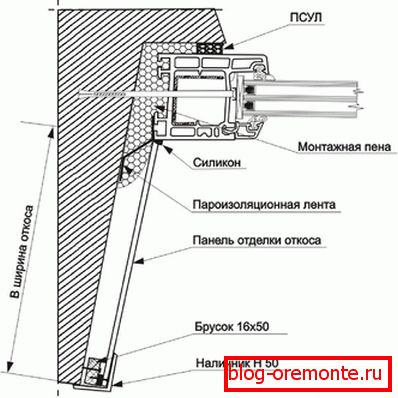
It is most convenient to demonstrate how to properly make a window slope using the example of its plastic modification, which is currently considered the most versatile and practical. Slopes made of plastic are easy to clean and do not fade with time. As a heater in such constructions mineral wool is used, which provides the windows with excellent waterproofing properties and eliminates their fogging. Installation of plastic slopes is made in the following order:
- First of all, along the perimeter of the slopes with the help of screws (flush to the wall) wooden slats are packed, which serve as the basis for flexible plastic. To obtain high-quality slopes, the slats must be positioned strictly vertically, which is achieved with the help of a building level.
- Next, using the level, the vertical (left and right) and upper horizontal lines of the outer edge of the slopes are plotted with a pencil and the starting strip is filled with self-tapping screws. The groove of this starting strip will serve as the fastening of the plastic slope.
- Then, an F-shaped profile is mounted, which is first measured exactly according to the height of the slope. This profile is attached to the wooden slats using a construction stapler.
- After that, it remains only to install plastic slopes with their simultaneous insulation. One edge of the plastic is inserted into the starting strip, and the other (after laying mineral wool under it) is fixed in the F-shaped profile. To obtain high-quality joints plastic must be measured with high accuracy.
As a result of competently performed operations, you will be able to get a completely aesthetic and fully hermetic construction. To eliminate microscopic irregularities, it is recommended to wipe the joints of all parts with white silicone.
Video
You can see the process of making PVC slopes in detail in this video: