How to make a sliding gate
In the life of every person who has a cottage or a country house in his possession, it has become traditional to make all the structures on his own, in particular if you can save a lot on this matter. There are no exceptions and entrance gates. Having sufficient experience in working with metal products, skills in using special equipment and an understanding of the principles of operation, you can easily figure out how to make a sliding gate with your own hands.
Specifications

For the improvement of buildings, the use of sliding (sliding) gates is becoming increasingly popular. According to the principle of operation, the named construction is represented by two types: manual and automatic.
There is no doubt that the decisive advantage of these products is considered to be an excellent aesthetic appearance. In addition, they look spectacular and modern, and also perfectly cope with the task of saving the space of the backyard plot, which in most cases is to the taste of the owners of small land plots. The defining advantages of sliding gates are:
- high level of security (it is more difficult for an outsider to open such gates than swing doors);
- weighty indicators of strength, stiffness and bearing capacity;
- small opening space;
- no height restrictions;
- saving time in winter for snow clearance;
- resistance to sail.
However, when considering a particular type of gate, you should not forget about its shortcomings. The sliding type is accompanied by the following disadvantages:
- overpriced;
- special foundation;
- cumbersome and heavy weight of the structure compared to the swing type.
When choosing the type of gate you should not rush to make a decision before consulting with a professional, in case of confusion. In most cases, restrictions on use can be easily circumvented, based on experience and non-standard solutions.
Production options

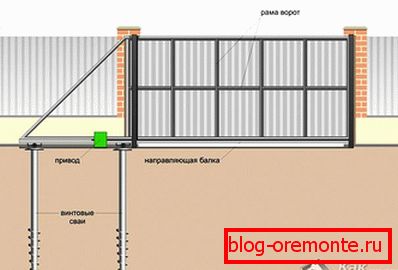
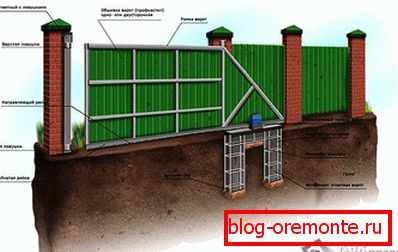
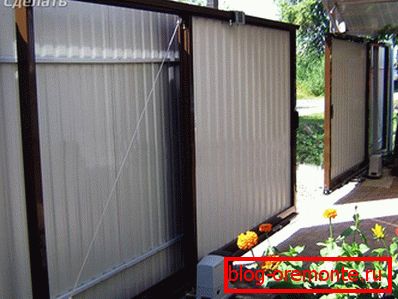
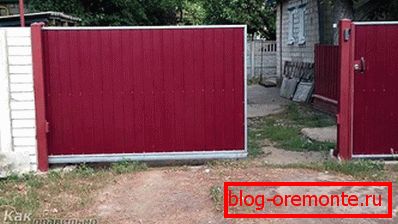
The process of moving the sliding gate occurs along the fence. In the closed position, the canvas completely blocks the entrance without gaps and cracks. The composition of the structure are presented in the following types:
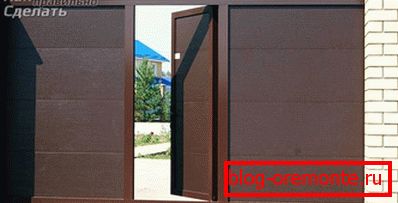
- single doors - having support as an additional foundation, the sash is shifted to one of the sides along the channel, while the upper waist is not required - ideal for canvas with a height of not more than 2 m;
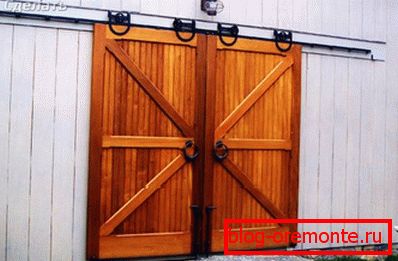
- bicuspid - relying on two prepared sites, two doors of the gate at the same time moving apart in opposite directions, requires an upper roller beam - a great way to evenly distribute the load for heavy structures with a height of more than 2 m
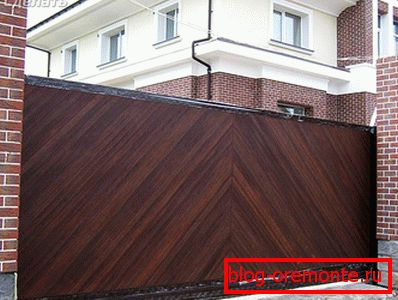
Facing the valves can be made of any material depending on tastes, preferences and financial capabilities of the host. However, the most used raw material is profiled.
Training
In order to make the sliding gate yourself, it will be necessary to prepare the necessary tools, materials and make an approximate sketch of the future construction.
Required tools and consumables:
- welding machine;
- clamps;
- channel beam with a width of 16 to 20 cm;
- fittings with a diameter of 10 to 14 mm;
- Bulgarian.
Before performing the construction of the gate will need to establish the size and make accurate drawings. The size of the door and the choice of the necessary fittings depend on the dimensions of the future construction. The width of the entrance opening should provide free access to vehicles. There are often cases when it is necessary to install five-meter gates (along the width) for the entry of passenger cars, since the narrow streets of summer villages are not always capable of ensuring an optimal turn of the car.
In order to correctly calculate the required width of the gate, it will be useful to preliminarily mark the intended arrival with pegs and try to drive through it into the yard. Depending on the received number, the required distance for the rollback of the gate is also calculated. In the case of sliding gates, the last indicator should be twice the entrance opening (at least a meter to each side).
Gate installation
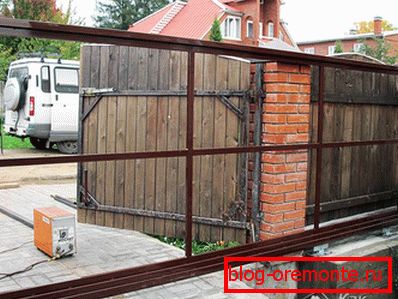
Having finished with preparatory procedures, we proceed to the installation of support pillars. As a basis for these structural elements, you can choose any available materials, ranging from wooden beams and ending with brick laying. The main condition is that the support should be in the ground at a depth of not less than 1.2 m. Otherwise, the weight of the erected gate can break the vertical, especially during seasonal floats of the ground, which will lead to the deformation of the gate and rapid failure of components.
We dig two holes with the required depth values and install the supports on the construction level, after which we concrete.
The time for the concrete to fully cure is at least 7 days in dry weather.
Base for sliding gates
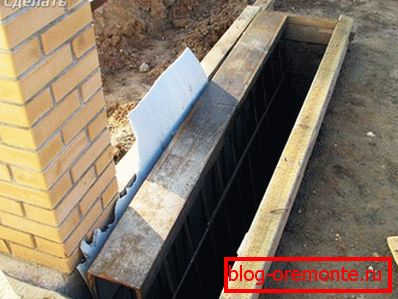
The primary event is the welding of meter rods of reinforcement to the channel bar. Next, we dig a hole 40–50 cm wide, at least 1.2 m deep and a length equal to the length of the portal opening. After that we install two channel beams "legs" down, check once again on the level and concrete products.
The channel should be located on the same level with asphalt. Since a channel with welded reinforced legs with a trench depth of 1.2 m may not coincide with the upper edge of the soil, it will be useful to put rubble, a small fraction, for example, 5 × 20, on the bottom of the trench

If everything is done correctly, then the end result should form a flat platform made of metal, which we will later equip with retractable carts.
Exactly the same way as when holding the foundation for supports, it is worthwhile to let the foundation stand for at least 1 week.
Frame construction
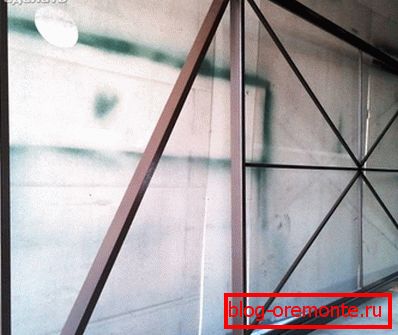
While the drying of the completed concrete foundations occurs, we proceed to the manufacture of frames. To do this, you will need to assemble two identical frames. The most used and easy to install material is a profiled tube 60? 40 or 50? 50 mm. Having defined the dimensions, we cut the required amount of the profile, we clean and degrease the surfaces of the elements.
Having finished with the described procedures, we proceed to welding. Based on the prepared drawings, we fasten all the prepared pipe segments to each other, forming the outer frame.
In the course of the work, it is necessary to first prepare the material for one of the gates, make a full-fledged frame and subsequently use it as a template for the second half. In addition, when working with metal products, do not forget about the mandatory use of special eye protection and skin protection.
In the resulting structure, we install an internal frame, which not only gives the necessary rigidity to the gate, but also becomes the basis for fastening the facing materials. For this purpose, it is advisable to use the same profile pipes, but with sizes from 20 × 20 to 20 × 40 mm, which should be point-to-point attached to the main frame. Then we weld the guides to the lower beam of each frame. Next, we clean with the help of an angle grinder or grinder of the welding spot, clean the cleaned places again.
All welding work must be carried out in a staggered manner, otherwise the resulting frame may lead or turn out from overheating.
Frame casing
Making sure that the prepared frames are dry, proceed to the installation of the facing of the gate. The most used material for these purposes is the professional flooring. Sheets are fastened by screwing in metal screws with a special drill or installing rivets.
Final events
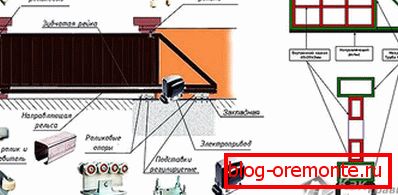
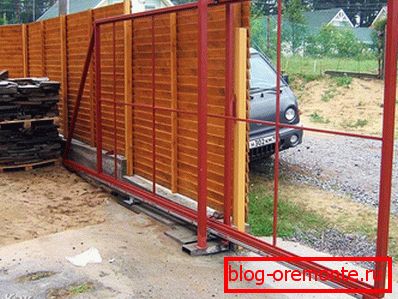
On each channel, we set the rollers for each sliding gate and push them as far as possible in opposite directions. Next, we put on them the guide frames and exhibit the construction level. After welding, we point the roller bogies to the channel beam.
Making sure there are no distortions, install the upper retention and end rollers. We proceed to check the work of the resulting gate and install small hardware.
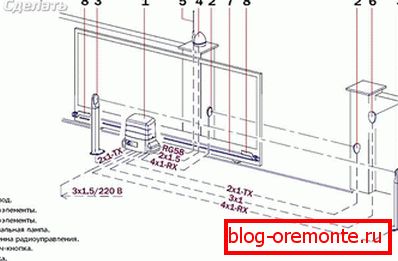
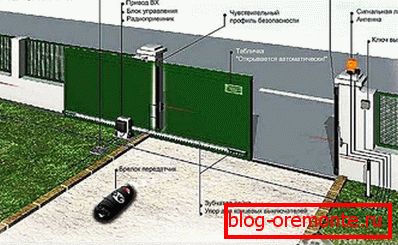
If you are going to install automation on the erected structure, then after purchasing the kits, carefully read the attached instructions. Exact following of technical documentation without effort will allow to equip gate with the desired equipment.
It will not be out of place to install the upper belay or channel on the supporting posts, repeating all the operations described above with the lower fasteners. It is more expedient to fix the catchers directly on the door leaves, so that when closing the doors they interlock, eliminating damage and forming a single structure.
Making your own design at the cottage or cottage will significantly reduce waste during the construction of the entry element. The installation process is simple, but requires strict adherence to the instructions provided, drawing up a sketch and precise control over the verticality and horizontality of each component. Having compiled and calculated the required amount of material, seek advice and assess the correctness of the actions taken by experts to make sure your calculation.
Video
Practical tips on how to make a sliding gate without help:
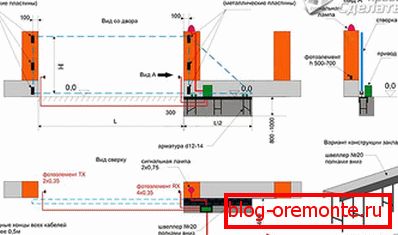
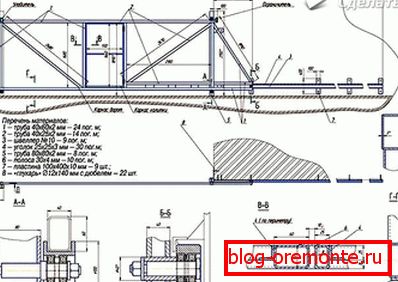
Schemes and drawings
Schemes offered by us will help you to understand the design features of sliding gates: