How to make a six-sided arbor of wood
With the arrival of the warm season, most residents of large cities begin their trips to homestead plots to spend outdoor recreation with their family and friends. Finding a place that is suitable for these parameters often takes a lot of time, besides, a rest away from home is fraught with many difficulties, such as unforeseen precipitation, transportation of food, picnic accessories, etc. Having your country house and a small plot of land, you can to avoid these unpleasant circumstances with ease and to save a lot of money by making an arbor. Its ideal location - among fruit trees in the immediate vicinity of the reservoir. Among the variety of forms of this building, the six-sided arbor is the most popular because it has excellent aesthetic and practical features. In this article, we will look at how to make a hexagonal tree gazebo out of wood with your own hands, which can not only be a great place to hold memorable feasts, but also each time emphasize the abilities of its author, becoming the property of the whole country house.
Design advantages
The use of this type is due to a number of defining advantages, the main of which are:
- compactness;
- spacious interior space;
- stability and strength;
- extraordinary design.
Selection of a place to place an arbor
In order to cope with the task, it will be necessary to take into account a number of important features: the purpose of the structure being erected, the appearance of the arbor and the opening space from it.
Purpose

If the gazebo is used as a room for eating in nature, it should be placed in close proximity to the main residential building, since the transfer of dishes, dishes and other paraphernalia will significantly increase the time for preparation for the event. If the design is intended to become a place of relaxation and reading your favorite books in absolute silence, then the building should be erected away from the main buildings in the shade of spreading fruit trees.
Opening space
![]()
Arbor should be placed overlooking the sights of your site or nearby suburbs. Excellent location arbor - near the pond or alpine slide. This will provide an opportunity to quietly enjoy the smoothness of the water and the fragrance of flowers, as well as get pleasure and peace from contemplating the beauty of Mother Nature.
In families with small children, it is best to place a gazebo on elevated sites that allow you to simultaneously monitor the entire territory.
Appearance
This factor is primarily due to the functional structure. Pursuing the goal of giving the land a special aesthetics and a certain charm, it makes sense to think about installing a gazebo near a pond or flowering beds. If gazebos are used for kids' games, place the structure in an open well-viewable area in the shade of garden trees.
Planning
In order to understand the question of how to build a reliable and high-quality arbor, you should initially create a clear sketch of the future structure. Today, for the preparation of this important document, you can contact any building and finishing company or carry it out yourself, using the options suggested at the end of the article. Properly executed drawings in conjunction with accurate measurements will allow you to perform any work with the least labor and temporary losses. At the planning stage, you should decide on the dimensions of the building and the type of consumables.
It is most expedient to choose wood as the basis for a gazebo, since this material can be easily purchased and delivered to any point of geography. In addition, the pricing policy of wooden products is significantly lower than its other counterparts and replacement options. This task will easily cope with a timber and board made of spruce or pine.
Required toolkit
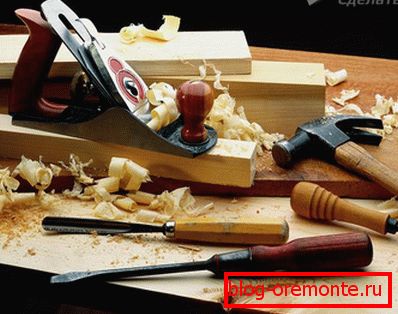
For fast and high-quality installation will need to prepare the necessary tools and consumables. Inherent representatives are:
- hacksaw for woodworking;
- hammer and nails;
- marking rope;
- plane;
- stameska;
- drill with a set of drills and bits;
- building level;
- roulette;
- sovok and bayonet shovels;
- homemade tamper.
In any building event, the use of electric tools will significantly reduce the time to prepare materials and increase the speed of construction of the structure.
Site preparation and marking
The primary task is to clean the installation site from third-party garbage, tamping and leveling the site. Then it is necessary on the prepared plot to mark a circle with a radius equal to the length of one of the edges of the gazebo. For the successful implementation of the task, it is necessary to prepare a simple device, which includes in its composition two small bars, sharpened on one side, and a connecting rope or string.
We attach the rope to each of the bars, after which one of them is driven into the intended center of the future gazebo, we wind off the required length of the rope and with the second we outline around the border of the structure.
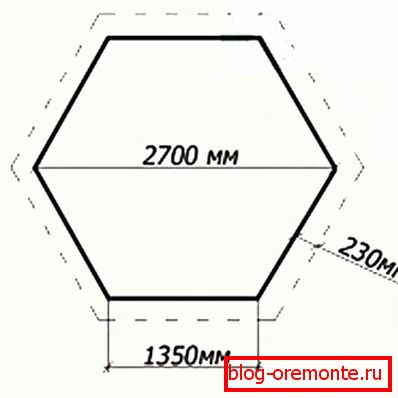
To obtain a regular hexagon, 6 segments should be marked on the inner side of the circle with a length equal to the radius of the named geometric figure. Ultimately, the 6 connecting points will become corners of the building.
The aesthetics, durability and speed of installation depend on the correct layout of the prepared space; therefore, it must be carried out strictly in accordance with the plan.
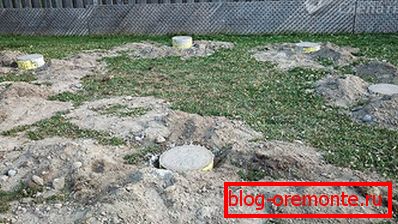
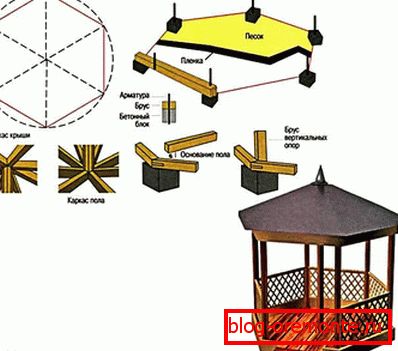
Base arrangement
In the question of how to make a reliable substrate, you should seek help from the experience of specialists. Practice shows that for the manufacture of the base of a six-sided arbor it is more rational to use the column type of the foundation, since it does not require lengthy preparation and is erected in a matter of hours.
To obtain it, it will be necessary to dig pits with a depth of 50 to 100 cm at the planned 6 points around the perimeter of the circle and in its center, depending on the weight of the proposed structure. Each of the recesses is filled with a small layer of sand-crushed stone mixture and qualitatively rammed. Then along the perimeter of the pothole, bars of armature from 4 to 6 pieces are driven in, and wooden formwork is installed.
After performing the steps described above, we pour the prepared pits with concrete. Having sustained necessary time for drying, a timbering is dismantled.
To give greater strength before pouring the foundation into the center of each recess we drive in the bars of the reinforcement, so that its upper edges protrude at least 20–25 cm above the formwork.
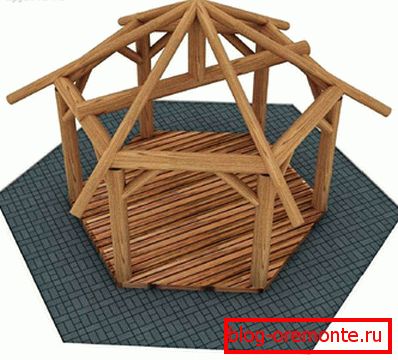
Frame construction
To successfully accomplish this goal, you must perform the following sequence of actions:
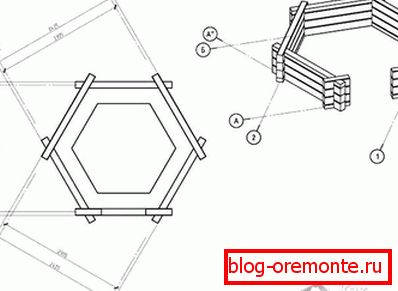
- In accordance with the drawing, we cut the bars of the required length, after which we process them with a plane and a grinder. Further, on each side of the timber-base, we outline a flat square with sides equal to the thickness of the wooden product and drill through the hole at the intersection of the diagonals. We lay out the prepared bars with a well on the reinforcing bars located in the foundation of the supporting pillars. Folding cant is done through a half-tree connection.
- Then, we proceed to the installation of the central support beam. For this purpose, it is more rational to use a bar with a cross section of 100 × 100 mm and a height equal to the distance from the central columnar base to the intended floor boundary.
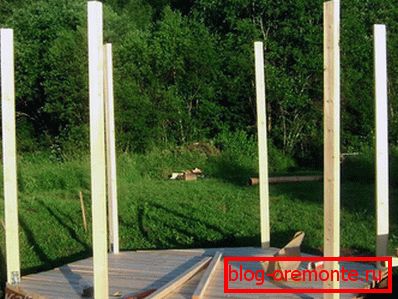
- After starting to build side racks. In their arrangement we will be helped by the same bar “weaving” with a length equal to the height of the future arbor. From the bottom side of each composite column, we drill a hole, then we put it on the reinforcement of the foundation. Verticals expose through a plumb or building level and fix the piles with metal corners using screws. To simplify the subsequent installation of the roof and the upper coronary frill, it will be useful to equip wooden supports with temporary racks made from scrap scrap.
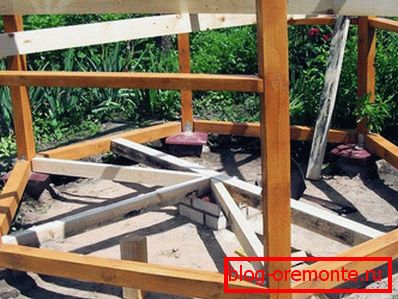
- The following procedure is the manufacture of the coronal ring. Named structural element is the same frill of timber, as in the base. The cut parts are laid out on the upper parts of the supporting pillars and fastened with self-tapping screws.
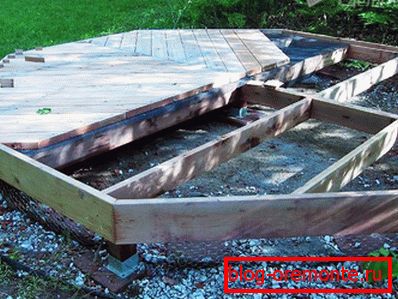
- The final event - floor equipment. To do this, you will need to cover the place under the future floor with plastic wrap and cover it with a considerable layer of sand. Next, proceed to the installation of the lag. As a rule, they are made of bars of 50 × 100 mm, although this value is only recommended and non-finite, so the definition of the type of wooden product and its dimensions remain for the owner. As a floor covering, it will be optimal to use classical batten, sheets of plywood or oriented strand board.
Before carrying out installation work with lags and floor, you should not forget about the treatment of each wooden element with protective antiseptic compounds!
Manufacturing roof system and roof
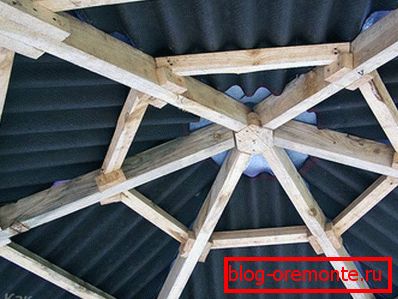
The roof installation procedure is carried out in stages and includes in the structure the truss system and the cladding. All work on the installation of this element gazebo is best carried out on the ground, and then install it in its place in the design.
For the manufacture of rafters enough timber 50? 100 mm. In addition, you will need to recall the well-known school theorem of Pythagoras, which, in a ridiculous interpretation, sounds like this: "Pythagorean pants are equal on all sides." On paper, it looks like this: a? + B? = C? the upper point of the roof, respectively, and "c" is the hypotenuse, the meaning of which is to be recognized.
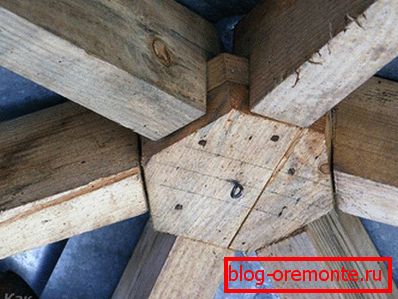
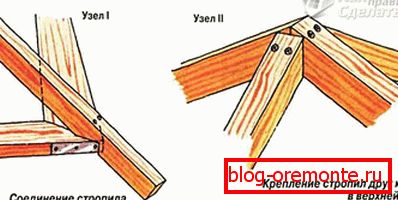
Having carried out simple mathematical calculations, one should add to the obtained value 20–30 cm on the roof overhangs. Next, to collect the rafters into a single system, it is necessary to make a hexagonal wooden blank, which is subsequently fixed in the center of the roof and connects each of the rafters to the inside of the roof.
The next event - the connection of rafter bars transverse beams. A bar with a cross section of 50? 50 mm, which is placed in 50 cm steps from the center to the edges of the roof, is perfect for this.
Well, the final stage is the placement of roofing material. In the case of using hard material (slate, metal tile or corrugated flooring), you can proceed to its installation without preparatory procedures. If soft roofing is chosen as a lining, it is necessary to precoat the roof frame with a rigid base (sheets of plywood or OSB board), and then proceed to the finishing.
Finishing work
The main part of the activities is completed, it remains only to build a railing for your own taste and color, as well as to carry out manipulations on decorating both the internal space and the external one. In addition, in the case of manufacturing an excessively high floor, especially if children are planning to visit the gazebo, it will not be out of place to build steps at the entrance. Since the erected structure is a street structure, it should be protected as much as possible from the adverse effects of natural phenomena.
As you can see, the construction of a gazebo in the summer cottage is rather difficult, however, with the right approach and due diligence, the installation process in accordance with the attached instructions can turn into a pleasant hobby for each owner, the result of which will please every member of your family and guest.
Video
You can learn how to make an eco-chat from the video we offer:
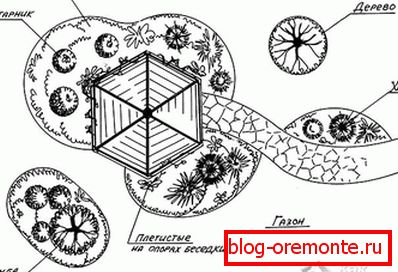
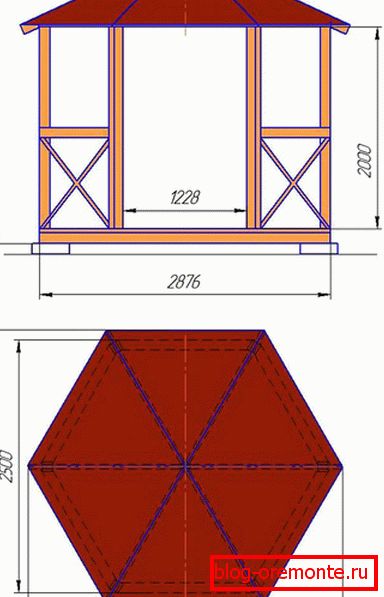
Drawings and diagrams
These schemes will help you to create your own project of a hexagonal wooden arbor:


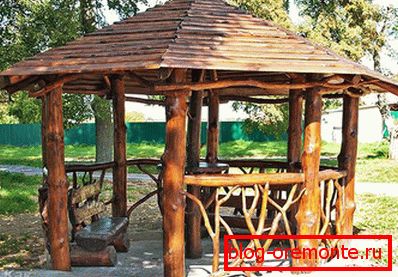
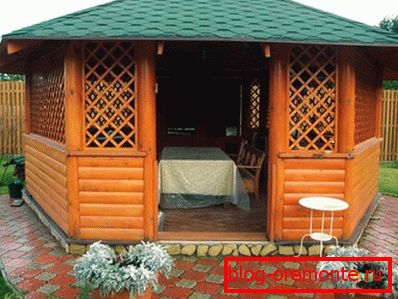
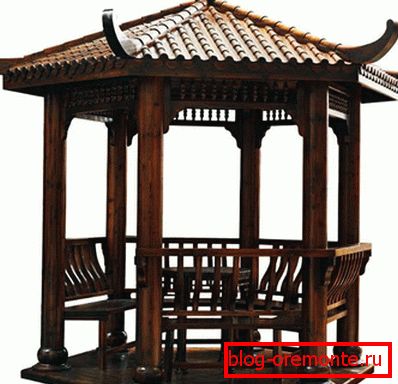
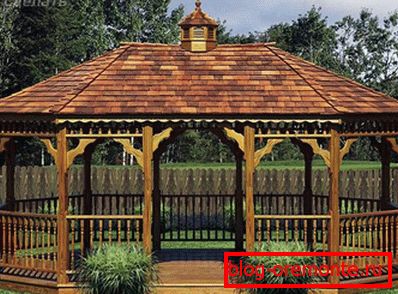
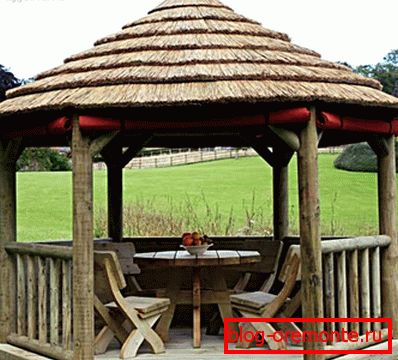
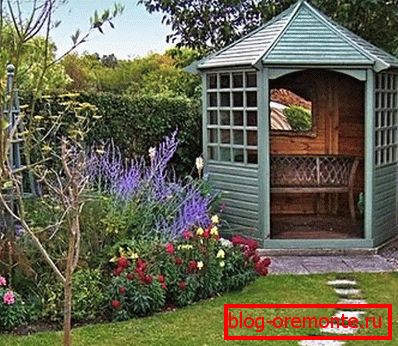
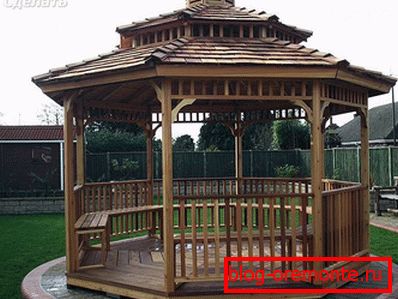
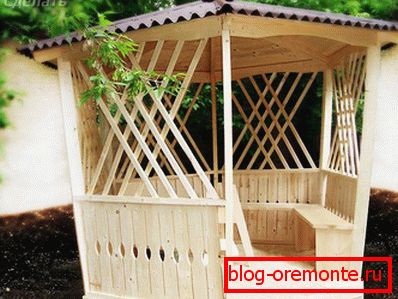
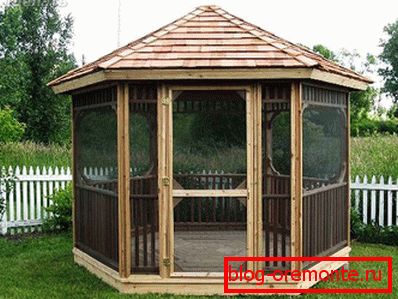
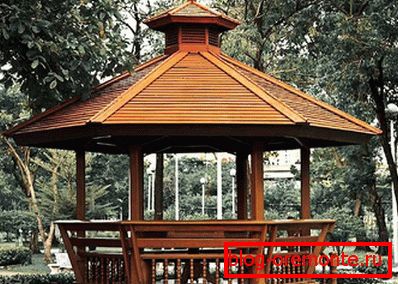
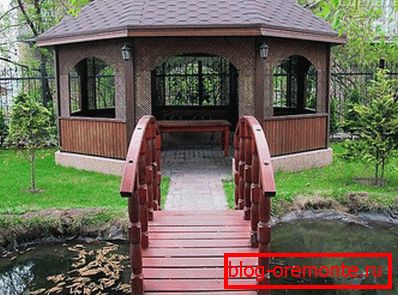
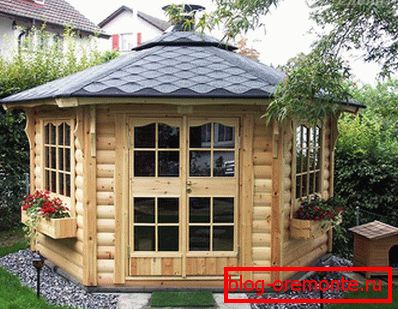
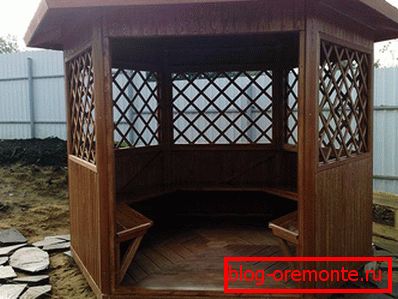
A photo
The following photo options will help you decide on the choice of gazebos: