How to make a renovation in the apartment
It is safe to say that there is no such person who would not have heard something about a European-quality repair. It can be said, the standard, a role model in construction. Many people strive to make such repairs in their homes, but not everyone succeeds. Interestingly, thousands of people every day use this word, however, as practice has shown, not everyone knows what it means. In general, speaking of euro-repair, all average people mean high-quality good repair, which is made beautifully and with taste. It becomes immediately clear that the room in which the renovation is made, significantly increases in price. Yes, to be in a house or apartment will be much nicer and more comfortable. If you decide to make changes in your apartment or house, collect money and are ready to work independently, then you need to learn how to make a renovation in the apartment: what it includes, where to start and what work you will have to do. All this information we will present in this article.
Renovation - what is it
In Soviet times, every family once in several years carried out simple repairs to give freshness to the room and change the situation. This was considered an obligatory ritual, in which all more or less adult family members participated. This repair was as follows:
- Finishing the ceiling, which was reduced only to whitewash.
- Wall decoration, which is often performed with simple paper wallpaper. Since the choice of colors, drawings and textures in those days was small, all the apartments were similar in finish to each other.
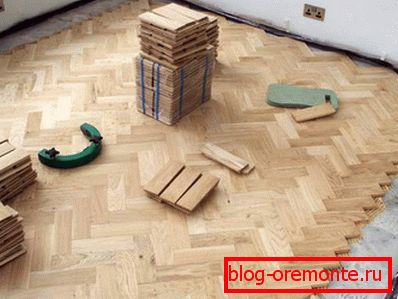
- Finishing the floor. Basically, then linoleum or parquet were mainly laid on the floor. But in some houses, for example, Khrushchev, the floor was wooden, consisted of boards that were painted and covered with carpets.
- Obligatory part of the repair work was the painting of wooden windows, as well as sewage pipes, radiators and water pipes.
This simple repair and ended. If we compare it with what repairs are being carried out in apartments and houses now, then this is, in fact, heaven and earth. More and more new building materials began to appear, the technology of repair work was changing. Today we can buy various components and materials from both domestic and foreign manufacturers. The choice of goods is so great that the eyes just run up! The general view of the room can be unique, as the owner sees it, everything can change before our eyes. And if once the repair allowed only to refresh the room, now it can be changed beyond recognition. It all depends on imagination and, most importantly, the amount of invested funds.
The word "renovation" has become popular just a couple of decades ago. Now this word has become a brand, and everyone who decides to do repairs, is committed to “Euroideal”.
Despite its name, it has no direct relation to Europe. As stated in the most popular online encyclopedia, the term "euro-repair" can be interpreted as a set of repair works that are performed in accordance with the European standard.
It should be noted that this concept is rather relative. But still, we can note several types of such repairs.

Redecorating. It can be called the most common type of repair, which is performed by each owner. Since over time, any finish loses its original appearance, it needs to be replaced. You can make your home more attractive and updated thanks to the variety of modern materials available on the market. Such repairs include wall, ceiling, laminate or linoleum.

Renovation of the middle class. This repair may include some intervention of the owner in the general layout of the room. In this case, limited to the creation of niches, arches, partitions, alignment of walls, replacement of doors and windows, etc. Such repairs are more labor intensive and can give your “cozy nest” a new look.
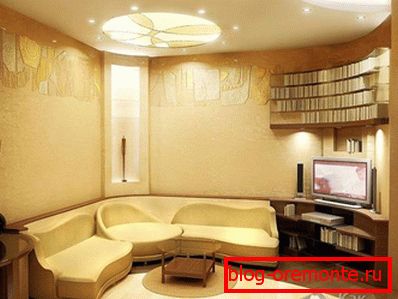
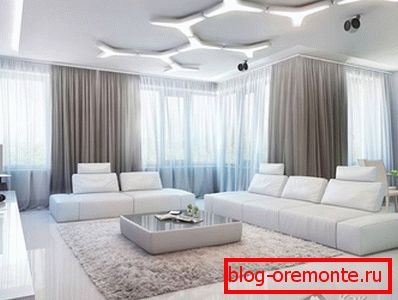
Renovated top class. It will allow you to transform your home or apartment beyond recognition. It is hard to do without the construction team and a professional designer who can turn the most ordinary Khrushchev into luxury housing. There are no restrictions for designer delights, fantasy can roam as you please.
It is clear that it is definitely impossible to determine exactly how much such repairs cost, since everything depends on the cost of the materials to be used, the square of the room, as well as the use of the services of specialists or the performance of the work by hand.
Consider that the higher the cost of materials for the repair, the more expensive the construction team will have to pay for the work done.
What are the pros and cons of European-quality repair

The advantages of this type of repair are sufficient. The most important of them are:
- the comfort of living;
- obtaining aesthetic pleasure from the contemplation of the updated interior;
- safety of your health.
Thanks to new, environmentally friendly materials, it is possible to make a home not only beautiful, but also harmless. It should be noted that modern materials used for European-quality repairs have a longer service life. Due to this, it is not necessary to do repairs as often as in Soviet times. Having made the repair once, you just need to maintain it in proper form. Facing materials, solutions and mixtures that are used now will not change their appearance even after reusable cleaning and cleaning.
Despite all the advantages listed above, renovation has its drawbacks. The main of them should be called its value. Even if you want to make cosmetic repairs, it can be expensive if you use good and high-quality materials. As you know, you need to pay for the quality, but you, of course, will not lose, such a repair will pay for itself. If we talk about the repair of the middle or upper class, then everything will be even more expensive.
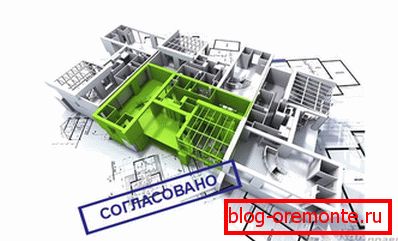
Another disadvantage is the long process of obtaining permission for redevelopment. When the project involves the dismantling and bearing walls or making the opening in them, then you have to wait even longer, because in this case a special commission is convened, making the final decision.
So, now you know what a renovation is, what it is eaten with and what its advantages and disadvantages are. If you decide to do it in your home, let's learn more about how to do it.
How to start

We must remember that any repair begins with the preparation and definition of the work front. This is what you need to do - decide what you want to do with your room and what type of repair to perform. First, assess the condition of the housing and think about what we would like to change. It is clear that everything will rest against your budget.
When you want to make something fresh and new in the interior, to change the situation, it is enough to carry out cosmetic repairs. There are no special difficulties in such work, and you can do everything yourself, saving money on hiring specialists. You will need them to purchase better materials.
And in the case when the soul requires global change, or you want to move to a new building, you need to do a major overhaul. You must be prepared for the fact that at the time of the repair work you will have to move in with your family or temporarily rent a home. Some materials, such as screed, need time to dry, and indeed, be in a place where repairs take place, unpleasant: dust, dirt, etc.

Once you have decided what repair you need, it is advisable to record all the work that you definitely need to do. This is done so that you can calculate the amount of consumables needed for work. In addition, you can roughly estimate how much all this will cost. Experts advise to purchase materials in advance and store them in a place where repairs will be made. Then materials can “acclimatize”. Moreover, buying everything together, you can save a lot, because in the store you can make a good discount. Bulk, as they say, cheaper. Especially since you can transport everything at once, too.
Some types of materials, such as wallpaper, laminate or tile, it is better to take with a small margin. After all, you can miscalculate in the calculations. In addition, you can easily damage the material during operation. The problem is that it is not always possible to purchase exactly the same material.
The beginning of the modern euro-repair apartment

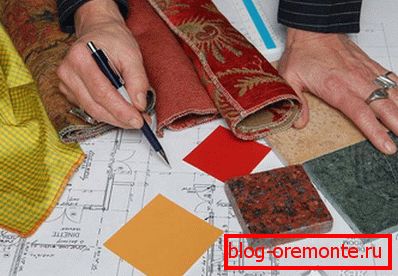
When you decide to do a major overhaul, the initial stage will be to attract a professional designer who will design the future interior in your apartment. He will be able to develop a sketch of the arrangement of furniture, outline changes in the layout of the room, electrical and communications. In addition, he will professionally select the finishing material in order to achieve the perfect combination of color and style. Rooms can be visually made more spacious and expand them, add light to dark rooms, etc. The designer will be able to arrange your room in accordance with fashion trends. True, the work of the designer is not cheap.
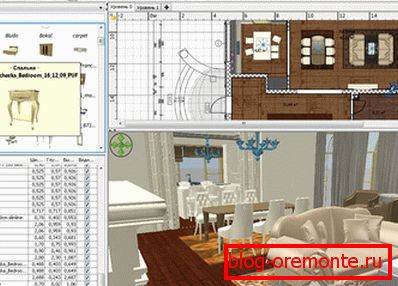
If you know how to work with a special computer program or are able to master it in a short time, then you can do this project yourself. It is clear that the selection of furniture, materials and design will not be professional, but it will be your vision of your corner. The main thing is that making a project yourself, you will save your own money.
When it comes to redevelopment of the premises, the renovation may include:
- installation of doors and windows, demolition and installation of new additional partitions;
- combination of two or more rooms into one;
- modification of the forms of rooms;
- the construction of arches with a complex shape, the manufacture of multi-level ceilings, the combination of a toilet with a bathroom, etc.
What room to start work from

If you are a beginner, you may be asking yourself this question. If you decide to make cosmetic repairs, you can start from any room in the room. You can make repairs separately in each room. Then you can proceed to such premises as the bathroom and kitchen. To some, such a method may seem inconvenient, but here the decision is yours. The main thing to consider is that the corridor and walk-through rooms are best done at the end of the repair, since you will often walk through them and carry tools and materials.
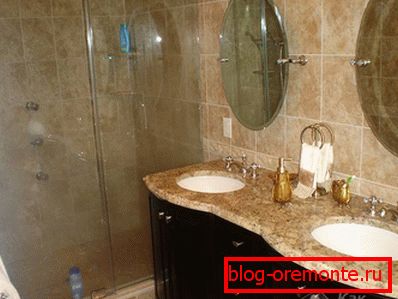
In the event that you decide to live in a house or apartment during the renovation, you will have to work separately on each room. Even if you decide to do all the work yourself, it is desirable to entrust some work to specialists. No matter how hard you try, it is important to do the wiring correctly, because the safety of both you and your property depends on it. Here we need certain skills and experience. The same applies to the installation of windows or doors. This job is not so difficult, but still not worth the risk. Especially it is necessary to allocate repair in a bathroom. As practice shows, this is the most difficult to repair room of all. By the way, this is why professionals for the finishing in the bathroom take more money than the rest of the rooms. The thing is that the process of performing work is quite time-consuming.

But as for the overhaul, here the situation is much more complicated. Let's take a closer look at all the steps that need to be performed in the correct sequence, if you want to avoid mistakes and do everything so that your repair goes perfectly and according to all building requirements.
Do-it-yourself overhaul - sequence of work
Overhaul consists of a whole complex of various works that must be performed in the correct order. As mentioned above, first you need to make a project and decide what changes you want to make in your home. And further work should be done in the following order:
- Dismantling.
- Wiring and all necessary communications.
- Draft (starting) ceiling trim.
- Draft (starting) wall decoration.
- Floor screed.
- Primer walls and ceiling.
- Finishing (finishing) ceiling.
- Finishing (finishing) wall decoration.
- Installation of flooring.
- Installation of new doors and plinth flooring.
Let's analyze in detail what the task is and how to carry out all these points correctly.
Stage 1: dismantling
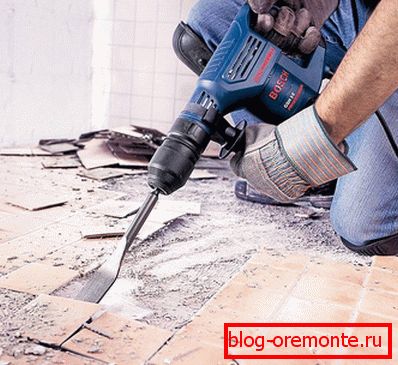
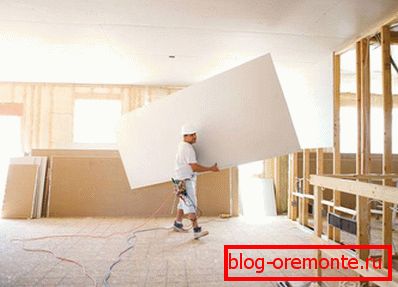
At this stage it is necessary to remove all unnecessary. Here it is definitely necessary to "break - not to build." This “extra” includes: old wallpaper, tiles, lamps, switches and sockets, decorative plaster elements, waste plasterboard systems and suspended ceilings, baguettes, ceiling whitewash, polystyrene tiles and other types of facing materials. We recommend dismantling the flooring at the very end. After all, all the garbage, dust and other filth from the walls and ceiling during work will fall on him, and not on the cleaned base. And only then everything is removed together. If you do not plan to change the floor, then you should take care of it: at the beginning, lay a thick oilcloth on it, then put one or two layers of cardboard on top, then it will be difficult to damage the floor. By the way, if it is a laminate, then it can be disassembled and removed from the premises.
Please note that the old doors and windows do not need to be touched yet, it will come to them later. While you can remove the trim from the door. Why? When you remove them, you will have to immediately install new ones, since, of course, without windows and doors, all the tools and materials can whistle "good people." It turns out that when installing new doors and windows at the stage of dismantling there is a possibility of their damage or contamination. But when your windows or doors are in good condition and their replacement is not required, before starting work, cover them with a thicker film. That's all - dismantling is done, and you can proceed to the next step.
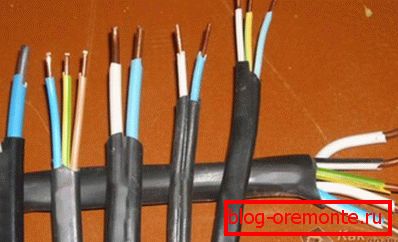
Stage 2: wiring and all necessary communications

This is one of the dirtiest types of work after dismantling that must be performed first. It is clear that for the beginning it is necessary to calculate everything and make a scheme. You have to decide where you will have a TV, aquarium, sound system, air conditioner and other devices that need a source of electricity. It is better to entrust this work to an experienced electrician, who can correctly draw a diagram, select suitable wires with the necessary cross-section and perform their connection.

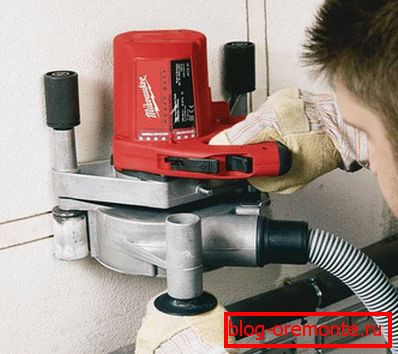
All you need to do is to build walls in the right places. Wires will be laid in these grooves or indentations. The grooves can be done in several ways, it all depends on the tool with which you will work:
- A chisel and a hammer is the longest and most laborious process, the strob does not always work out perfectly even, but it is cheap and angry.
- A hammer drill or perforator is a simple, clean and fast way, the main thing is to have the right tool. True, the strobe will not be smooth enough either.
- The Bulgarian is also a quick way in which you can get a smooth strobe, but there is one drawback - the formation of a large amount of dust at work, which is difficult to catch, even using an industrial vacuum cleaner.
- A wall chaser is a tool designed specifically for this purpose. The strobe is perfectly flat, and you can select the desired width and depth. Minus - the cost of the tool, if possible, you can borrow it from friends or rent it in the store.
After that, the wiring is done (television, electrics, telephone, Internet and other necessary wires). All of these devices have their own power and can load the wiring system in different ways. It is very important to calculate the entire load and choose the right cables, which is why it is better to involve an experienced electrician. If the wires do not survive, they will melt and a short circuit may occur, and what is fraught with, we think, you know. Moreover, the replacement of electrical wiring will cost you dearly, since you have to tear off the entire lining to get to the cables.
At the same stage, it is necessary to perform the layout of the other life support systems: communications for the plumbing system, heating, sewage, etc. If necessary, old metal pipes can be replaced with new, more reliable ones. Often use plastic pipes with good performance properties. This applies to both water pipes and heating and sewage pipes. Optionally, you can make a warm floor in the bath, corridor or another room as desired.
Stage 3: Draft (starting) ceiling finish
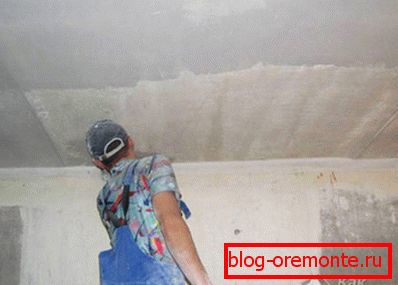
The whole essence of this work is to make the ceiling, which will be ready for subsequent finishing: painting, gluing plates, installing suspended systems and baguettes. With the help of plaster the ceiling needs to be leveled and eliminated all the flaws. Immediately primed the ceiling and paint it is not worth it, since you will have to work with the walls. During their preparation for finishing, construction dust will form, which will settle on the freshly painted ceiling. Such finishing is called roughing or starting, so that after all the roughing works you can complete the final finishing.
A completely different case with a stretch ceiling. Its installation is recommended to be carried out in the last turn, without preparing the ceiling in a special way.
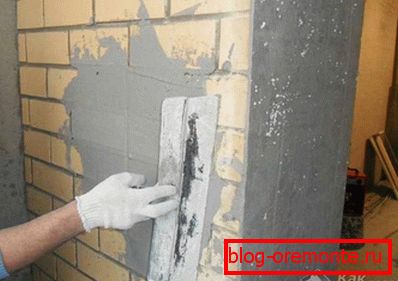
Stage 4: roughing (starting) wall decoration
It is at this stage that you can dismantle old unnecessary windows and install new ones. Order windows in specialized firms, which there is a sufficient number. You can arrange for them not only to deliver the double-glazed windows, but to install them immediately. It will be cheaper than hiring new employees, as the company can give you a discount.
After new windows are in place, they need to be protected by covering them with tape and tape. Now you need to deal with the slopes and all the walls in general: align the slopes, plaster the walls, patch them and clean everything, thereby preparing the surface for finishing. If you follow this sequence, then the dust that can get on the windows will be the minimum amount. Please note that Stage 3 and 4 can be performed at the same time, since all the works are almost identical.
Stage 5: floor screed
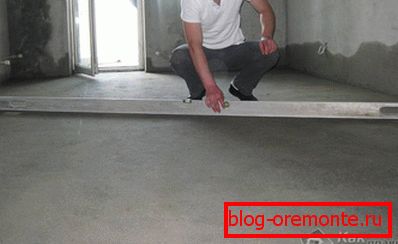
Rough finish is almost ready, you just have to do it on the floor. At this stage, you have walls and ceilings that are prepared for finishing. What to do with the floor? When you decide to leave the old coating, which is well preserved, you can skip this step and move on to the next one. If you need to make a new floor, and its basis does not meet the established requirements, you will need to make a tie. What it is? Leveling cement-sand layer, which gives the surface rigidity. Another way to prepare the base is to fill a self-leveling mixture, which is numerous on the market. It remains to wait for complete drying and you can proceed to the next stage.
If parquet will serve as a floor covering, then it is necessary to start installing it immediately after the rough base has dried. No matter how hard the parquet handlers can convince you that the sander they use will be able to work without dust - do not believe them. Dust will be present in fairly large quantities. Therefore, all you need to do before the walls and ceiling will be finished on fair. Then the finished parquet must be covered so as not to damage it during subsequent work.
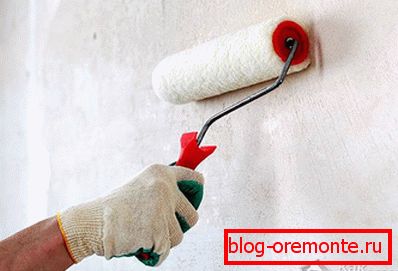
Stage 6: primer walls and ceiling
At first glance, this step may seem insignificant to you, but it is simply necessary to apply a primer on the walls and ceiling, if you do not want all your work to go ashes. The primer has good adhesion and transfers it to the treated surface. This property allows materials to bond well with each other. The primer penetrates deep inside. Thus, the applied finishing material will firmly adhere to the walls and ceiling.
It is necessary to apply a primer on the surface of the walls and ceiling according to the instructions from the manufacturer. To check whether everything is primed, it is necessary to wait until it dries and just hold it by hand. Now look at the hand - if there is no dust or dry putty left on it, you did everything correctly and can proceed to the next stage. If there is residual dust, walk around the tool again.
Stage 7: finishing (finishing) ceiling
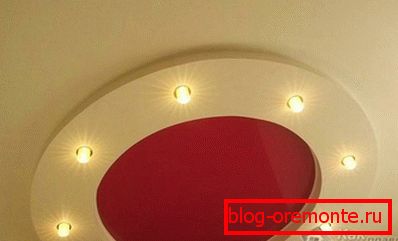
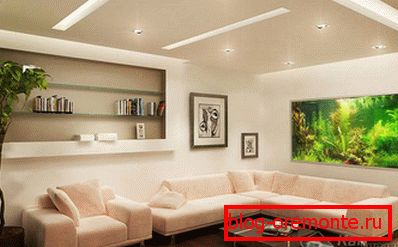
Now you can say you have reached the finish line, since the bulk of the work has already been completed. You just have to arrange everything and put in order. The first step is to finish the ceiling. As a cladding material can serve as wallpaper, decorative plaster, polystyrene plates (cheaper), plasterboard structures or PVC panels (great for rooms with high humidity, such as a bathroom and a kitchen). What exactly to choose is a purely personal matter. Start from disposable facilities and the overall design of the room. If the room needs to be visually enlarged, stretch ceilings would be ideal.
If you want to glue baguettes, you first need to finish the walls and only then begin to install them.
Stage 8: finishing (finishing) wall decoration
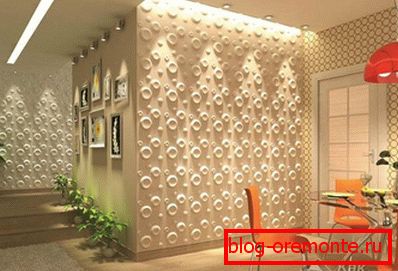
Now it is time for the walls. Here the situation is similar to the ceiling, except that the choice of materials is even wider. Ideally, it is better to choose all materials for finishing at the planning stage in order to immediately purchase them. Wall decoration is one of the important stages, since they play the main role in the design of the room. For their finishing you can choose:
- wallpaper, expensive or cheap. Products are so diverse that everyone can choose the color, pattern and texture to their liking;
 decorative plaster - looks very nice, but the technology is quite complicated;
- lining, laminate, block house and other wooden products will give the dwelling a natural look;
- paint is cheap and cheerful, a universal option available to everyone;
- cork cover - natural, high-quality, durable and environmentally friendly material;
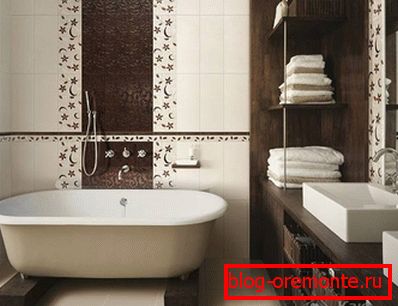
- ceramic tiles, with which you can improve not only the bathroom, but also the kitchen, hallway or a separate part of the room;
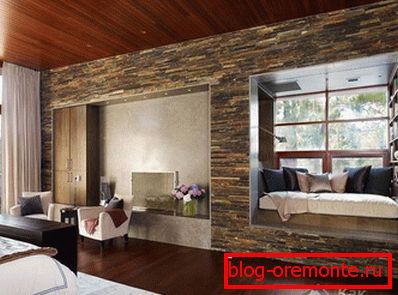
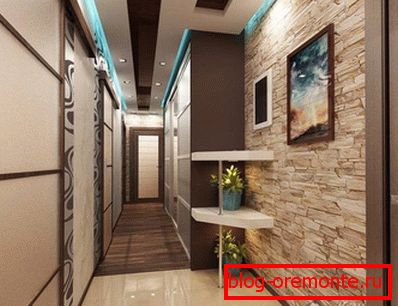
- decorative stone, which will give a home a noble look, moreover, it is also environmentally friendly, as it consists of natural natural ingredients;
- decorative plastic panels - not exclusive, but it looks pretty good.
You can do this work yourself, you just need to familiarize yourself with the technology and learn how to apply this or that finishing material. All these topics and instructions you can find on our website.
Now you can back install sockets and switches.
Stage 9: floor installation
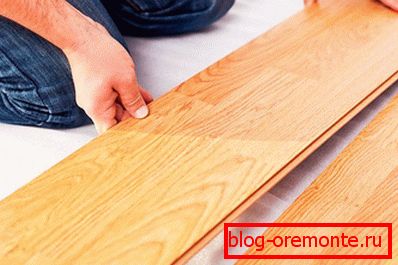
To be inspired and not stop there, look how much work you have already done! Repair is almost complete, it remains to perform only the last few steps. One of them is to install a floor covering. On the basis which you prepared in advance, it is necessary to lay finishing material. It can be linoleum, laminate, parquet, tile or carpet.
When you work with parquet, at this stage it should be already laid and polished. It remains only to open varnish.
Stage 10: installation of new doors and skirting
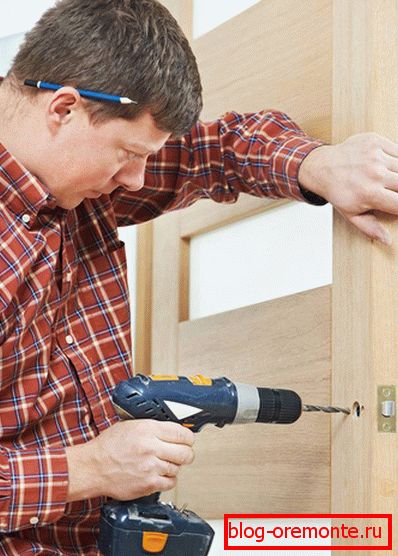
When the flooring is already in place, you can dismantle and install new doors, both entrance and interior. Renovation of the housing is almost ready, it remains only to install the plinth into place. After that, it's time to do the design and interior design. Arrange furniture, hang pictures, mirrors, mount lights and everything that is provided for in your design project. Now you can open the champagne and celebrate the end of the repair work!

The order of execution of work may vary depending on each situation.
Let's sum up
As you can see, it is not so easy to make a renovation. In this case, you need certain skills, but most of the work you can do with your own hands. Before this, it is better to get acquainted in detail with the instructions for performing certain types of work in order to do everything correctly and efficiently.
If you have any questions, suggestions or recommendations, write them in the comments to this article. Our experts will quickly and efficiently provide you with accurate information on your subject. In addition, we are pleased when others share their experiences, which will help other readers of our site!
Video
This video shows how the apartment was overhauled and what was the result:
A photo


See also:
- In what order to repair the apartment.