How to make a railing for the stairs
In the role of the business card of a private house is often a beautiful staircase, an integral part of which is the railing. It should be noted that the main functional purpose of this design is the possibility of convenient movement between floors. But for the reliability and safety of the stairs are responsible handrails and railings. From them, among other things, the overall attractiveness of the ladder construction largely depends. In the article we will tell how to make a handrail for the stairs with your own hands from wood and metal.
In the process of manufacturing railings should be observed high accuracy, because the components for them are located at different levels.
You will have to make different attractive items, maybe make patterns, etc. But do not be intimidated by the manufacture of railings, because more often "the eyes are afraid, and the hands do." For the work!
How to choose the source material
Before you start assembling the railing, you must decide which type of material will be most suitable for the interior of the house.
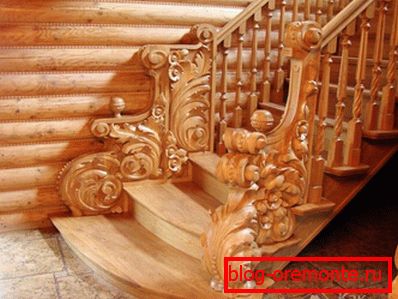
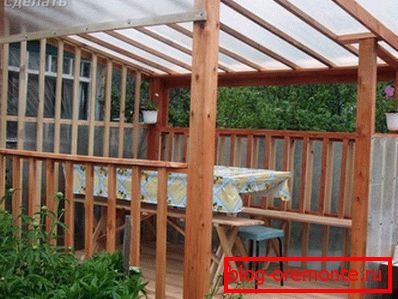
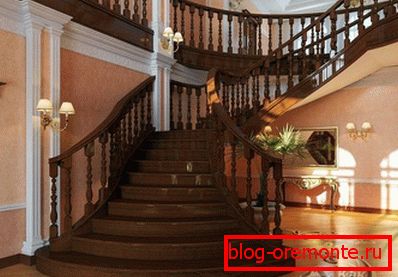
- Many generations use natural wood for the production of stairs and railings. Today, railings are made from different types of wood. And each type of wood fills the interior with a special aroma. Wooden railings will fit even in the most cutting-edge room design.
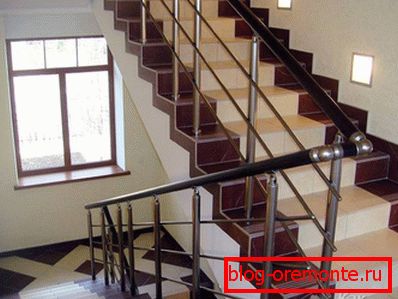
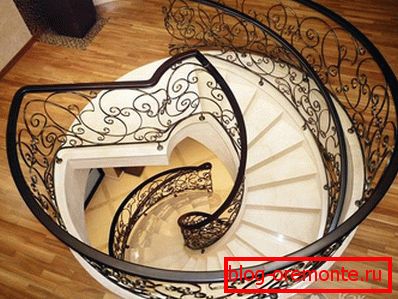
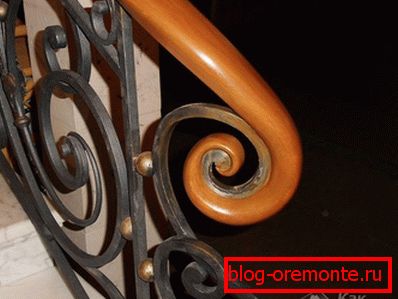
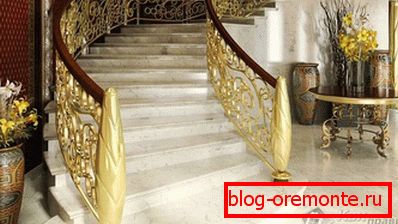
- Metal railings are also very popular. Bent and forged railings look noble and elegant. They are very versatile and fit into every interior. It is only a responsible approach to the choice of patterned pattern railings.
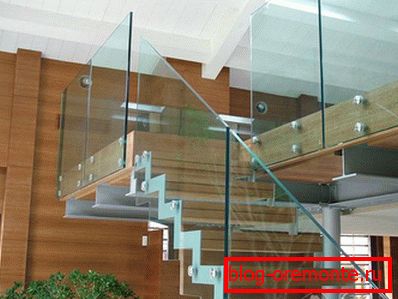
- Plastic and glass railing. Glass panels replace the balusters, and the handrails in this case are made of plastic. However, in this case, the railing can be used only with a certain interior solution. In combination with retro and classic styles such handrails will look inappropriate.
Important points to consider when making a railing
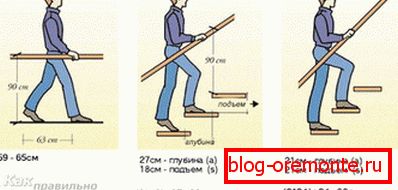
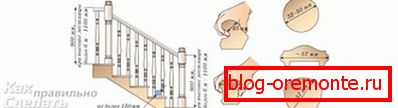
Here you should pay special attention to the form. If you have children, then it is likely that the railing can be subjected to great trials. The child is likely to repeatedly test the strength of the railing, for example, by loosening them or simply sliding down them. It is also worth noting that the lower part of the railing should be done so that your baby cannot slip between the elements. As for the height, then it is worth to think about it separately. The minimum height of the railing is 900 mm. The most successful height for a person 1.80 m tall is 1200 mm.
As for the surface of the railing, it should be perfectly smooth. If the staircase is narrow, it is allowed to install a railing on one side only. However, if its width exceeds 1250 mm, then both sides should be equipped with a railing. Note also that the distance between the balusters in the case of small tenants can not exceed 150 mm.
The tool is an important part of the preparatory process.
Before you make the railing, prepare the entire tool. Everything here of course depends on the source material you have chosen for the manufacture of handrails. If the railings are metal, then you will need a welding machine with the necessary materials for it. If you equip the staircase with wooden railing, then first prepare such a tool:
- two hammers - light and medium weight,
- stameski,
- hacksaw,
- screwdrivers
- chisel,
- electric drill,
- skin,
- jigsaw
- metal construction square, plummet either level,
- screwdriver.
The work of the master is afraid! Making stair railing
First of all, collect all the elements necessary for the work. The set for the assembly of railings includes:
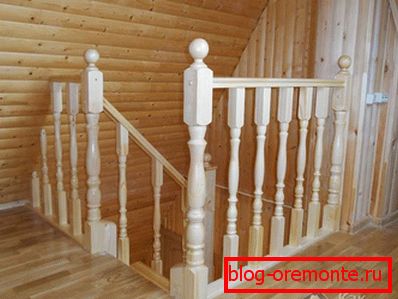
- Handrails - this is the part of the railing, for which a person holds his hand.
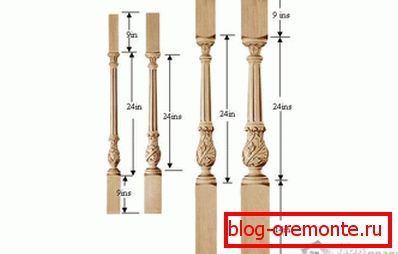
- Balusters - are vertical racks on which handrails are held.
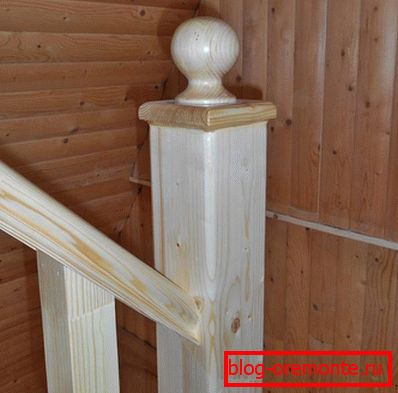
- Swivel and end cabinets - it is more durable than balusters, racks, installed vertically. They are placed at the beginning and at the end, as well as in the places where the stair structure is turned.
Manually making elements of the railing, please note that some of the finished parts in the process of assembling the structure will fall into the waste. This may be due to errors in the course of the work. Experts say that 10% of the elements will be defective. So make more elements than you actually need.
The assembly process depends on the source material. If we are talking about the assembly of metal rails, the main step is to connect the parts together using a welding machine. If you do not know how to handle it, then it is better to call a specialist at the house. It is possible to connect metal parts with rivets, however, such a connection is not very reliable.
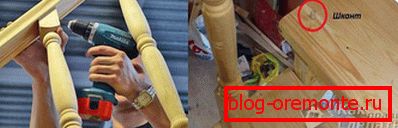
For the manufacture of wooden handrails, balusters and swivel thumbs, you will need wooden bars of different sections. For their processing will require a jigsaw. With it, you give the details form. After that, you should carefully polish the surface of all elements for the railing. And at the next stage, you can do the installation process.
Installation of wooden railing. Learning to do right!
Begin mounting the railing with the installation of end stands. These are points from which it is necessary to make a start in the course of performance of work. They should be installed at the beginning and at the end of the stairs, and also at its corners.
Fasten one of the drawstrings on one of the thumbs and stretch it between all the thumbs. So, you determine the location of the rail, which will allow you to properly and securely fasten it.
Then mark the mounting points of the balusters. The distance between them is determined individually, however, it is not recommended to put them further 20 cm apart. Continuous installation is welcome. These elements can be fastened both to the steps and to the bowstrings on which the steps are fixed. If you decide to fasten balusters to the string, then you need to pre-cut them at a given angle. Corresponding to the steps, balusters are mounted horizontally.
To fasten the balusters with nails is not very effective. Practice shows that the fastener of nails is quickly loosened during operation. It is better to use screws and specially designed for this glue.
Now balusters should be attached to the rail. If you make special slots in the handrail for the entrance of balusters, then the process of installing the railing for the stairs will be simplified. In those places where the staircase turns, for mounting balusters to the handrail, you need to make a special transition element, which is sawed at a certain angle.
After the balusters are installed, putty all gaps. Clean the surface of the finished railing from dirt and dust. All defects sand. Now leave the structure so that it can dry out completely. Then proceed to the finish, which includes coating the surface of the railing with varnish or paint.

If you want the wooden surface of the railing to preserve the beauty of the natural pattern, then you can use parquet lacquer to process them.
At this work on the installation of wooden railings will be fully completed.
We buy material for forged railing
Railings for forging stairs are much more difficult to make than their wooden counterparts. However, the effort is worth it! Initially, you should purchase the source material and assemble the tool:
- Level, grinder with nozzles, sweep circle.
- Welding machine with electrodes, mask.
- Metal and metal profiles of different sections. It is better to use a profile of a small section, because it is easier to cut and give it shape.
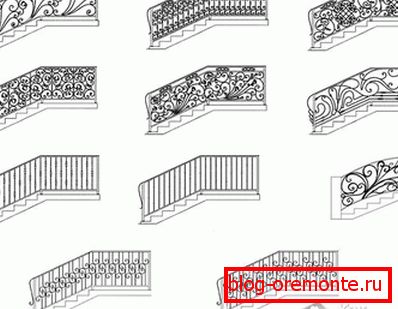
Before you begin, it is very important to think about the sketch of the railing. It is important to consider that the finished railings must meet all the features of the interior of the house.
Implement a very difficult project at home you are unlikely to succeed. Because for this you need a forge and pneumatic hammer. Choose a more modest, but no less attractive design.
Prepare a place for assembly. On the ground there should be a special coating on which you can draw on a scale of 1: 1 steps. To do this, remove the measurements. Measure the height and depth of all steps. Now draw the silhouette of the stairs on the prepared site. Then mark the outline of the railing.
The pillars should be spaced 10 cm from the first and last steps. This is necessary for reliable and durable fastening of the railing posts.
We invent a pattern and embody the idea
After you have painted the frame, think over the pattern. For example, it can be balusters resembling a vine. It can be decorated with metal sheets, sold in specialized stores. For drawing use easily washable chalk.
When you make a pattern, take a rope, and it will determine the length of each individual curl. To do this, attach the cord and measure the segment. In accordance with the measurements cut profile. Moreover, the profile should be slightly longer. Such a stock will help you make fewer mistakes. If it is superfluous, then you can always cut it off.
Getting to the forging and welding of the frame with a pattern
Each prepared segment you need to give a shape that is designed according to the pattern. Using a hearth at home is impossible, so bending the profile will have to be cold. To do this, of course, should be patient.
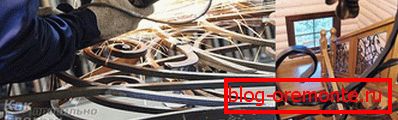
Use a hammer and a vice for this. Insert a section of profile into them and try to bend it with a gas key. A few attempts and you will do it! Then, if necessary, you should cut all the extra centimeters from the elements of the pattern. The resulting forged elements must match the pattern with maximum precision.
Now you need a welding machine. First, connect the frame of the fence. Lay out the desired shape of the profiles and grab them by welding. It is better to make the seam temporary so that in case of an error, it can be corrected without extra effort. Now fill the frame with forging elements that create the pattern. Fit a piece by piece by fixing them. Impose point seams that can be disconnected when absolutely necessary. If at the end of the work errors are not identified, turn the railing over to the other side and boil all the seams properly. Return the structure to its initial position and boil it on the opposite side. Now weld forged jewelry that will enrich the design. The finished section should be installed, not allowing deviations.
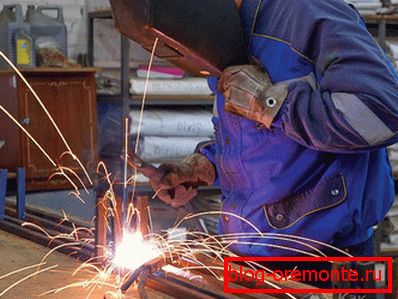
Strip all seams to be aesthetically pleasing. This process is carried out by the grinder with a stripping wheel. Pre-protect your eyes from sparks by wearing special glasses. Then fix the metal brush in the unit and carefully clean the railing surface. So you remove defects, rust and irregularities.
Final stage of production - painting

It is possible to paint a handrail with a brush or a spray. Do not forget to prime the metal before. Interestingly, only white soil will hide small irregularities, which will make the paintwork more smooth. When choosing paints and primers, pay attention to the composition, because they must be compatible. Each layer should dry well.
If you want a wrought iron railing to look gorgeous, you should apply a patina for forging. So, you can decorate some elements of forging. Now the manufacturing process is complete. All you need is to install the fence to a permanent place.
Do you already have experience in the manufacture and installation of railings? Then write us a comment. Your experience will be useful to us!
See also:
- spiral staircase with your own hands made of metal;
- how to make a staircase in the house to the second floor.
A photo