How to make a housekeeper with his own hands
Looking for what most often is a person before leaving the house? This may be a mobile phone that you have to call from another or home. Glasses that are always hiding somewhere. Well, the most important thing is the keys. It is their loss that causes the greatest stress when there are just a few minutes before the meeting. To all these things were always in sight, it is important to know how to make a housekeeper with your own hands.
What can it be
The key keeper is a small device whose design is limited only by the creative abilities of a particular person. She may be:
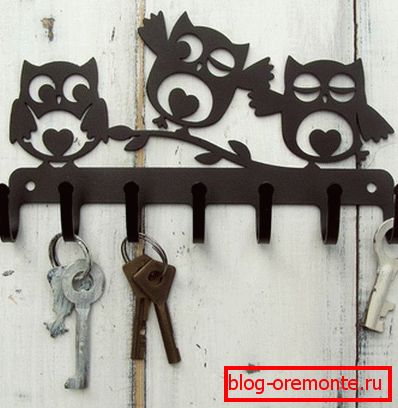
- Wall. It is usually located closer to the exit at eye level, so as to always be visible. It may have hooks in its design, and a more creative method of fastening the ligament may also be used.
- Pocket. It is a small purse, in which the keys are hidden. Such a product is useful in that it allows you to eliminate the appearance of scratches on any gadgets, as well as to prevent holes in pockets and bags.
- Desktop. In this case, it can be made in the form of a small box with attractive patterns. In order not to forget to put the keys in it, a special key chain is put on them.
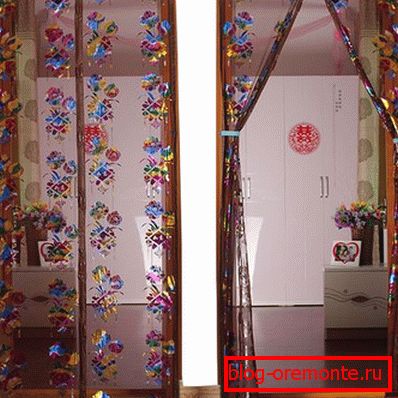
- Located on the door of the locker. Many have a pier near the exit. Why not use the inner surface of the door with more benefit.

This item does not have to be just a dwelling place for keys. Additionally, it can be adapted for business or other notes. Special mount will be useful for glasses or mobile phone. In addition, additional shelves will not forget where the last time was left brush and shoe polish. Also here you can store portable drives (flash drives), well, or covers from them, which certainly tend to get lost somewhere. If the wall key holders are located close to the door, then it is better to provide additional levels of protection so that no one, having thrust out his hand, could take control of the bond.
There is a huge amount of ready-made options. They are designed according to the place where they will be used. For office or other companies make metal products that have a built-in lock. Hotels boast solutions that are created for a specific interior. Warehouses are not distinguished by sophistication, but are designed to perform their main function, and not to please the eye. But the repair of a house or apartment is a reflection of the inner world of its inhabitants. Therefore, it requires an individual approach.
Wall Key Holder Options
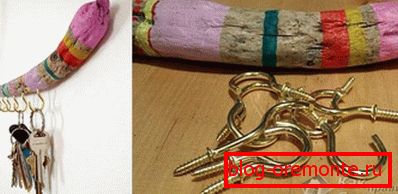
In the hands of a creative person, any little thing can become an element of design or decor. To make the simplest version you will need:
- branch intricate shapes;
- metal hooks;
- perforator;
- drill;
- self-tapping screws;
- dwelling.
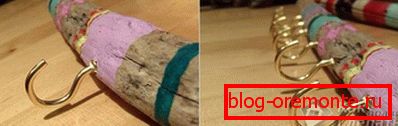
As the first element, a knot from an oak, larch or other tree whose wood is highly durable is a good solution. But it does not matter, you can take what you like the most.
- Emery paper sandpaper sanding. If possible, peel off the bark. This must be done because it may bring unpleasant neighbors who will drive wood.
- With the help of a drill, several holes are drilled. Everything will depend on how many keychains there are in the family. The diameter should be slightly smaller than the diameter of the hook thread. Two more extra will be required for mounting to the wall.
- To impart the desired tone, the product can be covered with stain. After complete drying on the surface, it is worth walking with fine sandpaper to remove the raised fibers.
- The next step is behind the polish. It will give the suspension a complete look. You can use both matte and glossy, everything will depend on what is best suited to the interior.
- The element is applied to the wall, and marks are made under the mounting for installation.
- Holes are prepared with a perforator, dowels are inserted and the key holder is screwed into place.
- The caps of the screws are recessed. You can decorate them with overlays or putty on wood.
- The final touch will be the twisting of the hooks and the hanging of the keychains.
This option would be an excellent solution for baths, log houses or logs. Well suited to the interior, where the decoration was used wood. Additionally, each hook can be marked with a symbol. Their application is carried out by an electric burner or in another way.
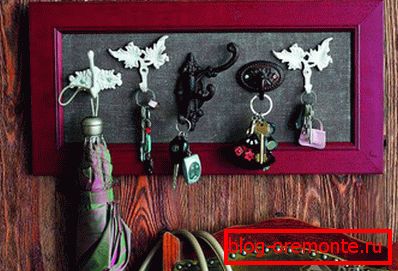
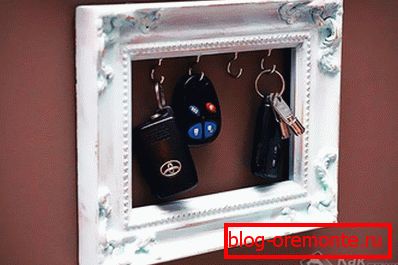
Most homes have picture frames. Some of them, perhaps, have long been gathering dust on the shelves, since they have nowhere to put. There is an advantage to breathe new life into them. For this you will also need:
- glue;
- a small piece of plywood or fiberboard;
- decorative hooks.
If the appearance of the frame is not much like, then it can be sanded and painted in the color that fits best. Plywood or fiberboard is adjusted to the dimensions so as to fit on the protruding sides of the frame. Additionally, this item can be covered with any fabric. In this case, you will need to make a gap of a few millimeters on each side. The cover is fixed with glue. They also attached hooks to the surface. The final touch will be the installation on the wall.
In another embodiment, you can not use sheet material to close the frame. After processing it, it is enough to tighten the hooks in the inner upper end and to decorate them additionally.
If you have the skills to work with a jigsaw or electric saw, then you can implement another unique project. It will require:
- plywood length of 25? 15 cm;
- varnish;
- stain or paint.

Before the start of manufacturing it is worthwhile to think about what would like to see key rings. This may be a figure of a boy and a girl, circles of different diameters, figures of objects, which include keys. Then you can find a suitable simple drawing on the Internet or draw it yourself. Thereafter:
- The ends of the plates are processed. The chamfer is removed and the corners are rounded. This can be done manually with sandpaper or with a sanding machine.
- The drawn or printed picture is applied to the plane. This must be done so that its lower part coincides with the lower edge of the workpiece.
- The image is transferred by a pen or a pencil. It can be simply transferred with a suitable metal object.
- The lines are drawn so that they can be clearly seen.
- Manual or electric jigsaw, which is set in a nail file with a small tooth, cuts are made along the outlined contour.
- Figures are laid aside.
- The main sheet is trimmed to 5 mm from the bottom. It is necessary that the charms are a little bit.
- The surface of the cut products is polished to remove all chips. Holes for rings are drilled.
- At will the surface can be processed a varnish, paint, wood stain or to make any pattern by means of a burner or knives for cutting.
- The product is screwed to the wall.

This key house can be customized for each family member. For example, larger charms are made for mom and dad, and smaller ones for children. Each of them will have its place and will not be lost again.
Another interesting solution would be a housekeeper from a small bar. For work you will need:
- bar 25? 8? 3 cm;
- face circular saw or jigsaw;
- a vice or support in which it is possible to sustain an angle in 45 °;
- metal or wooden blanks.
Wood is well processed with a grinding machine or other device. Angles can be slightly rounded, but you should not overdo it, because the product will lose its appearance. Then, every 5 x 7 cm, transverse marks are made with lines. On these tags cuts under 45 ° are carried out. They must be in the middle, otherwise the construction will simply lose its strength. The bar is fixed on the wall in such a way that the slot goes down. For each keychain, a small metal or wooden keychain is made. In shape it can be anything, but its thickness should coincide with the width of the cut. When keys are no longer needed, the key fob is simply inserted into the slot.

From the trinkets can be abandoned. Then the slits can be made of such size that one of the keys will prolazil into them. It will be enough to insert it into place and everything is ready. Gaps do not have to be at an angle. It is possible to arrange them completely horizontally.
Another interesting option would be to use small furniture locks. They can be purchased at any specialty store. Their number should correspond to the number of family members. Additionally, you will need:
- wooden block;
- feather drills;
- screwdriver;
- sandpaper or sanding machine.
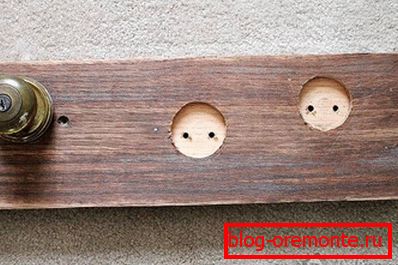
The timber should be of such thickness that the inside of the castle could completely fit in it and not look out. Pen drills will be needed in two sizes. The first must correspond to the diameter of the core, and the second - the diameter of the clamping nut. The tree is processed at will, so that the shape and configuration of the final product matches the already existing elements in the house. Markup is done. It is necessary to consider the width of the cladding ring. A drill hole from the front side is drilled with a smaller drill bit. Trying on the lock. With the help of a tape measure, the thread length for the nut is measured. On the reverse side, a hole with a large drill is drilled to a depth slightly less than the length of the thread. This is necessary to drown the fastener. The design is fixed on the wall. Each keyhole is signed or highlighted in a specific color.
The original solution could be the use of decoupage technique. In essence, it is a process of decorating various surfaces with a pattern or picture you like. For the entire operation will need:
- any wooden blank;
- napkin or rice card with your favorite pattern;
- PVA glue;
- acrylic lacquer;
- acrylic white paint.
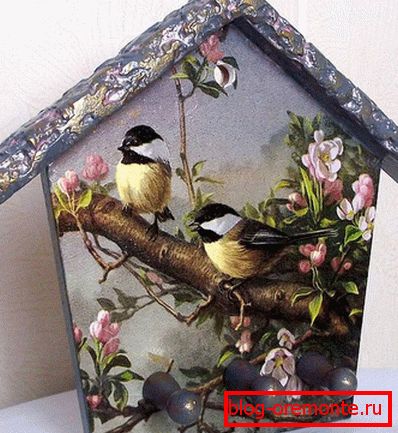
The surface is well cleaned and polished. Next, preparing the background for the application of the desired image. To do this, the front side is painted white. After drying of the first layer, it is necessary to put one more. Thus it will be possible to hide all the flaws. From the napkin or rice card, the necessary section is pulled out. Either the edges simply break off so that they are not exactly trimmed, since it will not look so attractive. The picture is placed in the middle of the prepared surface. PVA glue is applied with a large brush. Start from the middle and move to the edges. In this case, it will turn out to smooth out the paper well, as well as to remove all air bubbles. Glue needs to grab and dry. If the edges are empty, they can be decorated. The coloring composition is selected in tune with the overall picture. A small piece of foam sponge is cut and clamped in the clothespin. The device is dipped in pigment, excess is removed and pro-blotting is performed in spaces where there is no lining. The final touch is a protective varnish. It is applied in two layers. To make it easier to see the bald spots, it is enough to turn the plane to the light. After drying, you need to go fine sandpaper to level the flaws. Hooks are selected at will.
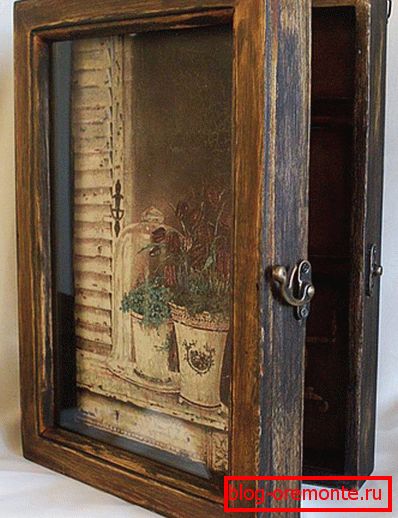
In addition to open options, you can make a secret, which will be hidden behind a picture or another element of the decor. To work you will need a small wooden box. You can take any of the cigars, creams, also suitable, and the old box, which is no longer used for its intended purpose. A frame with a beautiful picture is mounted on the top of the lid. A recess is made in the wall. If it is drywall, then it will be enough to cut it to the required size. In the case of a concrete wall will have to tinker a bit. The contour is cut using a grinder with a diamond wheel, and the rest is knocked down by a perforator. The main compartment is placed in the middle and fixed with screws and dowels to the wall or spacers to the drywall and crate. For the main cover, you will have to choose loops that would allow it to open together with the frame of the picture. Hooks are made inside. If you do not show it to anyone, it will be difficult to guess that something is hiding behind the drawing or photo.
If there are children in the house who like to play Lego, then some of its parts can be used to fix the keys. For this perfect single bar or a small module. It must be glued or screwed to the wall. A small brick will be used as a key fob. There are ready-made elements in which holes have already been made. In case of their absence, it is easy to drill or melt them with a hot awl or nail. When you want to leave the keys, you need to attach the part to the board.

A variation on Lego will be the use of men from this designer. You should proceed as described above, but it is better to glue the figures to the plank. Hard to fix and also have to hand. The ring is inserted into the palm or simply hung on the forearm. It looks nice - it seems that the designer asks not to forget the keys to the house.
Comfortable and unobtrusive option will be a unique design that will allow to suspend the keys without even looking. To implement the idea you will need a metal magnetic plate. Usually these are used for knives in the kitchen. Simply select a convenient place near the exit, screw it to the wall and use it. The more keys are not from non-ferrous metals, the more reliable the bond will be.
Do not limit yourself in terms of materials used. For example, do not buy ready-made hooks. If there are no unnecessary keys to the old castle or apartment in the house, then the holes in them are perfect for attaching to the surface with a screw and the bent ends will be for hanging. Plugs can be used for the same purpose. In aluminum products, the teeth are bent in such a way as to produce a greeting gesture with two raised fingers or twigs of climbers. Small wooden knots glued to the base, also act as holders.
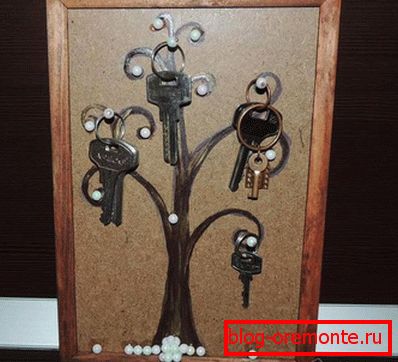
A beautiful solution that fits almost any interior is the use of beads or wooden balls. To perform the work will need:
- balls of various sizes according to the number of bundles;
- небольшой wooden block;
- strong thread or chain.

Through holes are made in the balls. A rope or chain is passed through the holes. One end of it is fixed with a smaller bead or a beautiful knot. The second part is attached to the ring. In the treated bar, transverse slots are made and it is fixed to the wall. In order to hang the product, simply enough to thread the thread into the slot, the balls will not let the bundles fall out.
You can add any key house with the help of a small box that will serve as an organizer. You can buy it in the store where you sell household goods. Often, their purpose is to store clothespins. It is also easy to assemble from small slats of plywood. Such a product will be an excellent device for a mobile phone or glasses.
Pocket Keychain
It is much more convenient to carry things when they are neatly packed. The pocket key holder is not only a functional accessory, but also part of the image of its owner. It can be executed with any pattern or be with the family coat of arms and initials. All this is really done by yourself. For one of the common options you will need:
- a flap of skin measuring 16 × 10.5 cm;
- rivets in the color of the skin;
- zaklepochnik;
- preparation under the key holder with carbines;
- scissors;
- punch.

The key keeper will look nicer if its edges are rounded. For marking, you can use a bottle cap, an intercom key, or something suitable. Further actions are in this order:
- At the intended installation site is applied billet with carbines.
- Labels from the holes are transferred to the skin.
- A bunch of keys is laid inside and the edges are wrapped. This will allow you to try on where it is necessary to install the rivets in order for the product to close. The corresponding mark is made.
- On the space that is located under the keys, the lining is made of the same leather. This will strengthen the back wall and prevent its wear.
- On the marked marks punch holes are made.
- The workpiece is fixed with rivets, and then the rivets are attached to the cuffs.
An additional highlight is the line of a contrasting thread, which can be done with a small indent from the edge.
Another option can be done on the principle of multitool. In order to determine which specific piece of leather you need, you need to collect all the keys in one tight and fasten them with something. You will need to attach them to the material and mark the width with a margin of a few millimeters. Next, the gateways are made and marks are made. One of the sides remains open, and the strap serves as a latch. The bottom line is that the keys will be in the case, and they can be removed on the principle of a penknife. From additional components will need eyelets and furniture hardware. The latter is usually used for fastening adjacent cabinets. It is a threaded bolt that enters the tube. Hats have them made the same.
- In places where the keys will be fixed, a hole is made.
- The elements are put in place, small pads of leather are placed between them so that they do not rub or ring.
- Inserted furniture fasteners.
- Rivets are fixed in the strap and on one of the sides.
- At the bottom is set the grommet to which it will be possible to fasten a key chain or something else.
Someone prefers a key holder in the form of a wallet. To do this, a piece of leather is selected, a zipper is sewn into it. The ends are sewn up. Inside fastens a small band with a ring or a carbine. A bunch of keys is hung on it.
Desktop Keychain

Desktop Keychain очень часто располагается на трюмо. Устанавливается на самом видном месте, чтобы, зайдя в квартиру, не глядя кинуть ключи и заниматься своими делами. В ее роли можно использовать любое небольшое блюдце или упаковку от украшений. Существуют готовые решения в виде изделий по форме ракушки или небольших шкафчиков.
As you can see, wooden or metal key holders are an affordable solution. You can make them yourself, using what is at hand. Many of these solutions can be used as a basis for your own research. We are interested in what ideas you have. Share them in the comments to the article.
Video
How to make a beautiful key case of wood in the Japanese style:
Master class on making pocket key case:
A photo