How to make a chair with your own hands
If you want to spend time comfortably, then you can not do without comfortable chairs. Manufacturers offer various options for such furniture for every taste, but in order to save money, many decide to make everything on their own. In this article, we suggest you consider several options for how to make a chair.
Wood selection
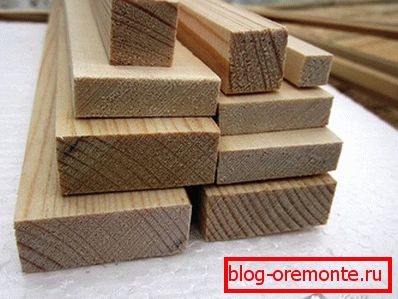
For the manufacture of the chair may require the following types of lumber:
- Boards.
- Array
- Logs
- Bars
Most often, several materials are used simultaneously. Why are logs on this list? With the appropriate equipment, boards and other blanks can be made independently. There are also original ideas on how to make a chair out of a log. Some of these ideas, you can see in the photo section at the end of the article.
As for the choice of lumber, it should not have knots, cracks and fungal diseases.

Be careful when choosing wood, as it is often tinted for a better look.
In general, lumber must comply with the following parameters:
- There should be no cracks on the bars, the edges should be smooth, and the material itself should be dry. Small deviations due to skewing are allowed.
- Boards should have a thickness of up to 100 mm.
- Breed solid wood should be suitable for the manufacture of the chair. It should be strong enough and durable. In most cases, the choice falls on an oak or mahogany. They are easy to process and are durable and durable.
- Also used pine or beech. These wood species are no less in demand and practical.
When buying do not take all the materials butt. Be sure to take with a small margin.
Chair with backrest
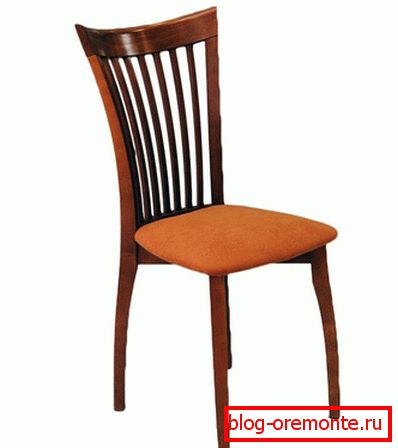
After reviewing the subtleties of the choice of wood, let's see how you can make a wooden chair with a back. The principle of manufacture is similar to the assembly of the stool. Only in this case the back is still made. In addition to lumber, the following materials and tools are required:
- Screws.
- Joiner's glue.
- Cutter.
- Stameska.
- Hammer and other carpentry tools.
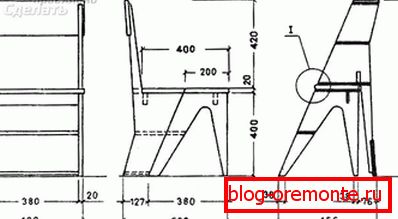
Now you can see a list of the names of the parts to create a chair, as well as an explanatory drawing:
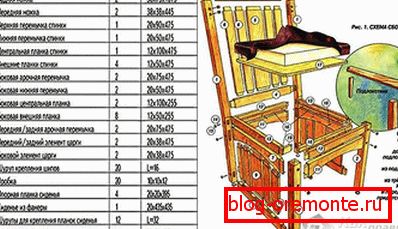
Although there are a lot of details, but in general it will be possible to assemble high-quality and durable wooden chair.
The work process consists of the following steps:
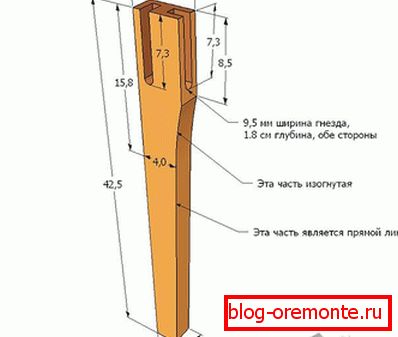
- The first cut legs. They will be 75 mm wide, 38 mm thick, and 1075 mm high.
- Next, find the point of attachment of the horizontal jumpers.
- Unlike the rear legs, the front ones will be shorter. Their height is 420 mm.
- These details, as well as the subsequent ones, must be carefully machined with a grinder.
- Now, using a cutter, select the grooves for joining the legs with jumpers. Beforehand, everything is exactly measured.
- For backrest jumpers, there should be 5 vertical and 2 horizontal racks 475 mm long.
- In the horizontal racks make grooves for fastening.
- Now, starting from the scheme, we make spikes on the parts with the number 3,4,5 and 6. In part number 3 from the middle to the edge, a bevel of the upper part is necessary.
- Pre-assemble, but without glue. So, you can correct all inaccuracies and check the spike / mortise connections. If everything fits exactly, then disassemble the backrest, glue all components with glue, reassemble and clamp the workpiece with a clamp.
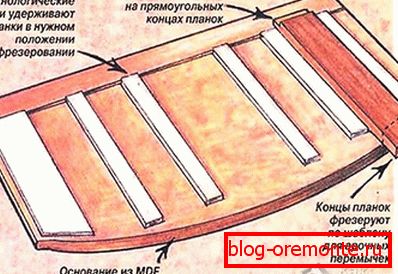
- At the next stage, the side inserts are made. One of them is an arched detail number 7, the lower crossbar 8 and 9, as well as rails 9 and 10.
- Next, cut out the workpiece at number 11 for arched lintels.
- To simplify the task of manufacturing this part, you can make a pattern of MDF, because all the arched elements have equal dimensions.
- Next, on the arched blanks, measure and make grooves into which the bars with studs 9 and 10 will be inserted. Accordingly, studs are made in them.
- The upper ends of the part should be adjusted strictly to fit the cutter. For the manufacture of thorns on the tops, take a cylindrical milling cutter.
- Now, take all the parts corresponding to the number 12 and 13, on the arched blanks cut spikes on the mustache.
- After roughing, all the compounds are coated with glue and clamped with this element of the chair.
- When the glue is dry, the joints should additionally be strengthened with self-tapping screws, the caps of which should be closed with decorative plugs.
- The next stage will work with the bar number 16, which is designed to support the seat. These strips are screwed with screws to the crossbar at number 18.
- Now that all the blanks are assembled, it remains to assemble them into one design. First, glue the parts 11, 12 and 19 to the rear leg. After that, insert the second long leg into the grooves. Having fixed a clamp, it is possible to twist self-tapping screws.
- Further to the finished back glue the side panels and side elements of the tsarga. Glue the front side of the king-legs with legs and arched jumper.
- The resulting design can be put on the spikes sidewalls. Check the squareness. To do this, use the square. If everything is exactly after the measurements and visually, then pull the product with a clamp and tighten the screws.
Once again it is worth recalling that every detail should be carefully polished. There should be no sharp corners and all kinds of irregularities. The collected chair is covered with stain and varnish (up to three layers). In this case, each coat of varnish is applied after the full drying of the previous one.
In conclusion, the seat is covered with soft leather, leatherette or other suitable material.
In order not to damage the floors, it is recommended to fasten rubber or felt pads on the back of the legs.
Folding chair
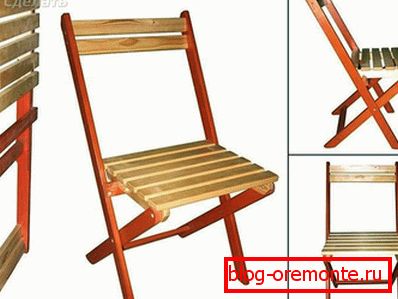
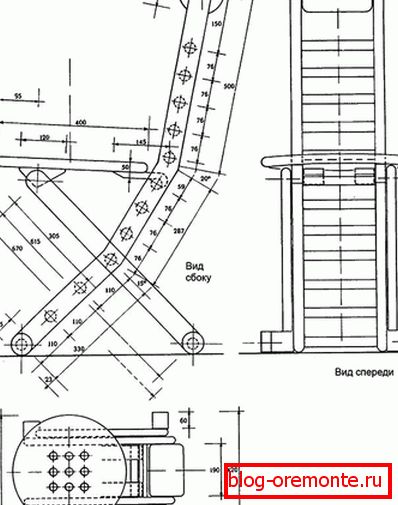
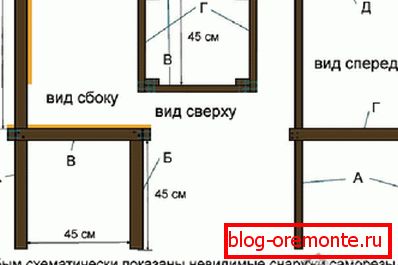
Now let's see how you can make a folding chair made of wood. It will require the following set of materials:
- For long legs 2 bars of 900 mm.
- For short legs, 2 bars of 550 mm each.
- For support under the seat 2 bars of 290 mm.
- For long legs 2 cross-pieces from the board 400 × 50 mm and 340 × 50 mm.
- For short legs 2 cross from a board 280 × 50 mm.
- Wooden rail for backrest base 400 × 70 × 150 mm.
- For the seat 6 slats 340 × 40 × 150 mm.
- Metal rod Ø 10 mm and a length of 36 cm.

The timber in all the above cases is used 30 × 30 mm, and the boards are 20 mm thick. To assemble a chair from these components, follow the instructions:
- In the bars designed to support the seat, drill holes for a metal rod. From the edge 40 mm, and from the supports 70 mm.
- After to them, the slats of the seat are fixed with screws, with a gap between them of 10 mm.
- Now, with a space of 110 mm at the upper end, drill holes in the bars of the long legs. In them, departing 40 mm from the edge, perform zapily for the back. Drill 2 holes at the bottom. So, you can fix the cross member. The back is fixed to the upper part.
- Thread the metal bar into the prepared holes, which are fixed with the ends in the grooves of the legs.
- For short connect with long, in the middle of the bar for smaller legs drill holes. Below and above the middle on the dowels fixed cross member.
- Finally, all parts are fastened with screws.
That's how simple folding chairs are made. Other details and subtleties of the assembly you can see in the presented videos.
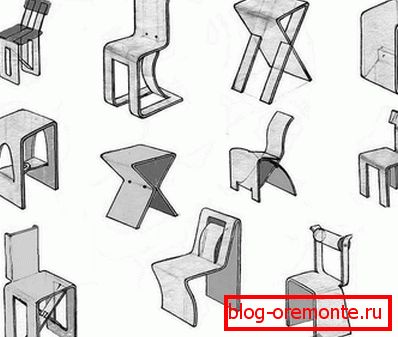
So, we have considered various options for an exciting process of making a chair out of wood. Be sure that you will be quite capable of collecting such a product. If you have other ideas, write comments to this article. If you want to find out about original solutions, there are several ideas in the photo gallery.
Video
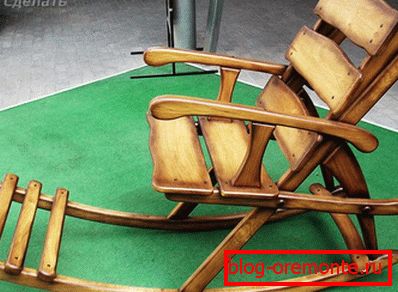
A photo


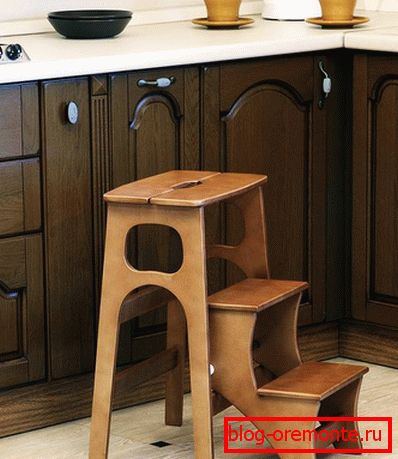


Schemes and drawings
Schemes and drawings are attached to some of the chairs offered in the photo gallery, which will help you understand how to make the chosen chair yourself: