How to make a bunk bed do it yourself
Today, making furniture at home is very popular and successful. Some craftsmen make sofas, tables, chairs, dressers and other furniture items, among which there are various beds. If you have two children, but not much space in the room, you can think about making a comfortable bunk bed. This decision can literally save you, since this bed would not take up much space, but it would bring tremendous benefits. An independent solution to the problem will save your money. To make such a bed yourself is not so difficult. All that is required of you is to have an idea about the future bed, buy the necessary materials and study the instructions for making the structure. All this will be discussed in our article. You can learn how to make a bunk bed with your own hands easily and correctly. And even if you are not a master who makes all sorts of furniture every day, you will be able to do it!
Advantages and disadvantages of a bunk bed
![]()
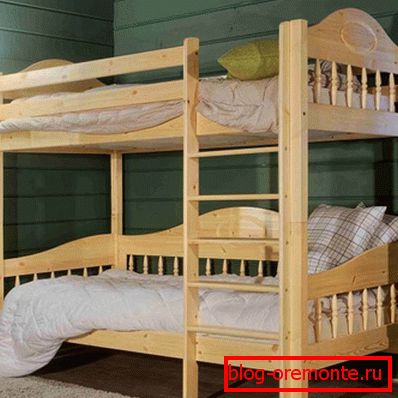
Such designs are considered very popular nowadays. It should be noted that previously they were widely used in children's rooms. And here the matter concerns not only the fact that they save space significantly (although this is the main factor). Often, this original bunk bed is used to make the children's room more original and comfortable. Children love something unusual and they like this bed very much.
Moreover, the designs can not always be double. It can be a single bed, on the second floor of which there is a sleeping place, and on the first floor - a working desk or, for example, a computer desk. It was noticed that the child sleeps on such a bed with a greater desire, so you do not have to persuade him to go to bed for hours. Even the fact that children have to agree on who will sleep on what floor also has a good effect on their development and their ability to communicate with others.
If you are thinking of buying such a bed or making one yourself, please note that a quality product will be quite expensive. There are cheaper models, but their quality is low and therefore there is no guarantee that your child will not be injured. That model of the bed, the manufacture of which will be discussed further, is very durable, reliable, stable and safe, it can withstand both a child and an adult.

By the way, there are some craftsmen who, for family reasons, even make a three-tier structure. Although most experts call it brute force, as the level of danger is much higher.

To summarize, having made a bunk bed for your children you will get the following benefits:
- You can save space in the room, because basically beds and sofas occupy the most available space, which can be used for more useful purposes, especially if the family lives in a one-room or two-room apartment. Place under the bed can also be used. There you can put boxes or other things that will no longer occupy space in the room.
- Unlike sofas or folding beds, it does not need to constantly disassemble and assemble. The child just needs to cover it and the room is considered to be cleaned.
- Your children will be more likely to go to bed and their stay in the room will be even more fun.
- If it is beautiful to arrange such a bed, then it will be a great addition to the interior of the whole room.

Despite its advantages, such structures have drawbacks, which you also need to know about. They are as follows:
- Insecurity. Anyway, but absolutely safe such a design can not be called. And the matter is not even simply in the unreliability of the building, but in the fact that we are talking about children who are at a high altitude. They can, playing, simply fall from the second tier. Some children often wake up at night, so when you get awake, they can easily fall out if they are not oriented.
- Some children are afraid of heights, so they will not agree to sleep on the second tier.
- You all know that warm air accumulates at the top, so the second tier will always be hotter, and the air there is dry. A child who suffers from a bronchopulmonary disease is not worth being there.
That's all you need to know. After weighing all the pros and cons, you can decide whether to resort to the construction of this structure or not. Also along the way you should choose whether to buy a bed or make it yourself. Well, now, we will analyze how to make such a bed with his own hands.
The main thing is the size
Before you develop a project of the bed and begin to manufacture it, you need to consider some points. First, you or your child must choose a comfortable place where it will be located. Secondly, consider the location of the staircase, which will provide access to the second tier. Well and the important moment - the sizes which will be ideal for a comfortable and safe arrangement on the first and second tier.
If we talk about the size, then there are certain rules that need to be considered when designing:
- The distance from the lower tier to the floor should be such that an adult feels comfortable sitting on it. Please note that you can store some things under the lower tier.
- The distance between the lower and upper tier should allow you to sit comfortably inside an adult. It will be convenient for parents who can spend time with children, and for children who will not hit the upper tier, jumping out of bed.
- You should consider the height of the ceilings in the apartment or house. The upper tier should not be too high, so that the child does not hit the ceiling.

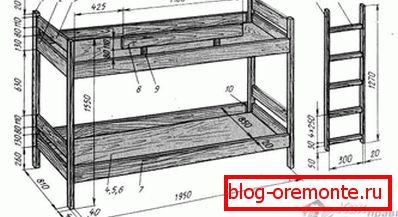
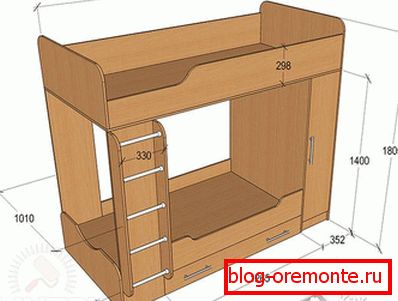
The bed, the instructions for the manufacture of which we present, is intended for a room with a ceiling height of 2.5 m. The mattress is 20 cm thick, and the bed size will be 180 cm by 80 cm.
Tools and materials
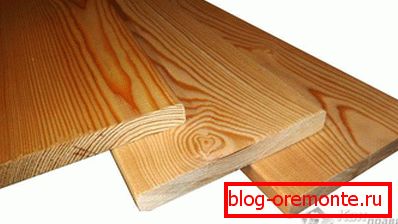
The finished bed will be made of natural material - wood, which for centuries has proven its practicality and quality. Pine is ideal for this purpose. First of all you need to prepare all the necessary components with which you will work. So, you need to purchase:
- pine bars 40 × 60 mm for stairs;
- pine bars 50? 100 mm for the racks and the frame of the mattress;
- pine plank of 20? 100 mm, 20? 150 mm and 20? 150 mm for struts and sides.
For the specific length of the boards you should not be attached yet, first you need to see what details are required, calculate their total length and purchase the material.
In addition, you can not do without their own skilled hands, through which you can perform such a design. Please note that making a bunk bed from a simple pine plank is much more difficult than, for example, from laminated chipboard. To do this, you will need certain skills to process the edge and stick on the chipboard cuts. Therefore, if you are new, use the boards.

In addition, to make the foundation on which the mattress will be located, you need to buy:
- 9 mm thick plywood sheet or a set of rails with lato holders;
- screws, screws, screws and corners;
- PVA glue and sandpaper;
- thermal tape or plastic edge;
- decorative washers stubs.
Before you start making a bed, all the wood that will be used must be left indoors for a week. So, your material adapts to the environment in order to acquire the same temperature and humidity as that of the room in which the finished bed will be placed. Due to this, all elements will not warp in the finished form.
The wood that will be at the heart of the whole frame should be well treated. It is important to work with the right material that would be perfectly flat, polished and free from various defects. If your handicraft material is cheap and unprocessed, you will have to do it yourself, which will require a well-equipped workshop. Since not everyone knows how and has the right tools, it’s better to buy ready-made boards at once, which you only need to cut. The cost of them, however, will be higher.
In the manufacture of bunk furniture with one hand is not enough. For the work will need the following tools:
- screwdriver;
- hacksaw or jigsaw;
- pliers and hammer;
- building level, square, pencil and tape measure;
- metal detector (you can take a magnet) and wiring.

A few words about the drawings
To pre-perform some kind of calculation, you need to familiarize yourself with the drawings of the future bed. But first you need to do it. There are two options: either draw it yourself, pick up your individual dimensions, or take some kind of drawing from the Internet. The priority is the first option and here's why:
- The most important parameters are not so much the length and width, as the height of the bed. On the Internet you can find various standard sizes that are not always suitable for your room. For example, not all ceilings are 2.5 m, although this is the height most often encountered. The height of some rooms can reach 5–6 m or vice versa - 2 m. A child who will be on the second tier should not only sit freely, but also move. It is unpleasant when the ceiling hangs directly above his head. The kid who sits on the top tier should not touch the ceiling with his hand raised.
- When you plan that children will sleep on the bed not one or two years, but several years, you need to choose the sizes with a certain margin. Standard is 90? 190 cm. Only, in this case there is an orientation to the used mattress.
- Counting the ratio, you must consider the thickness of your mattress.
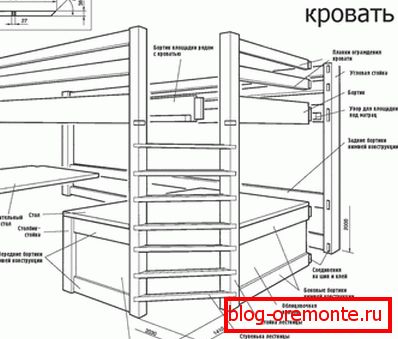
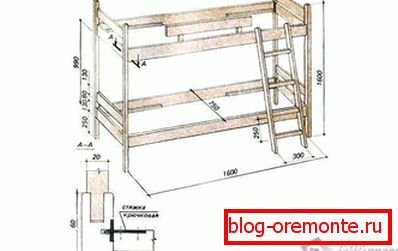
Make a detailed drawing is a must. It is important to make a scheme of two sun loungers, butt and facade design. It is necessary to draw with regard to scale and, if possible, as detailed as possible. If you make the scheme correctly, it will be very easy to calculate the necessary amount of materials.
If you want to use a ready-made scheme, which is found on the Internet, make sure that the dimensions of the design will fit into the size of the room. If you need to change or make adjustments, do it solely in proportion. For example, you can not change the height of the bed by 30 cm and position the lower bed above without consequences. Each change will affect the reliability and stability of the bunk bed. Therefore, if you already decided to make changes, apply them to the whole structure proportionally.
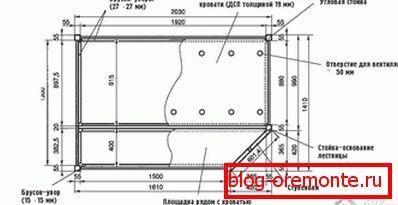
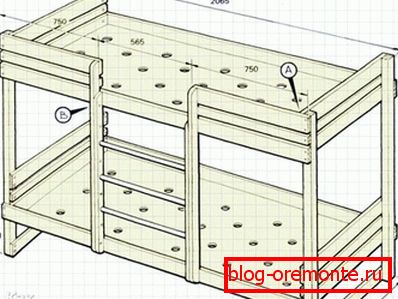
Below you can see the drawings of the bunk bed:


Making and assembling beds
You can cut the materials yourself, or you can place an order in a specialized company that, according to your drawings, will do everything perfectly. Once all the materials are ready, you can assemble the bed.
- First you need to make a frame for the mattress. Take four beams with a cross section of 50 × 100 mm and fasten them in the form of a rectangle that will be equal to the size of the mattress. For convenience of operation only, the length and width should be increased by 20 mm. Bars are important to bond well together and the best method for this is a spike into the groove using wood glue. But to bring this option to life is possible only when you have a milling machine. Otherwise, the elements are connected by metal corners.
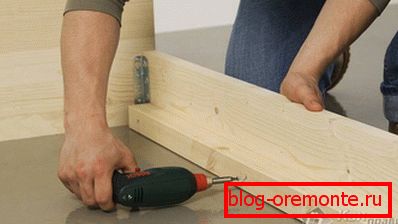 In the finished frame, install the spacer from the board 20 × 100 mm or from the same bar 50 × 100 mm. Pre-board should be cut to the width. Such spacers, depending on the planned load, can be from 1 to 4 pcs.
- Now it is necessary to fasten the outer sides to the bottom frame. For the lower bed, use boards with a cross section of 20 × 150 mm, and for the upper one, more reliable boards with a cross section of 20 × 200 mm are suitable. Screw the screws from the inside so that they do not pass through the sides.
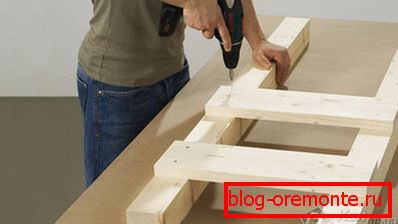
- In the next step, you must assemble 4 corner posts that will also serve as the legs of the bed. Since they will account for all the main load, the rack must be strong. Take two bars with a cross section of 50 × 100 mm, their length should be equal to the height of the whole structure, including the fencing of the second floor. These bars need to be fixed at an angle of 90? To get ready L-shaped profile. Pay attention that the self-tapping screw should be literally drowned in wood, and the formed deepenings should be puttied and oshkurit. You should have 4 identical support legs.
- In the finished supports, at the height of the second and first level chosen by you, you should plan and make holes for the mounting screw. It is important to control the entire assembly process with the square and the level in order to avoid mistakes. Make exactly these holes in the right places on the lounger frame.
- For safety purposes, it is recommended to fasten the whole structure to the wall. To do this, you need to attach the top frame to the vertical risers with screws. After that, the structure is laid to the wall in order to mark the future mounting points. At the level of the second floor in the wall and in the bed itself, make the corresponding holes. Note that the hole in the bed must pass through the racks of the rack and the frame. Then firmly press the structure against the wall and fix it with screws.
If you do not want to fix the bed to the wall, you can skip this step. - Now it remains to establish the first level of the bed. For reliability, use metal corners.
- It is time to make bumpers or a fence that will protect your children from falling. For this purpose, use boards with a cross section of 20 × 200 mm for the second tier, which are fixed to the racks. For the lower tier, use the boards 20? 150 mm. In the place where the stairs will be located, bumpers are not needed.
 To make a ladder, take two beams of 40 × 60 mm and fix them to the bed frame above and below. Then install the crossbar, securing them with screws. You can make and portable version of the ladder, which is not required to fasten to the bed, but if the children are on her crap, you can fall down her.
- It remains only to prepare the base or bottom under the mattress. Place a sheet of plywood or slats on the lato-holders on the frame below and above and fasten them.
- To give the product an aesthetic look, the surface can be sanded and opened with a shiny or matte varnish. Cover the visible ends with plastic or thermal tape.
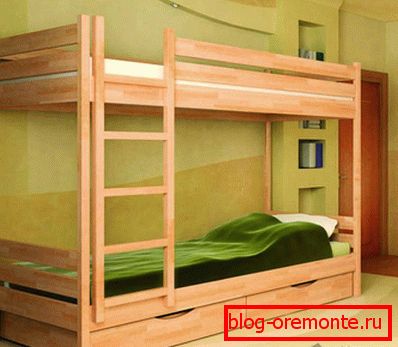
That's all, after drying the varnish, you can install a mattress, and your children can enjoy the rest in their new bed. The design is assembled with bolts and screws, so if necessary, you can very easily disassemble and assemble it. But this should not stop. You can equip the bed with an additional table top, or, if necessary, make the lower tier moveable so that it can be converted into a table. This children's bunk bed transformer just have children like.
Video
Below is a master class on making children's bunk beds:
The manufacturing process is in full swing. The main work is shown here:
The bed is almost ready:
Blueprints
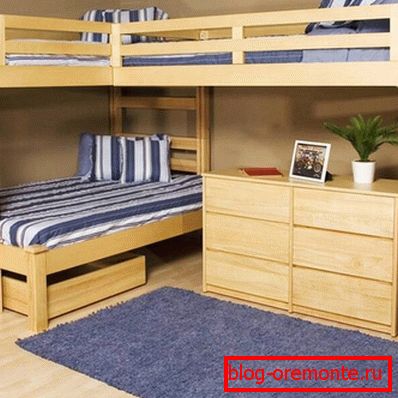
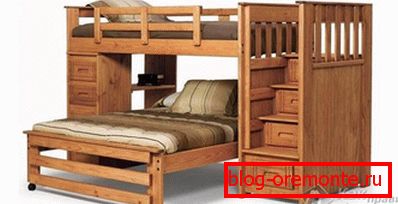
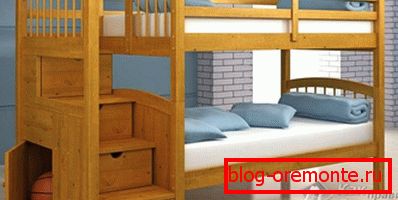
A photo
See also:
- How to make a retractable bed.