How to make a bed with your own hands
Now it is fashionable to independently make furniture at home, and every year the number of home craftsmen increases. Someone prefers to buy blanks and from them to assemble the necessary furniture, and someone does all the work on its own from beginning to end. Homemade bed can be very simple or with intricate shapes and patterns. It is not only a matter of skill and availability of equipment - personal preferences and financial capabilities play an important role. In this article we will describe how to make a bed with your own hands from various materials.
In order for the product to be happy and to be used for a long time, you need to approach the matter very responsibly, realizing the limits of its capabilities. It is necessary to choose a suitable model and prepare the tool taking into account the material used.
Required Tools
Depending on what material is chosen, certain tools will be needed to work with it.
To work with metal
- Electric welding machine.
- Bulgarian.
- File.
- Brush on the metal.
- Electric drill.
- Roulette.
To work with wood
- Jigsaw. If the product is from the boards, you can do with a hacksaw.
- Screwdriver.
- Electric drill.
- Roulette.
- Building Corner.
- Pencil.
- Plane.
- Stameska.
- Sanding machine.
As for consumables, then let's say about it separately, considering this or that model.
Material selection

Materials for the manufacture of beds:
- Metal corner.
- Profile or round tube.
- Solid wood.
- Plywood.
- DSP.
- Pallets.
The above materials can be used both individually and in combination. So, the metal bed can be equipped with wooden backs, and the product from plywood is assembled on a frame from a bar. The options can be many, and in more detail you can figure it out by reading the article.
Location
The first thing you need to clearly define what will be the size of the future bed, given its location. It is possible that you are modernizing the bedroom, changing its design, then you can move away from the usual patterns of bed placement and find a new place for it. If so, then pay attention to a number of tips that will help in this.
Tips
- Do not place the bed on the headboard to the window opening, as there will be a draft when the window is open and the head may be blown out.
- If you place the bed headboard to the doorway, then you will not see who enters the bedroom.
- It is better to not hang over the bed chandelier. She may fall off and fall on a person lying in bed.
- In non-insulated houses, the outer walls are very cold, so it is better not to put the bed in such places.
- A shelf unreliably nailed to the wall above your head can also cause a lot of trouble.
- In a narrow bedroom located in the center of the room the bed will not allow to move freely. In addition, such an arrangement can cause discomfort.
- Many people leave space at the head of the laptop. Note that this "thief of time" in this case will deprive you of many hours of good rest.
It may give the impression that there is no space left for the bed in the bedroom, but this is not so. We only gave recommendations, and you yourself decide how they are relevant in your case.
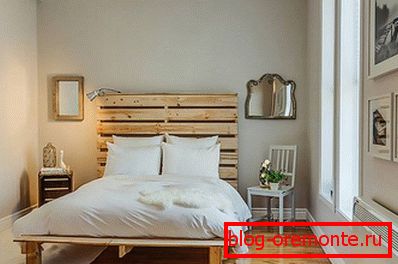
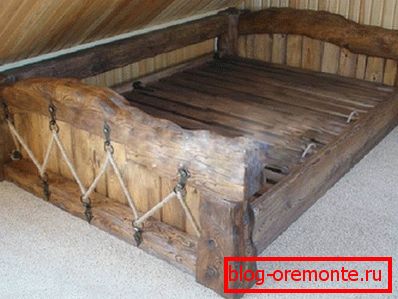
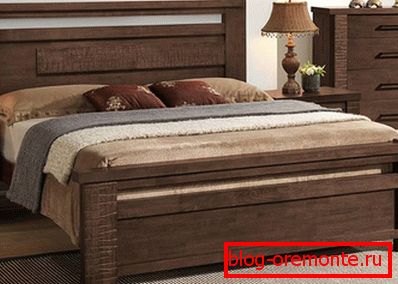
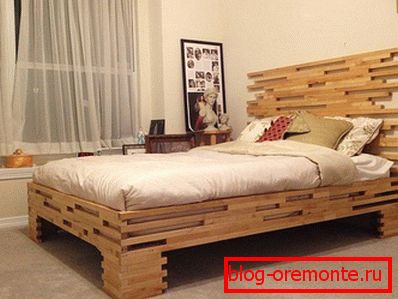
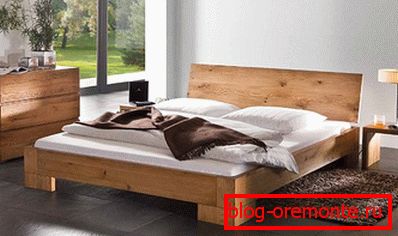
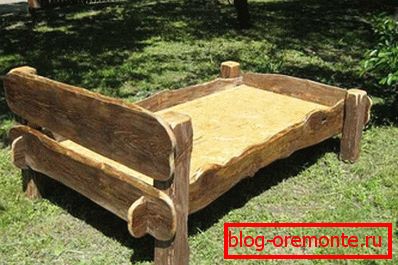
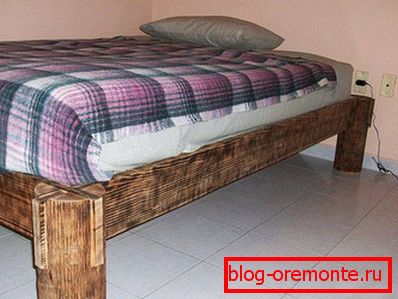
Tree bed

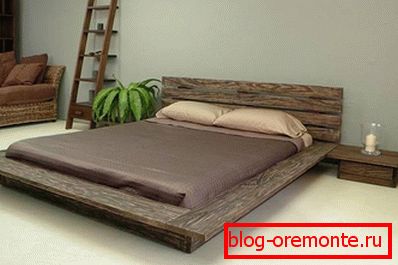
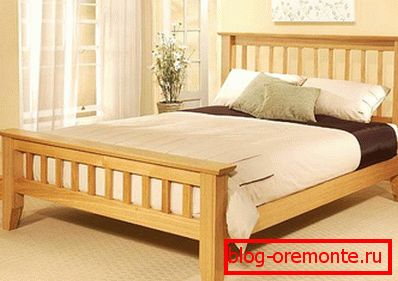
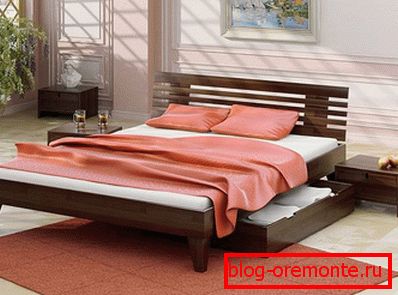
Do not be deceived by the seeming simplicity of the design. You need to tune in to the fact that you have to work a lot to make a bed out of solid wood. If you are determined, then there is every chance to do something original, while saving money. It is quite natural that at once it is not easy to determine the design of the bed, so first look at a few photos of wood products.
Photos of wooden beds
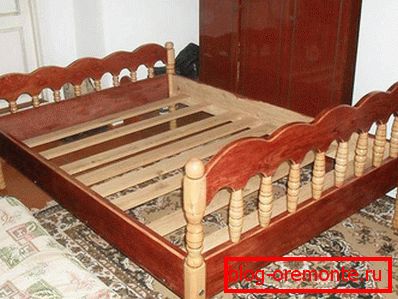


Choosing a vending product, you can find a similar drawing on the Internet or draw it yourself, taking into account the dimensions of the room and personal preferences. Often, homemade craftsmen take a drawing of the bed and rework it for themselves, removing or adding something.
From the array
If you are not going to sleep on the boards, then when planning the size of the bed you need to take into account the dimensions of the mattress. If it has not yet been purchased, then this should be taken care of in advance or on the selling sites you can find out the standard sizes and start from this data. If you are planning to make a bed of non-standard sizes, it is important to know what the mattress will have to do on an individual order.
A custom-made mattress will cost a bit more.
It is clear that in a relatively small article it will not be possible to describe the manufacture of several wooden beds, and we do not even strive for this. Based on the above example, it will be possible to understand how to build a bed from an array.
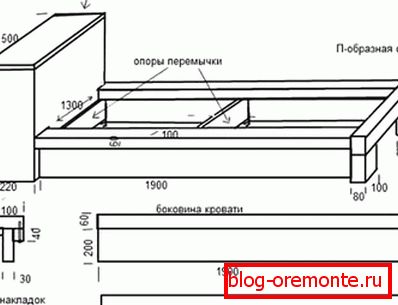
Let's consider an example of making a wooden bed under a mattress of 200? 160 cm, if there is a minimum of tools - only the most necessary.
The actual size of the mattress is often different from those stated by the manufacturer, and in a smaller direction. When purchasing a mattress, measure it, and then adjust the size of the bed to be made.
If there is no drawing with a bed that fits the size of the mattress, then you can use any one you like as a basis, remaking it to fit your size. If the design is very simple, then you can draw a sketch yourself.
Suppose that after checking the dimensions of the mattress, it turned out that its length and width is one centimeter less than the stated - 199? 159 cm. It will take such material:
- Timber 50? 40 mm, length 209 cm - 19 pcs.
- Planed board 22 × 100 mm, length 159.5 cm - 18 pcs.
- PVA glue (furniture).
- Self-tapping screws 41 and 65 mm.
Having a clear idea of the number and size of the required material, you can go to the store for it.
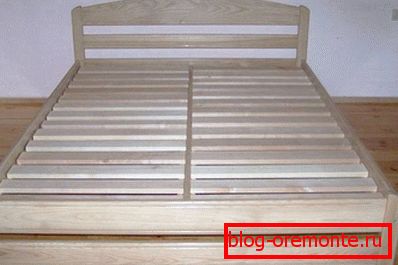
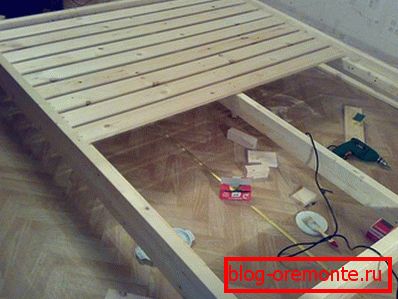
Making a frame
You can assemble the frame on the floor or on four stools.
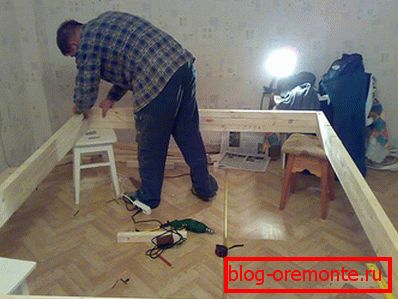
So, we need to make a rectangle with internal dimensions of 200? 160 cm, which corresponds to the dimensions of the mattress + 1 cm tolerance. Each side of the frame will consist of three bars assembled into a single structure.
- Out of 19 pcs. purchased timber 40? 50 mm, you need to choose 4 pcs. the smoothest and with the minimum amount of knots.
- For further work, it is necessary to cut off the excess at a right angle. With sufficient skills, you can mark up the timber, and then, using the construction corner, draw a cutting line. If the hacksaw along the line can not be cut off smoothly, then it is better to use the miter box.
- There should be 2 bars of 160 cm each and 2 bars of 208 cm each (inner size of the bed length is 200 cm + 2 bars of 4 cm each).
- The cleanest side of the bars will be used as the front (top of the bed), so this side of the bars lay down.
- Will need another 4 bars with the same size. You also need to cut off 2 bars of 200 cm each, and 2 bars of 168 cm each (the inner width of the bed is 160 cm + 2 bars of 4 cm each).
- In order for the frame to be strong, the corner joints must be made overlapped, so for the second row we use bars of a different size, which we sawed last.
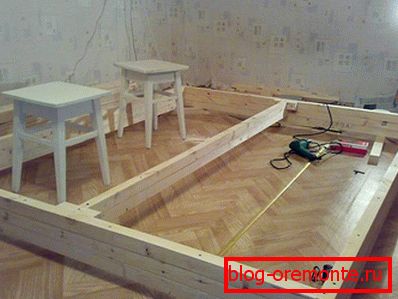
- Glue is applied to the bars of the first layer, and then the bars of the second row are laid and attracted by screws. Excess glue must be removed immediately, otherwise it will interfere with the work of grinding the surface.
- Now in the same way third row bars are attached.

- You need to check that the corners of the bed were at an angle of 90 ?. To do this, measure the size of the assembled frame diagonally - they must be the same.
- After the glue dries, you can continue to work.
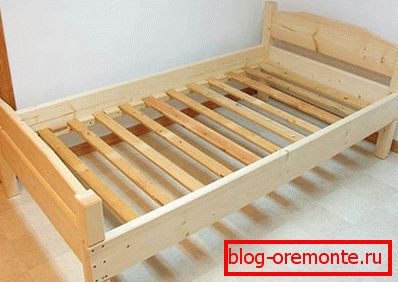
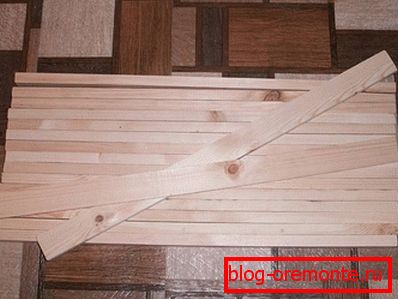
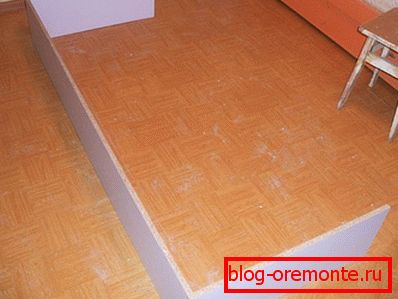
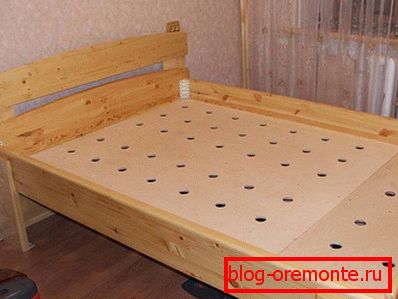
- Since our mattress is 159 cm wide, this size is quite large - the boards we use can bend. To eliminate this, in the center of the bed, from one back to the other, below, you need to make a stiffener. For its manufacture will require 2 bars with a length of 2 m each. They are also fastened together and installed in the same plane with the bottom of the bed. This is clearly seen in the photo.
In the manufactured bed there are 4 legs located at the corners, but for securing it is possible to establish the fifth point of support in the center - then the base will not bend for sure.
- The legs will be made of two bars of 40? 50 mm, fastened together. Their height is chosen according to the preferences of the owner in such a way that they will be attached to the lower two bars.
- Having stuck and fixed the screws with the screws, we will wait until the glue dries, and only after that we turn the bed to the position in which it will now reside.

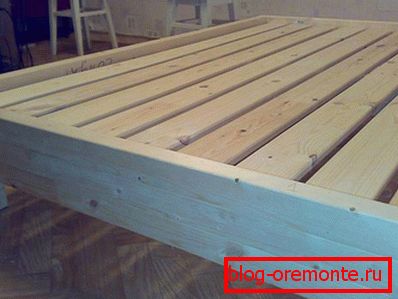
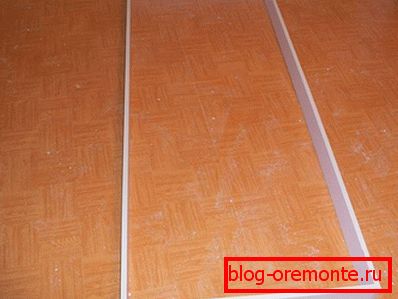
- For the manufacture of the base under the mattress along the sidewalls of the bed frame, you need to fix the remaining beam 50 × 40 mm (or the available trimming), since the boards will be attached to it. A guideline will serve as the lower edge of the upper beam frame.
- The width of the inside of our product is 160 cm, so in order to avoid the squeak of the board, you can make 5 millimeters shorter - 159.5 cm (or slightly less).
- Screw the boards, you need to lay them on the frame so that they do not touch the sides of the walls of the frame, and fix.
- Since the screws will be screwed from the edge of the board, then you will need to drill holes in each board using a thin drill bit.
- As for the distance between the boards, we find it empirically. In our case, the length of the inner part of the bed is 200 cm. We deviate from the edges by 5 mm. 199 cm left. Divide by 16 (number of boards). 199/16 = 12.44 cm. Let’s round it, and it turns out that you need to apply the markings on the support beam every 12.4 cm. Since the width of the board is 10 cm, the gap between them will be 2.4 cm, which suits us completely.
- If you need to get a greater distance between the boards, then you need to reduce their number and again perform the calculations according to the scheme given by us.
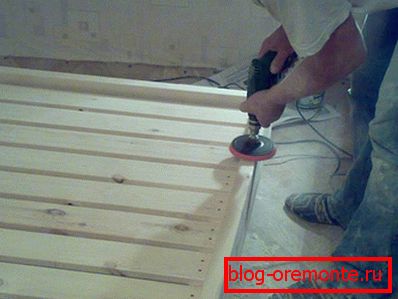
- Now it is necessary to sand the entire structure. For this, it is better to take the bed out of the room, as there will be a lot of dust.
- It is convenient to use a grinder or a drill with a nozzle on which the emery cloth is attached. After mechanized processing, you need to complete the process manually using a fine-grained emery cloth.
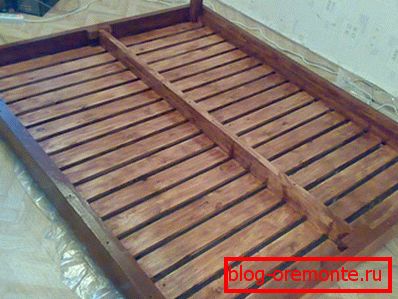
- The bed must be primed and opened with varnish in several steps, each layer is applied after the previous layer has dried. Work is best done using the spray gun. In extreme cases, you can use a brush, but it is important to understand that the appearance of the applied coating will not be the same as when using a spray bottle.

Headboard
You probably noticed that we still have 3 boards. From them we will make the back, as in the photo.
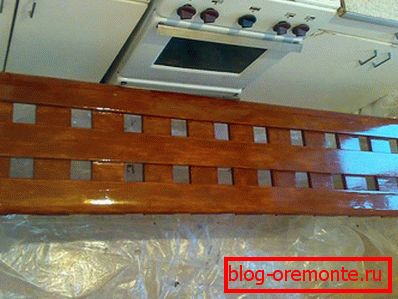
The height of the backrest is 45 cm, and the width is 170 cm, but this is not important, since it will not be a single unit with the bed - we will fix it on the wall to the level of the mattress.
Its production is not complicated at all. Three boards are sawn at 170 cm. From the scraps we make 11 boards of 45 cm each. If there are not enough boards of 45 cm, then one board can be screwed on 2 boards of 40? 42 cm. Varnishing it.

The back can be hung with hooks, only in this case it will knock on the wall. More practical is to firmly fix the back on the wall. Now you can use a wooden bed.
Video: make a wooden bed
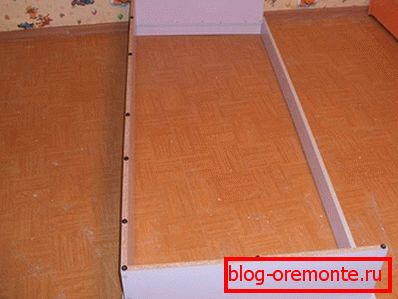
Chipboard bed: step by step instructions
Making structures from particle board can seem very complicated due to the nature of this material. If you make a cut, grind and glue the edge at home, then there are some difficulties, especially with cutting chipboard, as it is possible to damage the decorative layer. Many problems can be avoided if you make a drawing in advance and order the manufacture of parts in the furniture workshop. Houses will only build the structure.
This time we will look at the process of making a small single bed with two drawers. Here is an example of cutting a standard sheet of chipboard for one bed.

From the remnants of the plate you can make shelves for books or something else necessary in the household.
So, we have a ready-made set of parts that need to be assembled to make a bed.

To do the job you need the following tool:
- screwdriver;
- drill (you can use a screwdriver instead);
- jigsaw;
- Confirmation drill;
- bit extension;
- bits (cross and six-sided);
- mallet;
- pencil;
- ruler;
- awl;
- roulette.
Also consumables will be required:
- Confirmates - 50 pcs.
- Stickers or plugs for confirmats - 50 pcs.
- Self-tapping screws 3.8 × 45 mm - 15 pcs.
- Self-tapping screws 3,5? 30 mm - 30 pieces.
- Self-tapping screws 3,5? 16 mm - 40 pieces.
- Furniture corner - 12 pcs.
- Straight-through roller - 8 pcs.
- Wide furniture handles - 2 pcs.
- Plastic legs - 12 pcs.
- Bar 20 × 45 mm (3 m) - 3 pcs.
Now proceed to the assembly.
Since the mattress will be used 200? 70 cm, we will adjust the available slats to the width of the mattress, making them 70 cm long. As a result, there will be 12 pieces.
On ten rails on one side you need to fix the corners.

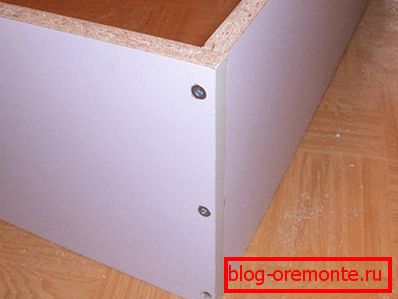
First, we make boxes that can be pushed under the bed. First of all we will collect a framework. To do this, we will decompose the blanks so that the part glued over with the edge is at the top. When assembling it is important not to confuse the parties. Well, if the edge is not glued from the end of the inner part, then you will not mix it up. If the edges of the parts are glued in a circle (which is wrong), then you need to try to fold the box without twisting it, and then attach the bottom. Making sure that everything is the same, you can proceed to the assembly.
Stepping back from the bottom (or top) edge of about 3 cm, you need to drill a hole with a confirmatous drill. This should be done carefully, as one awkward movement - the detail will be spoiled. The thickness of the laminated chipboard is 16 mm, therefore we recede 8 mm from the edge of the workpiece, drill a hole slightly with core, and without the slightest deviation.
If you have never collected furniture from chipboard, then first practice on unused sheet residues.
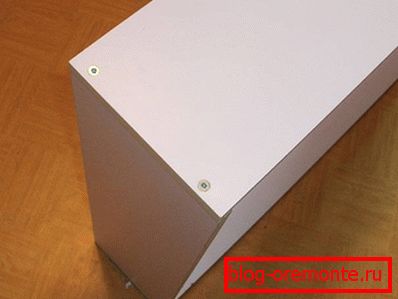
Combining the details, we get such a box.

In order to fasten the bottom, eight confirmatics will suffice - 2 on each side. These boxes are not designed to store very heavy things in them, because plastic rollers are not designed for this.
It remains to attach the handle and install the rollers. One box is ready, now the second is being assembled in the same sequence.

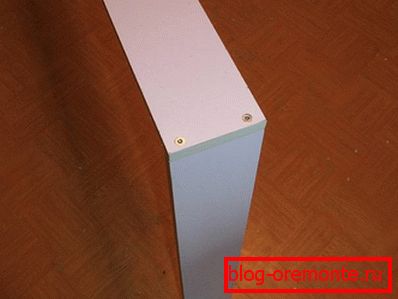
Putting the finished boxes to the side, proceed to the assembly of the bed. Since boxes will be installed on one side, 3 parts need to be assembled together, using 3 confirmats on each side.
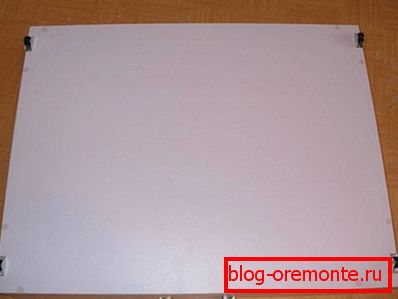
As a result, we will get such a “bench”.
Now we will collect a decorative box thanks to which the mattress will be fixed. This part is not as high as the bed base, so 2 confermats will be used for each side.
We put the resulting frame on the bed frame so that it does not interfere with opening the drawers, and join them together from the inside with 3.5 × 30 mm self-tapping screws.

Need to nail the plastic legs.
We proceed to the manufacture of fins. At the front of the frame it is necessary to draw a line from one edge to the other along the height of the bed frame. Now we will fix the bars with the corners fastened to them every 13 cm, so that their lower part is exposed along the line.
Вместо оребрения из досок можно использовать вырезанную по размеру плиту ЛDSP.

After that, it will remain 30 mm screws to fasten the bars to the opposite sidewall.

Rolling up the boxes and putting the mattress, you can begin to use the bed.

As we see, with the right approach, it will not be difficult to assemble a bed from laminated chipboard at home. The design can be of any size, as in the following video.
Video: we make a double bed podium from chipboard
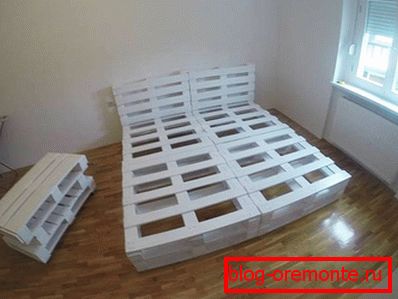
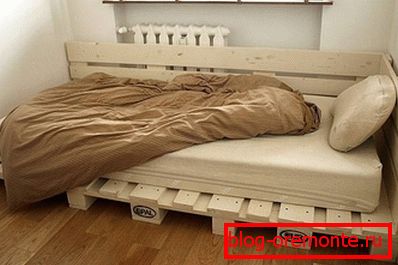
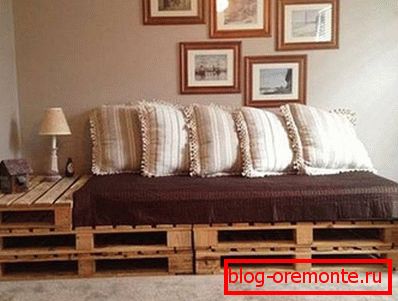
Bed of pallets
Now the beds made of pallets are in fashion. At first glance it may seem that this kind of construction would be appropriate only at some provincial cottage, but this is not so, because the beds from the pallets can be found in houses with rather rich furnishings.
From words get down to business. Consider one of the options for assembling beds from pallets. How many will they need? It all depends on the size and design of the manufactured product. So, a single bed with legs can be made from 2 pallets, and without legs - from 4 pallets. For the manufacture of our double bed, we used 8 pallets.

If there is such an opportunity, then you need to select the maximum whole pallets. They need to oshkurit.

All pallets should be painted using non-toxic paint on wood. Since the tree is very hygroscopic, most likely, the pallets will need to be opened with paint 2–3 times.
If there is such a desire, then you can open the workpiece varnish.

Having laid the first row of pallets, it is necessary to fasten them. If the wood is very strong, then holes are drilled under the screws.

Then fit the second row.

All pallets are fastened together with the help of metal plates, fixed with screws on the wood.

Thanks to this simple technology, you can make quite a decent bed out of pallets.

From the pallets can be done and back.
From the remnants of the pallets you can collect some furniture, and install it near the bed. In general - who likes what.
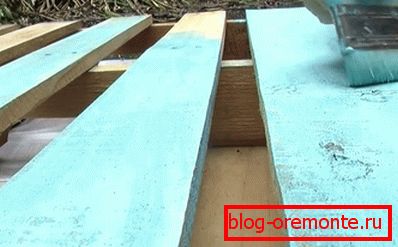
Plywood
You won't surprise anyone with plywood products, but you can make furniture out of it at home. We will use sheets of the FSF brand, as not every plywood is suitable for making a bed.

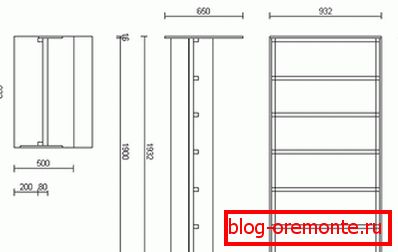
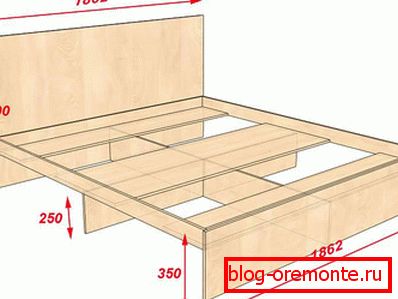
Consider an example of making a bed under a spring mattress of 1900 × 900 × 200 mm.
Materials for the manufacture of beds
Толщина используемой фанеры может быть 12, 15 или 18 мм. Тонкие листы можно использовать при креплении фанеры винтами. Из 18 миллиметровой фанеры кровать будет более прочной, но очень тяжелой, поэтому предпочтительнее использовать листы толщиной 15 мм – они намного прочнее стандартной ЛDSP.
- Plywood 2.44? 1.22 m? 1 sheet
- Timber 30? 40 mm? 2 pcs. 1.9 m
- Timber 30? 40 mm? 7 pieces on 0.9 m
- If the edges of the parts need to paste, then purchase additional PVC edge. Its consumption will be no more than 8 p / m.
- Clay "Moment"? 1 tube
- Screws 5? 40 mm? 26 pcs.
- Screws 5? 60 mm? 12 pcs.
- Screws 3 × 9 mm? 8 pieces
- Thrust bearings? 4 things.
Что касается инструментов, то они такие же, как и для работы с DSP. Вместо шурупов можно использовать саморезы по дереву.
The side wall of the back side of the bed is large in height. This is done so that the drawers under the bed do not rest against the walls. If there are no boxes, then the side walls can be made the same.
Making a bed
From the existing sheet of plywood you need to cut out the parts corresponding to the drawing.
If desired, you can use laminated plywood. In this case, it is important to consider that it is not easy to cut such a sheet at home without damaging the laminated coating. In addition, then the edges will necessarily need to paste over the furniture edge.
For cutting plywood you need to use a file with a small tooth, and a jigsaw to lead slowly - so we get an even cut without chipping. As a result, we should have parts of this size:
- The back of the front - 932? 650 mm.
- Back back - 932? 500 mm.
- The front side panel - 1900? 200 mm.
- The back side panel is 1900? 350 mm (if without lockers, then we also do 1900? 200 mm).
- The ends of all the parts must be sanded. To do this, you can use a small wooden bar wrapped in an emery sandpaper of medium grain.
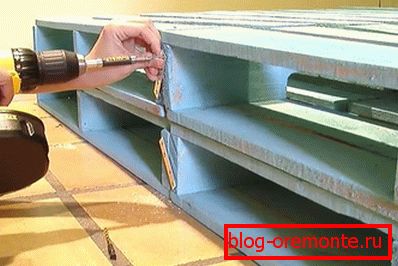
- After this, we assemble the bed frame.
Bed base

- The backs are attached to the side slats with screws of 5 × 40 mm (2 for each front side, and 3 for the rear).
- Then fasten the timber to the side rails of the bed with screws of 5 × 40 mm (7 pieces per side). The cap of the screws should be slightly recessed into the bar. If you drive it deeper, the screw will go through the plywood.
- We fix the cross-beams from the bar on the horizontal bars with 5 × 60 mm self-tapping screws (1 for each point).
- Screws of 5 × 40 mm screw the inside of the bars to the backs (3 screws each).
- At the last stage, lower the backs to the backrests, screw in the thrust bearings - 2 screws 3 × 9 mm each.
- We set the bed, put the mattress in and use our product.
If instead of a spring mattress on the frame to use soft, then from plywood you need to cut the bottom and fasten it to the bars from above.
As you can see, there is nothing difficult in the manufacture of plywood beds.
Of metal
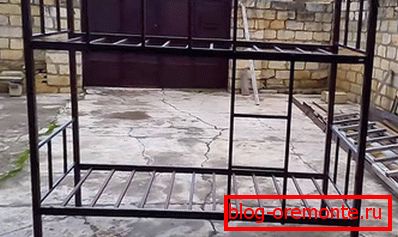
If you have some skills as a welder, you can make a metal bed. We will not even consider the bolted connection option, since such a product is very quickly loosened.
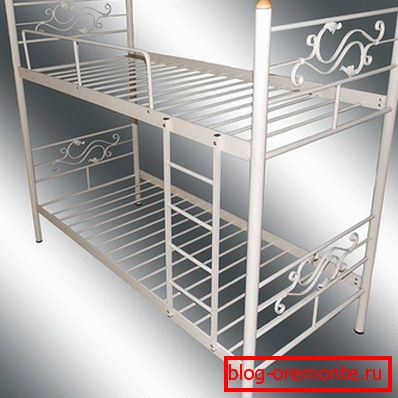
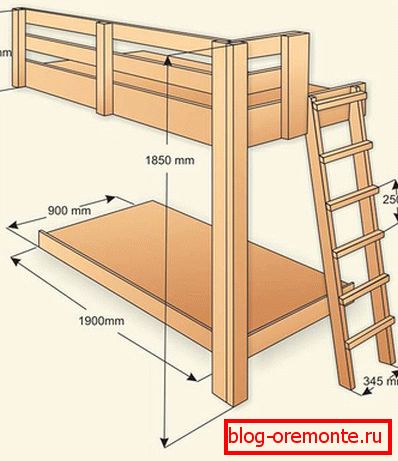
Look at the photo collapsible bunk metal bed. Agree that it looks very presentable.

For its manufacture needed the following materials:
- Profile pipe 50? 25 mm - 8 m.
- Profile pipe 40? 40 mm - 8 m.
- Profile pipe 20? 20 mm (or 15? 15) - 40 m.
In addition to pipes, a primer for metal and hammer paint was purchased.
One of the advantages of this bed is the absence of bent parts, so for its manufacture does not need a pipe bending machine.
If you buy pipes, and not use those that have lain for several years in the garage, then do not stop your choice on rusty ones, since then they will need to be cleaned for a long time.
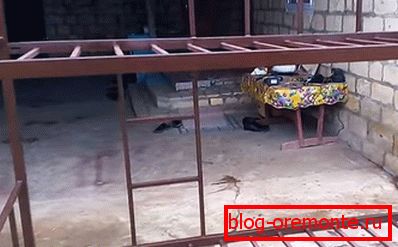
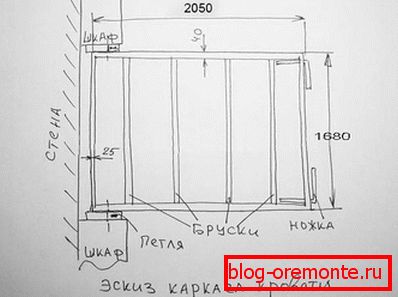
Frame making
Since the bed is collapsible, it is possible to make parts of it. Let's start with the backs.
- The base will serve as a pipe 40? 40 mm. They are cut into equal parts of 2 m. If the ceilings are low, it can be reduced to 185 cm.
- The width of our backs will be 90 cm, therefore we will cut off from a pipe 20 × 20 mm 8 identical segments of 82 cm (90- (4 + 4) = 82), and 8 pipes of 30 cm.
- For now we will use only half of the harvested material.
- On a flat plane parallel to each other you need to lay the pipe rack.
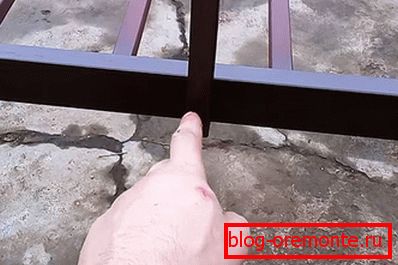
- Stepping back from the bottom of 40 cm and from the edge of 1 cm, a pipe 82 cm long is caught.
- It is necessary to check the construction angle correctness of the exposed angles.
- After 95 cm, the second pipe is seized.
- We return to the first one, and at the tacking we collect the grid - 2 tubes of 30 cm each and a cross member of 82 cm.
- Do the same with the second grid.
- After checking the angles and alignment of the stuck parts, they can be welded thoroughly.
- In the same way the second back is made.
Now proceed to the manufacture of shelves.
- The profile pipe 50? 25 mm also we will cut on 4 equal parts on 2 m.
- The width of the shelves will be 88 cm, so we will need 26 pipe lengths of 20 × 20 mm by 83 cm (88- (2.5 + 2.5) = 83).
- 2 pipes are laid on the edge parallel to each other.
- From the edges, mark 13 cm and grab one jumper by putting them along the bottom edge.
- Fold out the remaining 11 jumpers every 14 cm and grab them.
- After checking the regiment is scalded, and the second is assembled in exactly the same way.
- To the shelf that will be installed at the top, it is necessary to weld the fence of the same height as the height of the lattice on the back. The pipe used for the fence, you need to bend, and not to weld at an angle. If there is no pipe-bending machine, then you can fill it with sand and bend it in a vice or between two supports. This pipe must be welded in the middle of the bed, as in the photo.
- In the same way, 3 more vertical stands are welded, but it will not be welded to the back, so you need to weld a small bar from the end.
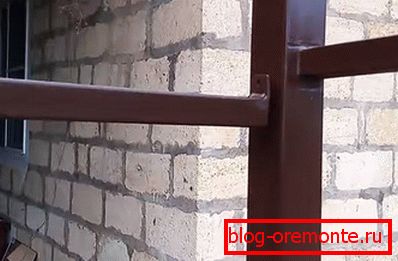
It was the turn to assemble the design together, for this we will use a little more welding.
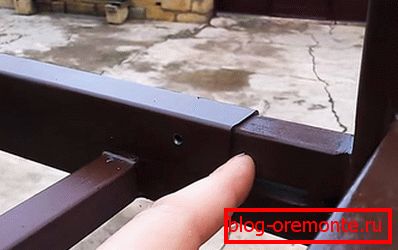
Since our bed is collapsible, we will make universal fasteners for it.
- From a 20 × 20 mm pipe, 16 pieces of 10 cm should be cut off and welded to the backs at the splicing point.
- At each point of attachment, 2 tubes are used. They are inserted into the grate tube and cling to the back. If this is not done, then it will not be possible to assemble the bed, since the attachment points will not be the same.
- Checking the correct location of the part, thoroughly welded the tubing to the back.

- With the help of the grinder it is necessary to process the welds.
Assembly
- Now we will assemble the bed.
- To collapsible parts firmly held together, they will need to be fixed with screws (after final assembly).
It is also necessary to make a small ladder, the dimensions of which can be arbitrary.
- We attach it to the shelves with bolts and nuts.
- At the final stage of the work, the entire structure is disassembled, degreased, primed and painted.
- After the paint has dried, the bed can be brought into the house and assembled.
- To close the ends of the pipes, specially designed plastic plugs are purchased specifically for this.

If the bed is made for children, then its length can be significantly reduced.
As you can see, at home you can make a beautiful and durable metal bed.
Making decorative items
If you want to do something original, then in the manufacture of a bed, instead of standard shaped tubes, you can use forging elements.
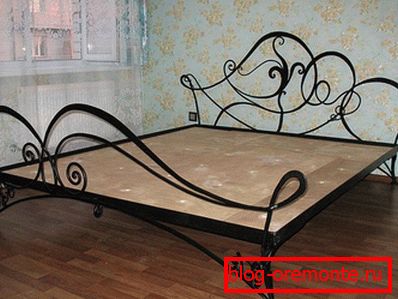
Such parts are sold in specialized stores or made to order. Good results can be achieved using bent parts, and you can bend them yourself.


Bed Feet
A person may have the wrong opinion that the legs of a metal bed will look rough. If you set a goal, then this element can also be made very attractive.

Video: making a metal bed with forging elements
The choice of design
Improper bed can cause a lot of inconvenience. Here are some tips from professionals in this area:
- Best of all, if the bed is made of natural materials. When using laminated chipboard, plywood, laminate and other materials with synthetic additives (glue, etc.), products must be certified for furniture production.
- Размер кровати имеет большое значение. Single bed может быть в ширину 100, 90 или 80 см, а двуспальная – 200, 180 и 160 см. Если нет ограничений по размеру помещения, тогда нужно действовать по принципу – чем больше, тем лучше. Длина кровати должна быть на 20 см длиннее роста человека (минимум 10 см).
- Constructions of chipboard (and laminated chipboard) are the most unreliable and brittle.
- The solid bottom of the bed does not allow the mattress to be ventilated, but too rare finning can cause the mattress to deform.
Since we are talking about the mattress, there are some nuances of choice.
- The mattress should not be hard. It should be soft enough, but not be too deformed by the weight of the person lying on it, so it must be selected individually. For a double bed, you can pick up 2 different elastic mattresses. To make sure that the mattress is right for you, you need to lie on it for 15–20 minutes before buying.
- If you purchased a hard mattress, then you can put a thick mattress pad on it, for the manufacture of which latex or memoriform is used (from 3 to 10 cm thick). If you have not decided on the choice, then it is better to buy a mattress with two-sided rigidity.
As for the design features of the bed, it is a matter of personal preference and convenience. In a small room you can place a bed, under which there will be drawers, foldable or sliding out of the podium. In the big room you can give free rein to the fantasy by making a wide bed.
Video: how to choose a bed in the bedroom
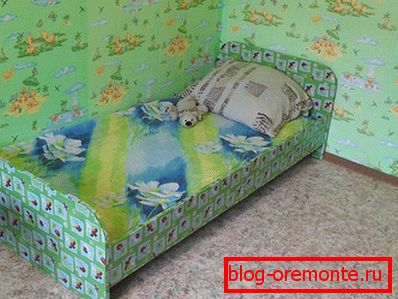
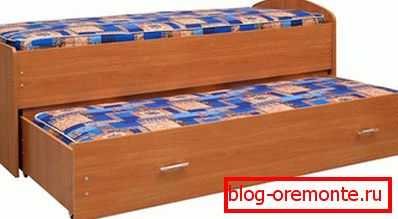
Single bed
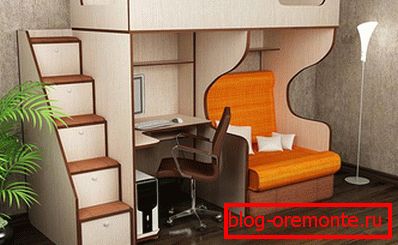
A single bed is installed when it is planned that only one person will sleep on it, be it a child or an adult. Also in the same room there can be 2 or more beds, for example for two children. Anyway, you first need to decide what design is suitable, and then take up the manufacture. Help in this can make homemade single beds.
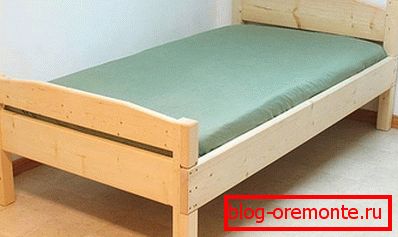
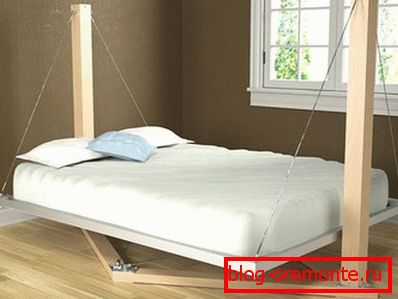
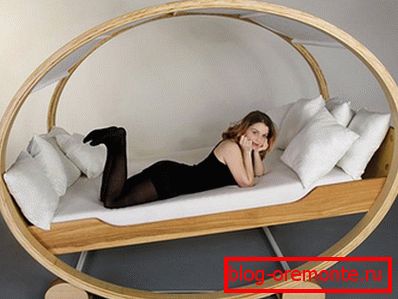
Photos of single beds
![]()


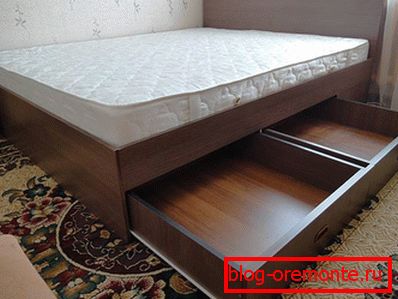
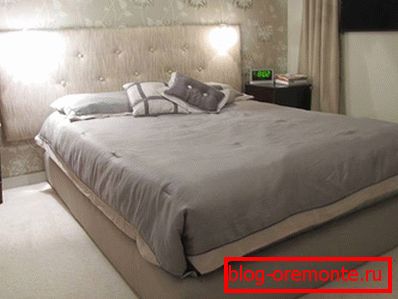
Double bed
As a rule, couples sleep together (at least for the first few years), and in order to sleep comfortably on this bed, you need to take care of its size and design. Look at the photo exhibition of double products.
Photo of double beds


![]()


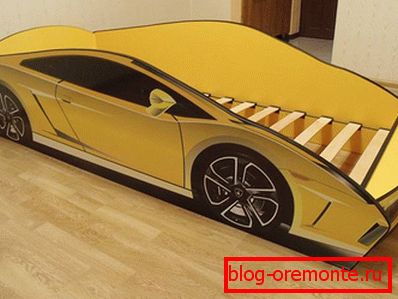
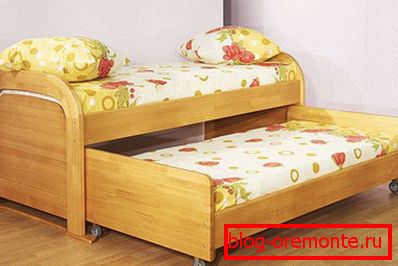
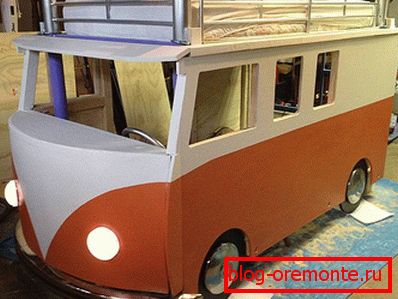
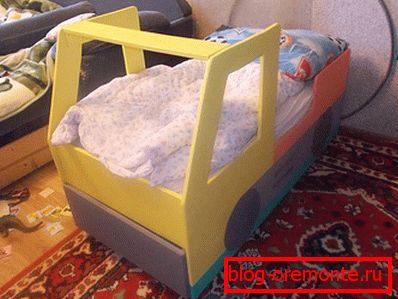
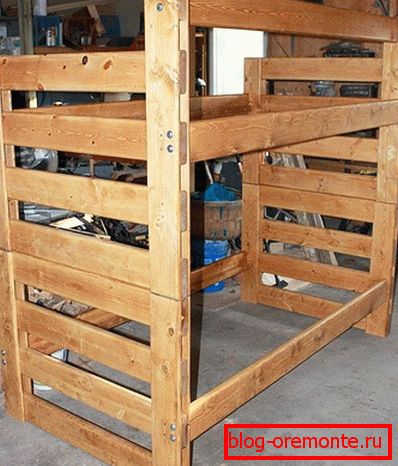
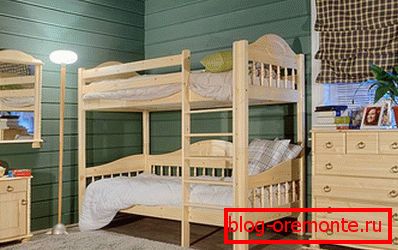
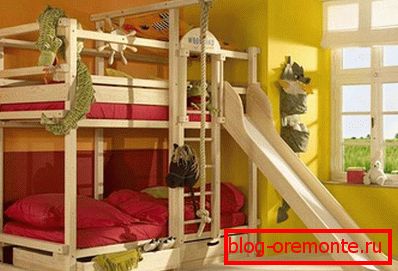
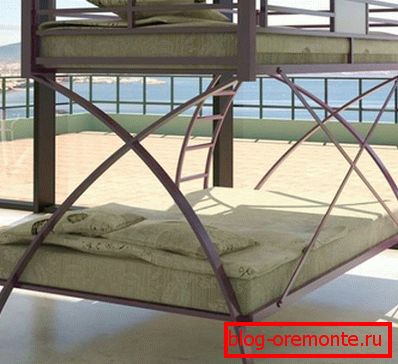
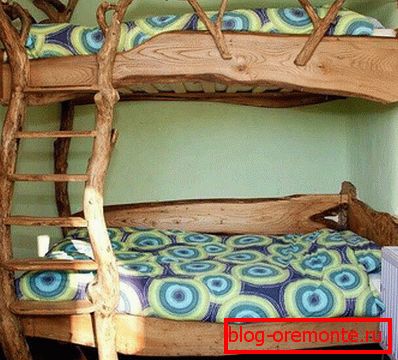
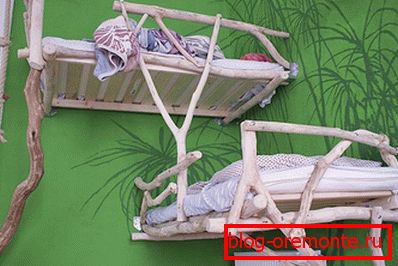
Bunk bed
Usually a double bed is made for children. This can be either a simple bed or a fairytale castle in which the child will sleep with pleasure. Choosing the design of this kind of children's bed, you need to think about the convenience and design.
Video: designing a children's bed
Photos of bunk beds
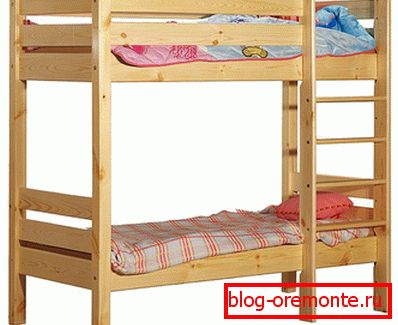
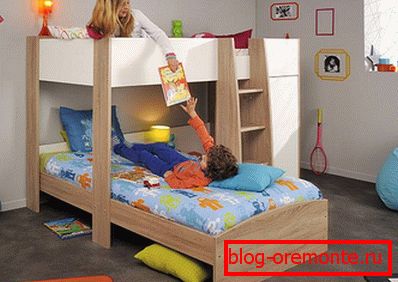
![]()
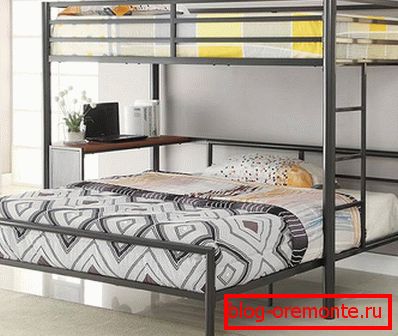
![]()


Drawings and diagrams: assembling a bed


Photos: DIY bed