How to lay tiles on wooden floor
Laying ceramic tiles on wooden floors is associated with certain technical difficulties, which are explained by the significant differences in their structure. Wood is able to deform under the conditions of a changing climate pattern (meaning its drying out with a lack of moisture and swelling from the excess of the latter). In addition, it can change its volume with sharp fluctuations in the ambient temperature, which naturally affects the state of the facing layer itself. The fact is that the microscopic displacements of the wooden base, invisible to humans, have a negative effect on the solidity of the tile surface. At the same time, there is a violation of the structural bonds of the material, accompanied by the appearance of characteristic cracks on the tile and crumbling of the seams, which, as a rule, leads to flaking of individual elements of the coating.
That is why before you put the tiles on the wooden floor, you definitely need to get acquainted with the special techniques, the use of which allows you to get rid of the problems described above. The specificity of these procedures consists in the preliminary deposition of another intermediate layer on the draft wood floor, which has damping properties and with its elastic surface turned in the direction of an “unstable” base.
At the same time, such a layer provides air access to the wood (that is, creates conditions for its ventilation), which excludes the possibility of rotting of the material, as well as the appearance of fungal growths and mold on it.
Laying conditions and tool used
Before starting working procedures for laying tiles in a wooden house, we recommend that you first familiarize yourself with the conditions that determine the possibility of using it in each specific situation. For this, the following requirements must be met:
- firstly, the house in which the floor work is carried out should not be new, since the subsequent shrinkage of the structure will lead to a change in the level of the flooring (so that after shrinking it may be necessary to build it up);
- secondly, the basis you use as a subfloor should be made of a moisture-resistant material (which is especially important when facing the floor in a bathroom, for example);
- and, finally, before starting work, an assessment of the current state of the used draft foundation must be carried out.

In addition, for laying tiles you will definitely need the following working tool:
- standard trowel of a standard size;
- notched trowel;
- building rule of the required length;
- special rubberized hammer;
- tile cutter;
- level, tape measure and marking cord.

Evaluation of the condition of the subfloor
Before starting the working procedures for laying ceramic tiles, you will have to become familiar with how the foundation of the floor should be prepared for the upcoming work. In this case, a wooden floor is a multi-layer construction consisting of support beams and a log with planks tightly packed on them. So in the course of the assessment of the state of the foundation, all its elements should be subjected to thorough inspection and verification.
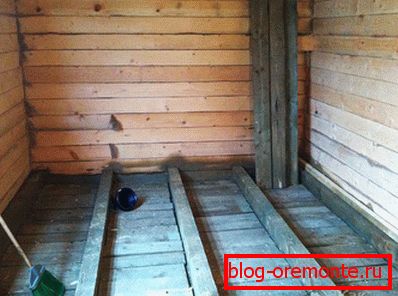
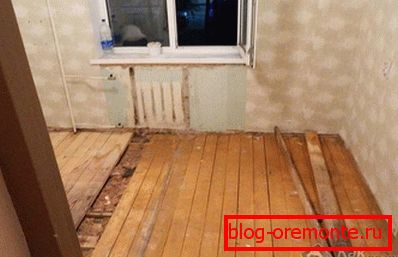
To do this, you will need to completely disassemble the old wooden floor, which will allow you to access the beams and lags. This operation is fully justified, since in order to form a rough base, you will most likely have to use an entirely new coating of grooved boards or other material.
The old floor with wooden floorboards (despite the absence of squeaks and deformations on moving it) is most often not able to serve as a reliable basis for laying tiles.
Foundation preparation

In preparing the design of the sexual base for work, special attention should be paid to the following points:
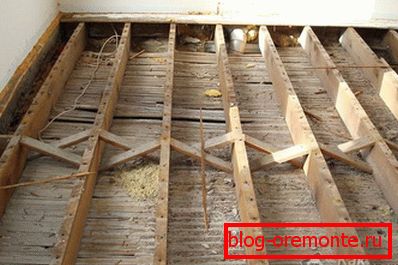 If you have a lag placed in increments of more than 50 cm, you will need to shift them, increasing the frequency of laying about two times. Otherwise, you run the risk of facing a situation in which the supporting elements of the structure can not withstand the weight of the floor covering with the laid tile.
- At normal pitch, the construction is checked for satisfactory condition of the beams and lag and, if necessary, they are replaced with the mandatory processing of new elements with protective antiseptic impregnations.
- After that, the free intervals formed between the lags are filled with small fraction expanded clay or any other insulating material, taking into account the small gap to the upper cut of the supports necessary for ventilation of these spaces.
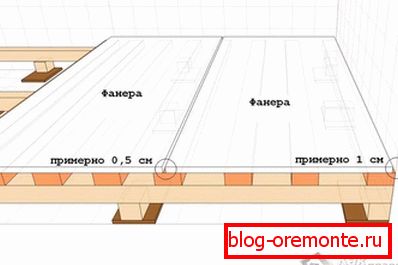
- As a rough base, it is best to use a special tongue-and-groove board, although in some cases (in the bath room, for example) the dry leveling of the base with gypsum fiber boards or waterproof plywood is acceptable.
 In the case of used as the base of used boards, you will definitely need to remove from them the old paint (varnish) with sandpaper or a well-sharpened scraper.
- Before the final fixing of old boards on the support lags between them, it is necessary to leave small gaps (about 3-5 mm), taking into account the possibility of thermal expansion of the material.
- The fixing of used floorboards is carried out by means of galvanized self-tapping screws, screwed one into each intermediate lag (two self-tapping screws are used in the extreme lags for fastening reliability), and the holes formed in the boards are carefully puttied.
Base leveling and damping
The final leveling of the already laid subfloor under ceramic tile is done by means of a grinder or simply by sanding with a suitable size sandpaper.
Next, proceed to the arrangement of the intermediate damping layer, the order of formation of which is presented below:
- First, the technological gap existing around the room perimeter is filled with mounting foam or glued with pieces of tape from a special polymer membrane (at the same time, the gaps between the laid boards or between sheets of waterproof plywood are filled in the same way).
- For the formation of a soft monolithic layer, softening the deformation and vibration of the subfloor, the latter is treated with latex impregnation or heated drying oil (instead of impregnation, its bituminous or waxed counterparts, produced in rolls, are sometimes used).
- In case of use of drying oil or impregnation, without waiting for their final drying, the surface is completely covered with a special paint net.

Upon completion of all the above operations, you will receive a continuous insulating layer that will not only compensate for fluctuations and changes in the volume of the wood base, but also reliably protect it from penetrating moisture. It should be noted that the method of preparation of the intermediate layer, considered by us, relates to alignment techniques, in which it is possible to do without a screed at all. After its formation, you can proceed directly to the installation of the ceramic tile itself.
Lightweight screed device

But most often, in order to improve the quality of the intermediate layer (to obtain a more rigid substrate for ceramic lining), a lightweight screed is additionally made on the aligned base, only slightly loading the supporting structure of the sub-floor. This screed can be implemented in several ways, involving the use of various binders:
- It can be made in the form of a classic cement screed with a thickness of no more than 3 cm. In the process of its preparation, a metal mesh is first mounted on top of the draft substrate, which is then poured with a previously prepared cement mortar.
- As a replacement for the classic screed, fillings from modern polymeric materials, which include glue based on liquid glass, are often used.
- In addition, for these purposes, you can use a two-component polyurethane adhesive composition, which upon completion of polymerization forms a sufficiently elastic layer, which perfectly protects the tile laid on it from possible deformations.
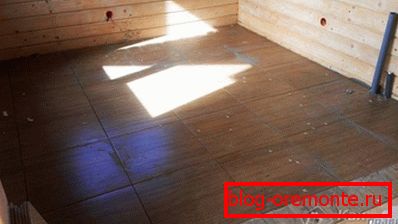
Laying facing coating

Before gluing the tile onto the ground prepared by the hands, a test layout of the blanks is carried out, allowing them to be fitted in problem areas (along the edges of the flooring or near pipes and other communications). With any laying option, you can hardly avoid the so-called tile trimming; cut at the place of preparation is recommended to be placed in shaded areas (around the perimeter of the room). In addition, it is also desirable to decide in advance on the shape of the trimmed tile blanks and to form their complete set before laying.
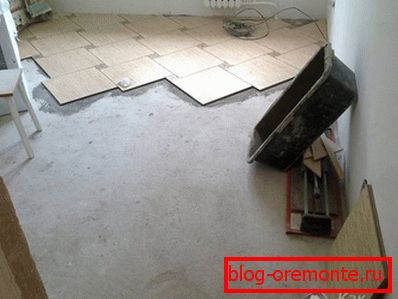
The process of laying ceramic tiles on an already prepared wooden base in one of the rooms (in the kitchen, for example) is not significantly different from the typical methods of laying facing coverings of this class. To implement them, you will need all the previously specified working tool.
Particular attention should be paid to the adhesive composition, which should be prepared in strict accordance with the manufacturer's instructions. Do not dilute this composition in quantities greater than necessary for finishing one square meter of surface.
In conclusion, we note that all the excess adhesive composition is removed from the surface of the tile with a damp cloth immediately when they appear, and the seams formed after hardening of the glue are moistened with water and carefully rubbed.