How to insulate the floor on the balcony: instructions from
Balcony city apartment can perform many functions. Most people use it simply as a warehouse. However, the real owner can turn the loggia into a cozy extension of the apartment. This useful space can be a study, a greenhouse or just a comfortable seating area with a beautiful view.
If the idea is already ripe in your head, it's time to move on to its implementation. First you need to take care of the most important - floor weatherization. After all, warm floor, it is a pledge that to be there will be nice and comfortable. In the article we will look at how to warm the floor on the balcony with your own hands, we will give detailed instructions, as well as photo and video materials. So where to start? Perhaps, with a choice of an optimum heater.
What insulation to choose
Building materials stores, especially in large cities, can lead anyone to confusion - the assortment of various materials is so great. However, there is nothing complicated, now everything will become clear. The main thing is to decide exactly how you would like to make floor insulation. There are only two ways:
- Warming using styling insulating coating.
- Installation of active heating system "warm floor".
So let's consider both options in more detail.
Installation of thermal insulation coating
There are many types of insulation - flexible, rigid, sheet, roll, etc. However, the principle of operation is the same for them - this is to ensure very low thermal conductivity. This is done mainly using materials with a high content of air, which provides thermal insulation.
- The most famous insulating material is foam. It has been used for a very long time and has a good reputation. It is not only cheap, but also very effective. Polyfoam is produced in the form of sheets of various sizes. Thickness is very different, from 2 to 10 centimeters. Warming is simple, the material is placed between the wooden lags of the floor. Then any finishing covering is laid on top.
- Minvat is also known to all and is actively used as a heater for construction and installation works. The basis of this material is a mineral fibrous substance. The advantages of this material are low cost, ease of use and excellent efficiency. Mineral wool is available in rolls and sheets of various thicknesses. Industrial mineral wool contains microscopic glass fragments, which in itself is not only unpleasant, but also harmful. However, mineral wool, sold in modern building stores, is devoid of this significant drawback and is completely harmless to home use.
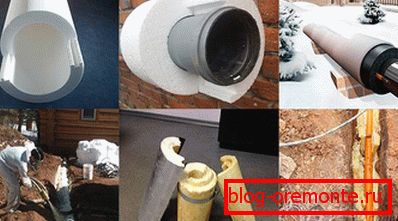
- Polyurethane foam is the most modern material of the above. It has the best insulating properties, practically does not absorb water, is convenient in installation. Sold in rolls of various sizes. The thickness of the insulation varies from 0.5 to 4 cm. Additional thermal insulation properties give the insulation a special foil applied on one side with glue.
Stages of work

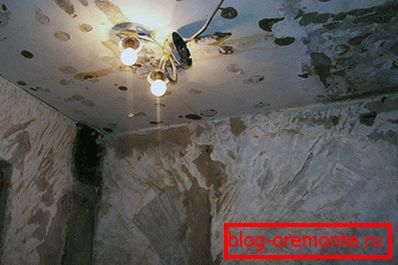
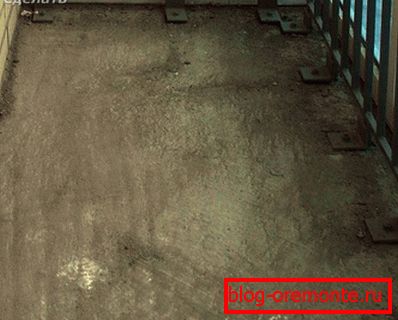
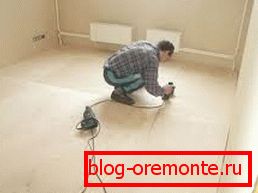
- The first thing that is needed is to thoroughly clean the surface from particles of old finishes and all kinds of rubbish.
- Then you need to waterproof the floor with a special film or penofola.
- After this, we carefully seal up all sorts of leaks and cracks.
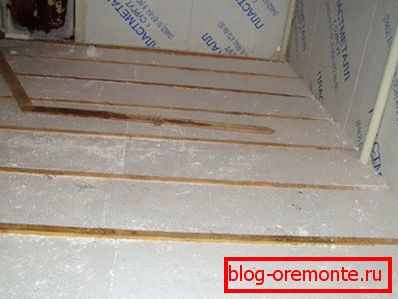
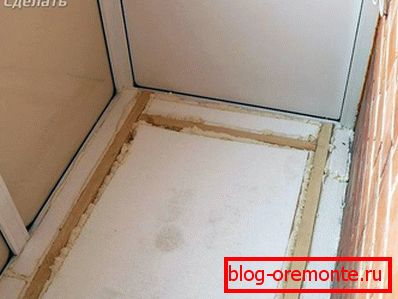
- With the help of wooden bars 50? 50 mm to build logs on the floor. The cross step between the bar should be approximately 50 cm;
- In the space between the bars, cover any insulation you choose so that its surface is flush with the top level of the lag;
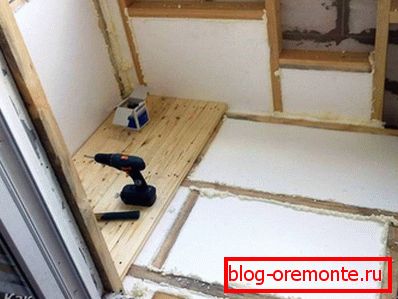
- Put chipboard on top and fix them with screws.

Technology "warm floor"
There are two options for active floor heating:
- Electric floor.
- Water heating. The construction with the water supply is much more complicated, besides, in the apartment building this option cannot be done - connecting the heated floor to the central water supply system is prohibited.
Installation of electric floor heating
So, the procedure:
- Preparing the floor surface. Of course, if the floor is badly damaged, significant restoration work will be needed, if this is all right, then before installing the heated floor, clean the floor well enough or walk with a vacuum cleaner.
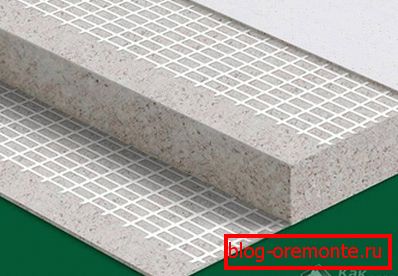
- Attach insulating plates to the floor with special glue. You can additionally use umbrellas.
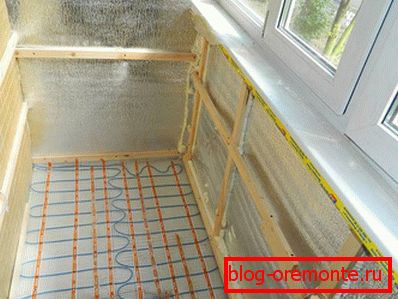
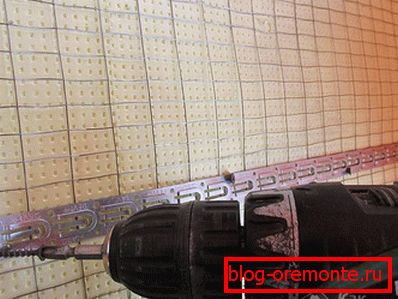
- Then put a metal grid for laying a warm floor.
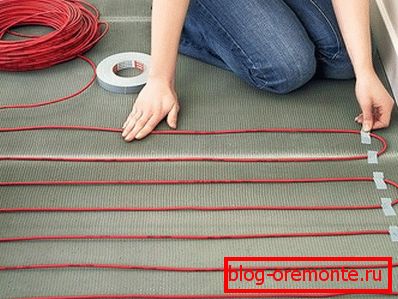
- Heated floor heating cables are fixed with mounting tape. Mounting tape must be laid on the grid, attach the screws.
- Fixing the cable, observe the 100 mm pitch.
- Then connect the temperature sensor and thermostat.
- Then on top of this whole structure is poured with a concrete screed with a thickness of from 3 to 5 cm.
Photo: the principle of installation of "warm floor"
The inclusion of a warm floor, perhaps only after complete solidification of the solution.
Video: cable floor installation
The hardening time can be specified in the manufacturer's instructions. Be sure to read it to have a full idea of how to act properly. Floor covering should be selected taking into account the use of a heated floor. This also applies to adhesives and floor tiles.
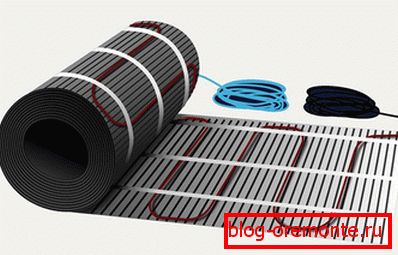
Another option for a warm floor on the balcony can be the so-called thin floors (special heating mats). They are made in the form of thin mats with a base, which greatly simplifies installation.
The use of an infrared heating system does not require pouring a screed, which, firstly, saves time and money, and secondly, significantly reduces the load on balcony ceilings.
Use of Penoplex
After the glazing of the balcony you can proceed to the insulation of the floor. One of the types of insulation used for these purposes is penoplex. It is a foamed extrusive polystyrene, which is produced by extrusion of general purpose polystyrene.
Preparatory work
The first thing you need to remove the old dilapidated flooring. If necessary, repair the concrete slab, repair all chips and cracks. Align the slab with a concrete screed. After the concrete dries (it will take about three weeks), the floor should be waterproofed.
As a waterproofing layer can serve as a ruberoid, bitumen or glass fiber. Whatever material you choose, you need to cut cuts to the size of the length of the balcony and + overlap on the wall, equal to 5 cm. Cuts waterproofing should be laid with an overlap of 10 cm on the hot bitumen mastic. It is important to conduct a thorough sealing of the seams. This is done with bitumen mastic. You can heat up the seams with a blowtorch / gas burner.
We warm a wooden floor
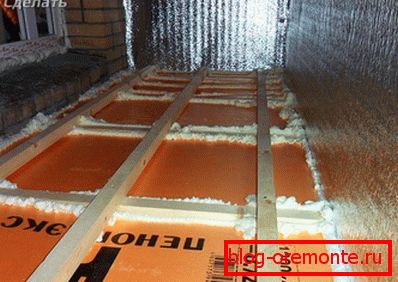
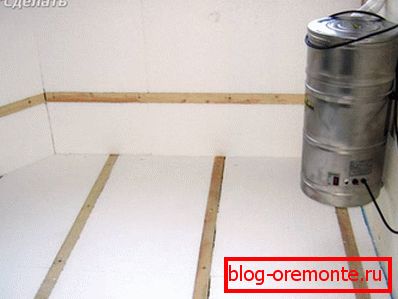
If you have to insulate the floor with wood, then along the balcony / loggia should be laid wooden dry logs, pre-treated with an antiseptic with a step of 500 mm.
The thickness of the lag should be chosen so that the floor on the loggia was ultimately at the same level as the floors in the apartment. As a rule, bars of 50? 50 and 70? 50 mm are used.
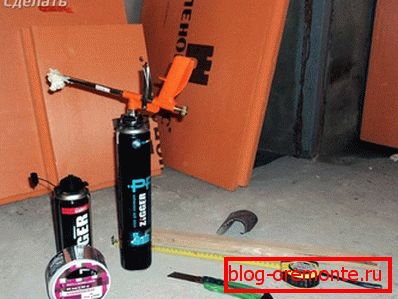
Lags are fixed on the mounting foam, and the horizontal installation can be controlled by a cylindrical level.
When installing insulation penfolem can not use foam, the content of which is toluene. This is due to the fact that this substance dissolves penoplex. It is worth noting that toluene is contained in foams for winter and universal use. Therefore, in our case, it is best to use foam for summer use.
There should be a small gap between the logs and the walls of the loggia, about 2–3 cm. In this space, you need to lay the foam panels, after cutting out it according to the size. The thickness of the insulating layer from the future functionality of the loggia and the temperature zone. Most often, Penoplex plates with a thickness of 30–50 mm are used for these purposes. Interestingly, the plates of the penoplex are interconnected by the “thorn-groove” method, which ensures a high density of the joint.
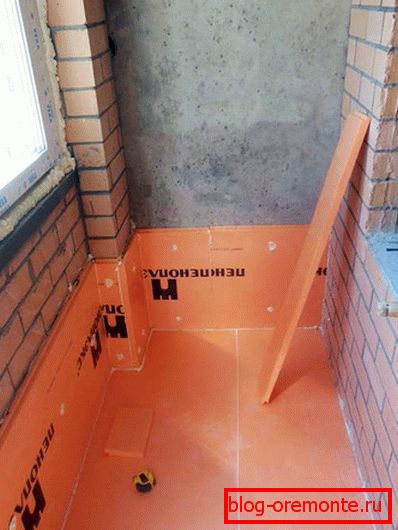
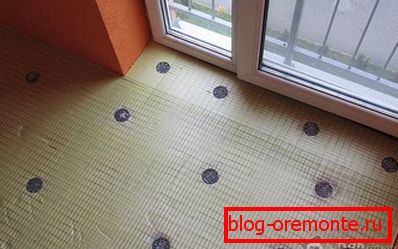
Fastening of insulation to concrete is performed by specially designed for this purpose self-tapping screws with a wide plastic hat. This is important because the use of metal screws in this case is unacceptable.
Next you need to conduct vapor barrier penoplex. For this, penofol with a thickness of 10 mm will fit perfectly. It will, among other things, play the role of additional insulation. It is necessary to lay it end-to-end, sizing aluminum seams with adhesive tape.
Then you can lay the wooden floor logs. It is recommended to use as a subfloor. Remember, however, that an air cushion of 10 mm should remain between the wooden floor and the vapor barrier.
At this stage, you can begin to finish the walls and ceiling. After completing these works, the floor covering should be laid on the floor. This may be linoleum, laminate or carpet. Then install the plinth.
Use of expanded clay
The balcony plate has a slope towards the street. This is to ensure that no melt and rainwater accumulate on it. In view of this, before carrying out the insulation, the slab should be leveled with a concrete screed.
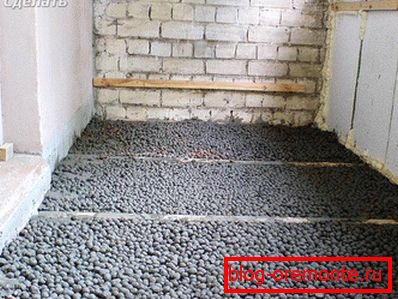
When used as insulant of expanded clay, the same material can be used as a leveling layer. If the fence is not solid, then you will need to make a formwork at a height of about 10 cm. Along it, you need to install a beacon profile that determines the level of the floor. Typically, the width of the balconies does not exceed 1 m, if this is the case in your case, then fill the clay with one continuous layer. In this situation, laying of cross beacons makes no sense.
Before filling the concrete floor with claydite, lay the plastic wrap on the subfloor. Thus, moisture insulation will be provided.
GVL
Smooth insulation can be hands, a wide spatula or aluminum rule. It is important to periodically tamp the material. After laying, tamping and leveling the claydite, you can proceed to laying the leveling layer of the base of the floor. Most often it uses concrete, less wood floor and gypsum-fiber boards. Although the easiest way to lay GVL (gypsum fiber sheets). The slab is simply cut to the size of the floor and fastened with self-tapping screws with an interval of 10–15 cm around the floor. This floor fits into 2 layers. Moreover, the second layer of GVL is glued, and then screwed to the first with screws.
After that, you can start finishing work. Parquet, linoleum, laminate or tile can serve as a finishing layer. As for the parquet flooring, in the absence of experience it will be difficult to achieve a positive result, but even an apprentice will be able to lay laminate or linoleum.
Concrete screed
Another option to manufacture a solid base after laying insulation - pouring concrete screed. In this case, everything is done in the same way as when laying the GVL. The only condition is that instead of GVL, a screed with a layer thickness of not less than 5 cm is poured. You can make an ordinary cement-sand mortar in a ratio of 1: 3 or purchase a ready-made mixture of marking CM-10 - CM-12. Whatever it was, it is worth considering that the screed will dry for about a week, or even more, and only after that you can begin to install parquet, tile or other finishing flooring.
DSP

On top of expanded clay, you can perform chipboard / OSB. The thickness of such plates should be from 10 mm. Otherwise, it is likely that the floor during the operation will bend. To increase the rigidity of the base, before filling the claydite, you can lay wooden bars across the floor, adjusting their height with a piece of timber from a bar.
On top of such a rough flooring can be laid carpet, linoleum, marmoleum.
Foam use
The cheapest and easiest way to insulate loggias is with foam plastic. Another advantage of the material - ease of installation. Polyfoam, as well as penoplex, is foamed polystyrene. The only difference between the material is different production. In the case of foam manufacturing, polystyrene granules are sintered under the influence of steam. Over time, the bond between the granules becomes weaker and weaker. Because of this, it is not as resistant to water and heat as penoplex.
The strength of the foam is enough to warm the floor.
By its refractoriness, foam plastic belongs to the GZ class, because it does not undergo flame retardant treatment. And as a result, the material burns well. The sound insulation properties and low thermal conductivity of the foam and foam is almost the same. At the same time, foam is cheaper than foam.
Step by step instructions for styling foam
To protect against moisture on the concrete slab you need to lay a plastic wrap, securing it with tape. Then a frame is made similar to the one that is made when the floor is being warmed with penoplex. The foam is placed between the lags in the tension, which means that the width of the cuts of the foam should be identical to the distance between the lags. Insulation is cut with a regular / stationery knife.
Foam should be glued to the floor. The recommended glue is Teplokley / liquid nails. Foam should be glued to each other with maximum density. Make sure that the joints of the foam does not coincide, if there is a need to install several layers.
Joints and seams need to be sealed. For these purposes, fit the usual sealant or foam.
Chipboard can serve as a rough flooring. If ceramic tile will be laid as a topcoat, it is better to make a subfloor from thin screeds or fiberboard. Otherwise, the foam will crack or bend.
Editorial advice:
- How to drain the air from the battery in the apartment.