How to install the toilet on the tile do it yourself
More recently, the toilets were mounted on a taffeta - a piece of wood mounted in the floor. Now this method is irretrievably obsolete, because newer advanced methods have emerged that make it possible to do without such mortgages. Nevertheless, the echoes of the past still make themselves known, which is expressed in the impossibility of even the slightest raising the floor level, since in this case the withdrawal will not be combined with the bell of the cast-iron sewer pipe. In this case, you have to lay the tile around the installed toilet bowl, which is somewhat inconvenient, and it does not work out very well, since the edges of the trimmed tile do not always fit snugly to the base of this sanitary ware. Fortunately, this method is used very rarely, so we will tell you how to install the toilet on the tile with your own, since this method is the most common.
Laying tiles
Most often, the tile layout on the floor of the toilet is planned, based on the convenience of laying or to maintain the planned style. This approach can not be called wrong. But when installing a toilet bowl on a tile, another problem often arises - the opening for fixing the device has to be drilled at the junction of tiles or on the edge, which often leads to chipping of the tile. This does not affect further installation, but the type of flooring can be badly damaged. If this is possible, it is better to decide in advance on the installation site of the toilet bowl and make sure that the tile is laid in one plane, and so that the holes have to be drilled at least a few centimeters from the edge.
Tools and consumables

Modern man needs a modern tool, so if you already have a hammer and a piercer on hand, then take them away. We will need:
- perforator or drill with percussion mechanism;
- Key 10 or Phillips screwdriver (depending on the fasteners purchased);
- the drill for the perforator of Ø10 mm (if to use a drill, then to use a drill on concrete of the same diameter);
- mounting kit to the floor;
- silicone or mastic;
- marker;
- soft simple pencil;
- FUM tape.
Now you can do the installation.
Installation
| Illustration | Job Description |
|
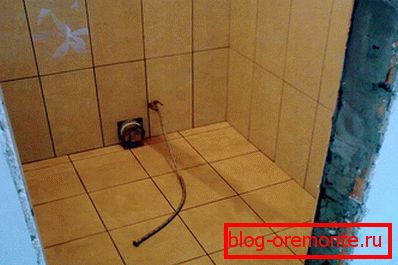
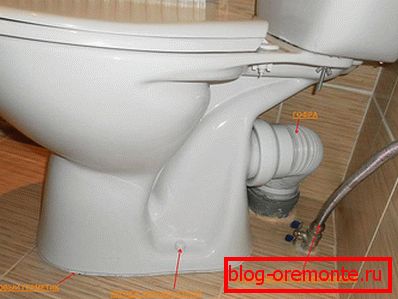
| If the toilet is connected to the sewer by corrugation, then this gives some opportunity to change its position. When the connection is made to the socket, there are no options. In this case, you need to install as it will stand in a fixed state. The toilet is placed on the floor so that the drain freely enters the socket (the bottom or side connection - no difference). After that, you need to check whether the device is level, and, if necessary, align it. |
|
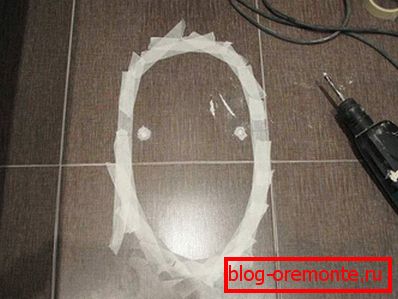
| The sole needs to be outlined with a marker so that a clear mark remains on the tile - this will help later to install the device in the same place. |
|
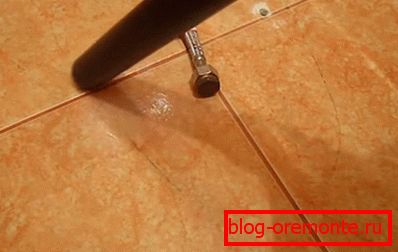
| In the course comes a simple pencil (or marker). With it, through the mounting holes make marks on the tile for mounting hardware, then remove the toilet in the direction so that it does not interfere. So, on the floor should be clearly visible marks from the pencil - in these places will need to drill holes. Where are they located? From the edge of the tile or closer to the center? It depends on the answer which tool we will use. |
|
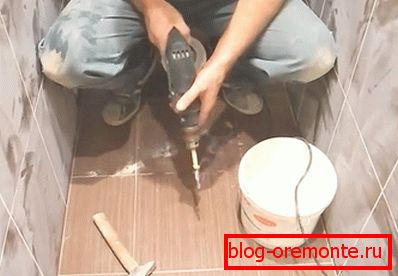
| Most often, drilling is performed with a perforator, with a drill installed in it. The device must have the drilling mode selected, but the hammer mechanism is turned off, otherwise the tile will crack. In problem areas, where there is a high probability to destroy the edge of the tile, it is better to use a crown intended for drilling glass. If the drill slides on the tile, then in the place of drilling it is necessary to scratch it with a core or slightly tile the tile, –– having set the target, chop up a small piece of enamel. |
|
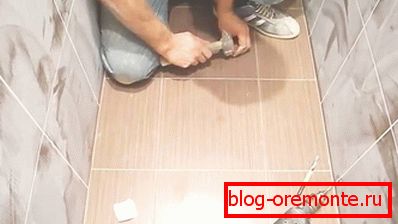
| Having drilled a tile, we switch the perforator into the percussion mode and drill a hole in the base, a little more than the length of the plastic dowel that is in the kit of the acquired fastener. In order not to be mistaken, on the storm one can tape down the level to which he must enter the floor. Enema can be flushed openings, so that they do not remain rubbish. If the enema was not at hand, then use a vacuum cleaner. |
|
| Check the depth of the drilled holes again to make sure that everything is done correctly. This can be done with a pencil. Just insert it into the hole, grab it near the hole and pull it out. Then you can compare the existing result with the length of the dowel. If everything is in order, then we will continue to work. In that case, if you see that the dowel will not enter the full length, you need to clean the hole again or deepen it with a drill. |
|
| Insert the dowels into the drilled holes so that they are flush with the tile. If necessary, the dowel can be driven with a hammer, but only very carefully. |
|
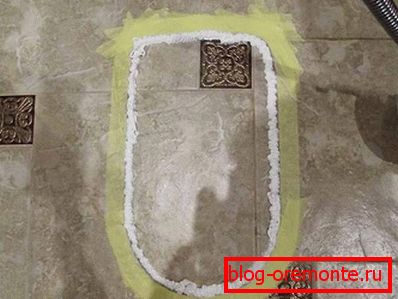
| On the outer edge of the markup, glue the tiles with masking tape. Apply a layer of sealant on the inner edge of the contour marking, and place the product with the sole clearly on the sealant. It remains to fix it on the floor with the existing fasteners. After the sealant dries, the masking tape is removed. |


The installation of the toilet bowl is completed on this and it can be used, but there are such cases when the fixture cannot be used. This is discussed in the next section.
Installation без сверления плитки
Why do you need such a more problematic and less reliable way to install a toilet bowl? The fact is that it is not always possible to drill the floor, for which there are good reasons:
- The base is very durable, and it can not be drilled (this happens very rarely).
- Under the tile, in the place where you want to drill, laid communications, such as underfloor heating, plumbing or electrical cable.
Anyway, since there is a question, it means that you need to give an answer to it. We will not repeat, therefore we will begin the installation process from the point when the toilet's bottom was outlined with a marker, leaving a clear mark on the tile.
- We need a grinder and a sweep (peeling) circle, which need to remove the top layer from the tile inside the markup. The thickness of the layer being removed is equal to the thickness of the inner rim of the heel of the toilet bowl.
- There is usually no enamel on the bottom of the toilet bowl, but if there is, then it should also be removed.
- Often you can hear the recommendations about the fact that the installation can be carried out without drilling, using an ordinary cement-sand mortar. We immediately say that this is not the best option, because such a connection would be unreliable.
- Take liquid nails №915 (for bathrooms) and abundantly apply on both surfaces, pre-degreasing them.
- To the toilet does not sink to the ground, use the crosses for tiles with a thickness of 2-3 mm, putting them in the glue.
- Now install the device, slightly crushing it.
Liquid nails provide a secure fixation, but you need to wait at least a day, then remove the crosses and seal the voids with glue. If time allows, it is better to start operation no sooner than in a week.
Video: how to install the toilet on the tile