How to install a sink in the bathroom
You are faced with the fact that you do not know how to install a sink in the bathroom? In the view of many people, doing this kind of work can only be done by a professional plumber who has a large number of tools. However, not everything is as difficult as it may seem. After reading the stated material, you will understand that the installation of the drain can be done by yourself.
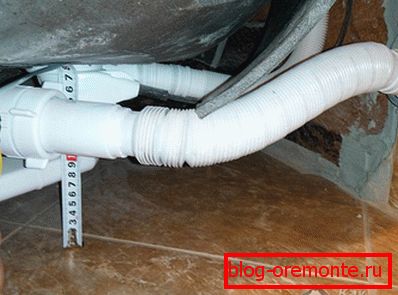
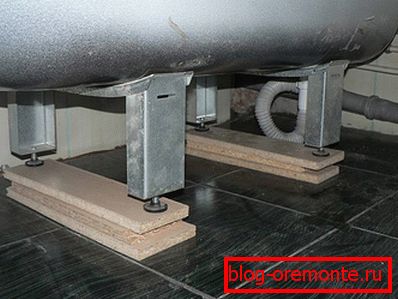
Siphons can be of different heights. Therefore, the first step is to measure the distance from the bottom of the bath to the floor. It should be at least 15 cm. If the bath is not yet installed, then you need to install and firmly fix it - it should not move.
What is this device
How to install the drain in the bathroom? For a person who is not familiar with this kind of terminology, such a question can only raise additional questions, but in reality this means that a special siphon will be installed in the bathroom with a tap to connect overflow. This is what we will talk about, but first you need to understand the device and the principle of operation of this device.
The principle of the siphon
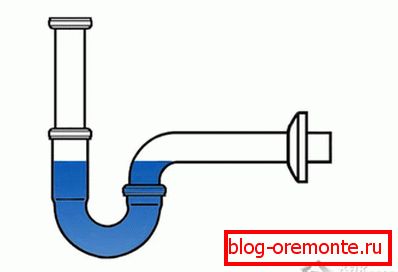
Regardless of the design, the drain is equipped with a siphon, in which water must constantly be in, and if it evaporates or the water seal fails, unpleasant odors from the sewer pipe will enter the room. To avoid this, a funnel or vacuum valve must be installed.
If the reason for installing a new drain is that it smells foul, then you need to determine if the siphon is to blame.
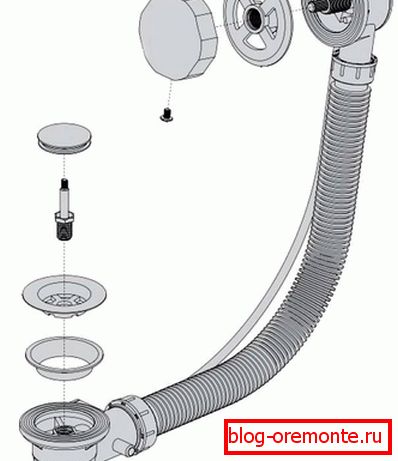
Bath drain device
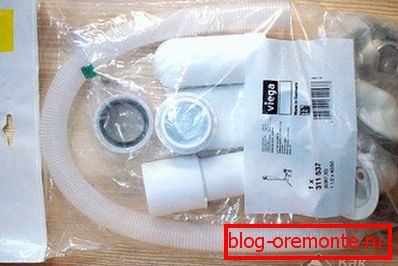
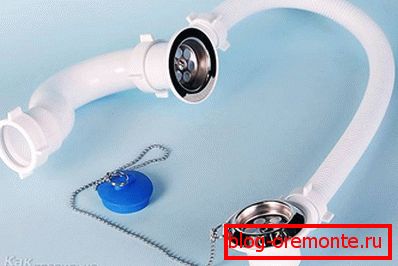
Having decided to purchase the simplest modern bath drain, you will encounter the fact that instead of the device shown in the figure, you will be given a package with a bunch of plastic parts. Do not be afraid! If not you, then your children or grandchildren collected designer Lego. You can be sure that siphon assembly is much easier and faster.
How to assemble

So, the siphon is purchased and delivered home. So that no part is lost, open the package and lay out the contents on a wide table, and preferably on the floor. Carefully inspect every detail so that there is no flaw. Check for loose connections.
Branded siphons are packed in a cardboard box and are completed with detailed assembly instructions. Defective parts almost never come across.
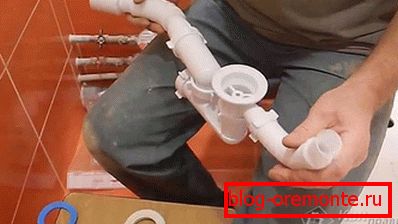
Finding a solid assembly instruction there is unlikely to work out - at best, a small siphon pattern. Since there are not as many details as it may seem, then finding your place for each one will be easy. So what should pay close attention, so this is which side to install the rubber seals. The fact is that they are cone-shaped. The rule of installation of these rubber bands one - narrow to the neck, and wide to the nut, which is clearly seen in the figure (shown by brown arrows). Immediately crimp all connections are not worth it, as you may need adjustment in place.
Mount plum
After collecting the drain, you need to install it in the bath.
- First of all, you need to check if there are any pieces of old gasket or some kind of debris left. The landing area must be clean and smooth (both inside and outside the bath). If this is not the case, the installation cannot be performed until the problem is resolved.
- The lower part of the siphon has a wide neck with an inside outburst - this is the seat for installation (indicated by the blue arrow). If the length of the hands allows, further installation can be performed without an assistant. The siphon with the gasket laid on it is brought under the lower opening of the bath and is kept in this position.
- From the inside of the bath, make sure that the bottom gasket does not move to the side.
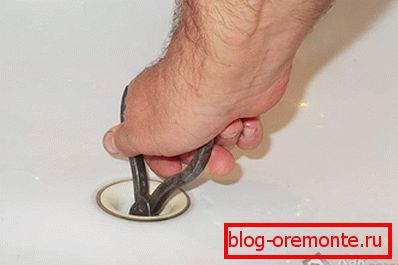
- A gasket is laid on the drain hole (indicated by a green arrow), the top cover is mounted and screwed onto the grille. In modern models, the fixation is carried out with a copper screw; in older models, the cap is threaded and screwed directly into the siphon.
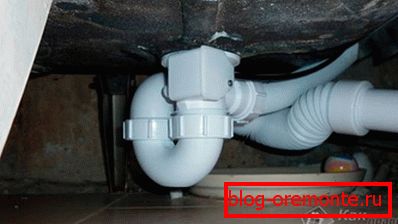
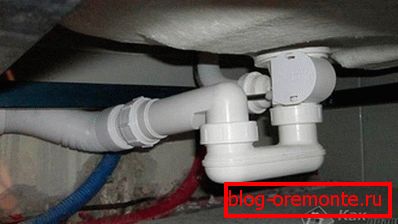
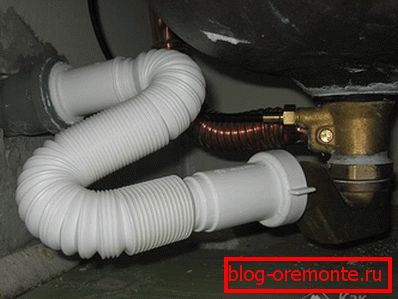
- In the same way, the overflow hole is tied up and its connection to the siphon is performed using a flexible hose with pre-fitted nuts and conical washers.
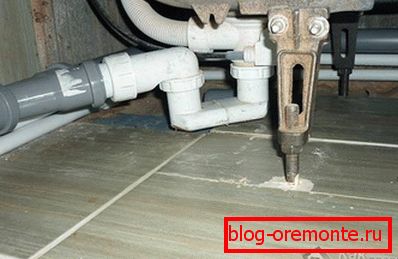
- The next step is to connect to the sewer. As a rule, there are no problems when connecting to PVC sewer pipes, but in order to make the connection to the cast-iron pipe, you will have to purchase a rubber sleeve of a suitable size.
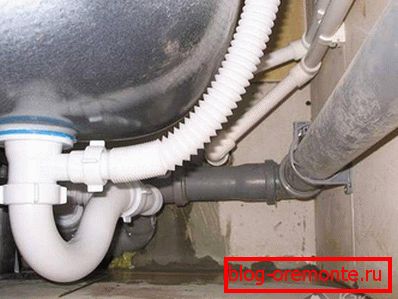
- Having pressed all the connections, you need to check if there are any leaks. This is done simply - water is drawn into the bath, and under the bath you need to look. Then you need to close the stopper and check if there will be drops of water from the bottom when the bathtub is a bit full. The final step is to check the tightness of the overflow installation. For this you need to draw water until it is poured into the siphon through the overflow.
Is it dry under the bathroom? Then the siphon installation was successful.
Plastic parts do not have high strength, so when fixing them do not need to exert great effort. Having found a leakage, disassemble the connection and, having lubricated the gasket with sanitary silicone, assemble it.
Automatic types of plums
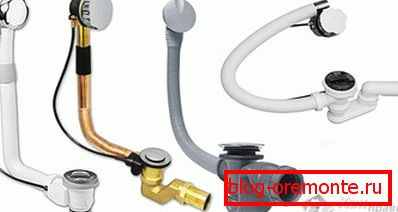
Now let's look at what automatic drain-overflow is and how to install it correctly.
It is important to take into account that among these devices there are models in which the management of the drain occurs in different ways.
- Drain-overflow automatic.
- Drain-overflow semiautomatic.
It would be wrong to say that one is easy to use and the other is not, as they are structurally different. Therefore, everyone chooses a drainage mechanism at his discretion.
If we talk about cheap models, the automatic overflow will not last long. Since it cannot be repaired, soon the whole device will have to be changed again.
Installation of semi-automatic siphon
Semi-automatic siphons (as well as automatic) can be made from:
- sanitary plastics;
- brass;
- copper;
- chrome steel;
- silumin.
Silumin siphon is the worst choice. Not only can it break during installation, so after a while it’s just a mess. Products made of copper, brass and chrome steel can be called durable, but because of their high cost, they are not in great demand.
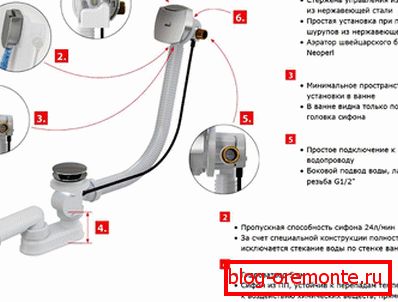
Products from sanitary plastics are stronger than silumin siphons and more durable, since they are not afraid of an aggressive environment. A significant role in the popularity of plastic products is played by their low cost and simple installation. As for the assembly, the process is not much more complicated than the installation of an ordinary plastic drain-overflow, and differs only in the fact that instead of the gratings, it is necessary to install controls, as shown in the diagram above.
Installation of automatic siphon
It is even easier to install an automatic drain than a semi-automatic one, since the installation of controls is not needed - the whole mechanism is at the bottom of the siphon.
If the automatic drain will also provide water supply to the bowl, then such a device must be installed by a representative of the company; otherwise, from the moment you have completed the installation, the manufacturer will no longer fulfill the warranty conditions. If it is simpler to say - under the guarantee it will not be repaired or replaced.
Practical advice
The acquired drainage system must be convenient and reliable, which must be taken care of in advance. When making a choice, it is important to pay attention to the following:
- Control of the drain mechanism can be carried out by means of a valve, button or handle. Decide in advance and firmly decide which mechanism is right for you and will be the most convenient. If it's hard to imagine, then you can go to the plumbing shop and ask the seller to show different models.
- If a metal drain-overflow system is acquired, then you definitely need to find out what metal it is made of. Some manufacturers of silumin products are sprayed on them and outwardly they are very similar to products made of brass.
- The white bathtub will be in harmony with any colors of the siphon caps. The main thing is that there is no nalapy and disharmony with the style of the room.
- Automatic or semi-automatic? Do not rush to make a decision, just hear the word machine. The draining method differs radically. In an automatic system, in order to bring the mechanism of action of the drain into action, it is necessary to apply a force to the lid covering the drain hole. If you need to drain the water, taking a bath, then there is no problem. The semi-automatic system controls the drain system from the outside.
- When choosing a semi-automatic system, it is important to pay attention to the location of the control cable - it can be both outside and inside the overflow pipe. The latter arrangement of the cable is more aesthetic, but is beyond repair.
Installing a siphon on the bath is easy. It is necessary to follow the advice from the presented instructions for assembling and installing a specific model of equipment ..
Video
This video shows how to assemble a simple bath siphon:
See how to replace the bath strapping:
A photo