How to install a sidewalk curb
Laying paving slabs, you need to know about how to install a curb. That he will bring the appearance of the track or platform to the desired state. To achieve this goal it is necessary to follow a few basic steps. About them, as well as manufacturing technology will be discussed in this article.
Types of curbs
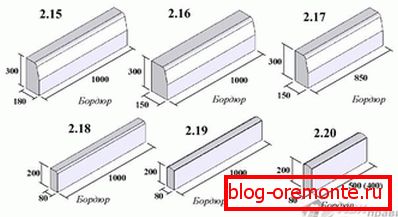
Pavement curbs can have a large number of different configurations. But among them there are two main ones:
- One sided. It is used in cases when it is necessary to make an edging for the track. In this case, one of the sides is flat, which serves as a stop for the tile being laid.
- Double sided. Very relevant when it is adjoining to the lawn. In this embodiment, the upper end has a beveled chamfer on both sides.
The form of such options:
- semicircular;
- in the form of a wave;
- in two small steps;
- inclined;
- in the shape of the letter D;
- square.
This distinction is relevant only for certain types of materials for manufacturing.

Metallic. This type of product is more like a small fence. The height can be very diverse and is adjusted to the needs and preferences of the customer. Most often it is a tape that rises 15 cm above the surface. In addition, the shape and patterns can also be selected individually. It goes well with any surrounding exterior. Metals that are resistant to oxidation are chosen as the base: aluminum, stainless steel, copper and others.
Plastic. There are products made entirely of plastic or with various components. The first are more like metal fences. And the latter are made mainly of PET base, which is mixed with concrete. The advantages of this solution is the maximum possible service life. Plastic does not decompose, so no precipitation will not be terrible to him. Especially relevant for garden and park paths.
Wood. They are used in the case of a specific project or a designer's idea, for example, it could be a country-style garden. In order for it to serve as long as possible, the prepared bars are processed using an antiseptic composition that will prevent rotting. This option is installed much easier than others.
Brick. The material can be used bricks of various configurations. The most attractive looks facing. But the choice is important to approach scrupulously and not regret the funds. Otherwise, salt deposits appear over time, which spoil the appearance. The advantage is high maintainability, because to repair the damage it will be enough to replace only one or a few elements.

From natural stone. They are used as whole blocks, which are made by cutting, as well as chips, added to the cement composition. Most often used in the finishing of the tracks in expensive mansions, where it is necessary to create a certain landscape design. In addition, products of this type well protect the installation site from grass germination.
Concrete. Made by casting or vibrating rammers. The latter are more durable. The advantage is the possibility of self-production. It gives the freedom to choose the shape and color. You can create a unique solution specifically for a specific type of tile.
Why is needed

Is it really worth spending your strength on messing around with making and installing curbs? There are several reasons why they are really needed:
- Give completeness to the whole project. Adjusted contours always look more spectacular than an unlimited path that seems unfinished.
 Exclude rinsing tracks. Falling precipitation or approaching moisture can contribute to the destruction of the material laid. Curbs hinder this process.
- Give extra strength. When walking, there is a fairly large pressure on the surface. If you step on the edge, it can easily be damaged. Edge gives extra emphasis, which will avoid this.
- Cost savings. If we take into account the two previous steps, it becomes clear that the repair of the pavement will be needed less often than in other cases.
- An additional limiter for people with poor eyesight.
- Large curbs prevent vehicles from entering the pedestrian area. This contributes to the safety of strolling children.

There are simply no disadvantages to such a solution, except for the cost of funds and labor.
Independent production
Production of borders can be carried out in two main ways:
- In separate forms. Convenient in that you can make the elements in any convenient place, and then deliver for installation. Such products are easy to repair, as has been described in the case of brick edging.
- At the place of installation. The fence is poured directly on the desired area. The advantage is the possibility of giving virtually any desired shape.

There are several solutions in the manufacture of curb modules. The first of them - with the use of U-shaped channel. The process will require:
- a segment of the specified material;
- 2 metal plates;
- metal or fiberglass reinforcement;
- Master OK;
- Bulgarian;
- sand;
- cement;
- rubble

A site is selected with a fairly flat surface. This is to ensure that there are no surges in the final product. The profile is cut to the required size with a margin of 30 mm. Retreating to 10 mm from each edge, made cuts grinder. Their width should be such that the sheet metal fits in the middle. It will serve as dampers to prevent solution leakage. The inner surface of the channel is polished and cleaned so that it is sufficiently smooth without rust. In the middle fit a thick plastic film. She must lie with an overlap on the edge, so as not to slip in the process. The next step is preparing a concrete solution. It will be required to observe a ratio of 3: 1: 3 (fine gravel or sifting, cement, sand). It should not be very liquid. A small frame is connected from the reinforcement. The dimensions are selected in such a way that it is completely submerged in the solution. Those. each side should be 3 cm less than the internal space of the channel. The prepared space is filled with concrete. It is well smoothed and compacted. If there is a vibrolath, then it will perfectly help with this. After a few hours, the product is removed, the oilcloth is removed and it is left until it is completely cured.
An eccentric sander can be used as a vibration compactor. To do this, it is necessary to remove the sandpaper, turn it on and walk along the walls of the mold until it shrinks completely.
If there is a desire to obtain a structure of an unusual configuration, then a gutter for pouring can be used as a mold. Today they are made of various kinds, so it’s easy to choose one that you like. When choosing, pay attention to the wall thickness. Its size should be as large as possible to support the weight of concrete. If you did not manage to find something good in strength, then you can make a special stop for the mold. To do this, make a small wooden box or just dig a hole of the appropriate size. The edges will abut against the walls and will not spread. Fill in the same way as described above. As a reinforcing base, you can use 1 rod fittings Ø12 mm or metal mesh.
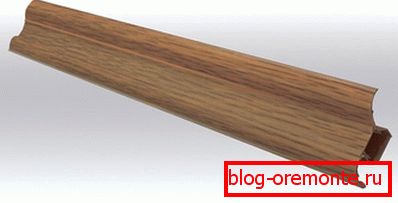
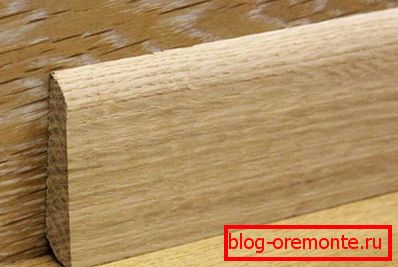
There is another interesting option to create a design solution. The form for filling is made. To do this, you can use a channel, sheets of plywood, boards or something else. In the middle of one of the inner corners fit favorite plastic baseboard. It is covered with wax from the sprayer to ease the backlog. It can be glued so that it does not move. After that, the prepared cement mixture is poured. After solidification, one or two edges will be obtained with a profile from the installed element.
Installation
In order to fill the border right on the spot, you will need to clearly define its location, as well as the planned shape. Further, the sequence of actions will be as follows:
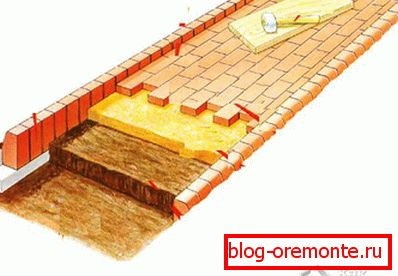
- The top layer of fertile soil is removed along with the roots of the grass and other plants. This will eliminate their proliferation and damage to the structure.
- Dig a trench. Should its depth be 20 cm plus distance in order to be drowned? products. The width is chosen in such a way as to cover the width of the future formwork.
- На дно пластом в 10 см укладывается песок и хорошо трамбуется. Таким же слоем засыпается мелкий rubble
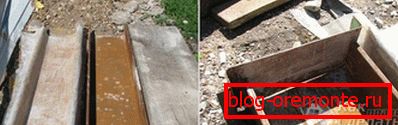
- Formwork made of edged boards, metal sheets or other suitable material. In order to strengthen it on the outer edge, wooden pegs or metal rods are driven in. It is better to try to set it in a level, so that the plane is even.
- Preparing a solution in the ratios as described above. The consistency should not be very liquid, but not dry.
- Metal fittings are laid in the trench. It will be enough of several elements placed along.
- Poured ready mix. She is well rammed. You can use the method with a grinding machine.
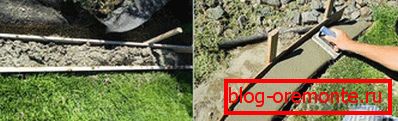
- In order to give the top the desired shape, you can make a special molding. For example, for this you can take a wide rectangular trowel and bend around the edges. It turns out the tool with the profile of the letter P. You can give another. You just need to carry out on the end, removing the excess solution.
- Along the way, you can make ironing. To do this, dry cement is applied to the fresh mortar and rubbed. Subsequently get a nice glossy surface.
Full strength will be gained in about a month. If it is too hot outside, then periodically it is necessary to wet the curb so that it does not crack. After a few days, the formwork can be dismantled and covered with cracks in the soil.
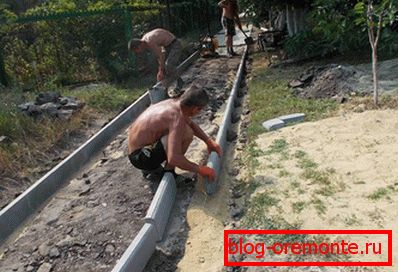
The installation of sidewalk curbs from prefabricated elements is in many ways similar to the previous version, but there are some special features. From the tool will need:
- forceps for carrying modules;
- sovok and bayonet shovel;
- hand tamper;
- roulette;
- laser plane builder or bubble level;
- geotextile fiber;
- crushed stone;
- sand;
- cement;
- rubber kyivanka;
- capacity for preparation of solution.
![]()
The trench is prepared according to the steps described above. But between a layer of sand and rubble is laid geotextiles. It will give extra rigidity.
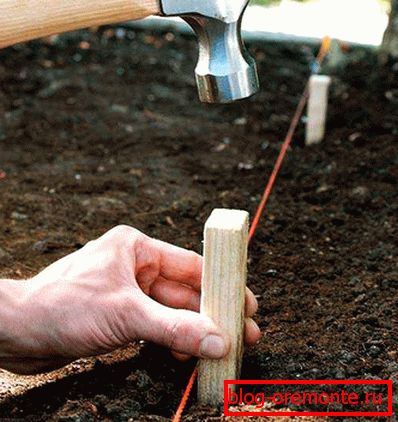
- Pegs are driven in along the entire length of the planned works. They can be from any suitable material. Between them the fishing line or string is pulled. It is aligned with a laser plotter of planes or level. Its height should be a label for the top edge of the border.
- A cement-sand mixture is prepared in proportions, as in the previous case, but no crushed stone is required.
- It is laid out evenly on the prepared base on the size of the border element. The thickness should be from 3 to 5 cm, it all depends on the specific conditions.
- With the help of a bubble level and a rubber mallet, focusing on the tensioned cord, the alignment is performed.
- The joints between the blocks are coated with cement-sand mixture.
- To increase the strength of the whole structure, you can pour another 5 cm.
- After the concrete grabs, it can be covered with sand and rammed.
- It is better to start laying tiles only in a day.
Installation бордюра из кирпича осуществляется точно таким же образом. Но траншея под него потребуется меньшей глубины. Также нет смысла в слишком большом слое раствора, достаточно будет 1 см. В отношении изделий из металла достаточно будет подготовить ямы под ножки каждой секции, если они предусмотрены. Сделать их необходимо большими на 10 см с каждой стороны. Внутренние стенки укрываются при помощи рубероида или другой гидроизоляции. Дно уплотняется таким же образом, как описывалось для траншей. Модули устанавливаются и выставляются по уровню. Производится заливка раствора. До его схватывания можно сделать дополнительные распорки, чтобы оградка не сместилась со своего места.
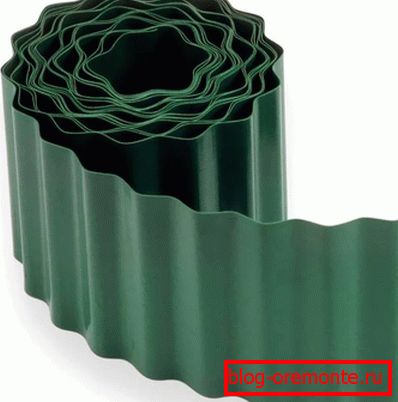
In the case when it is necessary to divide the space into zones, then it is not necessary to install the curb. In this case, a special tape may be useful. It is made of polymeric materials. Often its thickness can be 2 mm, and height up to 30 cm. In order to install it, you will need another assistant. A narrow trench is dug around the perimeter of a particular plot. The tape is well stretched with emphasis on one of the walls. After that, it is filled with soil and well rammed.
Now you have a basic knowledge of how to properly manufacture and install a sidewalk curb. Each project turns out individual. We would be interested to know what happened in your case. Share your impressions and tips in the comments to this article.
Video
Finished curbs are installed as follows:
If you decide to fill the curbs with concrete in place, you can act as follows: