How to install a plastic plinth
The floor is considered the same decoration of the room as the walls, so it is very important that the floor was not only beautiful and high-quality, but also harmoniously combined with the baseboards. In our recent Soviet past, wooden baseboard profiles were used throughout the construction of houses, which were periodically painted.
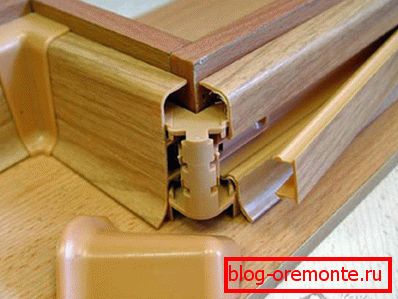
Today they are replaced by practical plinths made of plastic, which look great, do not require updating of the surface color and are fairly easy to assemble. In this article we will describe how to install a plastic baseboard with a cable channel on the floor, without the help of experts.
Useful tips
- The first thing to remember is to install the baseboard after pasting the walls with wallpaper and laying laminated parquet, linoleum or other flooring.
- Before going to the hardware store, you should determine your preferences in choosing the color of the plinth and make measurements of the room (perimeter).
- Based on the measurements made, you can easily determine the required amount of purchased material. As a rule, the plastic profile length is about 2.5 m. To the calculated perimeter of the room you should add a small margin (up to two meters) and then divide the resulting value by the profile length (2.5 m).
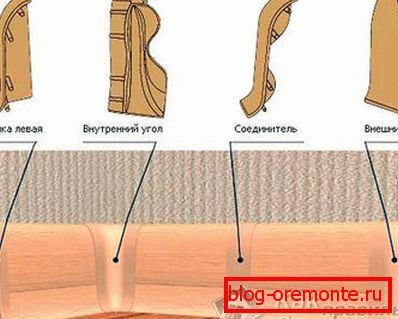
- Be sure to count the inside and outside corners of the room. This is necessary in order to purchase the required number of end caps and the necessary connecting elements.
When purchasing a plastic plinth, check that it belongs to the same manufacturing batch at the factory. Carefully study the batch number indicated on the sticker, as there is a chance that you can buy a plinth of various shades of the same color.
Required Tools

Below we list the necessary tools that you will definitely need during the installation:
- perforator;
- roulette;
- pencil;
- hacksaw;
- awl (for making holes);
- knife;
- self-tapping screws;
- screwdriver.
Installation work
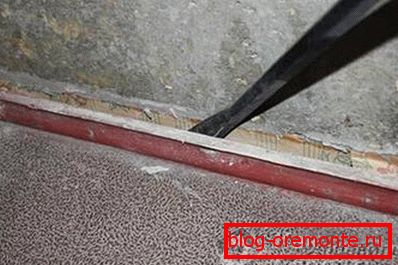
Before you start installing the plinth, you need to prepare the bottom of the walls, that is, remove old nails, as well as any cement flows, even if they are small.
The process of mounting plastic skirting directly divided into the following steps.
Markup
Carefully inspect the room and determine which wall in the room is the longest — start with it and start marking: put a corner on the end of the plinth and place the plinth in the far corner of the room (to the place of its future fixing).
Stepping back from the angle of about five centimeters, use a pencil to mark where you plan to make the first hole. Masters advise to place the second hole from the first at a distance of approximately 40 cm. Similarly, determine the places for the remaining future holes and also mark them with a pencil. At the end of the markup, set the plastic baseboard aside and start drilling.
Drilling

It is clear that the holes in the wall will help you make a punch. After this rather dusty procedure, use the vacuum cleaner to get rid of the dust. Drive dowels into the drilled holes.
Mount
 To fix the plastic baseboard, start with the first hole, i.e. from the corner. Attach the plinth to the wall and with an awl pierce a hole in it into which you insert the screw and screw it into the dowel using a screwdriver. Before you begin to tighten the last screw, be sure to put the connector on the opposite end of the plinth.
Plastic is a fairly soft material that is easily pierced with an awl. Therefore, be careful when working with a plastic baseboard to prevent scratches and do not make it any extra holes.
Then take another piece of plinth, insert it into the connector, fasten it in the same way.
As soon as you see that you are approaching a corner, measure the remaining section of the wall and then cut off the required plinth length. When doing so, consider the length of the connector and the distance to the next corner. Calculate everything so that both ends of the plinth fit into the connectors by about 4-5 mm. Using this algorithm, fix the plastic baseboards on the remaining walls of the room.
Laying cables in the plinth
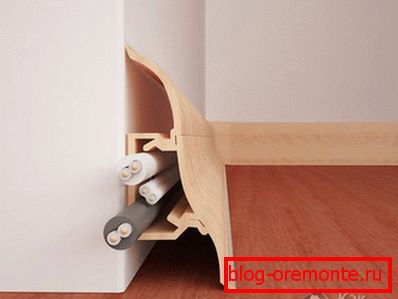
All the cables that you decide to lay in plastic skirting, lay in the process of its attachment. The cable is laid in the groove of the plinth, as a rule, below the screws. Be extremely careful that during the installation process you do not damage the cable.
If you did not think in advance about laying the cable during installation, it does not matter, since the cable is laid in the plinth and after installation. But for this you have to unscrew the screws, lay the cable and then screw the screws into their previous location. In this embodiment, the cable is located on top of the screws. But for you there is absolutely no difference: will the cable be below the screws or on top of them.
Installing the plinth in the bathroom
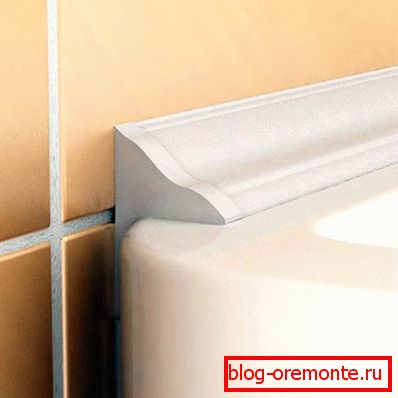
Plastic baseboards in the bathroom are also known as PVC borders. It is installed at the point of contact between the bath and the ceramic tile. There are two methods for installing it:
- On the tile.
- Under the tile.
Installing a plinth under the tile is a difficult process. However, installing a curb in this way increases the quality of waterproofing. However, if later it will be necessary to replace it, then, along with the plinth, it will be necessary to dismantle the row of tiles under which it is laid. As for the installation on the tile, this is the easiest method. You can do this work yourself. Next, we consider the installation technology using this method.
Installation of PVC curb in the braid
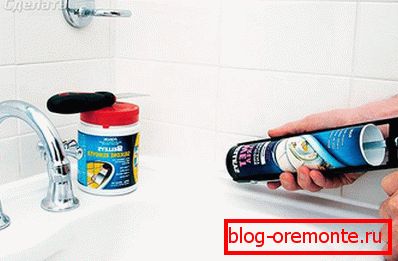
For work you will need the following:
- Plastic border.
- Silicon.
- Liquid Nails.
- Masking tape
- Construction gun.
- Clean wet rag.
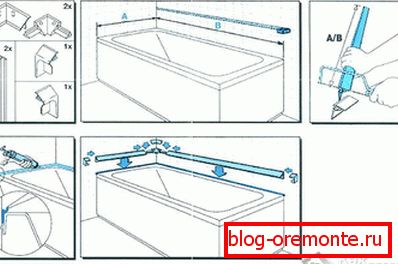
The process of installing plastic baseboards in the bathroom is as follows:
- First of all, clean the surface of the wall and bath from any contamination. Also clean the gap between the bathroom and tiles.
- The surface must be completely dry.
- The gap between the bathroom and the tile is filled with silicone with a construction gun.
- That in the course of work the enamel of the bath is not damaged, seal it with masking tape. This can be done by putting it on a dry plinth in the corner on which it will later be pasted, glue the adhesive tape near the edge of the plinth. After you take away the plinth, and the tape remains on the surface.
- After that apply liquid nails on the basis.
- Putting the baseboard against the wall and bath, press it as hard as possible.
- At the same time from the baseboard can get out the glue. It must be carefully removed with a damp cloth.
- When the liquid nails have dried, the edges of the border are additionally insulated with silicone on the bath and tile. For this purpose you can use white silicone to match the color of the bath.
By following these simple steps, you’ll be able to prevent moisture from entering the bath.
Video
From the following video you will learn how to fix the plastic skirting with cable channel: