How to hammer the dowel into the wall
When performing many repairs often there is a need to use dowels. When this part is driven into the wall surface, a reliable fixing unit arises that is able to withstand heavy loads. Properly hammered dowel is almost impossible to remove from the body of the material in which it is fixed. Let's figure out how to hammer dowels into the wall correctly.
Variety of dowels
Dowels there are many types. For each case, different ones are selected - it all depends on the task. All dowels are divided into two large groups: universal and expansion.
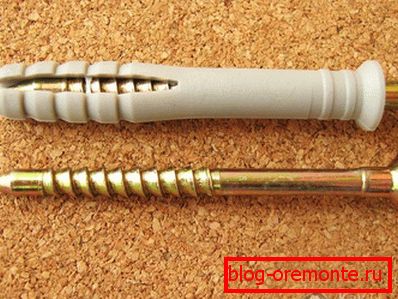
The expansion dowels include fasteners, the housing of which is subject to expansion during installation. The upper part of the part is usually made of dense plastic, while the core, which is screwed into the sleeve, is made of plastic or metal. Such dowels are mainly hammered into solid walls with solid filler.
Universal dowels can be fixed in the wall, which is hollow. The material of the upper part of the dowel under the action of the rotating force of the core twists and forms a nylon surface that fits tightly to the surface of the hole made in the wall. For fixing insulation used dowels with wide caps.

The length of the dowels varies widely - from 20 to 120 mm. The same applies to the diameter of parts - from 4 to 20 mm.
One of the most popular fasteners are plastic expansion plugs. The body in such parts is made of nylon, polypropylene or other identical materials. The plug of such an anchor looks figural - on it are seen a lot of sharp protrusions and antennae, thanks to which the part is firmly “sitting” in the wall. The expansion plastic dowel is equipped with a metal core that is longer than the outer base. The core is threaded or there are conical formations. Thanks to them, the inside of the dowel, when screwed in, is firmly held in a plastic sleeve and, accordingly, in the wall.
Dowel plugging process
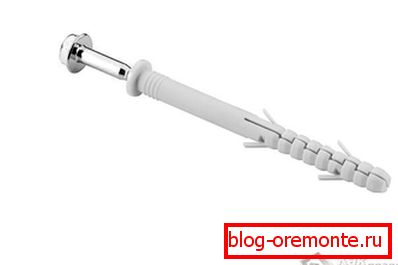
During construction and repair, a dowel with a self-tapping screw or a dowel-nail is most in demand; they can be fastened in different materials. To properly fix them in the wall, providing a quality mount, you must comply with certain conditions. Only at first glance it seems that it is very easy to hammer dowels into the wall. In order not to damage the material, you must follow the rule that the dowel body should not protrude beyond the edge of the wall surface.
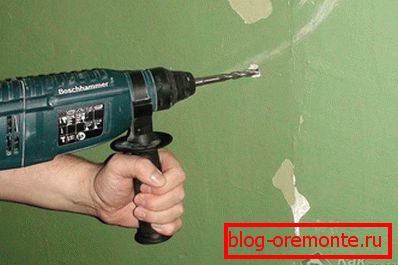
- A hole is made in the wall by a perforator, and the diameter of the drill should coincide with the size of the plug in the dowel in cross section. It is important that the depth of the hole was 0.5 cm longer than the dowel.
- After the hole has been made, it must be cleaned with a handy long object. To get rid of dust, the hole can be purged with air or, for example, cleaned with a vacuum cleaner.
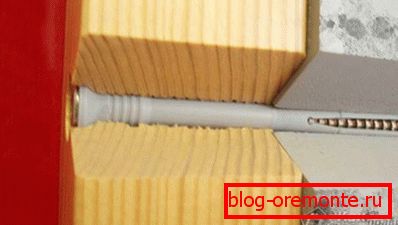
- Then it is necessary to insert the body of the dowel into the hole and hammer it into the hole until the edge of the part coincides with the wall surface.
- After that, the screw is screwed into the plastic base almost all the way. In the version with a nail, the latter is hammered. After entering into the body of the outer shell of the part, the core will have a bulging effect on the base in the hole, while it will be almost impossible to pull the dowel. To install the dowel quality, you need to follow all the necessary rules.
It should be noted that the core must be twisted, and not hammered. Otherwise, the sleeve may burst and lose its fastening properties. This statement is only suitable for the dowel, the core of which is the screw. The nail must be hammered to the stop.
Video
Watch an illustrative dowel-nail installation video: