How to glue the cork on the wall: step by step instructions
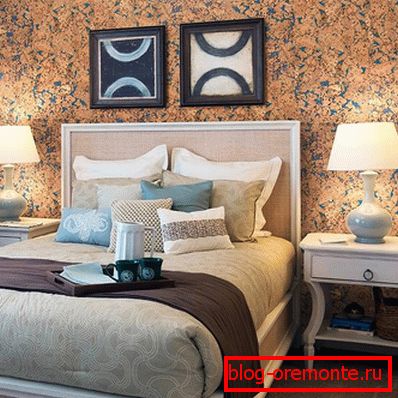
If you are an adherent of environmentally friendly materials that do not affect your health and are safe enough, then choosing a cork as a finishing material would be an ideal option for you. Particular attention is paid to the repair exactly the walls and finishing materials for them. Usually most of these materials do not meet environmental requirements, which is not the case with traffic jams. Such a finishing material is not only safe for health, but also looks very beautiful. The use of cork wallpaper in the interior has become a new fashionable trend.
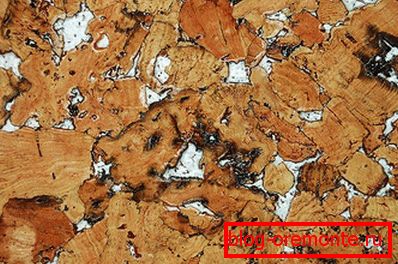
This finishing material has gained its popularity due to the fact that it is made from natural ingredients. Naturally, the cost is slightly higher than the price of ordinary wallpaper, and the technology of pasting walls is slightly different. But the result will be uncommon. Let's look at how to glue the cork on the walls with your own hands correctly.
Types of material and its advantages
Cork wallpaper is not cheap. However, the cost is justified by environmental friendliness, high performance, long service life and excellent decorative effect. You can find products and cheaper, it all depends on the popularity of the company that produces the material, on the type of coating and the basis used.
If we talk about the types of cork material, then there are several. It:
- baseless wallpaper;
- wallpaper with the base.
Wallpapers without a base are much more expensive, but have an absolute environmental friendliness. In the manufacture of such wallpaper glue as a binder material is not used. But how do particles interconnect? When the cork is heated, the resinous substances that are in it melt, connecting the particles of crumbs together. Products of this type are rather dense, but at the same time have low fracture strength. Therefore, you need to work with such wallpaper very carefully.

Much more accessible wallpaper with a paper base. This is a cheaper and more common option. Their production consists in gluing cork veneer on a paper base. It is much easier to glue such wallpapers on the wall, because they are not so easy to spoil. You can do this kind of work yourself.
The technology of gluing wallpaper from cork on a paper basis is not much different from the process of gluing ordinary wallpaper.
These wallpapers mainly perform only a decorative function. Due to the small thickness of the product, they do not have heat-insulating and sound-proofing properties. Their advantages are that they are cheaper, have a small weight, some are already coated with wax or varnish, in addition, they can be glued not only on the walls, but also on the ceiling.
Some types of cork wallpapers on paper basis do not need to be applied with glue on them before gluing. The fact is that for sticking you just need to remove the protective film and stick the wallpaper on the wall.
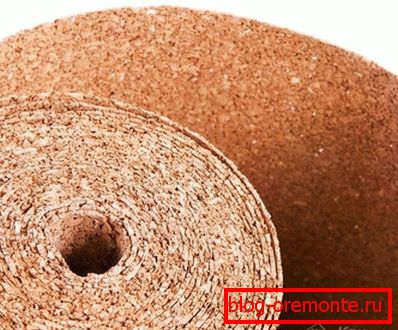
You can buy material in a specialized store. Wallpapers are:
- Rolled.
- Tiled.
The material in rolls is sold in reels, which are 30, 60 or 100 cm wide, and 10 m long. The thickness of such wallpaper is 3 mm. If we talk about products from a tile, then they usually have a standard size - 30? 30 cm or 60? 60 cm. Knowing these parameters, you can easily calculate how much material you need to paste over the walls.
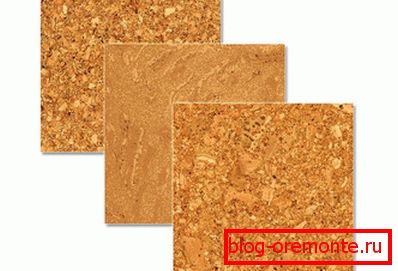
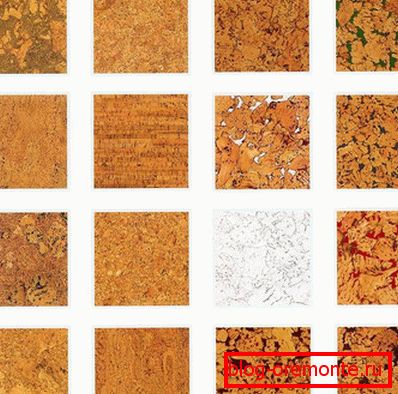
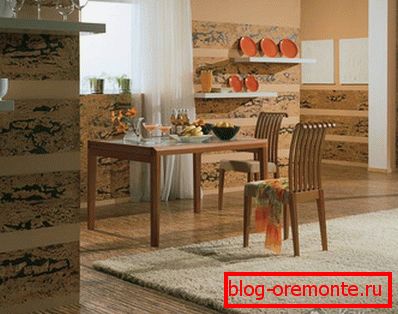
Please note that tile materials can be single-layered and double-layered. The latter type is characterized by the fact that its lower layer is most often colored, and the upper layer consists of pressed cork granules. Due to this, the top layer seems to be highlighted and has a certain shade, which gives the material originality.
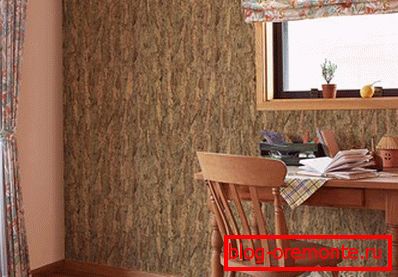
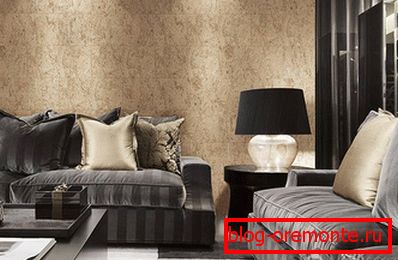
It should be noted that everyone can choose the material to your taste, since the products have a different texture, pattern and color. Decorative cork is able to give your home a unique look.
But why cork is considered to be expensive? Due to its performance. What are they?
- Ecological purity.
- Convenient sizes.
- The presence of a protective coating (varnish or wax).
- High operational period, 20 years and more.
- Resistance to mechanical damage.
- Easy care when you can use any detergent.
- Do not cause allergies and do not absorb unpleasant odors.
- Wallpapers without a base have good sound insulation and heat insulation properties.
- With their help, you can hide the defects of the walls: curvature and irregularities.
- Can be used to finish the ceiling and floor.
As you can see, using a cork for finishing your home is very profitable. So, having learned all about traffic jam, you can proceed directly to the work on pasting the room.
Calculation and purchase of material
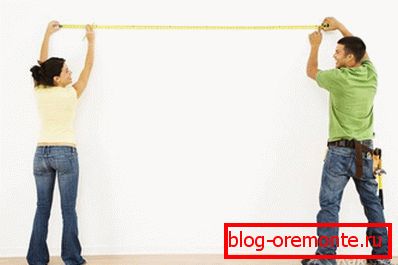
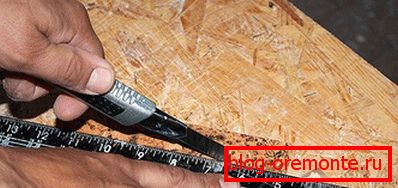
First you need to decide what type of cork to buy: without base or with base, tile or roll type. It would be reasonable to calculate all the waste and see which of the options, how much money is required. In addition, it is important to determine how many rolls or plates will be needed so that a lot of unnecessary pieces are left. If you are going to finish all the walls in the room, then you need to know the perimeter with the doors and windows, as well as the length and width of the roll or tile.
To learn the perimeter, use the formula familiar from school:
P = 2 (a + b)
where “Р” is the perimeter of the room, and “a” and “b” is the length and width of the room.
For example, your room has a size of 6? 4. Apply the formula:
P = 2 (6 + 4)
So, the perimeter of your room is 20 m. Now you need to divide the perimeter of the room by the width of the wallpaper strip to find out the number of solid stripes. If your chosen roll of cork wallpaper is 1 m wide, you will need 20 whole strips.
Next you need to know how many pieces come out of one 10 m roll. To do this, you must divide the length of the roll by the height of the ceiling. For example, the height of your ceiling is 2.5 m, then from one roll you can cut 4 pieces of wallpaper.
Now, to determine how many rolls to buy for your room of 6? 4 m in size, you need to divide the number of full panels by the number of solid pieces from one roll. It turns out: 20 (whole cloths) should be divided into 4 (whole pieces). Even without a calculator, it becomes clear that you need to buy 5 rolls of 10 m cork, 1 m wide. In the same way, calculate the amount of material for other rooms, if necessary.
It is not necessary to buy material close to each other, it is better to take an additional 1 roll. There is no guarantee that the new wallpaper will not be spoiled by pets, children or you accidentally repair. By purchasing an additional roll, you can eliminate the "accident".
In the case when you want to use a tiled stopper, the order of calculations is even simpler:
- Calculate the area of the walls.
- Determine the area of one tile in the same way.
- Divide the wall area by the tile area.
For example, your wall has a height of 2.5 m and a width of 5 m. To find out the area of this wall, you need to multiply the width by the height. It turns out that the area of this wall is 12.5 m2. When your purchased tile has a size of 60? 60 cm, its area is 0.36 m2. So, 12.5 m2 need to be divided by 0.36 m2. Thanks to the calculator, you can find out that for one wall 2.5 m high and 5 m wide, 35 cork slabs of 60? 60 cm are needed. The same should be done to find out the number of slabs on the other walls.
Having calculated how much material you need for work, you can go to the store and purchase it. There you need to buy not only cork, but also glue, which will be needed for work, if the wallpaper is not self-adhesive. But what kind of glue should I use?

It is important to buy wallpapers in advance and place them in the future room. Before you begin to glue the walls, the wallpaper should be in the room for 2 days in order to “acclimatize”, gain moisture and get the temperature of the room. If you do not do this and stick the wallpaper immediately after purchase, the cork on the wall may become deformed, the joints will disperse and in the worst case everything will fall off.
Buying glue

Before you buy glue, you need to know his following indicators:
- Reliability and durability.
- Toxicity level
- Its setting time.
Ordinary PVA glue is not suitable for pasting cork wallpaper, as it will not sustain their weight. Yes, and liquid nails for this work can not be used. Let's just say - not even every glue has only positive characteristics, but you still have to buy some. Therefore, you need to choose from the best. You can glue the cork cover with the following compounds:
- Glue "Moment". This is a fairly durable and versatile adhesive composition, which is quite possible to stick on the wall cork wallpaper. He quickly grabs. It is very convenient to apply the composition linearly or pointwise, especially on the tile. However, all this has its drawbacks: this glue can deform the cork layer or destroy it. Moreover, it is expensive and toxic.
- Glue "Moment Stopper". This is a special version of the previous type of glue, which is even better. It can be an excellent alternative to the simple “Moment”, as it is not so toxic, and also resistant to water and frost.
- Glue "Decol Vern". It is intended for gluing products from cork and will perfectly hold the wallpaper on the wall. But it will have to sacrifice environmental friendliness: it is highly toxic, so all the work must be carried out in a respirator. Take care of a special suit that covers the skin so that the chemically active composition does not get on the skin. Please note that it is also flammable. This glue sets very quickly, so the cork must be properly attached to the wall the first time. Because of this, such glue is not very suitable for wallpaper, it is better for them to glue tiles.
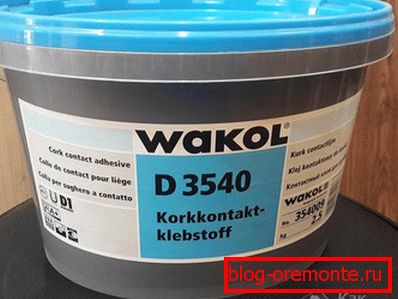
- Glue "Wacol", "Сork House". The most suitable options when you need an odorless glue. Glue from these manufacturers is not part of the solvent, is environmentally friendly, moisture-resistant and quick-drying. These are the best options for glue for sticking wallpaper from cork.
If these options do not suit you, you can consult with specialists in the hardware store, who can also tell you which glue will work best. Having defined, you can start the preparatory work.
Video
Selection of tools and preparation for sticking
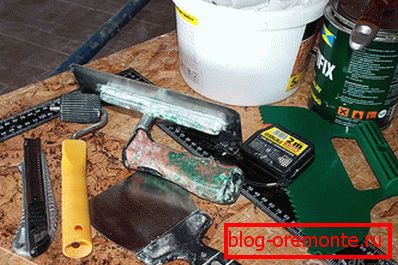
When you have acquired everything you need for work, it remains to stock up on the tools that you need in the process. Among them:
- level or plumb;
- pencil;
- construction knife and scissors;
- rags;
- roller;
- small spatula to which glue will be applied;
- comb for applying glue with a small tooth;
- wooden or metal ruler.
If we talk about the technology of surface finishing wallpaper from cork, it consists of the following steps:
- Preparing the walls.
- Surface marking works.
- Sticking material on the walls.
- Trimming excess parts.
Having prepared all the tools and materials, you can proceed to the preparatory work, which begins with the removal of the old cladding material, if any. Wall-paper, a tile or decorative plaster - all this needs to be cleaned to the basis. When cracks and chips have formed on the walls, they need to be repaired. Do the same with paint or putty that has lagged behind the surface.
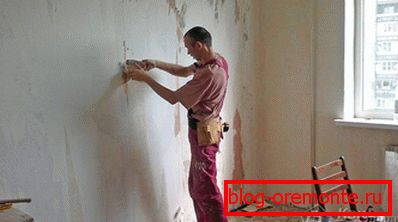
Having cleaned the walls of dust and dirt, they must be leveled using an additional layer of plaster. You can then perform surface treatment by applying a deep penetration primer on it. Wait until the primer is completely dry.

The cork is not combined with gypsum, so we do not recommend to putty or gloss over the walls with screeds or primers, in which it is present.
A few hours before sticking the product, you need to cut the wallpaper and spread them out on a flat surface so that they align a little. Remember that wallpaper from cork can not be glued deformed. In the meantime, the canvas is aligned, you can mark the wall and prepare the glue. Like regular wallpaper, cork wallpaper starts to glue from the window. Therefore, the markup also needs to be done from the window. Since from the first line all the rest will be drawn, it is important to make it perfectly smooth. With the horizontal arrangement of the strips of the product, you need to draw lines using the building level. When the glueing will be traditional, with a vertical arrangement, use a plumb. Carefully check if you have drawn everything correctly.
As soon as the entire surface is marked, you can prepare the adhesive composition. Since the glue, depending on the manufacturer, is mixed in different ways, follow the instructions that should be indicated on the package. Basically the composition should be thick. That is why applying it with a brush does not work, you need a spatula or comb. At this preparatory work is completed, you can proceed to wallpapering.
The process of pasting walls with cork

Now that moment has come when you can go directly to work. The technology is simple, and you need to carry out the work from the window opening. Please note that it will be very difficult to do such work yourself, even regular wallpaper is difficult to glue, so use the help of a spouse, another relative or friend to glue the wallpaper together: one of you needs to hold the cut canvas near the ceiling and the other to align it.
The quality of work performance may depend on many factors. The main one is the correct application of glue. For reliability, it can be applied not only on the canvas, but also on the wall. However, not all adhesive formulations are recommended to be applied in two layers. Therefore, it is better to look at the information contained on the packaging in the instructions for the glue, as well as to the coating of cork.
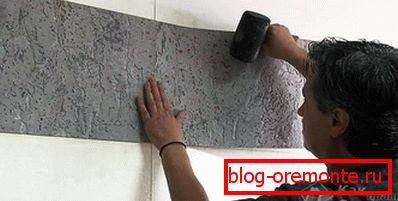
After you have applied the adhesive to the surface, you need to wait 20 minutes for it to be absorbed. This contributes to a stronger grip. It is important that the layer of glue is not very thin, as over time, such wallpaper may fall off. For reliable fixation, the canvas with the applied glue must be firmly pressed to the wall. It is convenient to use a roller.
Now pay attention to some of the requirements that you need to adhere to in order to properly paste the cork wallpaper:
- They need to be glued only end-to-end.
- When working, do not bend the material on the fracture, as the veneer will easily crack.
- Particular attention should be paid to the corners, they need to be cut and docked in the corner.
- If there is waste, they can be used in places that are difficult for the eye to notice.
- All excess need to be cut off with a knife, not only with scissors.
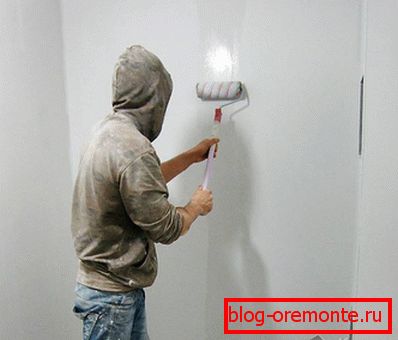
So, the first canvas should be glued, focusing on the markup. Let your assistant hold him, and you gradually glue the strip to the wall. Once everything is done, apply glue to the next sheet, and while it is standing, roll over the pasted piece with a roller. Glue all subsequent strips end-to-end with a cloth, removing glue residues that may be exposed when working with a roller. Trim any excess pieces. After the room is fully prepared, leave it for 3-4 days so that the finishing material is completely dry. Then these wallpapers are optionally opened with a “breathable” varnish. This will help extend the life of the coating and protect it from damage.
The same must be done with all the rooms in the dwelling if you want to cork them. Now you know how to glue the cork wallpaper roll. But that is not all!
Innovative finishing material
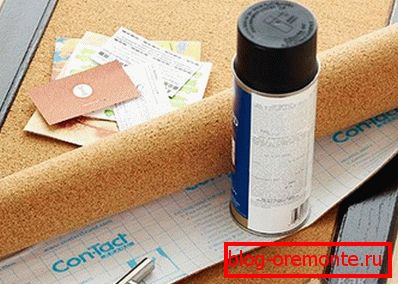
One of such materials can be called self-adhesive wallpaper from cork. They are sold in standard rolls with a length of 3 m and a width of 48 cm. How should they be glued?
First you need to prepare the surface: it should be dry, clean and smooth. Just as in the first case, it is desirable to perform markup in order to navigate along it. After that, you need to measure the wall and cut the sheets from the roll. Then take the piece of wallpaper to be pasted and separate the protective 3-centimeter layer across its width. Now, together with your partner, attach the open part of the material to the wall, gluing it. Please note that this should be done very carefully and carefully so that everything works out the first time. As soon as the web is firmly fixed, remove the protective film for a certain length of material and glue this area, and so on.
To remove air bubbles after sticking, which will be formed under the wallpaper, use rags, removing the bubble to the edges of the strip by smoothing. When you fail to do this, and the air does not completely come out, use a small needle to pierce the bubble. Then smooth the material again with a rag.
Recommendations for working with cork

Cork wallpapers can be easily glued both horizontally and vertically. But what if you chose not a roll wallpaper, but a tile covering from cork? There is nothing complicated here either. The glue is applied identically, as well as on the wallpaper, only here on the wall they need to be laid on the same principle as laying tile. And this can be done in several ways: rhombic, vrazbezhku, exactly or diagonally. The choice is yours. Just remember that you need to decide at the preparatory stage, and not immediately before sticking.
Another important nuance - cutting wallpaper. For those who are beginning to glue the wallpaper - this is a major headache. To simplify your task, remember: the main tool for such work should be a construction knife with interchangeable blades. As already mentioned, the cork is a very brittle material, so a very sharp knife is needed for cutting it. Thanks to this, you can minimize material breaks. As soon as you feel that the blade is blunt, break it off and continue working further. When it is necessary to make any cuts, for example, for sockets or switches, we recommend using one template. If you need a cutout for an outlet, use the underside of.
Wallpapers that are covered with wax on the front side look very beautiful, but they can be spoiled by the traces of your fingers, since everything is clearly visible on them. What to do if you still get them dirty? For this you will need a construction dryer. It is necessary to heat up a little place that you "marked", and the wax softens under the influence of heat. Then all traces will heal. However, if the cork is stained with dirty or dusty hands, it cannot be repaired, it can only be replaced. Therefore, when working, use gloves or wash your hands often to avoid various kinds of dirt.
How to care for cork coating

This coating can even be washed with special detergents. So that your work is not in vain, the cork did not lose its original appearance, and you did not have to change the entire coverage, do the following:
- Clean your wallpaper regularly with a vacuum cleaner and wipe them with a damp cloth.
- If grease gets onto the coating, it can be removed with a mild detergent.
If stubborn stains do not take the usual detergent, use an abrasive, fine-grained skin to remove them. After such a stripping, the treated area must be coated with wax or varnish.
If you follow these simple rules, the life of the finishing material will last at times. Yes, and the overall appearance will always please not only your eye, but all those who will be in your house.
Now you know everything you need to work with cork coating. You should not be frightened by the complexity of the entire work, as the result is worth it. The interior, made in this style, looks just great.
We hope that this article has helped you to stick the cork wallpaper. If you have any questions, or you have already encountered some difficulties at work, write to us in the comments. We will be happy to help you deal with them!
Video: технология оклеивания стен пробкой
If you decide to glue wallpaper in the form of a tile, we recommend watching the following video:
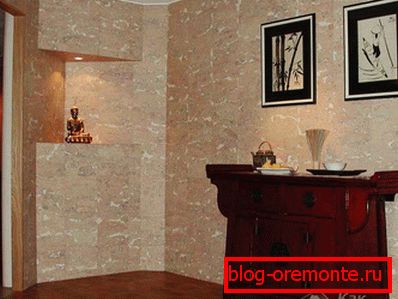
Photos of interiors


See also:
- What is glass fiber and how to glue them.
- Tips on choosing paint for wallpaper.
- Sticking wallpaper on the ceiling.
- Interior with photo wallpapers.
- How to cut wallpaper correctly.